Just went through this recently with my own swap. Although everything was described in words, it would have been much more helpful to have a visual comparison to identify all the parts. So I took some time to record it all in pictures.
Also few things I did differently compared to methods folks have mentioned/tried previously:
- AT Vacuum Pump Dowel Pins: Knocked them from the front, out the back
- I didn't have a lot of luck with vice grips on the dowel pins. I mangled the top one trying to get it going. Eventually had to knock the top one out from the back, which wasn't perfect because I was lazy to remove parts for hammer clearance. There is probably enough clearance to knock the pin clear out the back. This is what I did for the bottom one. Much more consistent and clean.

- AT Coolant Crossover Pipe: Used MT Cover with Coolant RTV
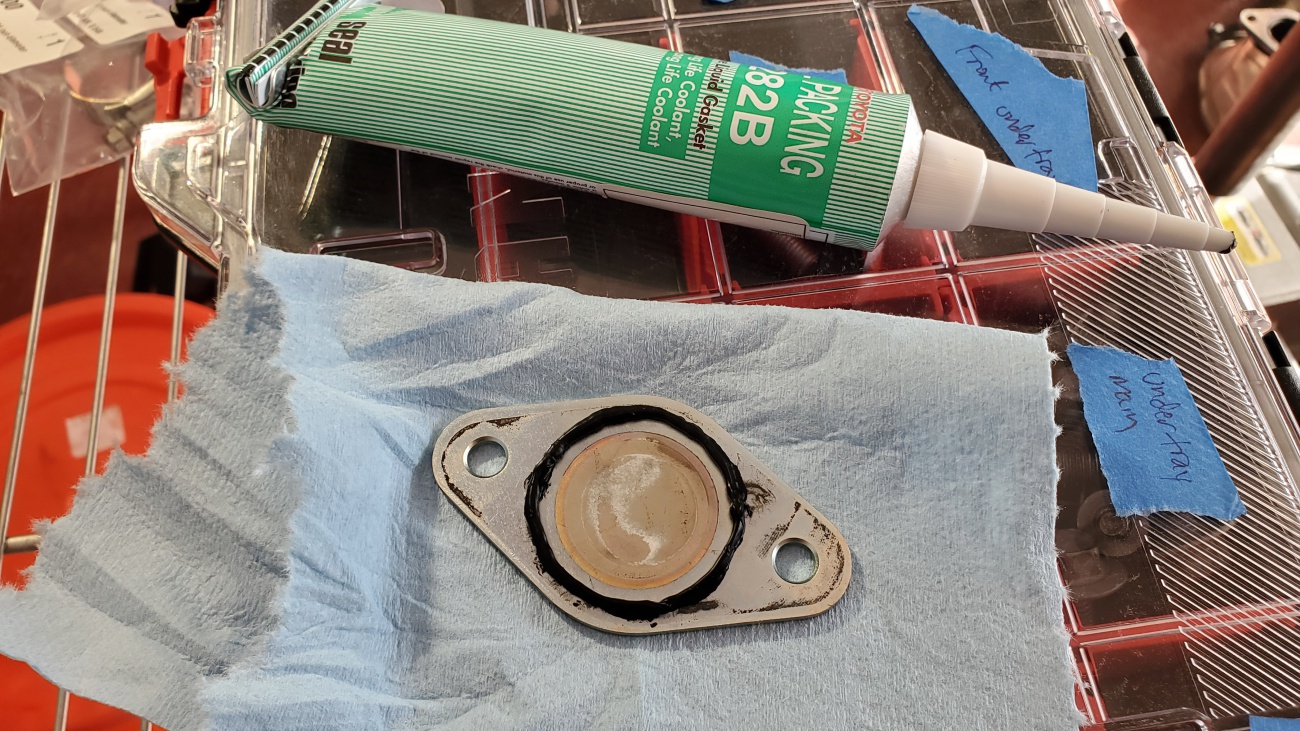
- The metal coolant crossover pipe is physically different between the MT and AT. The MT has a machined o-ring groove and flat cover plate. The AT is just flat (with no groove) and seals against the AT thermostat. I didn't want to go through the trouble of swapping the entire pipe and didn't like the idea of capping and bleeding a thermostat.
- I ended up using some Coolant RTV (Threebond 1282B) to seal the MT cover plate against the AT coolant pipe. The shadow of the o-ring/coolant against the MT cover plate made a perfect template to lay the bead, and I verified that the sealing location and surface matched using the AT plate. Used the short bolts from the MT configuration. Finally, used a magnet to help guide the plate on and align properly. (See below picture)


- AT Vacuum Pump Oil Line Cap: Bought a new plug and gasket
- I didn't transfer the MT oil galley plug and gasket near the DI ECU. I elected to just buy a new one from Toyota ($3 total: SU003-02193 & SU003-02155)
- You only need one plug for the actual galley on the top of the engine. The port on the back is just left open to the elements in the MT. I just wanted to plug mine to keep it clean
The rest of the below images are the side-by-side of the parts you should expect to interact with during the configuration change