Kit Link:
http://www.nedautoparts.com/collecti...oem-subaru-brz
Summary:
I went ahead and ordered the Never Ending Details oem oil cooler kit for my 2015 FRS. This cooler is a oil to water cooler which utilizes engine coolant to cool the oil. The cooler is an oem subaru unit utilized on several turbo cars like the wrx. I noticed my canyon driving temperatures reaching 280 degrees F and thought a cooler would be a good idea. I also have a short commute and was hoping the oil to water cooler would help with warming up the oil in the morning. I have outlined my installation process below. I also took logs of oil temp, water temp, and ambient temp for highway warmups and canyons runs before and after. I must add that this is only the way that I installed the oil cooler and I in no way take any responsibility for any issues anyone else has using this as a guide. I am just trying to help.
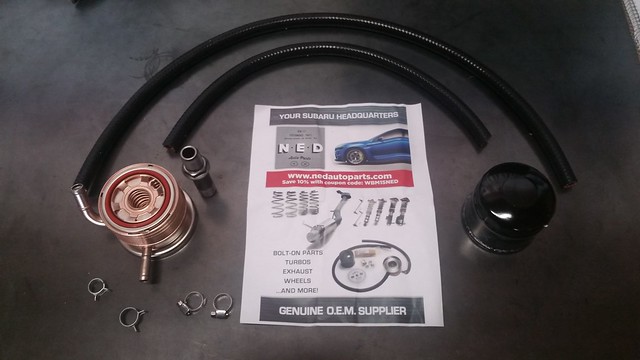
What you get:
The kit comes with the oil cooler, the extended oil cooler filter stem, two coolant lines, a replacement oil filter, and some hose clamps (2 oem pinch style, 2 worm drive hose clamp style). I went ahead and picked up two more standard stainless hose clamps at lowes as I prefer those over the oem pinch style clamps.
https://flic.kr/p/wPih8W

Tools:
Screwdrivers (flat head and phillips)
Pliers
24mm deep socket
Ratchet wrench
Oil filter removal Tool
Torque Wrench (Optional)
Installation:
I have outlined and photographed the installation below. I have also put together a video showing the stages of the process Video Link:
https://flic.kr/p/wPiT8y

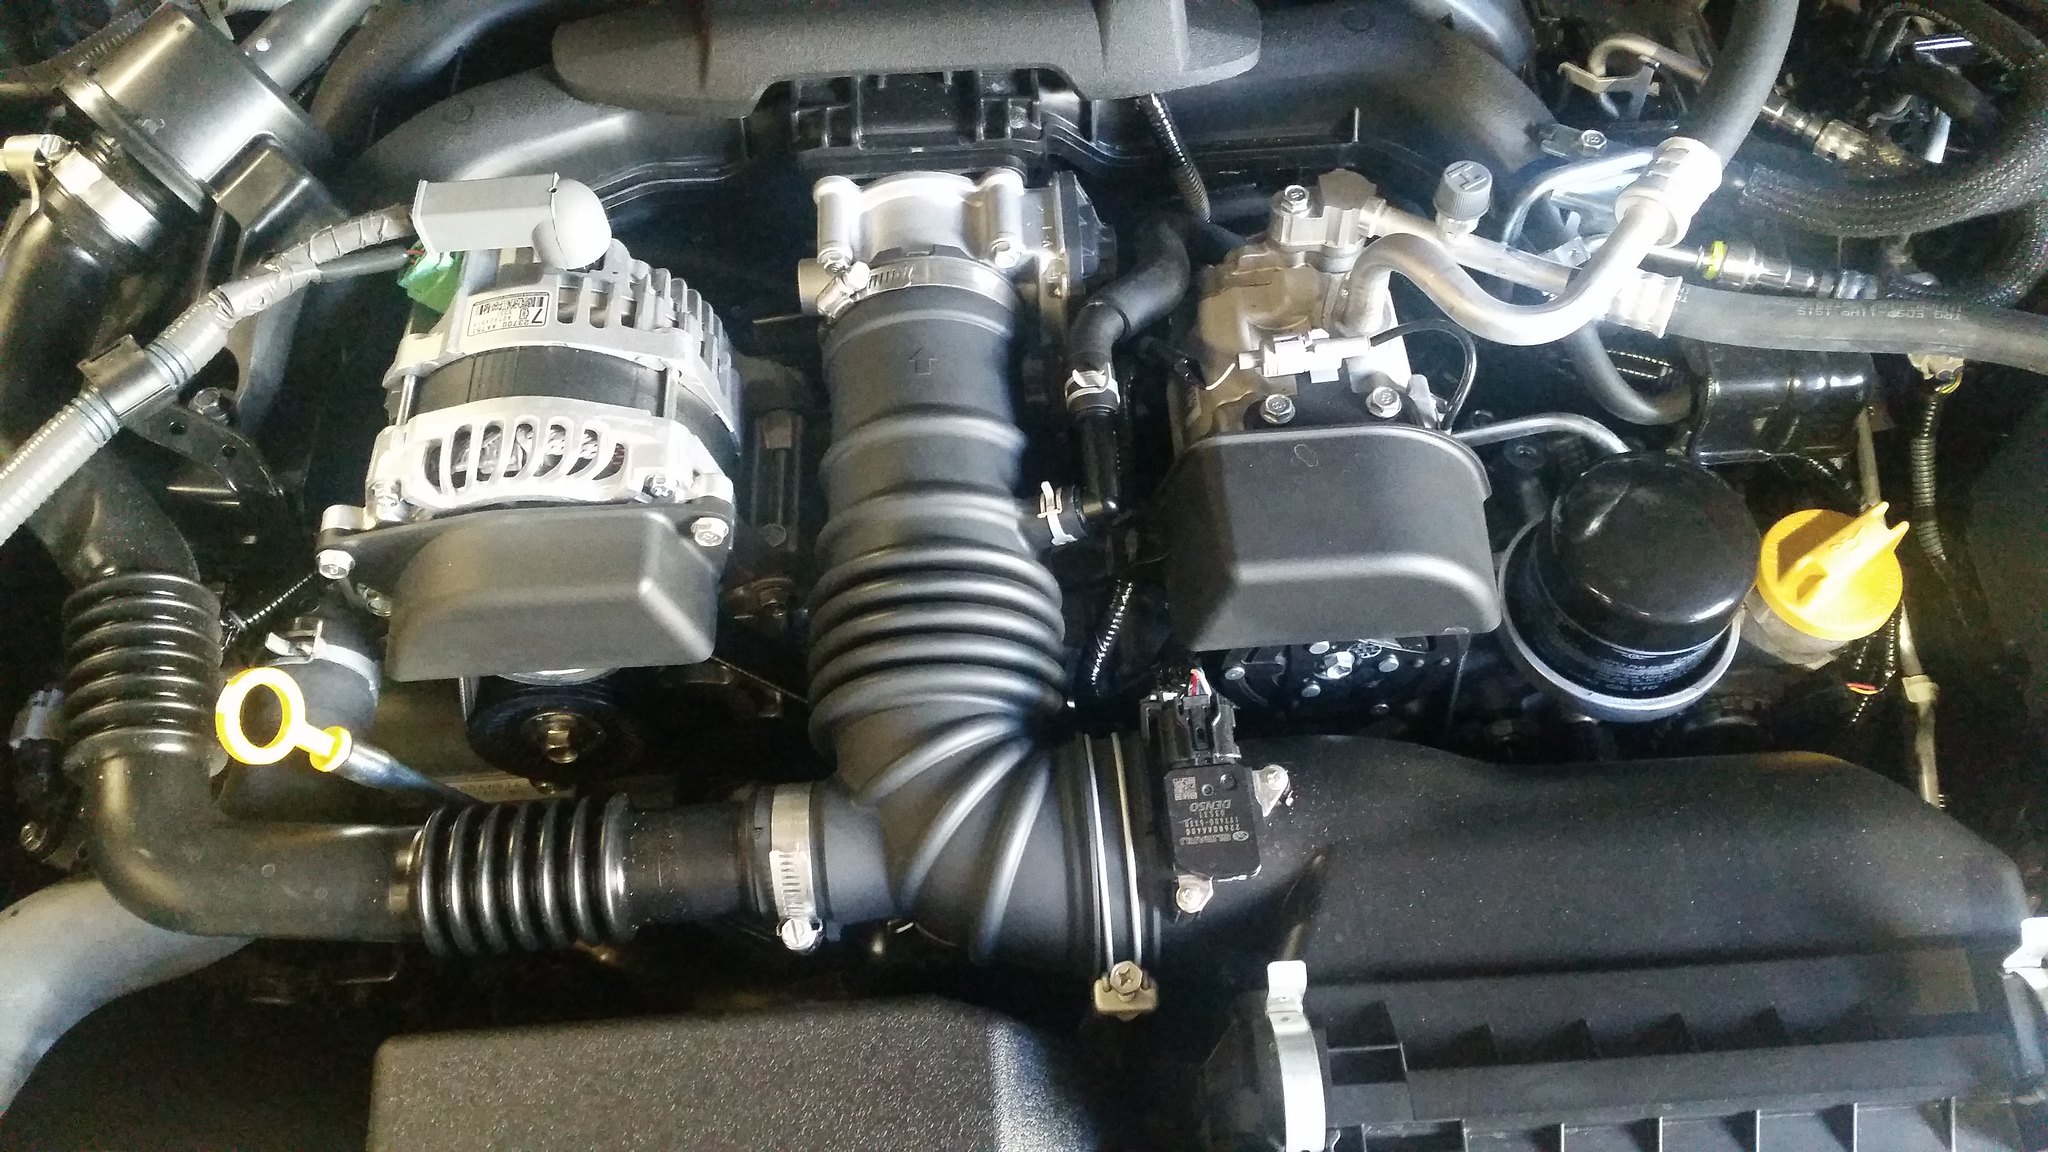
Above you will see the stock configuration. The first step is to remove the intake tube from the airbox, throttle body, sound generating tube, and breather hose. Use your pliers and screwdrivers to loosen the clamps and remove the intake tube.
https://flic.kr/p/wPqHBB

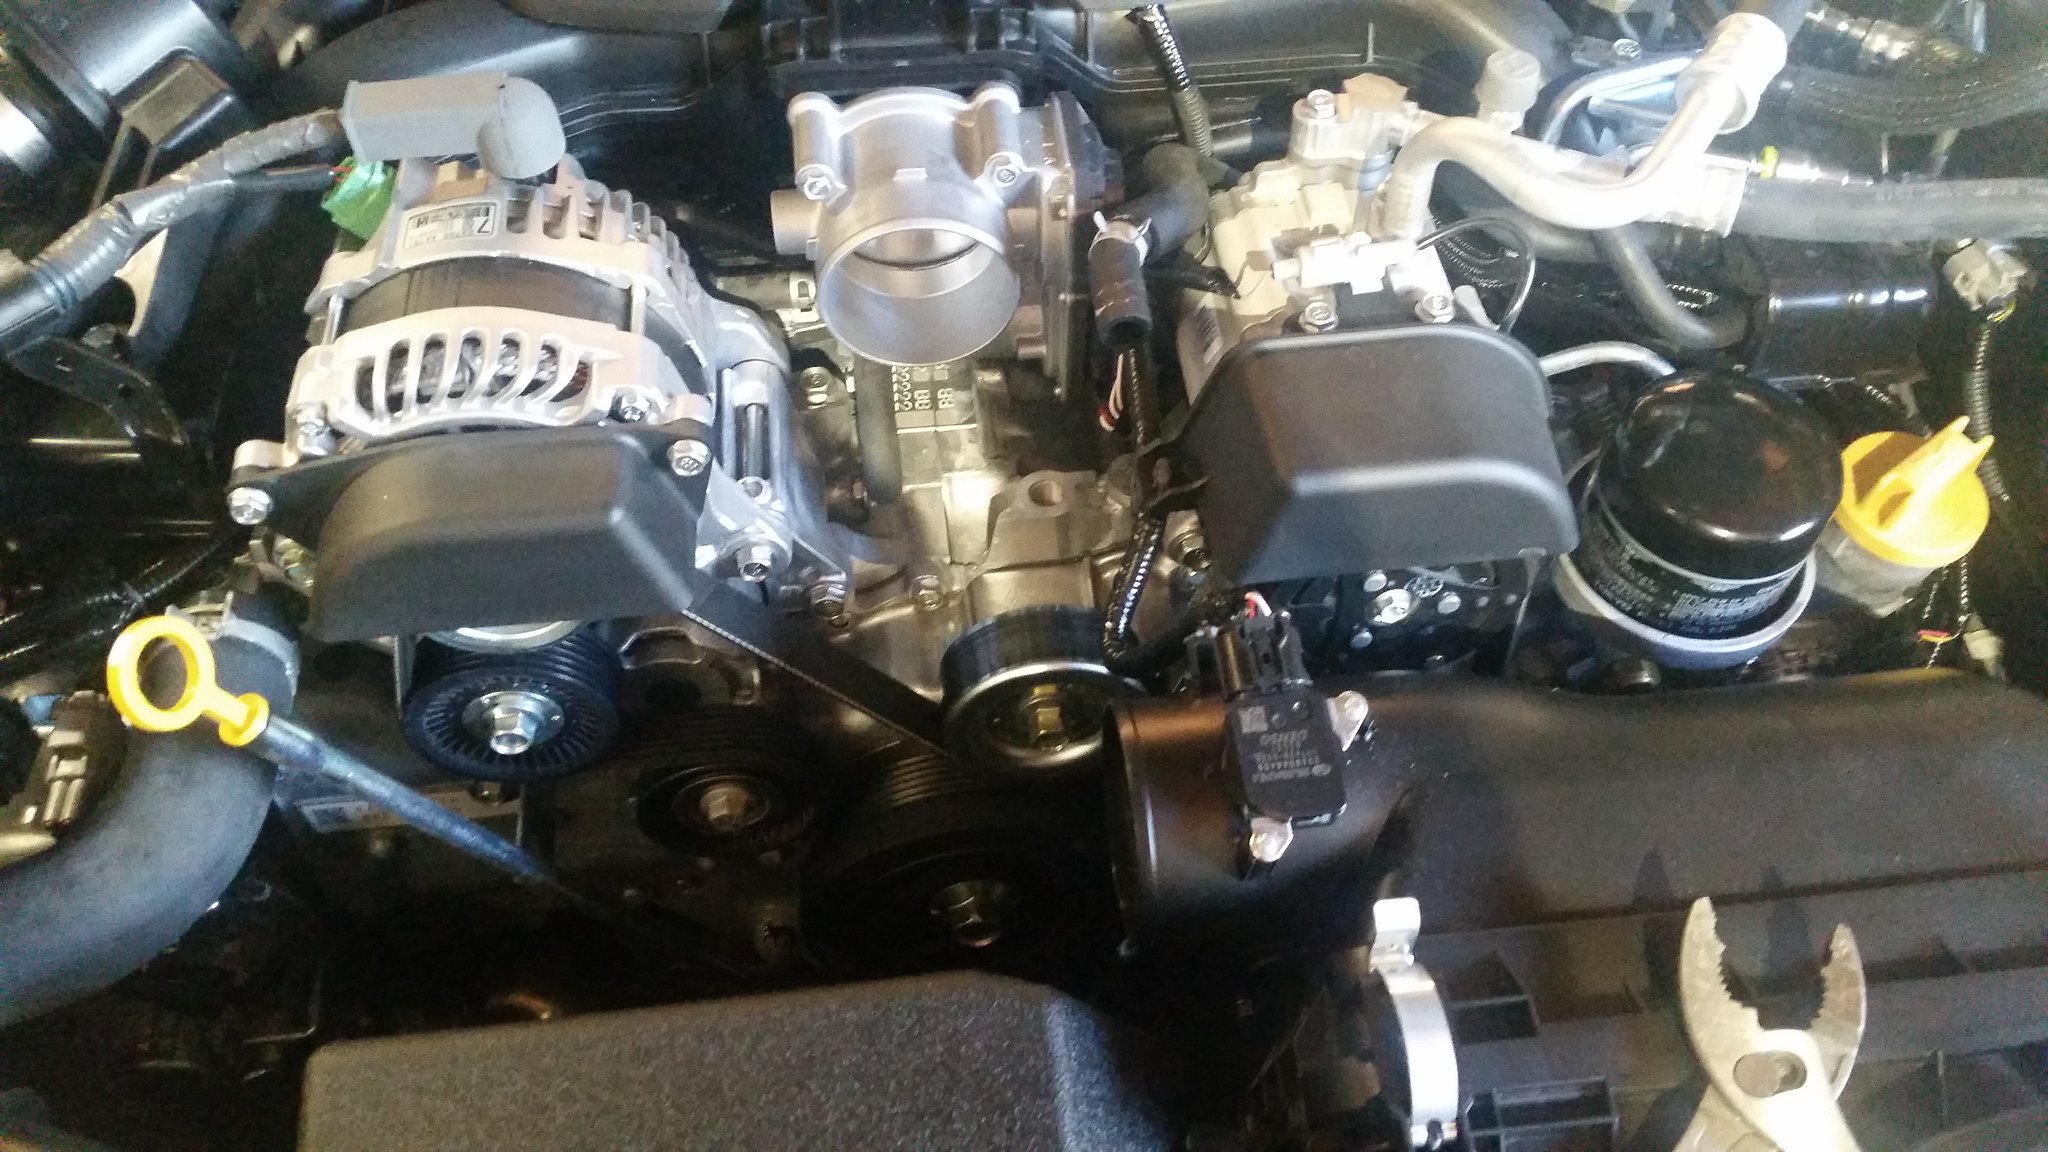
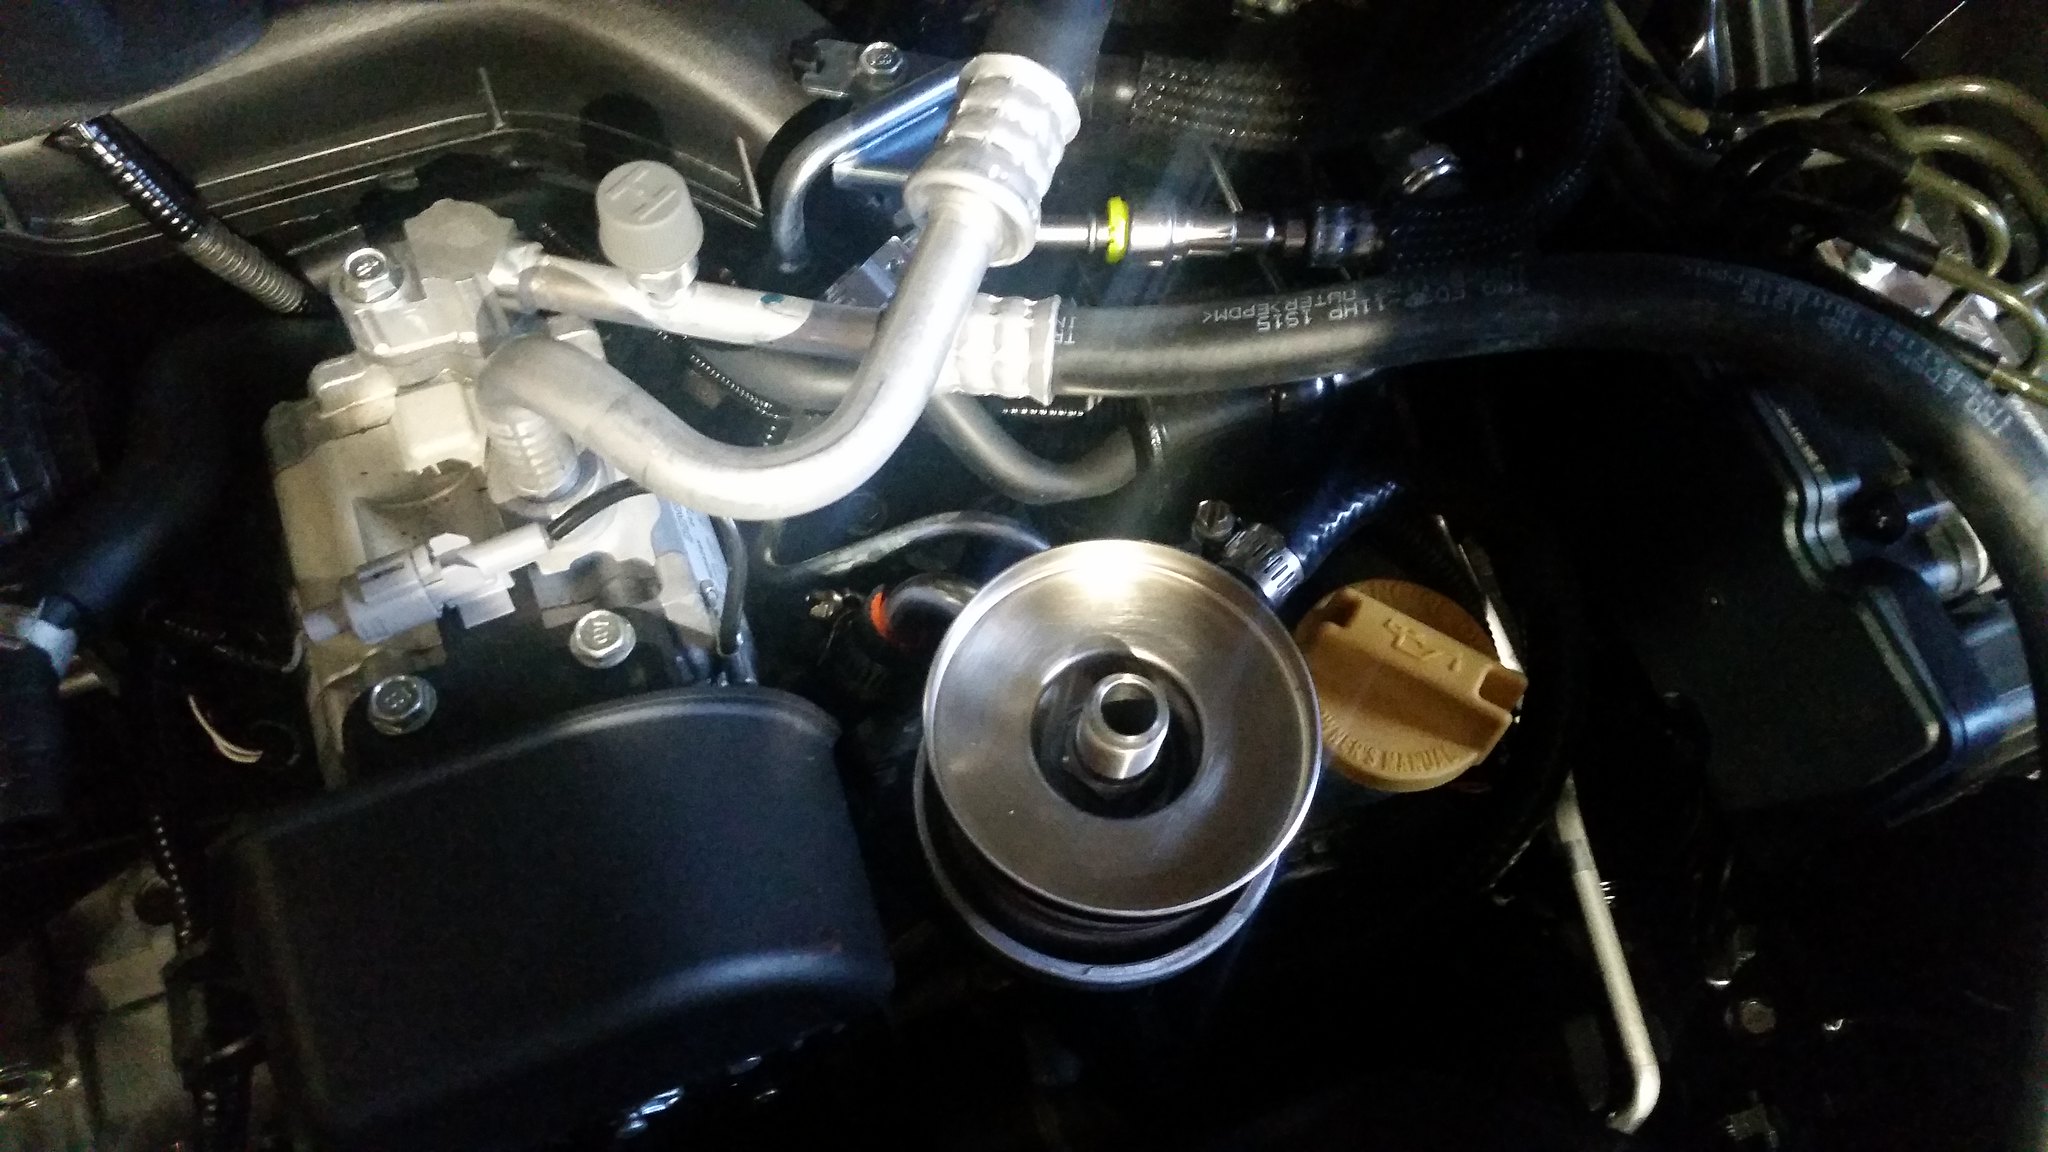
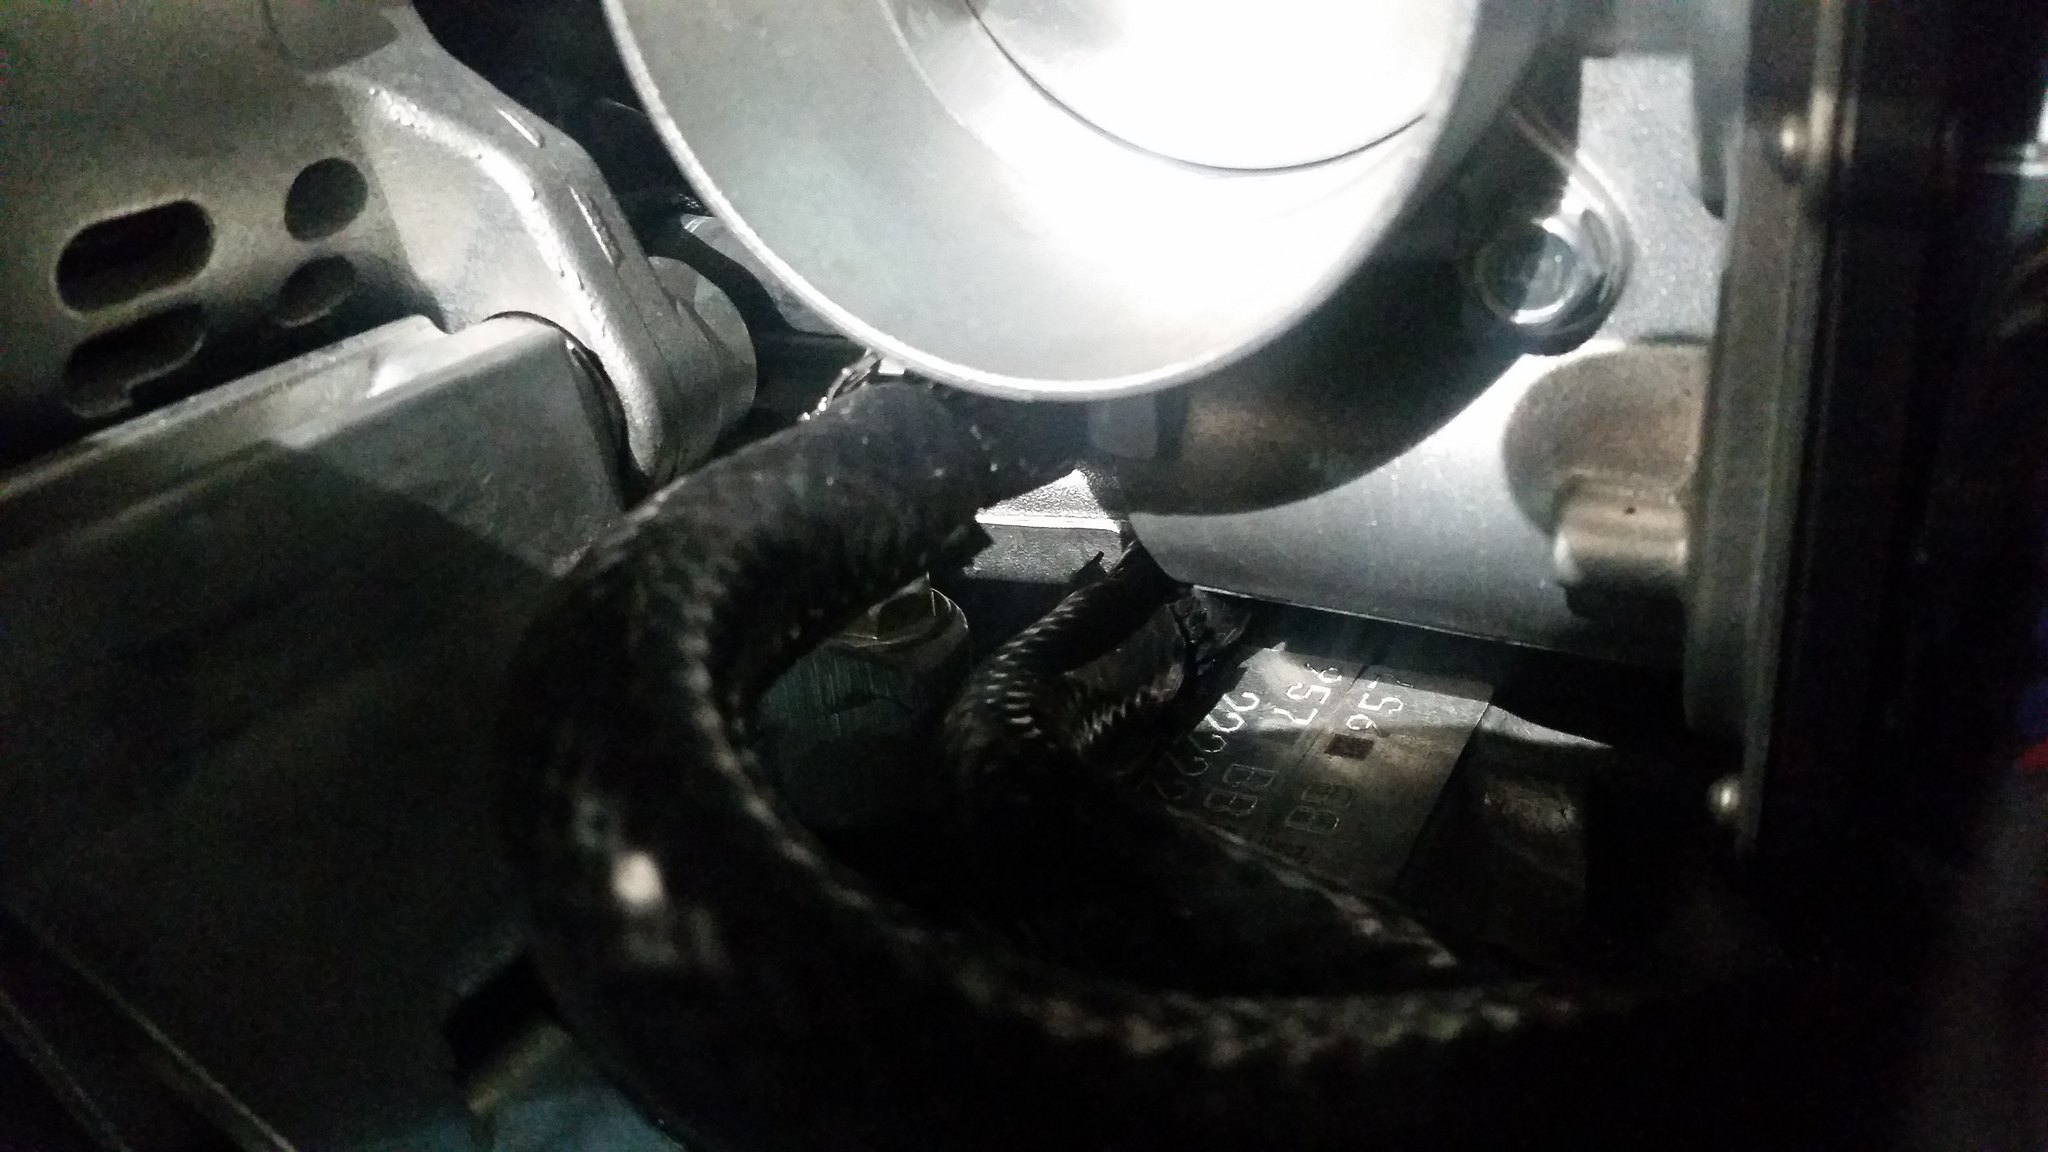
Under the throttle body you will notice a U shaped hose that loops coolant through the throttle body. As I understand, the two fittings the hose loops between are utilized in forced induction applications to cool a turbo. Since the frs/brz is naturally aspirated, they install a hose to loop the coolant back into the system.
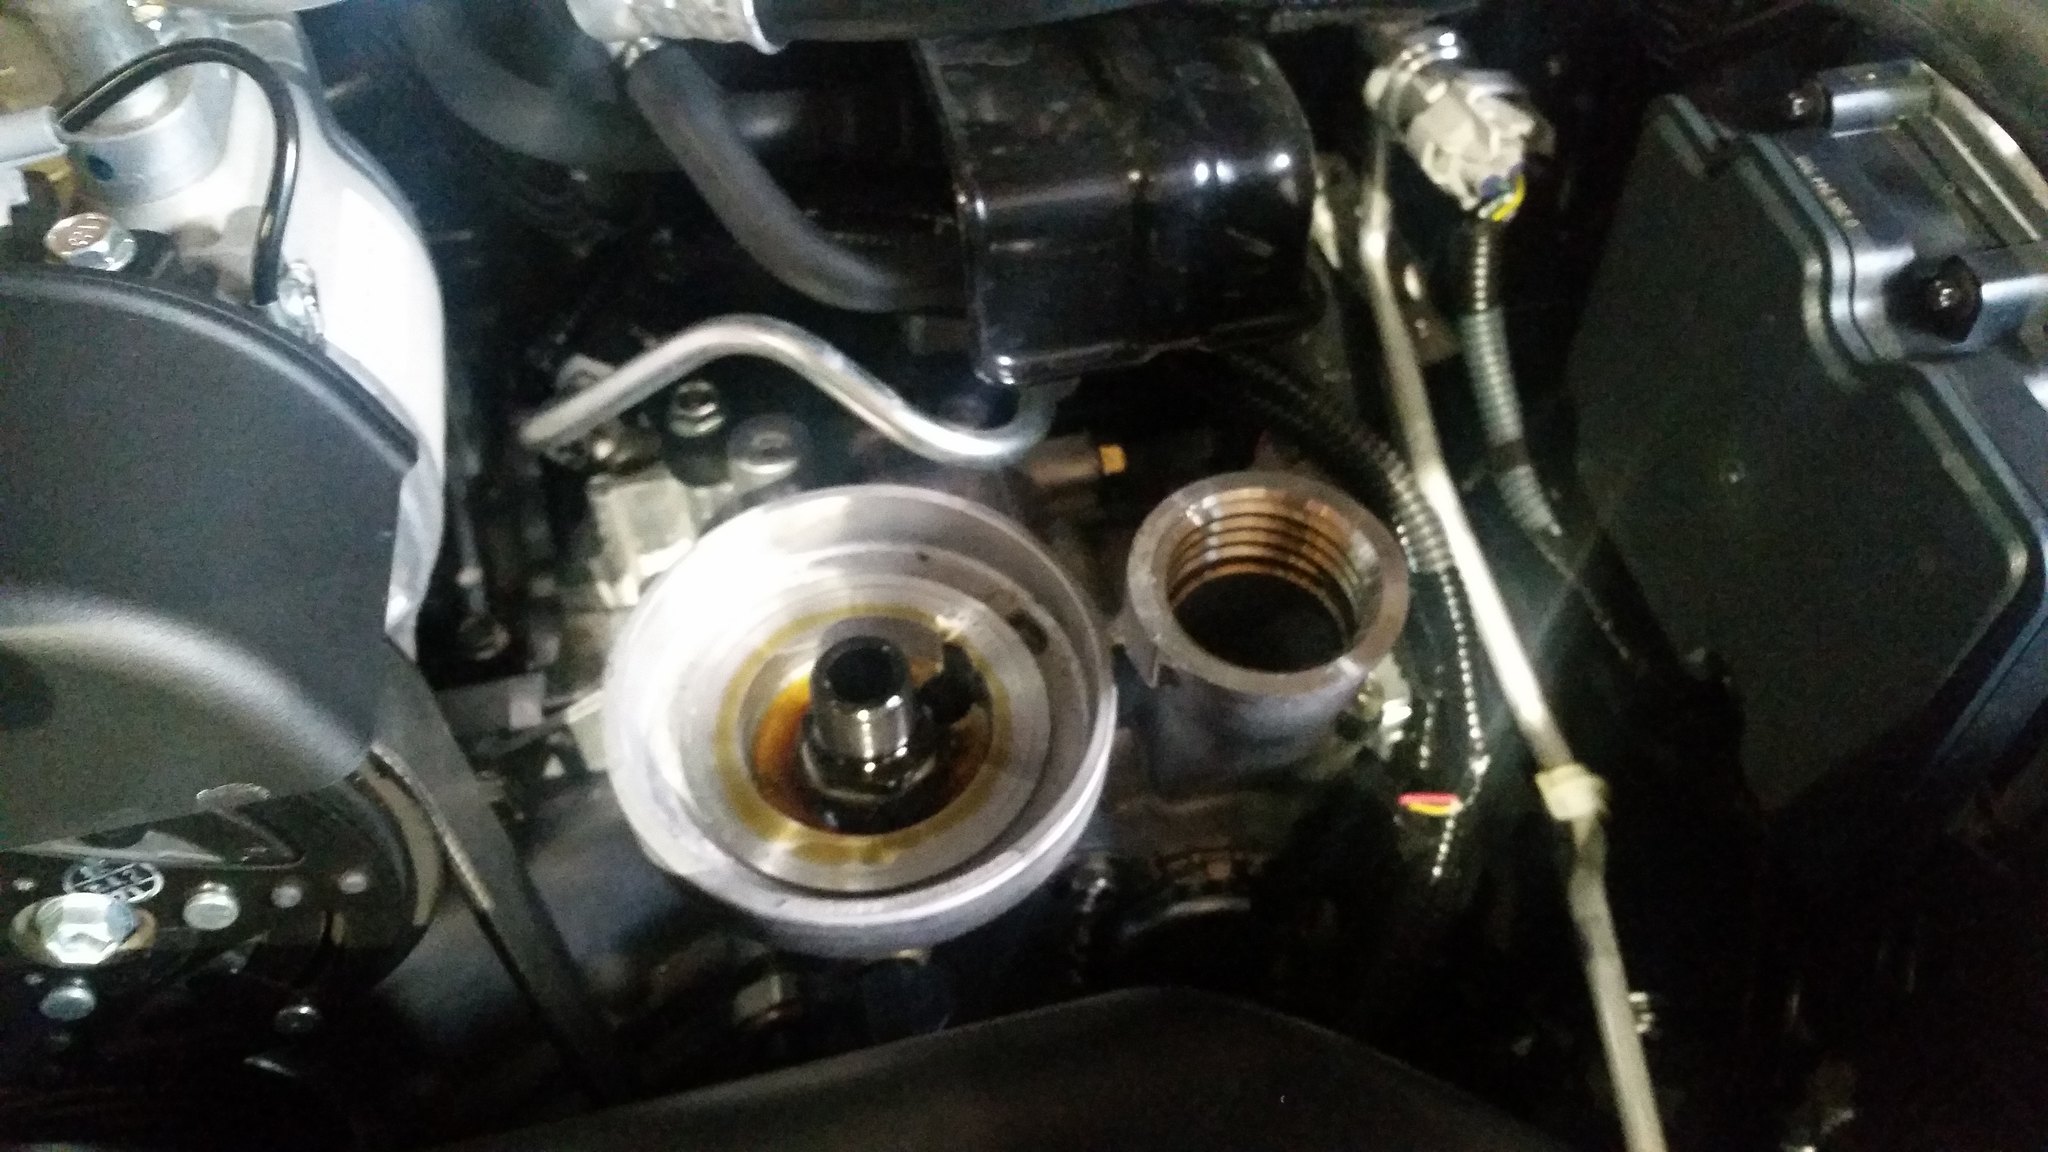
The next step is to remove the oil filter. Utilize your tool of choice to remove the filter. Once removed you will see the stock short filter stem as pictured below.
https://flic.kr/p/wa3Lxx

You are going to use your 24mm socket to remove that filter stem.
https://flic.kr/p/wPqEKK

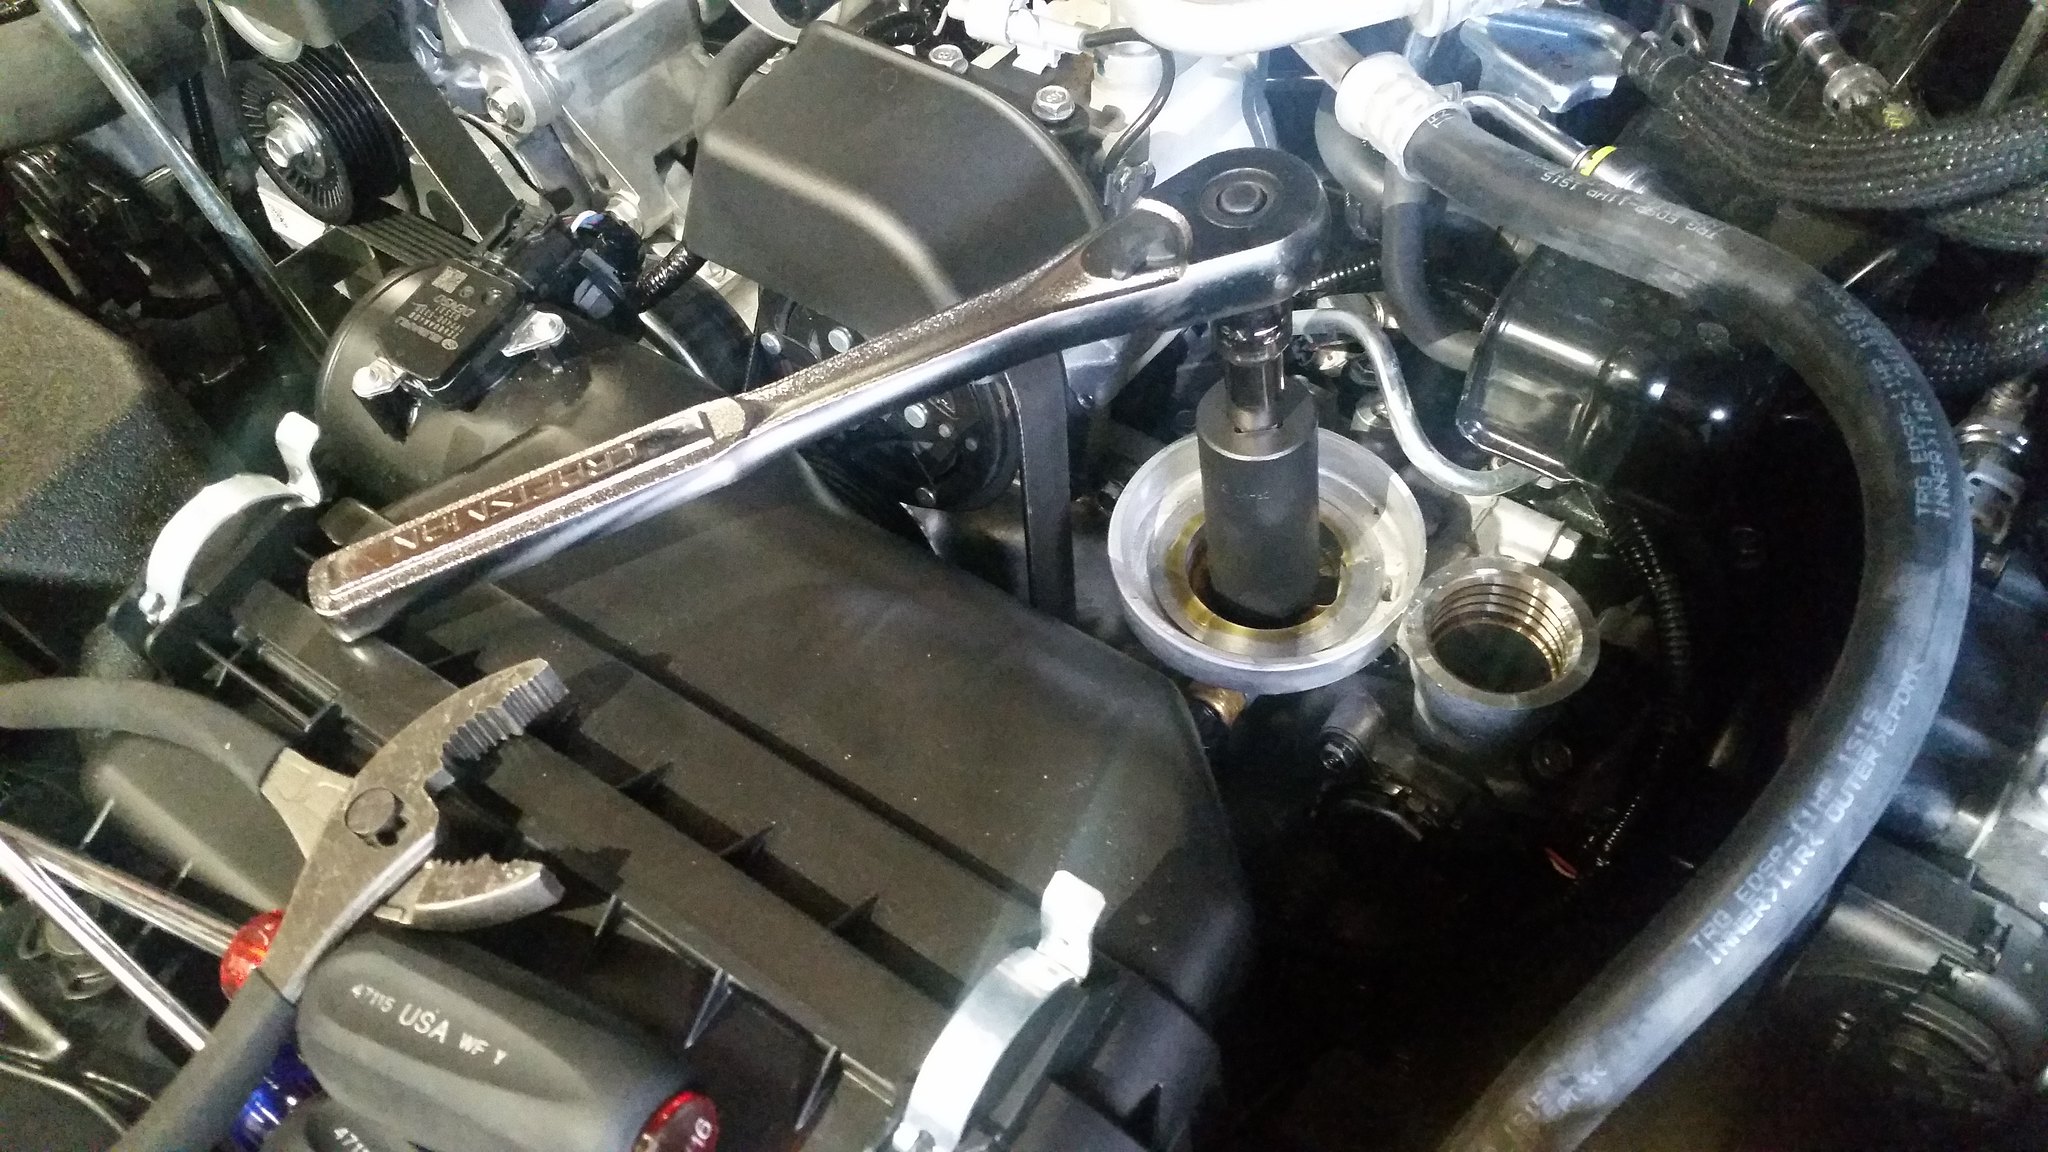
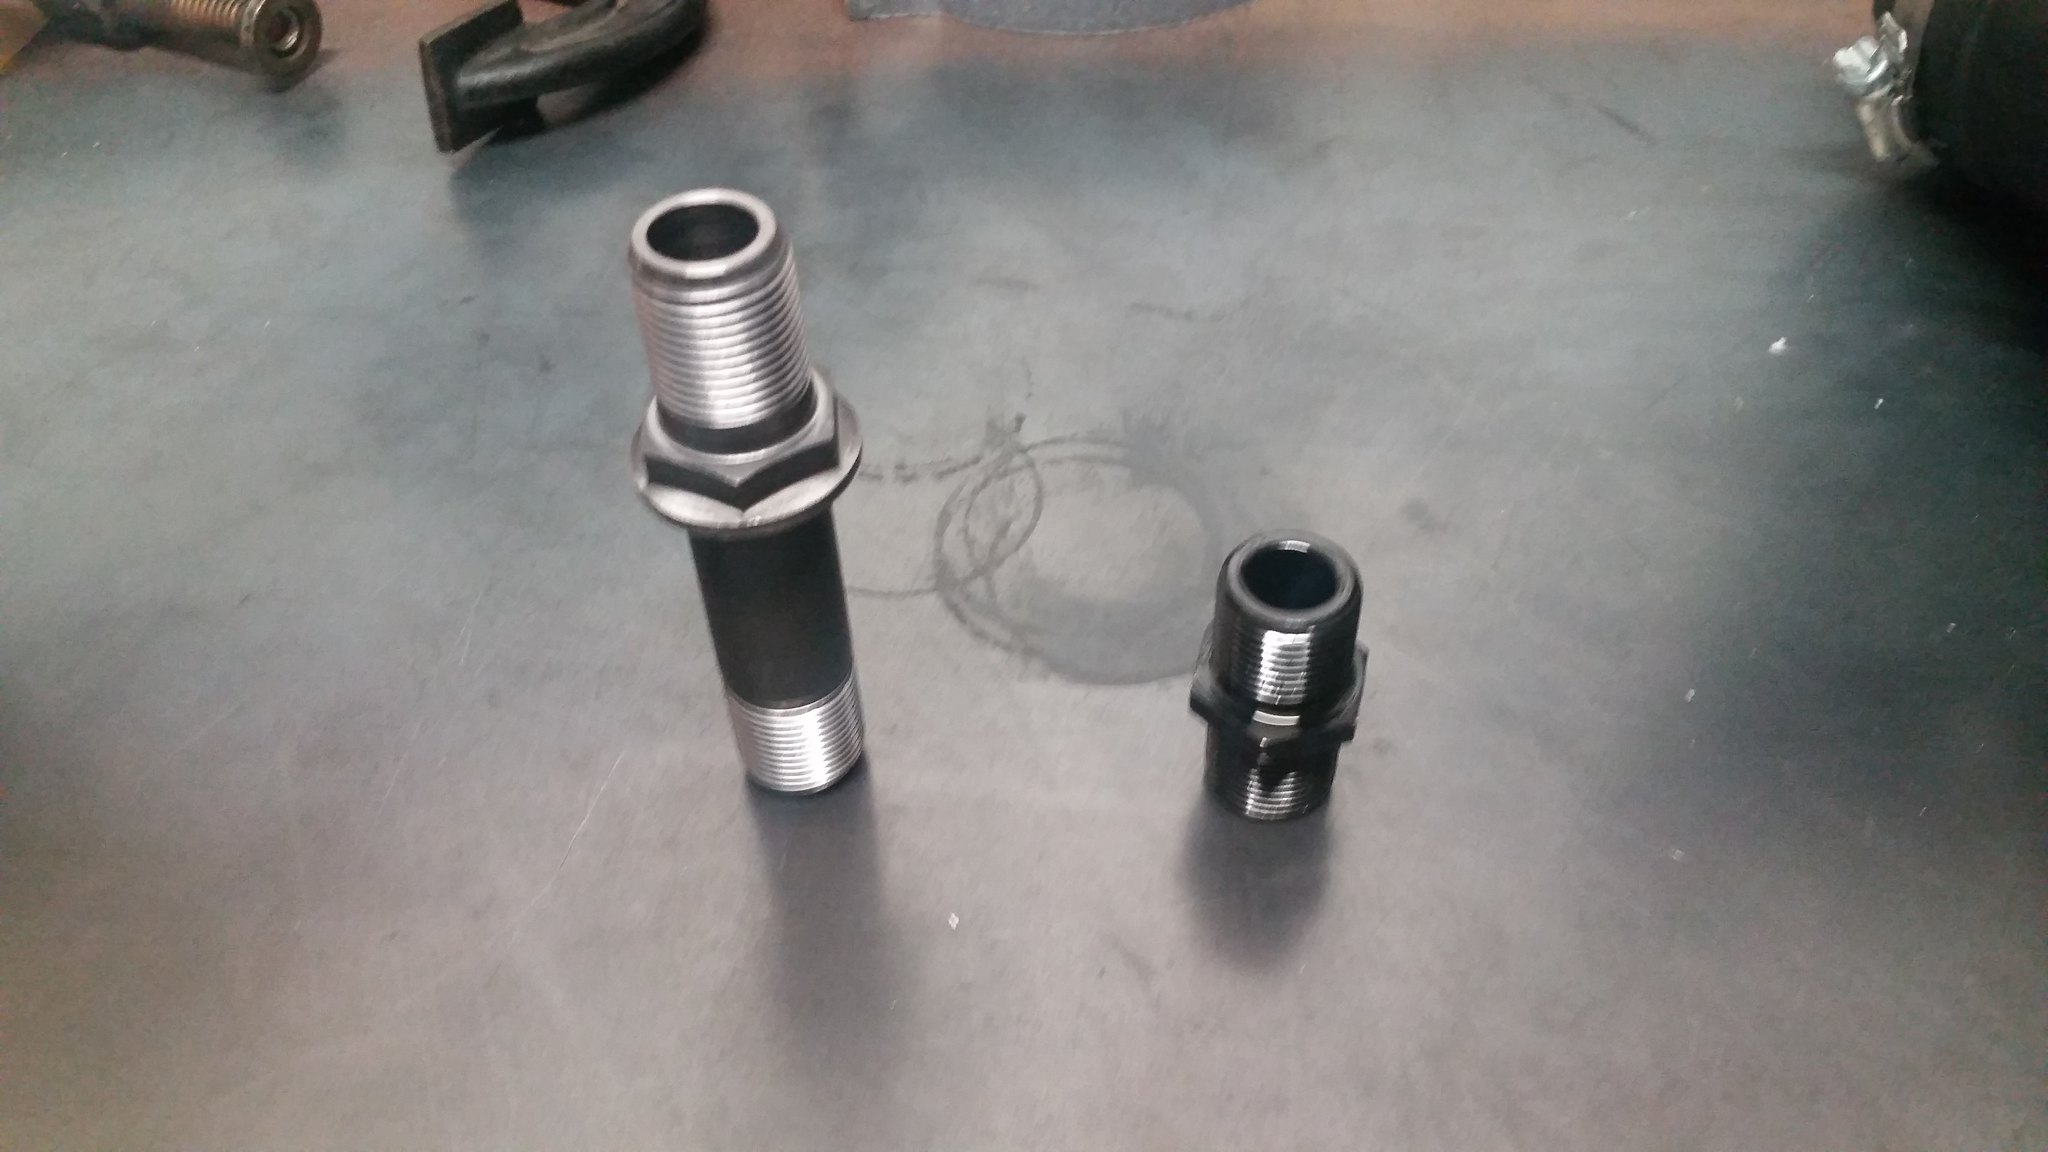
Here you can see the kit supplied longer stem which will pass through the oil cooler versus the stock short stem.
https://flic.kr/p/x4ANrj

Next you will want to install one hose onto the straight fitting of the oil cooler and one hose onto the bent fitting of the oil cooler. You will want to put the longer hose on the straight fitting. Go ahead and install your hose clamps. Be sure to check your orientation to make sure the clamps are oriented correctly. Then go ahead and install your oil cooler where the oil filter was prior, in the orientation pictured below, with the bent fitting adjacent the ac compressor and the straight fitting near the oil fill spout. The long stem passes through the oil cooler and threads in where the short stem was before. No need to tighten just yet. The two lines are run under the ac compressor to get to the throttle body. The line off the bent fitting goes directly under the compressor. The line off the straight fitting loops around the front of the cooler and then back under the ac compressor. I routed it between the two sensors on the block just below the cooler. Be sure to keep the hose away from the accessory belt. You may want to route the lines before installing the stem to give you the ability to move the oil cooler around.
https://flic.kr/p/wPiLzd

In the photo below, you can see the hoses routed under the ac compressor and in position to be hooked up to the nipples under the throttle body. You may need to trim their length depending exactly on your routing. I trimmed them with a pair of dikes.
https://flic.kr/p/wPiK4C

Go ahead and remove that U hose under the throttle body and connect the hoses you ran under the AC compressor to the now available fittings. In my case, only a bit of coolant leaked out, so you may want to stuff some rags in there to soak it up. Take care to align your clamps so you can access the worm drive to tighten them. These fittings are a bit smaller than those on the oil cooler, so the hoses will not fit snugly unless you tighten the clamps down considerably. The fit concerned me at first, but testing has showed no leaks so far.
https://flic.kr/p/x69YKS

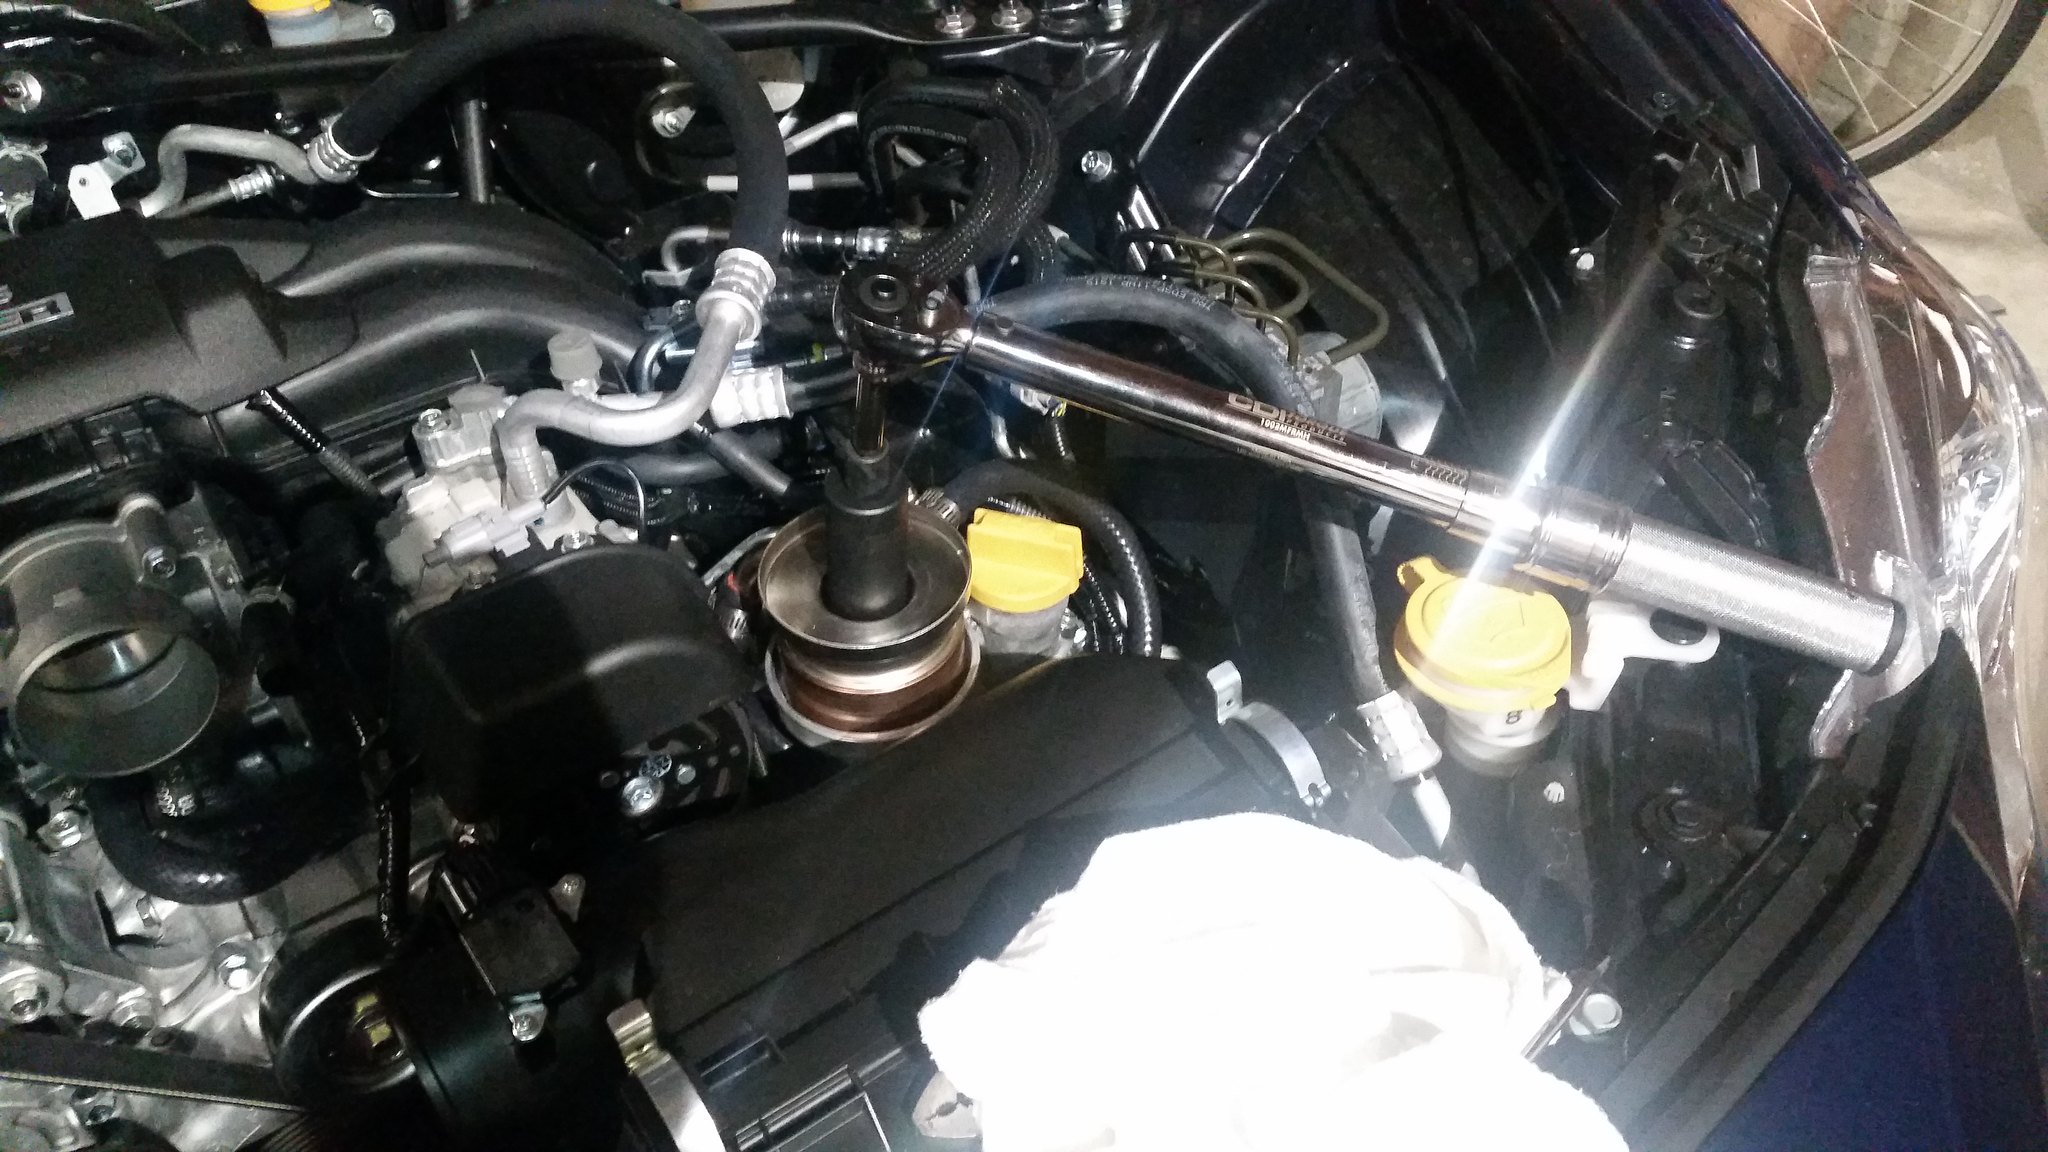
Now after all the lines are hooked up, you will want to go ahead and torque down the filter stem and oil cooler in the correct orientation. My research on Nasioc showed that 40 ft/lbs was appropriate.
https://flic.kr/p/x4AGZ7

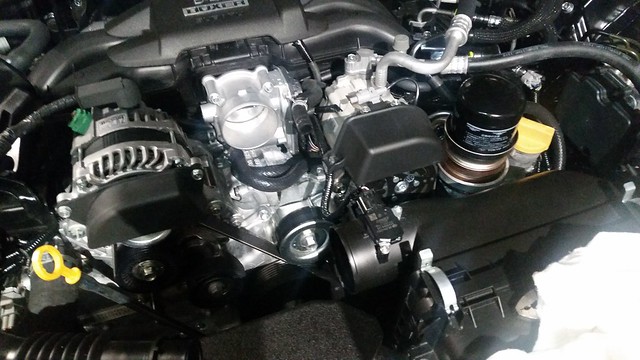
Here is a photo of everything installed minus the intake tube.
https://flic.kr/p/wa3Bya

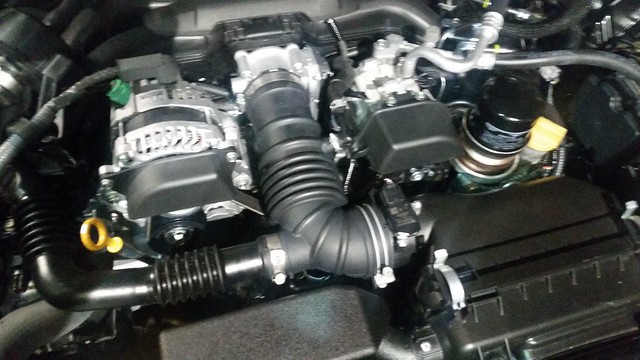
Now go ahead and install your intake tube, be sure to attach it to the throttle body, airbox, breather hose, and sound generator tube. Then go ahead and tighten down your clamps.
https://flic.kr/p/wPiiiS

After the process is complete. I recommend running the car for around 30 seconds, revving the engine a few times to 3,000 rpm. Then shut it off and check for any leaks, particularly oil leaks.
After that, you will want to fill and burp your coolant system. I recommend the grimmspeed thread linked below and I also utilized a Lisle spill free system which is also linked below. Finally, you will want to top off your oil if you do indeed swap oil filters as a bit of oil is trapped in the old oil filter.
Grimmspeed thread:
http://www.ft86club.com/forums/showthread.php?t=9883
Lisle Amazon LInk: [ame="http://www.amazon.com/gp/product/B00A6AS6LY?psc=1&redirect=true&ref_=oh_aui_search_ detailpage"]Amazon.com: Lisle 24680 Spill-Free Funnel: Automotive[/ame]
Logging:
I’ve attempted to document both oil warmup as well as oil temperature during spirited canyon driving.
Oil Warmup Logging
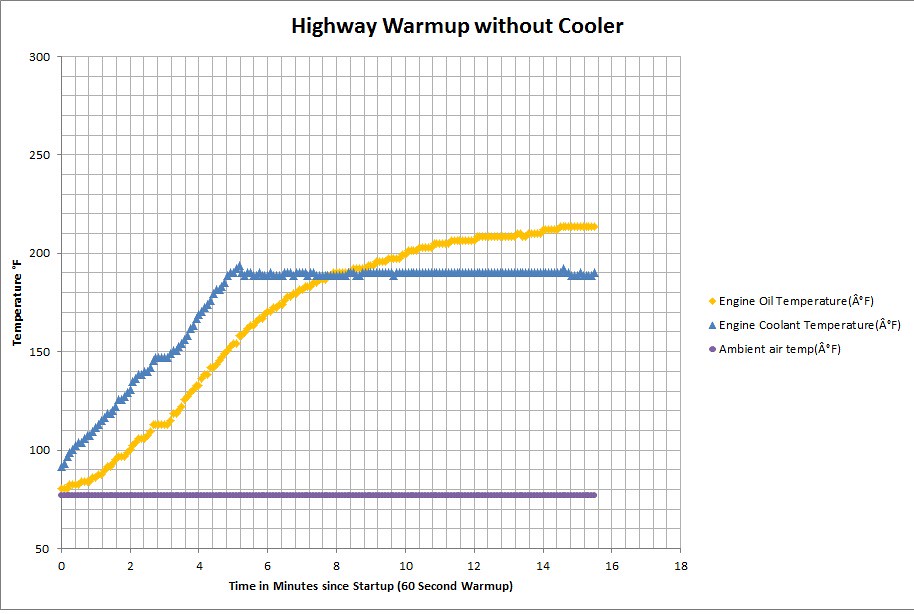
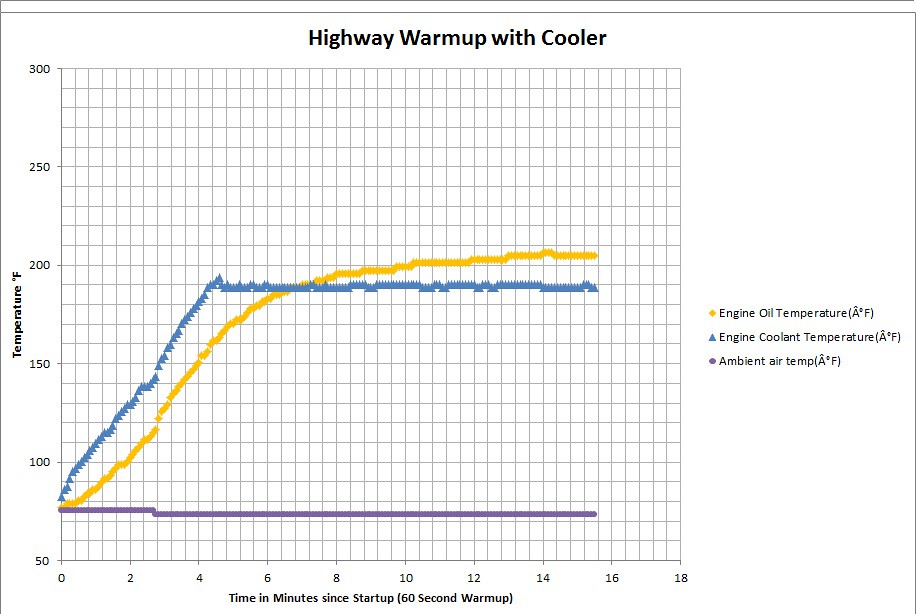
Please see before cooler and after cooler logs below of the coolant and oil coming up to temperature. Effectively identical procedures for each log. Start car cold in garage, begin logging approximately 15 to 30 seconds after starting car. Pull out of garage after rpms drop after cold start. Surface streets for approximately 90 seconds then highway driving at approximately 70 mph until temperatures stabilize. As you can see, the initial warmup of oil temperature seems to have improved slightly. Also the oil temperatures do stabilize a bit lower with the cooler at freeway speeds than without.
Warmup without Cooler (oil temperature stabilized at 213 degrees)
https://flic.kr/p/xcUmAc

Warmup with Cooler (oil tempreature stabilized at 204 degrees)
https://flic.kr/p/xcm8C6

Canyon Run Logging
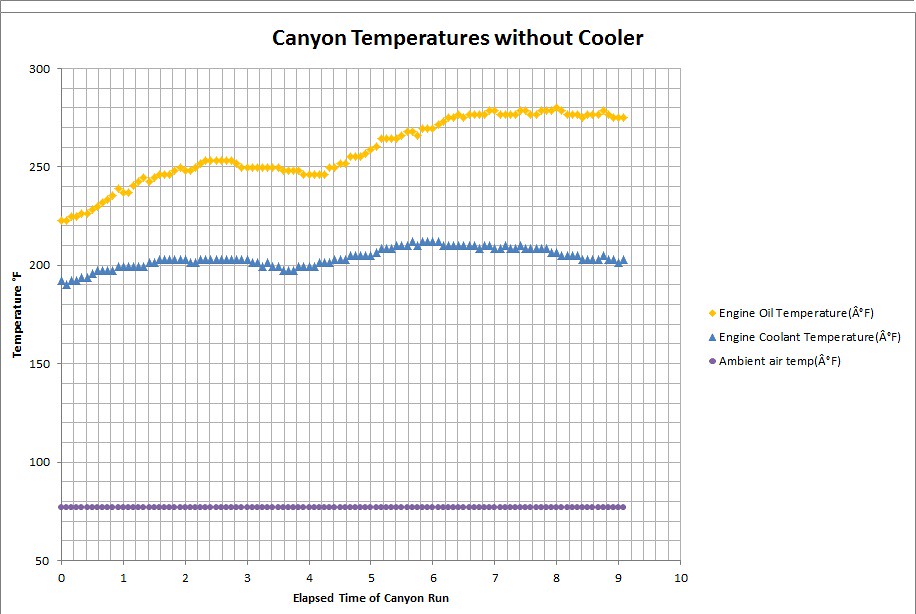
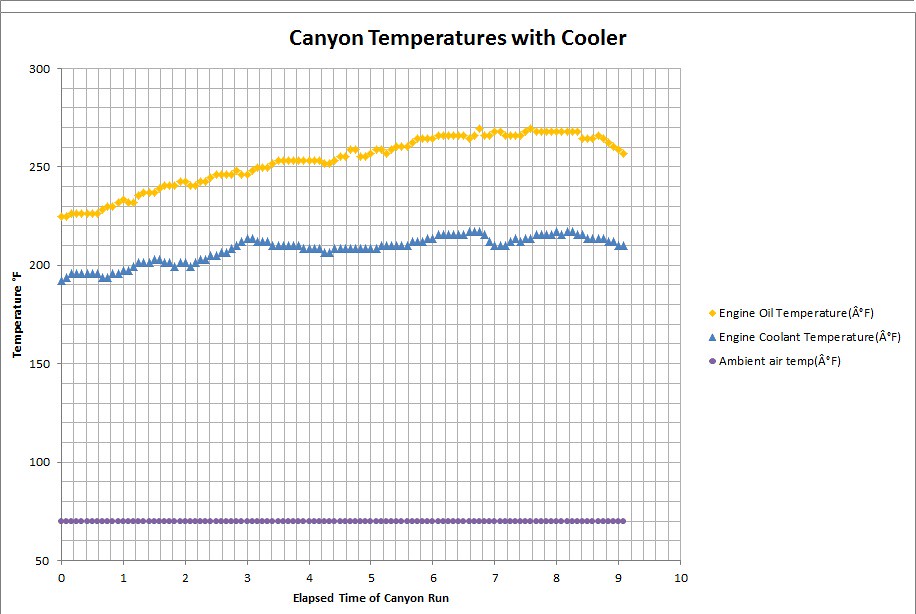
This test was run at Palomar Mountain in Southern California. I have provided logs, before and after cooler, of going up south grade which is a steep and tight uphill mountain road. It is the most demanding road in my area for cooling purposes. While it is tough to get a totally clear run up the hill on Sundays when I generally go, both runs were fairly clear. I got stuck behind a car for a few corners on both runs until they let me by. I feel like they are pretty comparable. I do believe I was driving a bit harder on the run with the cooler though as I got to know the road a bit better. This is working the motor very hard, on and off redline in 2nd gear multiple times up the hill.
Canyon without Cooler (max oil temp: 280.4, max coolant temp: 212)
https://flic.kr/p/xcm8yD

Canyon with Cooler (max oil temp: 269.6, max coolant temp: 217.4)
https://flic.kr/p/xa2GSy

Conclusion
All in all I think it does its job. The cooler decreased my oil temperatures with minimal expenditure and an easy installation.