 07-09-2015, 10:53 PM
|
#1
|
|
Not Bаnned Anymore
Join Date: Jan 2015
Drives: Heavily Modified FRS
Location: Calgary, AB
Posts: 9,827
Thanks: 14,918
Thanked 8,275 Times in 4,797 Posts
Mentioned: 355 Post(s)
Tagged: 374 Thread(s)
|
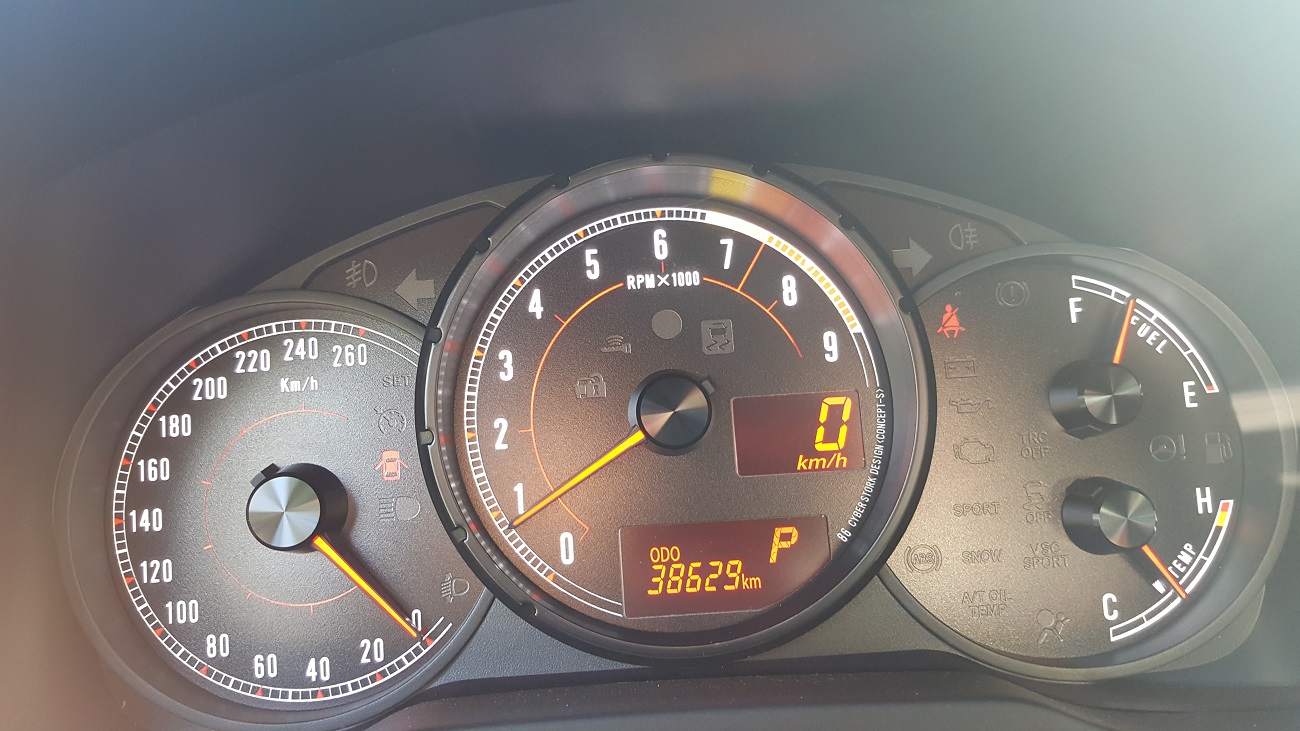
>>Gauge cluster overlay DIY<<
Hello everyone!! This is my first DIY so here it goes. DO AT YOUR OWN RISK. This is the goal
Edit: I ordered my parts from @Max @ 86WORX
I cant figure out how to post a link from my phone  but its easy enough to find on his site. They are under interior parts. but its easy enough to find on his site. They are under interior parts.
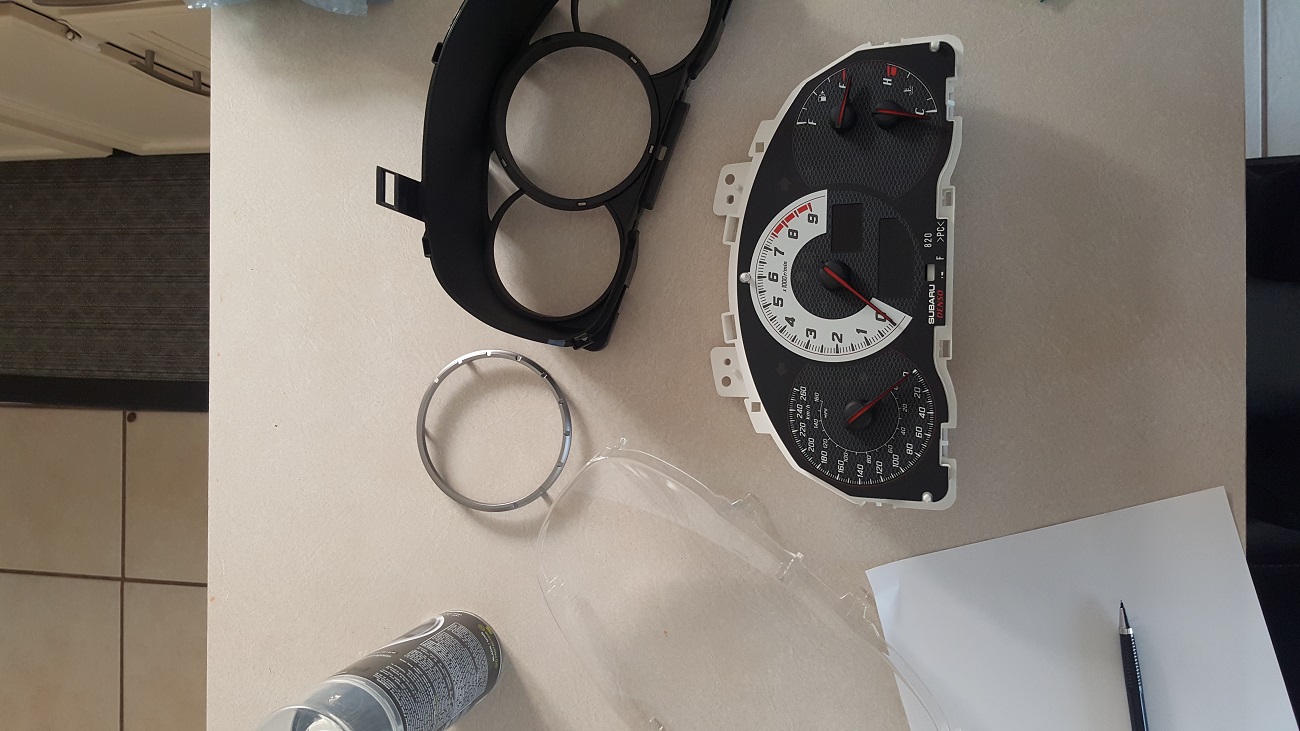
 Step 1) Remove the gauge cluster from the car. There is another DIY on here on how to do that, It is really easy and if you can't do that you should not be attempting this.
Step 2) remove all the plastic bits, I chose to paint my silver ring black so I removed that too for painting.
Step 1) Remove the gauge cluster from the car. There is another DIY on here on how to do that, It is really easy and if you can't do that you should not be attempting this.
Step 2) remove all the plastic bits, I chose to paint my silver ring black so I removed that too for painting.
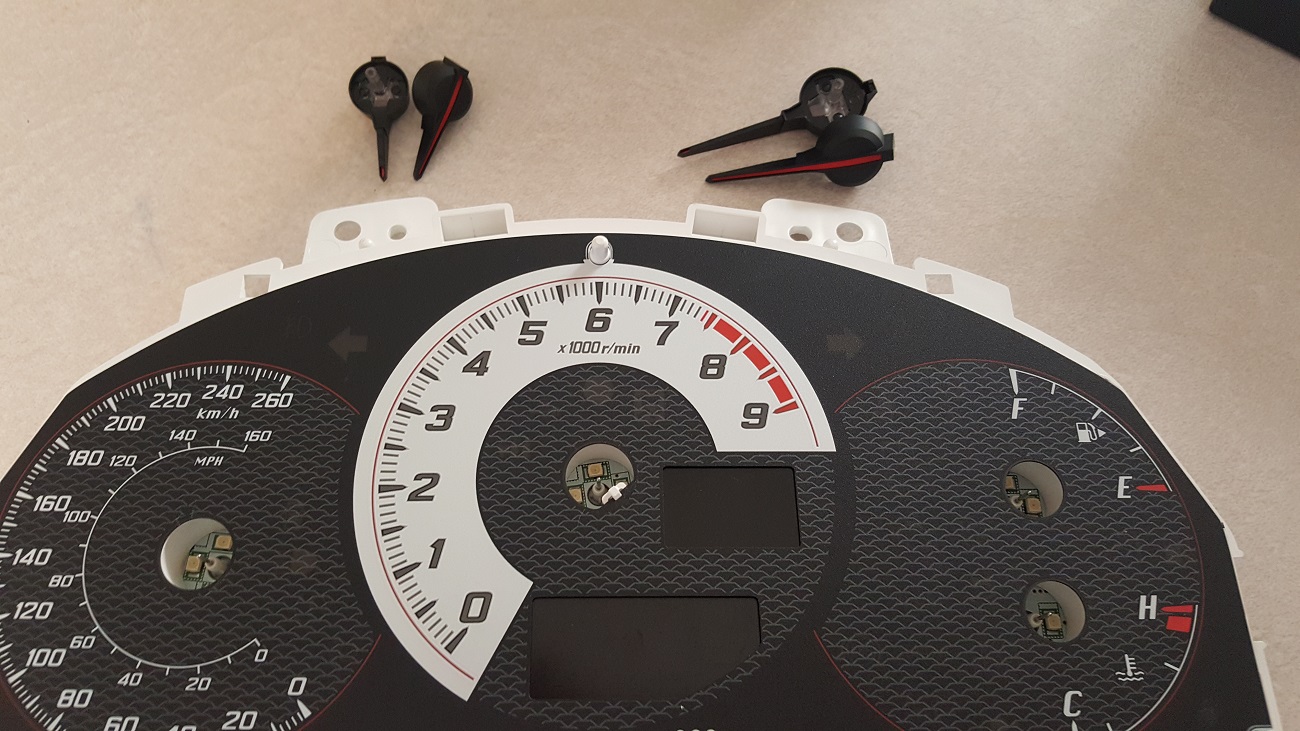
 Step 3) Remove all the needles. Note the position of each one very carefully as you have to be very meticulous putting them back EXACTLY where they were. Be very careful here, you have to lift straight up. You will end up with this.
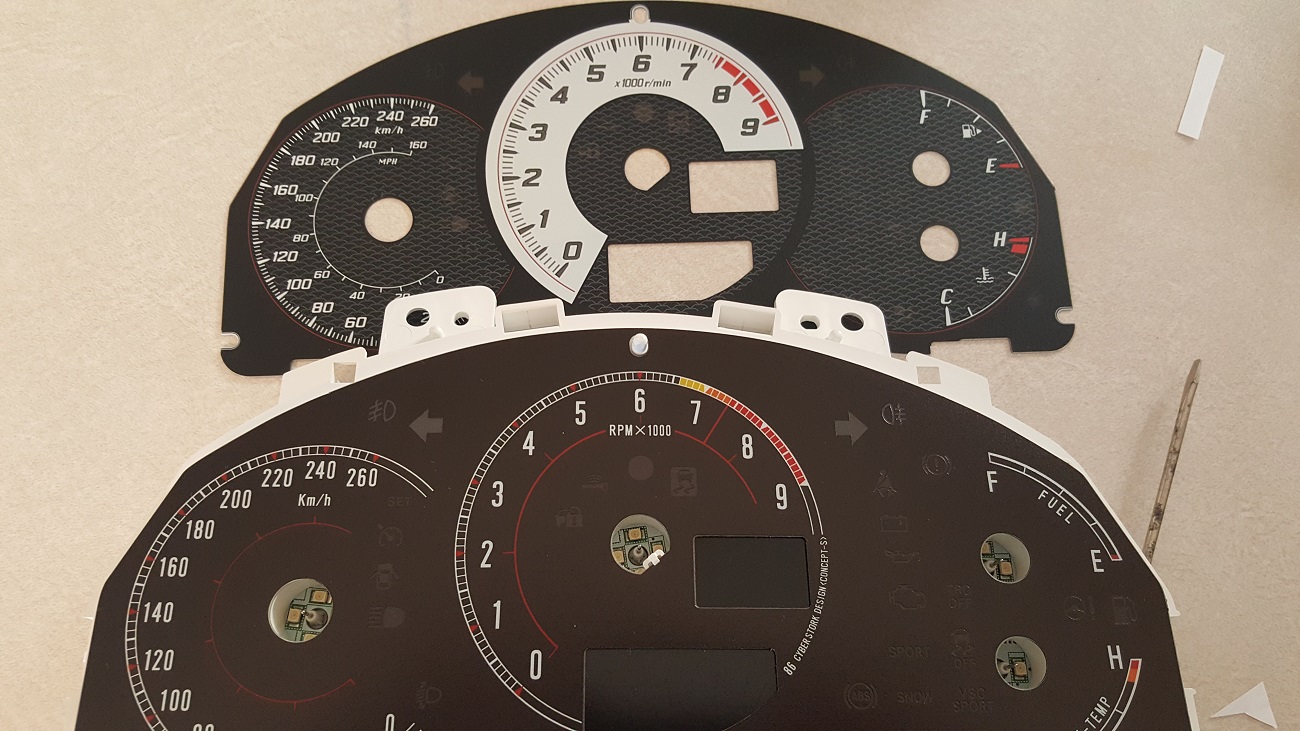
 Step 4) Lift the faceplate off and lay down the new one.
 Step 5) Push the needles back on, Be very careful to not push them on fully at first. Once it is on a little turn them until you hit the stopper and use that as a reference point to reset them. I.e. spin the temperature needle to the left until it hits the stopper, that is where it will be when the car is off so the needle should point backwards slightly. You can just use a small amount of force to get the needle to rotate while the motor is held to the stopper to help you line it up. You will get this. I also chose to get needle caps too so this is me applying those.
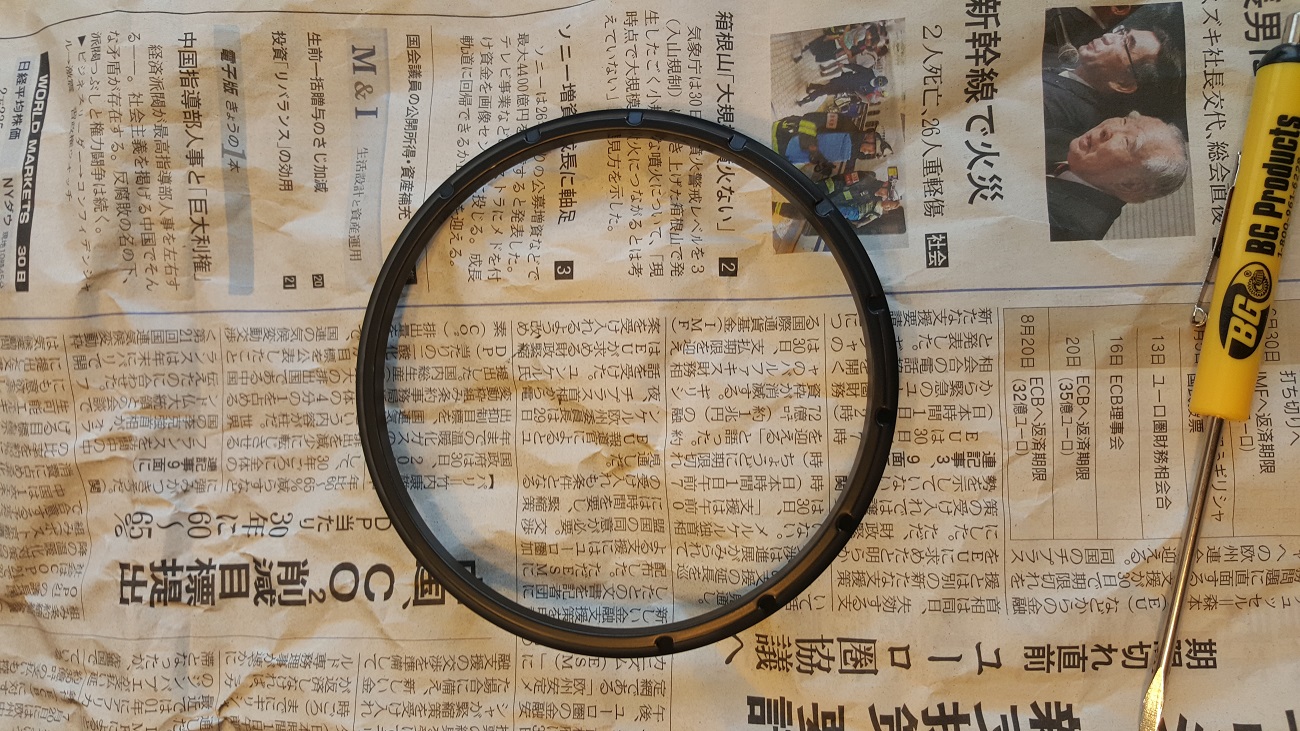
 Step 6) Optional: Paint the Silver ring (note the japanese news paper that came as packaging for my overlay/needle caps #JDM lol!)
 Step 7) Reassemble!! Note I mixed up the tach and speedo meters so this pic is not right!!
Now Just go test it!!
Step 7) Reassemble!! Note I mixed up the tach and speedo meters so this pic is not right!!
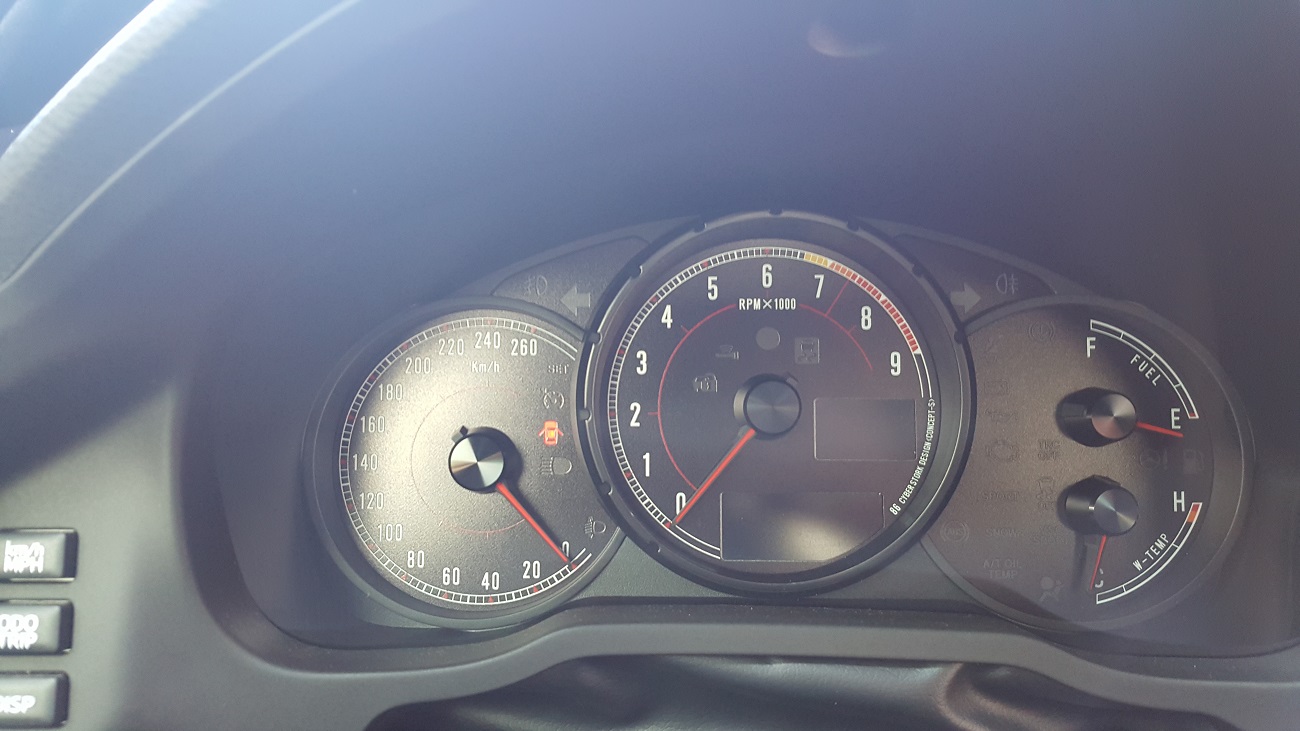
Now Just go test it!!  Here is 1 lights on shoot in the day and a poorly shot picture of lights off during the day. Here is 1 lights on shoot in the day and a poorly shot picture of lights off during the day.
 I am pressed for time so that is all for now! I may or maynot update this depending on the demand. P.S sorry if I cant spell
Last edited by go_a_way1; 07-10-2015 at 11:03 AM.
|

|

|