


|
||||||
| Cosmetic Modification (Interior/Exterior/Lighting) Discussions about cosmetic mods. |
 |
|
|
Thread Tools | Search this Thread |
 08-20-2015, 12:16 AM
|
#1 |
|
Member
Join Date: May 2015
Drives: frs
Location: 85365
Posts: 92
Thanks: 1
Thanked 6 Times in 6 Posts
Mentioned: 0 Post(s)
Tagged: 0 Thread(s)
|
Bayson R TRD rep install FRS.
I recently purchased the Bayson r trd reps and am a bit unsure on how to install them CORRECTLY. They didn't include any instructions and I've contacted them but they haven't got back to me. I got an idea of how to install them, I am just unsure on how to mount the rear side of the sideskirts to the lower quarterpanel.
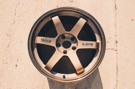
Here was the hardware that was included.  Any info is greatly appreciated, thanks!!!! |

|

|
|
08-21-2015, 01:50 PM
|
#2 |
|
Senior Member
Join Date: May 2012
Drives: 2015 Halo FR-S
Location: Puyallup, WA
Posts: 328
Thanks: 87
Thanked 233 Times in 132 Posts
Mentioned: 7 Post(s)
Tagged: 0 Thread(s)
|
Which piece did you purchase? The front lip, sides, or rear lip?
|
|
|
|
|
08-21-2015, 02:29 PM
|
#3 | ||
|
Senior Member
Join Date: Sep 2012
Drives: 2013 Scion FR-S
Location: San Antonio TX / Dyess AFB
Posts: 948
Thanks: 26
Thanked 451 Times in 242 Posts
Mentioned: 11 Post(s)
Tagged: 1 Thread(s)
|
Quote:
Quote:
__________________
 |
||
|
|
|
|
08-21-2015, 04:34 PM
|
#4 | |
|
Senior Member
Join Date: May 2012
Drives: 2015 Halo FR-S
Location: Puyallup, WA
Posts: 328
Thanks: 87
Thanked 233 Times in 132 Posts
Mentioned: 7 Post(s)
Tagged: 0 Thread(s)
|
Quote:
 I'm interested to know how the front lip and the sides go on as I was looking to pick these up as well. |
|
|
|
|
|
08-21-2015, 08:13 PM
|
#5 |
|
Junior Member
Join Date: Jun 2015
Drives: FR-S 10 Series
Location: Southern California
Posts: 8
Thanks: 0
Thanked 5 Times in 2 Posts
Mentioned: 0 Post(s)
Tagged: 0 Thread(s)
|
 BaysonR TRD Side Skirt Installation: SCREWS 6 Brackets (goes with the little (12?) golden screws) - Underneath of the car 4 Gold Screws Holders - Front of the car 4 Silver Screws Holders - Back of the car 8 Black Screws - For the front and rear of the sideskirts. They go into the the gold and silver holders. REAR SIDE SKIRTS No holes are being drilled. The silver clamps allow you to clamp the sides of the car to prevent drilling. The rear side skirt use the 2 silver screw holders and 2 black screws. Clamp the silver screw holders in between the rear end of the car and align it with the side skirts.  FRONT SIDE SKIRTS Same thing just use the gold screw holders. Remove the bottom two push pins. Tug in the clamps; align it with the side skirts and screw in.  BOTTOM OF THE SIDE SKIRTS. This is where you make the side skirts fit in super snug. Use the tiny gold screws to attach these brackets into the side skirts. Once you've attached these brackets, force the brackets to fit into a metal lining that's underneath your car. The lining should already have predrilled holes for you to screw in. All the screws needed in this step are the tiny gold pieces. Remember their are two screws used for each attached bracket. One that goes to the bracket itself and the other on the metal lining.  PM me if you have any questions. PM me if you have any questions.
Last edited by kemit; 08-21-2015 at 09:25 PM. |
|
|
|
|
08-21-2015, 09:11 PM
|
#6 | |
|
Junior Member
Join Date: Jun 2015
Drives: FR-S 10 Series
Location: Southern California
Posts: 8
Thanks: 0
Thanked 5 Times in 2 Posts
Mentioned: 0 Post(s)
Tagged: 0 Thread(s)
|
Quote:
|
|
|
|
|
|
02-01-2020, 11:23 PM
|
#7 |
|
Senior Member

Join Date: Apr 2016
Drives: 2013 Supercharged BRZ, E85, Ohlins
Location: Oregon
Posts: 143
Thanks: 23
Thanked 132 Times in 61 Posts
Mentioned: 3 Post(s)
Tagged: 0 Thread(s)
|
Bayson R TRD rep install FRS.
I went with the lower-profile 'S Style' side skirts that have a flare shape to them (wrapped in my case), sold here.
There are NO front screws for this model due to its lower profile. I added some extra 3M double sided trim tape to the that area for security. These skirts DO require (re)drilling of mounting holes in skirts ( the stock bayson holes are too bar inboard to catch the fender lip; You also need to drill the fender lip holes; at least I did on my 2013 BRZ. Third, i had to remove about 3" of the round-over detail on the inside of the fender lip to allow the skirt to install flush against the fender lip. See photo. This area will be fully covered by the skirt. This curved detail appears to be just a bondo-like substance that cuts easily with a knife ( its not metal.) Lastly, you need to either shorten or replace the 6mm speed nuts provided by bayson; the ones provided dont get close enough to the outer edge of the fender (at least not on my 2013 BRZ.) Photos explain it all: . . . Pleased with the final results so far ! we'll see how they stand up to some spirited driving. Note I had the flare portion wrapped in satin black (easier to re-cover them that way). update: so the front pass side moved about 1/4 in after some spirited driving. I will be adding a single body screw to each Skirt at the front. Also: the 3M 1-inch double sided tape is not up to the job. The black, heavy duty Gorilla brand double sided mounting tape is up to the job so far. Seam at body is staying nicely closed now. If you install these skirts, i recommend placing the top seam first *before* you tighten any of the screws. then check the mounting holes align, and if not, redrill them. Unless everything is properly aligned, tension from the screws will pull the top seem apart. I ended up adding three body screws In the fender liner at the rear, and one at the bottom front on the bottom. Last edited by canyons; 02-15-2020 at 11:46 PM. Reason: DETAIL |
|
|
|
| The Following User Says Thank You to canyons For This Useful Post: | Irace86.2.0 (02-01-2020) |
|
|
|
|
|
|
|
 Similar Threads
|
||||
| Thread | Thread Starter | Forum | Replies | Last Post |
| Bayson R lip kit review | Cjymiller | Cosmetic Modification (Interior/Exterior/Lighting) | 59 | 07-06-2017 01:23 PM |
| WTB Bayson R sti brz lip GTA area | FLYFISHR | Canada Classifieds | 4 | 04-15-2015 05:41 PM |
| Bayson R BRZ STI Replica | snezze21 | Cosmetic Modification (Interior/Exterior/Lighting) | 9 | 11-05-2014 05:12 AM |
| brz bayson r rep front lip?! | DAN_BRZ | Canada Classifieds | 11 | 06-05-2014 02:42 PM |
| Who has Bayson R Lip kit? | Cjymiller | Northern California | 21 | 09-29-2013 09:52 AM |


 BRZ
BRZ