


 03-11-2019, 09:14 PM
|
#43 |
|
Senior Member

Join Date: Sep 2017
Drives: 2022 BRZ Limited Silver
Location: Jacksonville, FL
Posts: 2,532
Thanks: 882
Thanked 2,045 Times in 1,188 Posts
Mentioned: 68 Post(s)
Tagged: 0 Thread(s)
|
SCCA T4 Build thread
The FIPG from the factory on my car was also black. I cant recall if the pan was black though and I dont have any photos of the pad to refresh my memory. My guess is the crap in your pan has either been there forever or is from the clean up work done with the recall. Who knows maybe they didnt use TB1217H on the early builds which may have something to do with the bearing failures in early MY2013s. The replacement short block I got also had black FIPG. I kind of expected it to be gray.
Last edited by ermax; 03-11-2019 at 09:27 PM. |

|

|
|
03-12-2019, 08:09 AM
|
#44 | |
|
Senior Member
Join Date: Nov 2016
Drives: 2013 BRZ Limited 6MT
Location: Nashville, TN
Posts: 208
Thanks: 36
Thanked 80 Times in 58 Posts
Mentioned: 1 Post(s)
Tagged: 0 Thread(s)
|
Quote:
|
|
|
|
|
|
03-12-2019, 08:36 AM
|
#45 |
|
Senior Member
Join Date: Sep 2017
Drives: 2022 BRZ Limited Silver
Location: Jacksonville, FL
Posts: 2,532
Thanks: 882
Thanked 2,045 Times in 1,188 Posts
Mentioned: 68 Post(s)
Tagged: 0 Thread(s)
|
It's kind of a bummer they don't have pry points though. Being steel it's easy to deform the lip of the pan. I understand the use of FIPG on most of this engine but I just don't understand why they didn't use a normal gasket on the lower pan. Not only is it a pain to get off but a pain to clean up without scratching the paint off the pan and needing to respray it.
I like how they mixed it up and threw in a rubber gasket for the valve cover though. Hahaha. |
|
|
|
|
03-12-2019, 02:25 PM
|
#46 | |
|
Senior Member

Join Date: Jun 2012
Drives: Nevermorange FRS
Location: Seattle, WA
Posts: 4,160
Thanks: 755
Thanked 4,200 Times in 1,803 Posts
Mentioned: 77 Post(s)
Tagged: 1 Thread(s)
|
Quote:
But that's all behind me now.. gotta keep working! Onto the rear shocks!
__________________
SCCA T4 - FRS
|
|
|
|
|
|
03-12-2019, 02:41 PM
|
#47 |
|
Senior Member
Join Date: Jun 2012
Drives: Nevermorange FRS
Location: Seattle, WA
Posts: 4,160
Thanks: 755
Thanked 4,200 Times in 1,803 Posts
Mentioned: 77 Post(s)
Tagged: 1 Thread(s)
|
springy things in the rear
The rear Sportline springs are the same resting length as the OEM which makes me wonder how they would lower the car 1.4" advertised - I assume that's a function of the progressive rate of the tighter coils that allows the spring to compress 1.4" more vs OEM when the car sits.
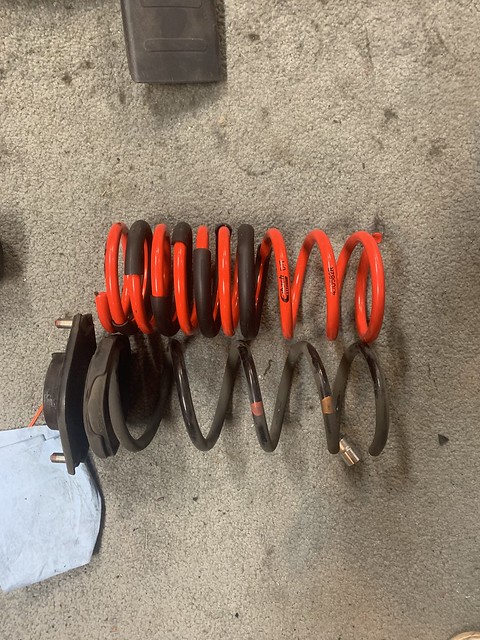 IMG_0478 by Rice Classic, on Flickr IMG_0478 by Rice Classic, on FlickrI was planning on using the raceseng 2" rear extended top hat but I'm not sure that's going to work - but I'll get to that in a moment. Let's start by removing the OEM perch - thankfully this one is pressed on so I only need to tap it off. However, I will have to grind quite a bit away to make it fit the 2" width I need for the Bilstein.  IMG_0473 by Rice Classic, on Flickr IMG_0473 by Rice Classic, on Flickr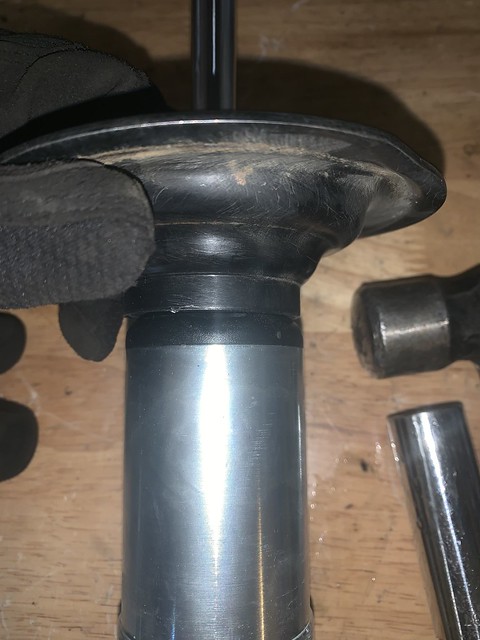 IMG_0474 by Rice Classic, on Flickr IMG_0474 by Rice Classic, on FlickrNot the final grind FYI - it got wider and much cleaner.  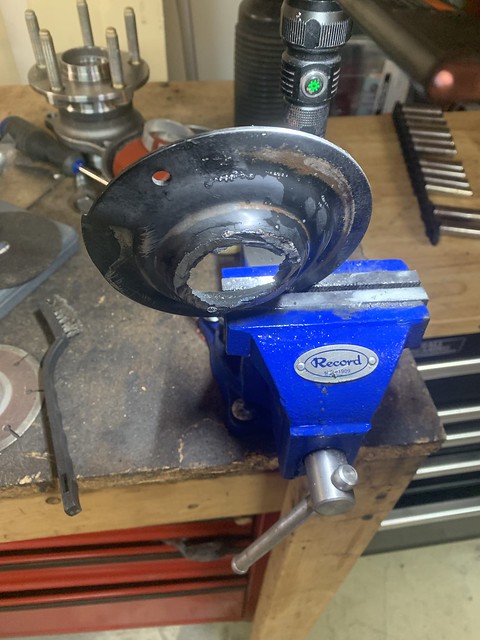 IMG_0475 by Rice Classic, on Flickr IMG_0475 by Rice Classic, on Flickr IMG_0477 by Rice Classic, on Flickr IMG_0477 by Rice Classic, on FlickrAnd now I have the "top-hat" conundrum. By using this 2" extending top hat I have to compress the spring (Preload) by about 2". The first 1.5" was by had and I had a 2nd person thread the top nut on and tightening the nut added about another .5". So that's ~2" of preload with everything set at the lowest height I can set it - meaning I would have great bump travel at the loss of droop. Secondly, if I find I need to raise the rear it will only increase preload and further reduce droop. 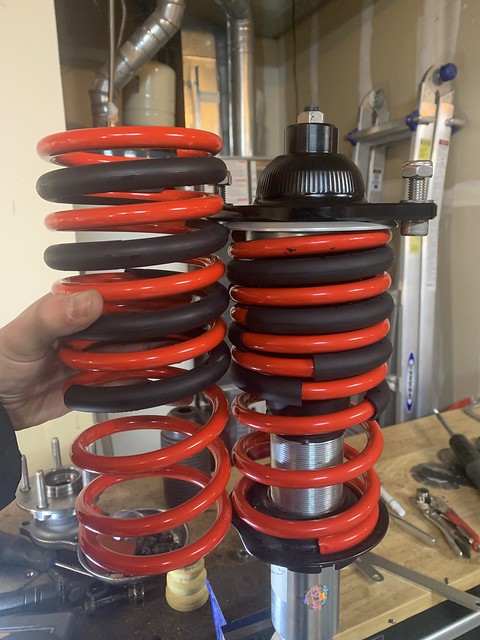 ISSO7503 by Rice Classic, on Flickr ISSO7503 by Rice Classic, on FlickrI can use the OEM top-hat instead (not pictured) which only preloads the spring by 1" (or less) which will give up some bump travel but improve droop, preload and give me a bit of room for corner balancing; raising the rear if needed since everything is set at full-low... Once I have the car on the ground I'll know for sure which top hat I will need to use. Ideally at rest the shock shaft will be at 50% of its stroke.
__________________
SCCA T4 - FRS
|
|
|
|
|
03-24-2019, 03:06 PM
|
#48 |
|
Senior Member/Old Fanboi

Join Date: Nov 2011
Drives: 2000 2ZZ-GE MR2 Spyder HT
Location: Back home in Ohio now
Posts: 2,446
Thanks: 1,931
Thanked 2,014 Times in 915 Posts
Mentioned: 16 Post(s)
Tagged: 0 Thread(s)
|
How are things going? Are you making progress?
__________________
So many modders have more cents than sense!
|
|
|
|
|
03-25-2019, 12:44 AM
|
#49 |
|
Senior Member
Join Date: Jun 2012
Drives: Nevermorange FRS
Location: Seattle, WA
Posts: 4,160
Thanks: 755
Thanked 4,200 Times in 1,803 Posts
Mentioned: 77 Post(s)
Tagged: 1 Thread(s)
|
Picking up where I left off...
It's about time for an update.
Let's start where I left off - top hats and springs. I ended up going to back to the OEM top hat. It afforded me a lot less spring pre-load which is favorable and gave me some room for adjustment without significantly adding to that preload. 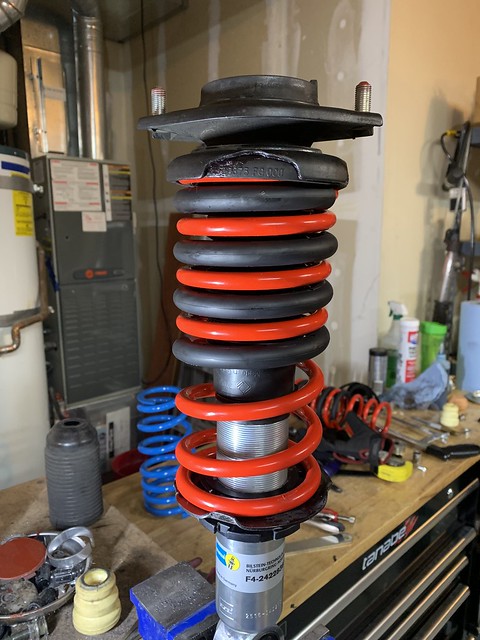 IMG_0483 by Rice Classic, on Flickr IMG_0483 by Rice Classic, on FlickrAnd it all went in alright. 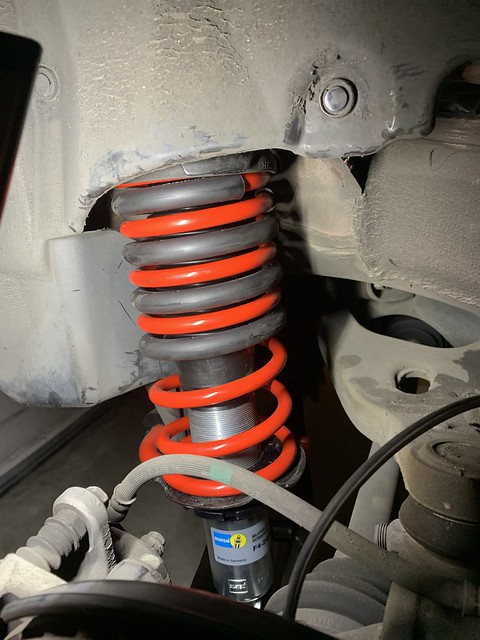 IMG_0490 by Rice Classic, on Flickr IMG_0490 by Rice Classic, on FlickrWith that out of the way - it was time install the SPC bits for some adjustability and the RacerX sway bar end links. Nothing fancy (nor expensive) and that's what I LOVE about the T4 rules! 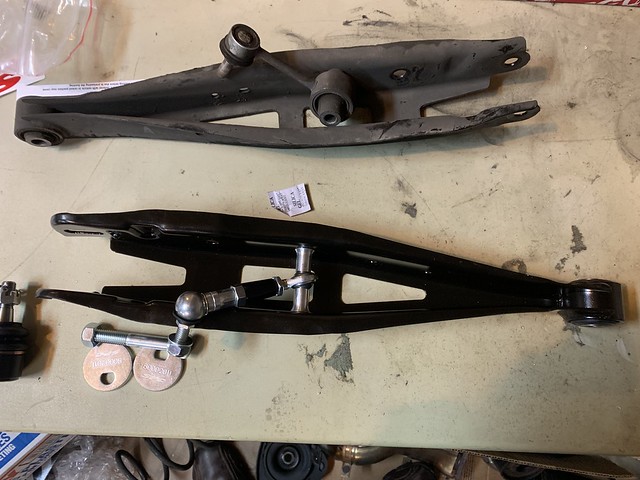 IMG_0486 by Rice Classic, on Flickr IMG_0486 by Rice Classic, on Flickr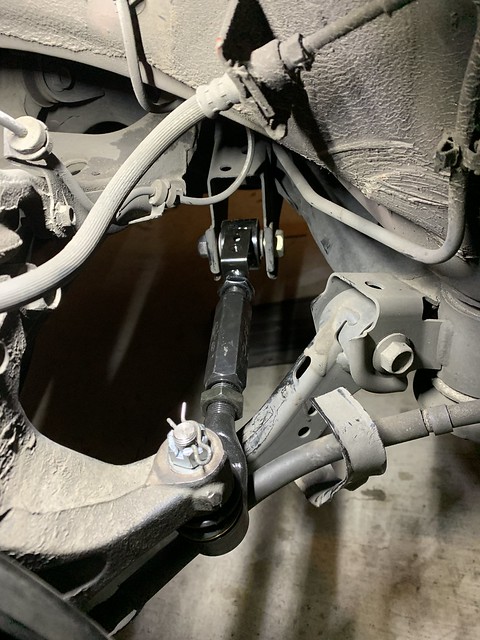 AQEH5303 by Rice Classic, on Flickr AQEH5303 by Rice Classic, on FlickrSo now that the rear suspension was in place it was time to do the rotating bits on the rear - hub/bearing/rotor/brakes. 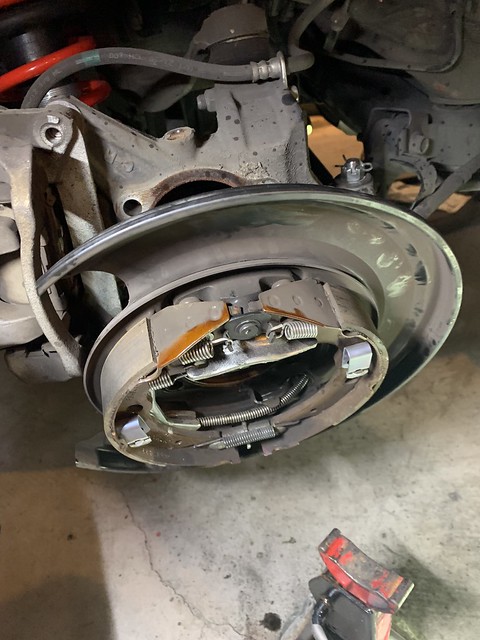 IMG_0497 by Rice Classic, on Flickr IMG_0497 by Rice Classic, on FlickrI took a wire wheel to everything and then coated in anti-seize so the next time I do this it's not all chemically fused together with rust! 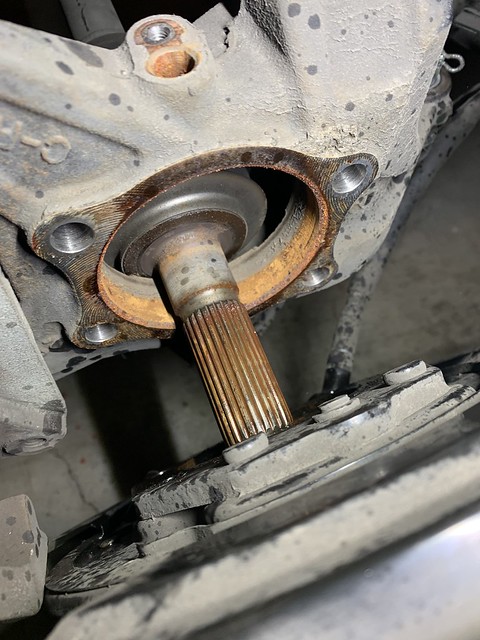 IMG_0496 by Rice Classic, on Flickr IMG_0496 by Rice Classic, on Flickr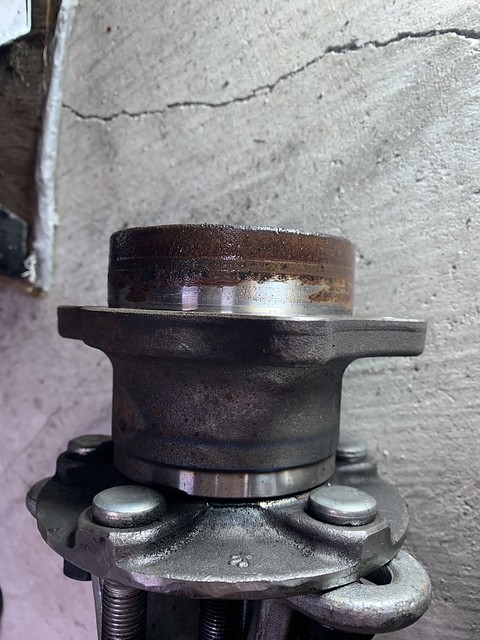 IMG_0498 by Rice Classic, on Flickr IMG_0498 by Rice Classic, on FlickrI felt bad replacing these because they felt great! 84k miles and the bearings feel like they're new. But - it's a new race car build so I'm starting fresh. 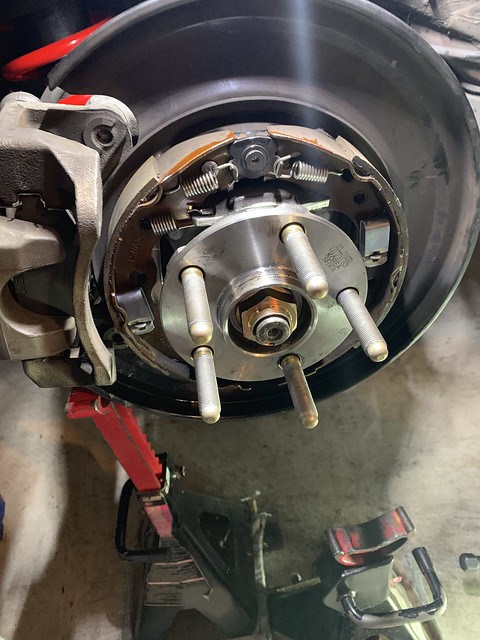 IMG_0500 by Rice Classic, on Flickr IMG_0500 by Rice Classic, on Flickr
__________________
SCCA T4 - FRS
|
|
|
|
| The Following User Says Thank You to rice_classic For This Useful Post: | Rampage (03-25-2019) |
|
03-25-2019, 01:05 AM
|
#50 |
|
Senior Member
Join Date: Jun 2012
Drives: Nevermorange FRS
Location: Seattle, WA
Posts: 4,160
Thanks: 755
Thanked 4,200 Times in 1,803 Posts
Mentioned: 77 Post(s)
Tagged: 1 Thread(s)
|
...continued
Going back to the front of the car..
The Hotchkis strut tower brace wasn't copacetic with my raceseng cascam mounts so I had to get creative in my bolt-bin. The bolt wasn't long enough to accommodate the cascam plate and the strut bar so needed something longer. Here how much pass-through existed without the strut bar in place. 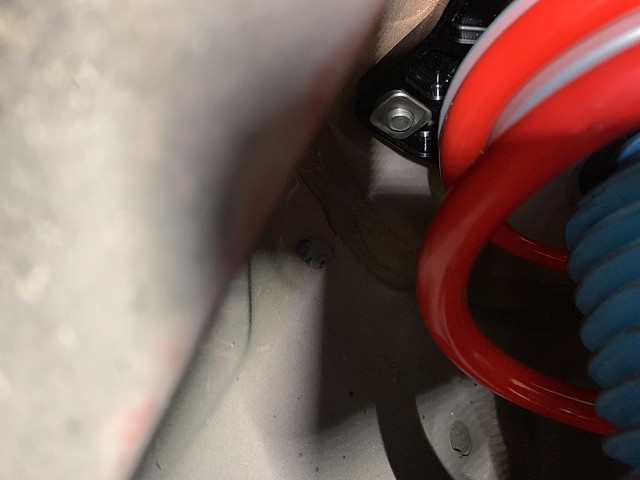 IMG_0517 by Rice Classic, on Flickr IMG_0517 by Rice Classic, on FlickrHere's the Cascam ones on the left (silver bits) and the alternates I had to choose from. 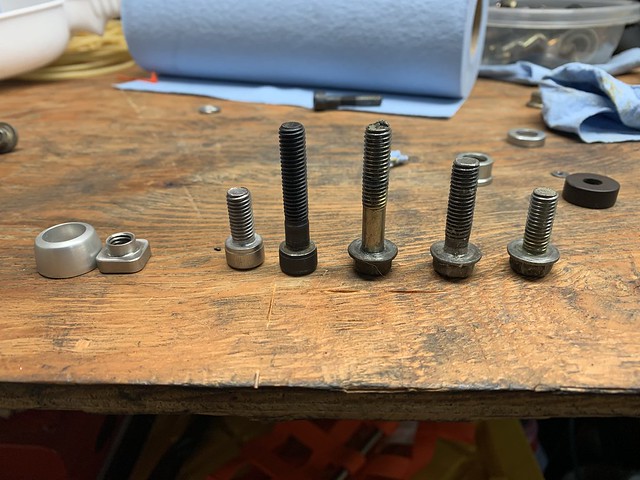 IMG_0516 by Rice Classic, on Flickr IMG_0516 by Rice Classic, on FlickrFirst was the long black one in the raceseng washer... 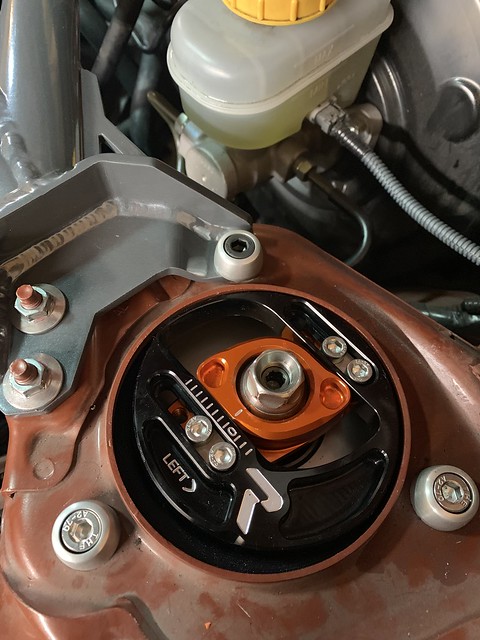 IMG_0514 by Rice Classic, on Flickr IMG_0514 by Rice Classic, on FlickrIt protruded too far so I had to go for a shorter one with it's own washer. The reason for finding the right one was to A) make sure enough threads were engaged and B) so the upper spring perch wouldn't touch the bolt once I slide everything over for the camber adjustment. It's less "pretty" but the problem was solved. 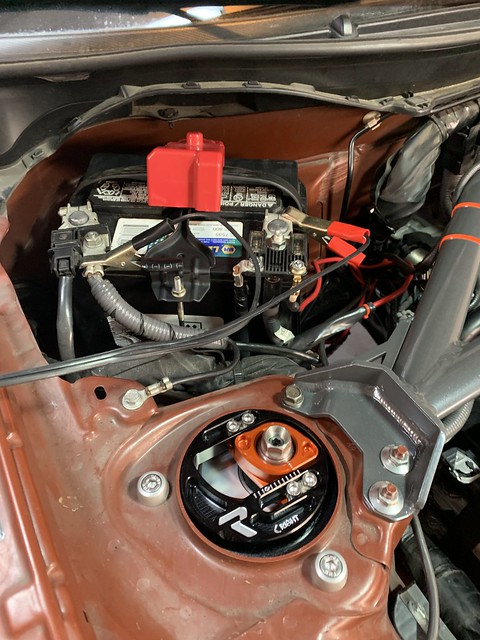 IMG_0529 by Rice Classic, on Flickr IMG_0529 by Rice Classic, on FlickrThat strut bar gave me something to tie my Innovate AFR sensor to as well, although I will probably relocate that attachment point. But now I get to move onto one of my favorite bits... the Stereo Delete for the gauges and kill switch. First and foremost I needed to figure out a way to kill the car and I was happy to find a very simply/safe solution. The 80amp fused wire off the positive terminal feeds a discrete block of fuses in the main block including fuel pump and ignition. Kill that - car dies. It works brilliantly. The rules don't require me to install this, but I won't only be racing with SCCA - I also race with ICSCC and they require these... 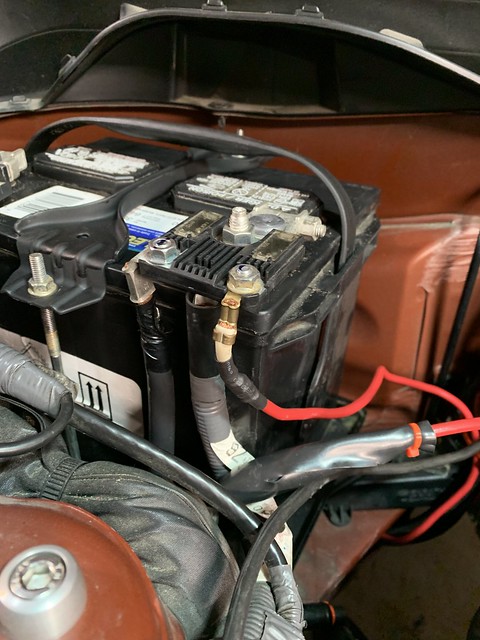 EZUO3583 by Rice Classic, on Flickr EZUO3583 by Rice Classic, on FlickrNow for the gauges... 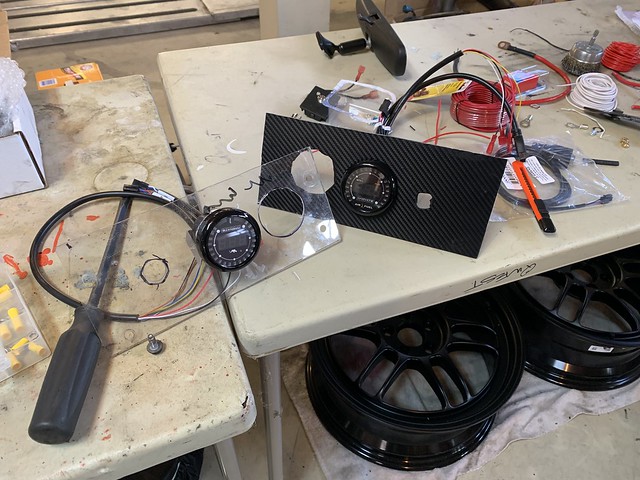 IMG_0507 by Rice Classic, on Flickr IMG_0507 by Rice Classic, on Flickr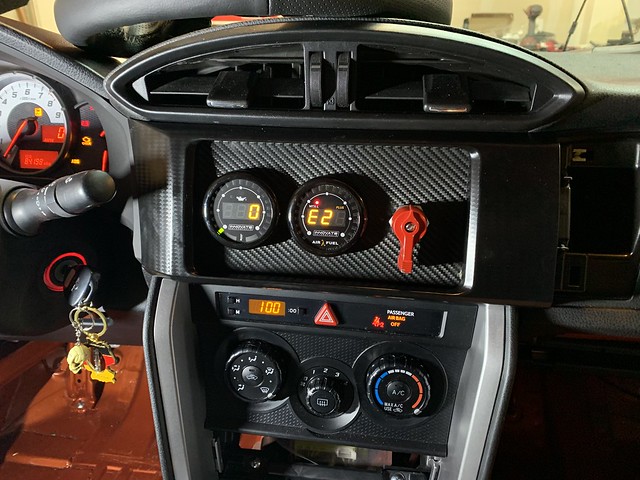 IMG_0509 by Rice Classic, on Flickr IMG_0509 by Rice Classic, on Flickr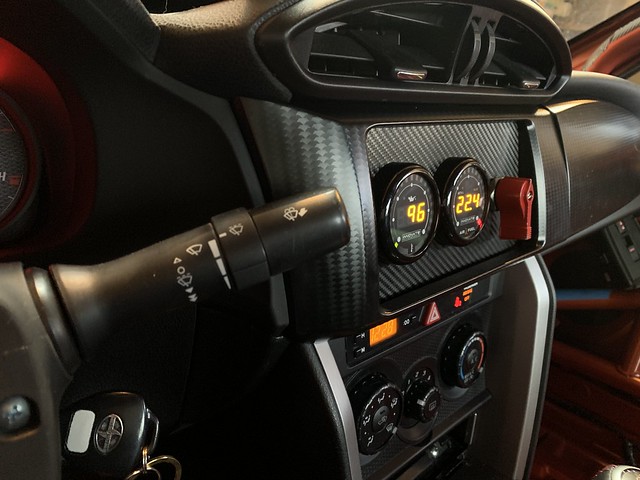 IMG_0534 by Rice Classic, on Flickr IMG_0534 by Rice Classic, on Flickr
__________________
SCCA T4 - FRS
|
|
|
|
|
03-25-2019, 01:24 AM
|
#51 |
|
Senior Member
Join Date: Jun 2012
Drives: Nevermorange FRS
Location: Seattle, WA
Posts: 4,160
Thanks: 755
Thanked 4,200 Times in 1,803 Posts
Mentioned: 77 Post(s)
Tagged: 1 Thread(s)
|
Getting close to running the car...
I'm quite happy with out that gauge plate turned out. And speaking of being happy out things turned out... THE MANIFOLD! I also got a 1" bung welded in, just after the overpipe for the AFR sensor (not shown)
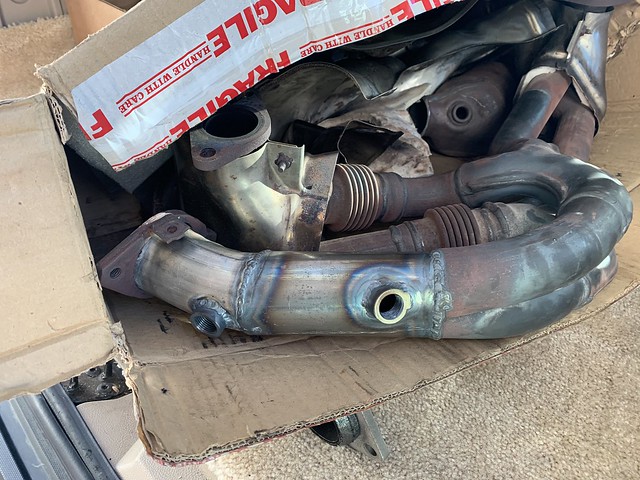 IMG_0494 by Rice Classic, on Flickr IMG_0494 by Rice Classic, on FlickrI also got ready for the first starting of the car by having my trusty extinguisher in place with my fancy quick disconnect mount. 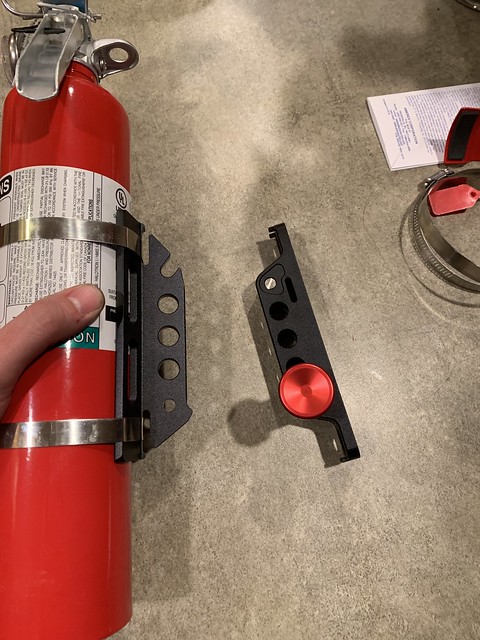 CPGY4753 by Rice Classic, on Flickr CPGY4753 by Rice Classic, on Flickr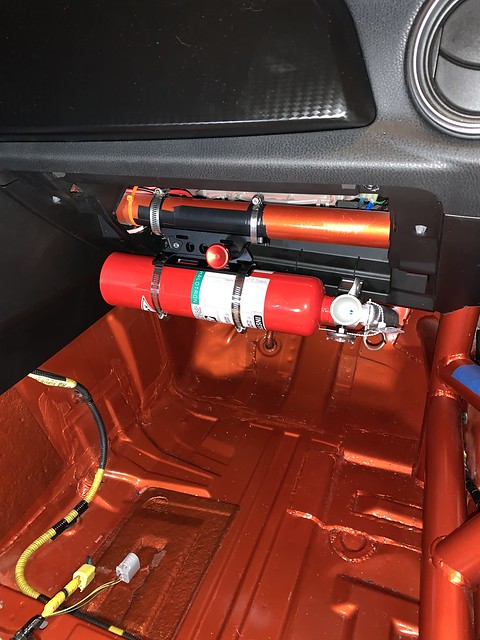 IMG_0523 by Rice Classic, on Flickr IMG_0523 by Rice Classic, on FlickrI will be installing a full fire suppression later this season but I needed the car at a minimum readiness for testing in April. So now it was time to do alignment, scales etc...and in order to do that I need to move it to the other garage bay which means! Starting it! I pulled the fuel pump plug so that I can dry crank it to fill up the oil cooler and lines and make some pressure before letting her rip.  IMG_0531 by Rice Classic, on Flickr IMG_0531 by Rice Classic, on FlickrAnd then she fired right up! But.. but... It wasn't all good. 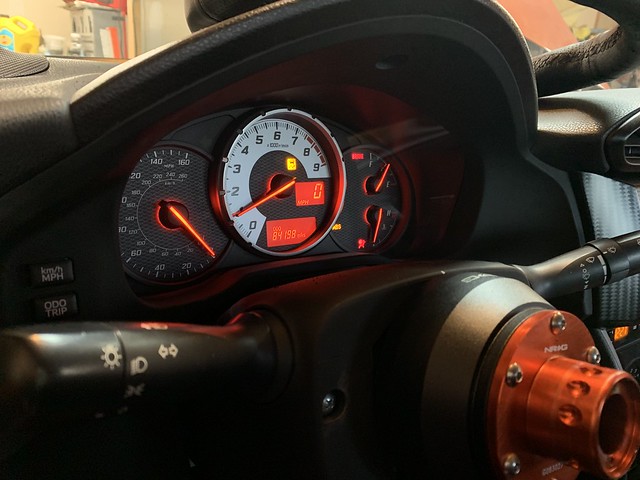 IMG_0533 by Rice Classic, on Flickr IMG_0533 by Rice Classic, on FlickrI got the TC/ABS light on and my scanner says steering position sensor fault. The Vehicle speed sensor code I had before was remedied by replacing the left rear speed sensor. For this fault, I'm 99.9% I broke my clock spring by not setting it center when I installed my NRG wheel adapter. Well, sure enough that I ordered another one today. Besides that - the car runs great with no other codes. But now it's time to start the alignment and scaling... Since the front wheel width and the rear are the same, I was able to string the car.  IMG_0543 by Rice Classic, on Flickr IMG_0543 by Rice Classic, on FlickrI used Toe-Plates on the front but they were fine, no adjustment needed. However the rears were all over the place so I got Toe close, then did camber, then finished toe since on the rear, camber and toe impact each other. 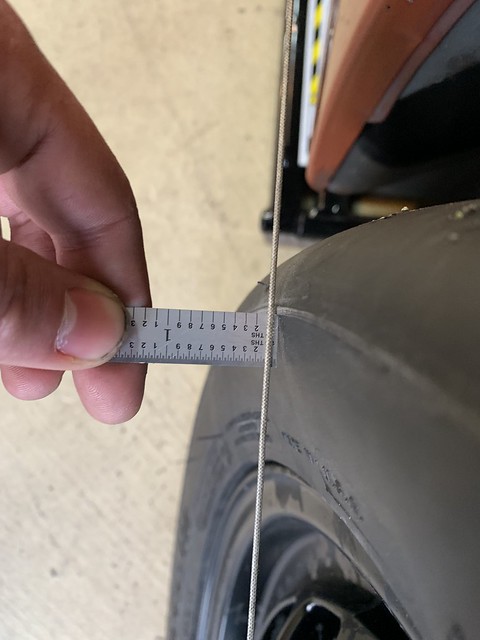 IMG_0541 by Rice Classic, on Flickr IMG_0541 by Rice Classic, on FlickrUnfortunately I won't be measuring my Caster today..  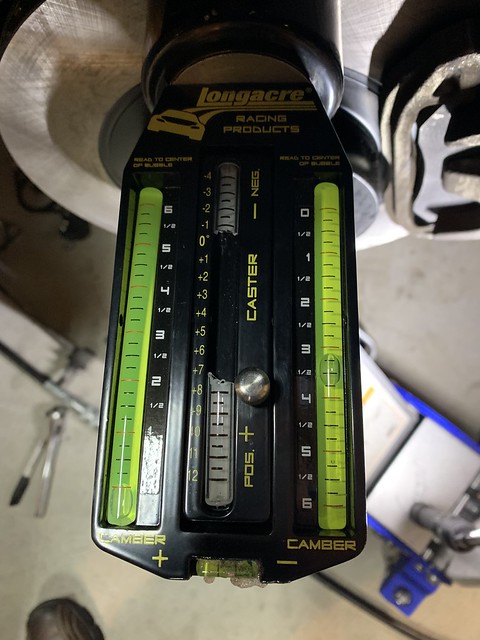 IMG_0519 by Rice Classic, on Flickr IMG_0519 by Rice Classic, on FlickrI added a couple boxes of kitty litter to the passenger area for ballast and started working scales. Did pretty well even though I added too much (Min weight is 2925lbs with driver). 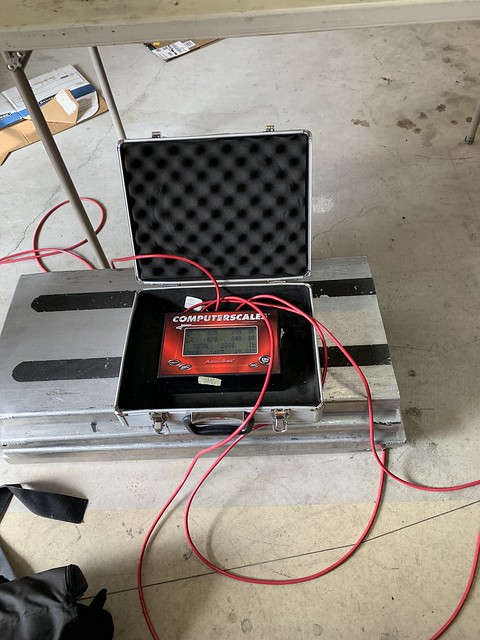 IMG_0566 by Rice Classic, on Flickr IMG_0566 by Rice Classic, on Flickr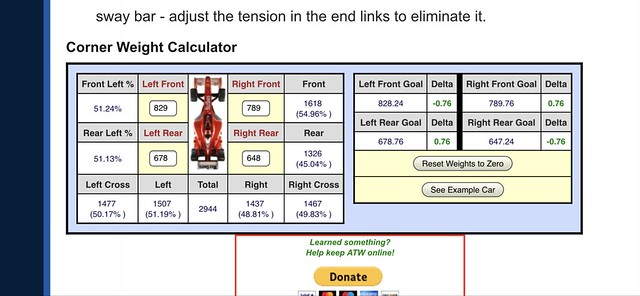 IMG_0568 by Rice Classic, on Flickr IMG_0568 by Rice Classic, on FlickrLink to the corner weight table I used: http://farnorthracing.com/autocross_secrets11.html I had a friend help me mount these 245s onto the 7" wide wheels (because rules).  IMG_0537 by Rice Classic, on Flickr IMG_0537 by Rice Classic, on FlickrTire mounting = Free Tire Balancing = free also.. 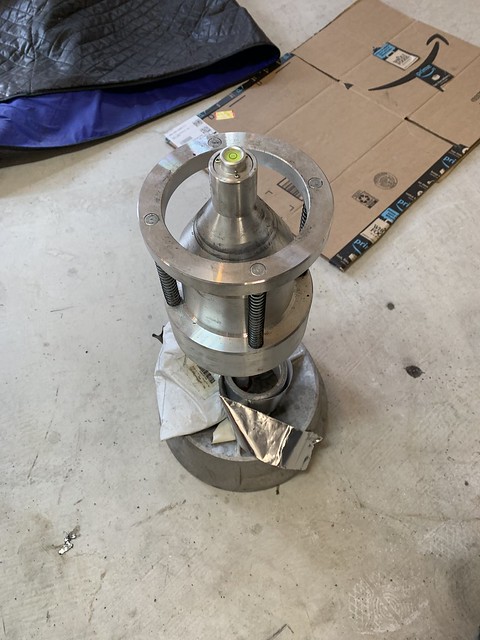 IMG_0575 by Rice Classic, on Flickr IMG_0575 by Rice Classic, on Flickr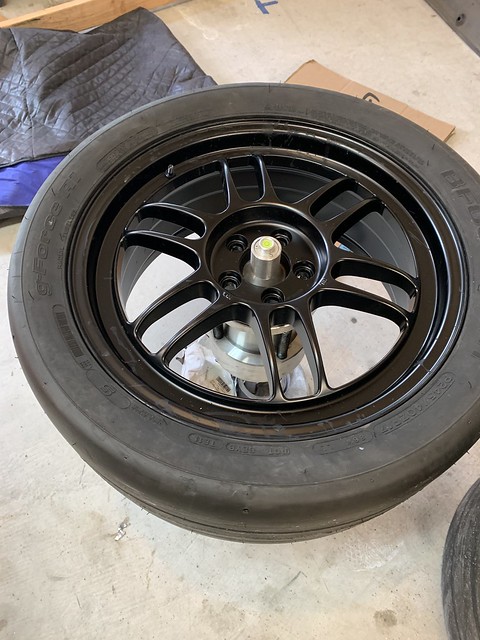 IMG_0577 by Rice Classic, on Flickr IMG_0577 by Rice Classic, on Flickruh oh.. gotta add some weight to this one! 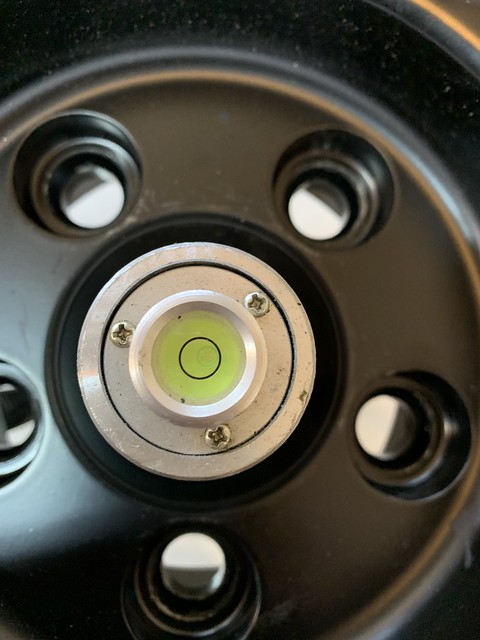 IMG_0576 by Rice Classic, on Flickr IMG_0576 by Rice Classic, on FlickrI put the OEM wheels back on and did a drive around the neighborhood and everything is working. There's a metal dragging noise which I'm pretty sure is rotor backing plate that got bent and touching the rotor so I'll address that soon. Time to schedule the DYNO!!!
__________________
SCCA T4 - FRS
|
|
|
|
| The Following 3 Users Say Thank You to rice_classic For This Useful Post: |
|
03-25-2019, 01:27 AM
|
#52 |
|
Senior Member
Join Date: Jun 2012
Drives: Nevermorange FRS
Location: Seattle, WA
Posts: 4,160
Thanks: 755
Thanked 4,200 Times in 1,803 Posts
Mentioned: 77 Post(s)
Tagged: 1 Thread(s)
|
Remaining items...
__________________
SCCA T4 - FRS
|
|
|
|
| The Following 3 Users Say Thank You to rice_classic For This Useful Post: |
|
03-25-2019, 07:15 AM
|
#53 |
|
Senior Member/Old Fanboi
Join Date: Nov 2011
Drives: 2000 2ZZ-GE MR2 Spyder HT
Location: Back home in Ohio now
Posts: 2,446
Thanks: 1,931
Thanked 2,014 Times in 915 Posts
Mentioned: 16 Post(s)
Tagged: 0 Thread(s)
|
Great update. It is fascinating to watch this come together.
__________________
So many modders have more cents than sense!
|
|
|
|
|
04-14-2019, 05:22 PM
|
#54 |
|
Senior Member
Join Date: Jun 2012
Drives: Nevermorange FRS
Location: Seattle, WA
Posts: 4,160
Thanks: 755
Thanked 4,200 Times in 1,803 Posts
Mentioned: 77 Post(s)
Tagged: 1 Thread(s)
|
Techstream, ECUTek and... rain
After 2 laptops, 2 cables and 8 attempts... I finally figured out how to make techstream work. I would have figured it out with 1 laptop and 1 cable and probably 3 attempts if I realized that the first cable wasn't fully plugging into my OBD2 port when I thought it was.
 Working now!  CGIF5141 by Rice Classic, on Flickr CGIF5141 by Rice Classic, on FlickrWhy Techstream? 1) seatbelt ding, 2)TPMS, which I never figured out and 3) steering calibration, because I had to buy a new one of these:  IMG_0630 by Rice Classic, on Flickr IMG_0630 by Rice Classic, on FlickrTime for a Dyno appt. Happy result considering I'm sticking with 92 octane for now. https://www.flickr.com/photos/156129...ream/lightbox/ Results are positive (but secret)  The cool shirt box was finished, the weight added (painted AND clear coated!) and rain tires purchased. I bought the RE71Rs because I was curious about their wet weather performance and I could get them in short notice. The reason for the wet weather curiosity... It's the PNW in April which means rain... always rain.  IMG_0653 by Rice Classic, on Flickr IMG_0653 by Rice Classic, on Flickr PUZR1937 by Rice Classic, on Flickr PUZR1937 by Rice Classic, on FlickrIt's probably time to remove the license plate though..  IMG_0654 by Rice Classic, on Flickr IMG_0654 by Rice Classic, on FlickrI was able to do several laps with everything from heavy rain with lots of puddles to a wet-to-drying track. They displace water well and hydroplaning was limited below a certain speed but I feel like they are far away from the wet performance of a Hoosier H2O. I would not show up to a competitive event in the rain with these. I expect I will be selling them soon.
__________________
SCCA T4 - FRS
|
|
|
|
|
04-14-2019, 05:34 PM
|
#55 |
|
Senior Member
Join Date: Jun 2012
Drives: Nevermorange FRS
Location: Seattle, WA
Posts: 4,160
Thanks: 755
Thanked 4,200 Times in 1,803 Posts
Mentioned: 77 Post(s)
Tagged: 1 Thread(s)
|
Lessons learned from test day:

__________________
SCCA T4 - FRS
|
|
|
|
| The Following User Says Thank You to rice_classic For This Useful Post: | Rampage (04-14-2019) |
|
04-14-2019, 06:05 PM
|
#56 |
|
Senior Member/Old Fanboi
Join Date: Nov 2011
Drives: 2000 2ZZ-GE MR2 Spyder HT
Location: Back home in Ohio now
Posts: 2,446
Thanks: 1,931
Thanked 2,014 Times in 915 Posts
Mentioned: 16 Post(s)
Tagged: 0 Thread(s)
|
When is your first event?
__________________
So many modders have more cents than sense!
|
|
|
|
|
|
|
|
 |
|
|
 Similar Threads
|
||||
| Thread | Thread Starter | Forum | Replies | Last Post |
| SCCA T4 Race Car Build - Suspension | ccdrift | Tracking / Autocross / HPDE / Drifting | 10 | 11-11-2018 12:50 PM |
| Daryl Harr's FR-S SCCA Race Car Build | driver71 | Member's Car Journals | 39 | 05-28-2016 04:50 PM |
| VADERR's Tie Fighter (C Street SCCA Build) | VADERR | Member's Car Journals | 49 | 02-10-2016 12:31 PM |
| My SCCA National budget RTR build | SeanRTR | Tracking / Autocross / HPDE / Drifting | 69 | 09-05-2014 12:49 PM |
| Bad Panda Motorsports - SCCA Solo STX BRZ Build | BadPanda | Member's Car Journals | 7 | 06-13-2013 01:08 AM |


