


 07-03-2016, 03:31 PM
|
#505 |
|
Senior Member

Join Date: Oct 2013
Drives: 2013 Scion FR-S
Location: ONTARIO CA
Posts: 650
Thanks: 208
Thanked 393 Times in 213 Posts
Mentioned: 6 Post(s)
Tagged: 2 Thread(s)
|
Confirmed:
Greddy EVO GT does not fit Confirmed: JDL D2 Catback fits  
__________________
|

|
| The Following User Says Thank You to Apex-Apex For This Useful Post: | VerusEric (07-03-2016) |
|
07-04-2016, 03:01 AM
|
#506 |
|
Senior Member
Join Date: Aug 2014
Drives: '14 981CS, '99 NB1
Location: Oregon
Posts: 1,274
Thanks: 1,234
Thanked 1,201 Times in 631 Posts
Mentioned: 114 Post(s)
Tagged: 2 Thread(s)
|
Installed the JDM underbody panels this weekend. Figured out a very simple way to get them installed cleanly with the rear diff covers.
Technically, if you are lucky, all that is needed outside of all the hardware Velox provides is a 3/8" drill bit. This assumes you still have 2x of the longer BHCS available that Velox provides. If you are using all of them - see if there is a spot where you can put back two of the shorter BHCS so you can steal them (I was able to do this at the rearmost part), or you'll need to get two more M6 bolts of the same length. You'll also need to dig up the stock hardware you removed from the car during the diffuser installation: - 2x rear push clips that were removed from the rear bumper - 2x bolts that held the e-brake cables in place Here's step by step from memory:
Pictures:      
|
|
|
| The Following User Says Thank You to johan For This Useful Post: | sato (07-04-2017) |
|
07-04-2016, 04:07 AM
|
#507 |
|
Senior Member

Join Date: Mar 2015
Drives: 2014 GT86
Location: Latvia, Riga
Posts: 4,333
Thanks: 696
Thanked 2,085 Times in 1,436 Posts
Mentioned: 53 Post(s)
Tagged: 1 Thread(s)
|
That uncovered middle arc with shaft & exhaust sticks out a bit. Would be nice to see that covered aswell. And then one complete set with diffuser, all the covers for slightly cheaper then parts alone

|
|
|
|
07-05-2016, 02:11 PM
|
#508 |
|
Senior Member

Join Date: Mar 2012
Drives: 2018 Golf R
Location: Richmond, VA
Posts: 2,807
Thanks: 5,386
Thanked 1,095 Times in 647 Posts
Mentioned: 68 Post(s)
Tagged: 7 Thread(s)
|
I installed mine this past weekend. It's only been sitting in my garage for a year...
I put the diff covers behind the underpanels instead of over them like @johan though. 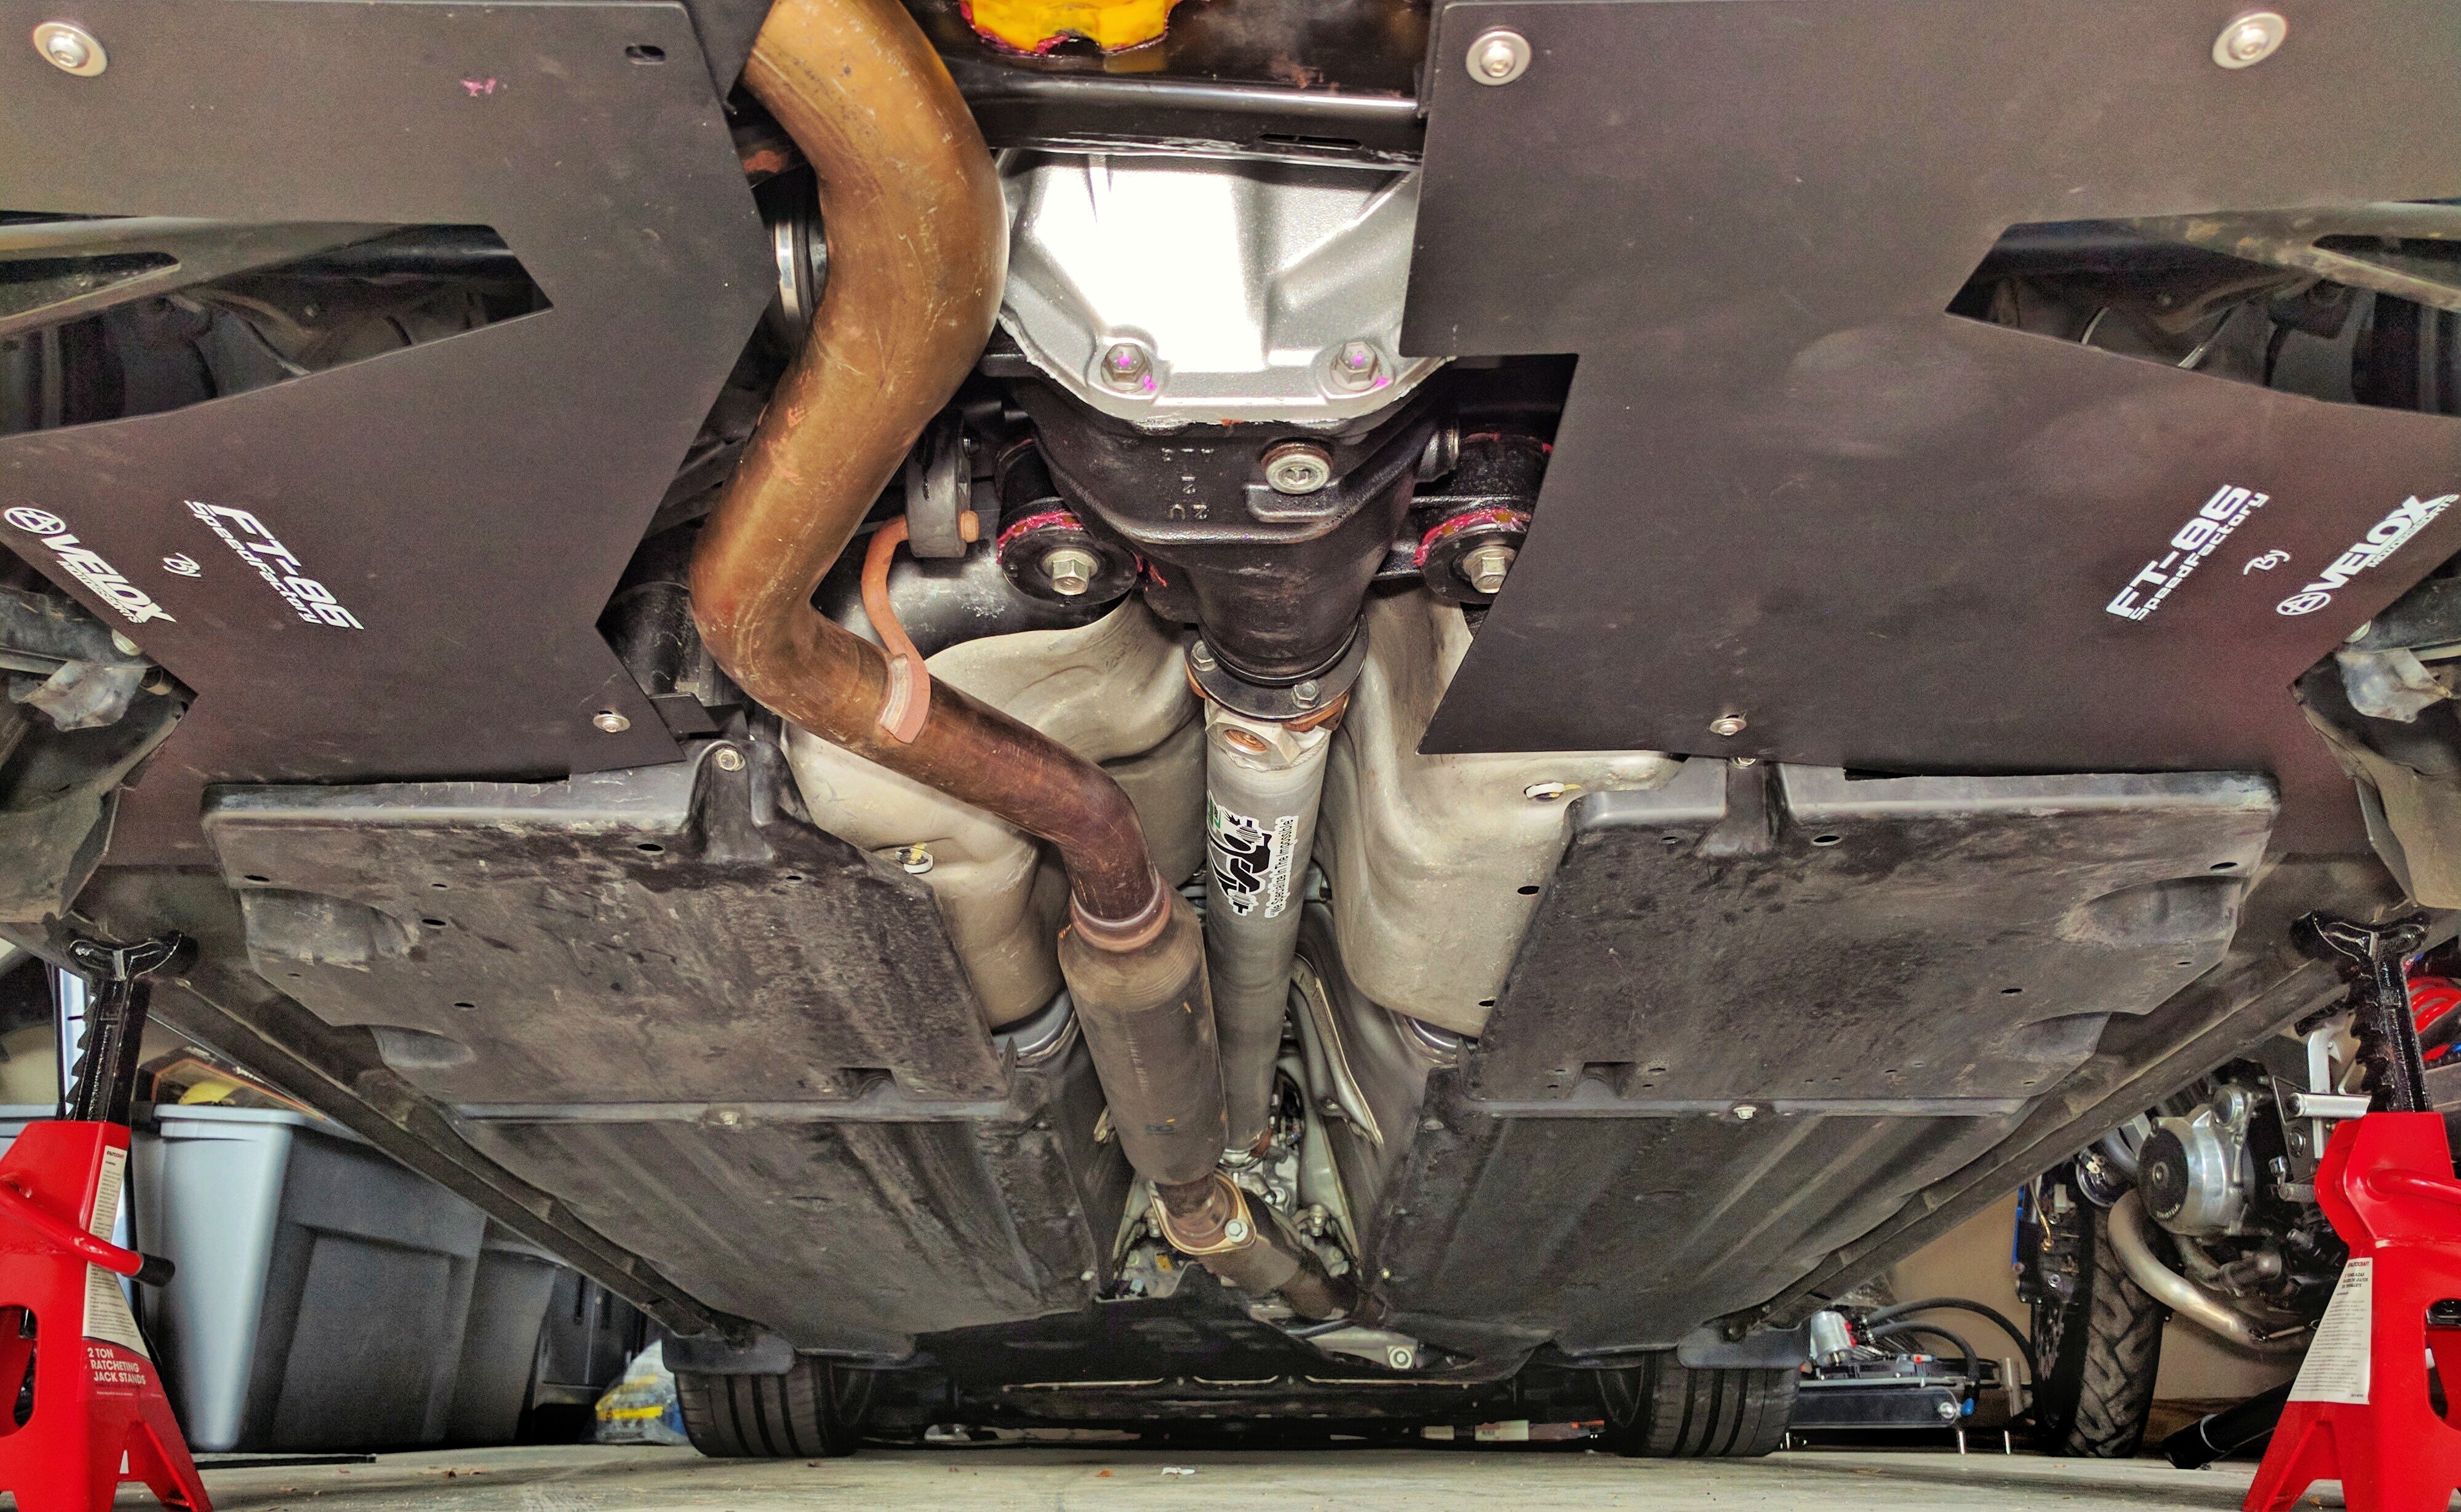 IMG_20160702_163050 by Morgan D, on Flickr IMG_20160702_163050 by Morgan D, on FlickrI ended up slightly bending the raised lip on the leading edge of the diffuser to fit the OEM exhaust. I may be switching up the exhaust that's on there, so I didn't want to cut it now and have a gaping hole for later.
__________________
Parting out HERE
|
|
|
|
07-05-2016, 02:48 PM
|
#509 | |
|
Senior Member
Join Date: Aug 2014
Drives: '14 981CS, '99 NB1
Location: Oregon
Posts: 1,274
Thanks: 1,234
Thanked 1,201 Times in 631 Posts
Mentioned: 114 Post(s)
Tagged: 2 Thread(s)
|
Quote:
At least that's my theory based on my little bit of aero knowledge. ** waits for @VeloxEric to appear to set the record straight. ** |
|
|
|
| The Following User Says Thank You to johan For This Useful Post: | civicdrivr (07-05-2016) |
|
07-06-2016, 03:45 AM
|
#510 | |
|
Join Date: Mar 2015
Drives: BRZ, STI, GT350R, Supra, 987.2
Location: Indiana
Posts: 1,146
Thanks: 567
Thanked 2,529 Times in 780 Posts
Mentioned: 87 Post(s)
Tagged: 3 Thread(s)
|
Quote:
Technically, we would recommend installing the diff/suspension covers above the JDM panels. Below would cause turbulence; but again, it likely doesn't matter one way to the other nor are we able to test this in CFD because it would likely be immeasurable there as well. Above would be better intuitively to us though. We were quite impressed with the ability of the rear diffuser to exhibit attached flow on my car when we did some more real world testing recently. The below photos are with the diffuser installed at the lowest position with no diff/suspension covers installed. We expect to see even better flow attachment when I get some diff/suspension covers installed again. My MPG definitely dropped when I remove the suspension/diff covers when I installed the Type 80. 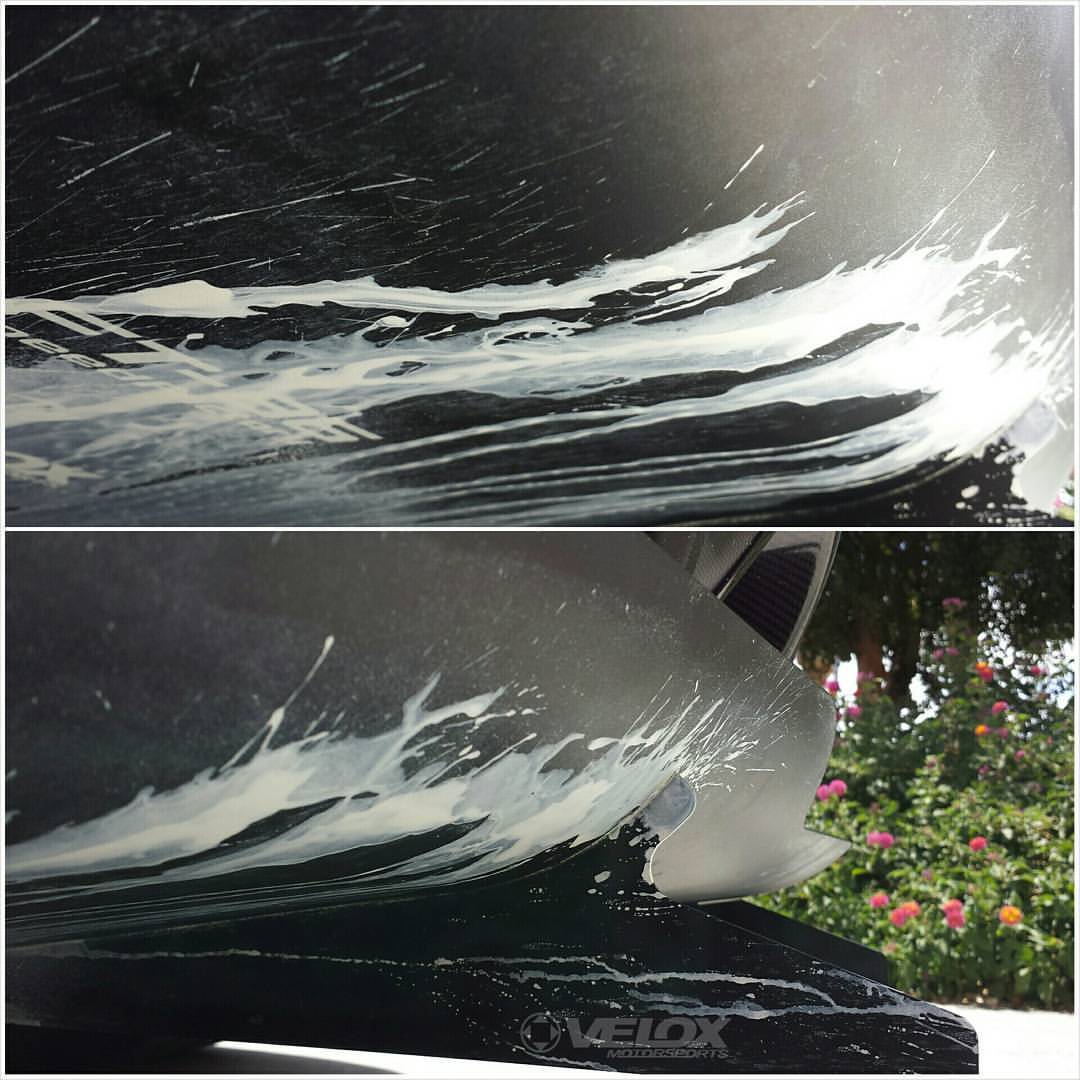 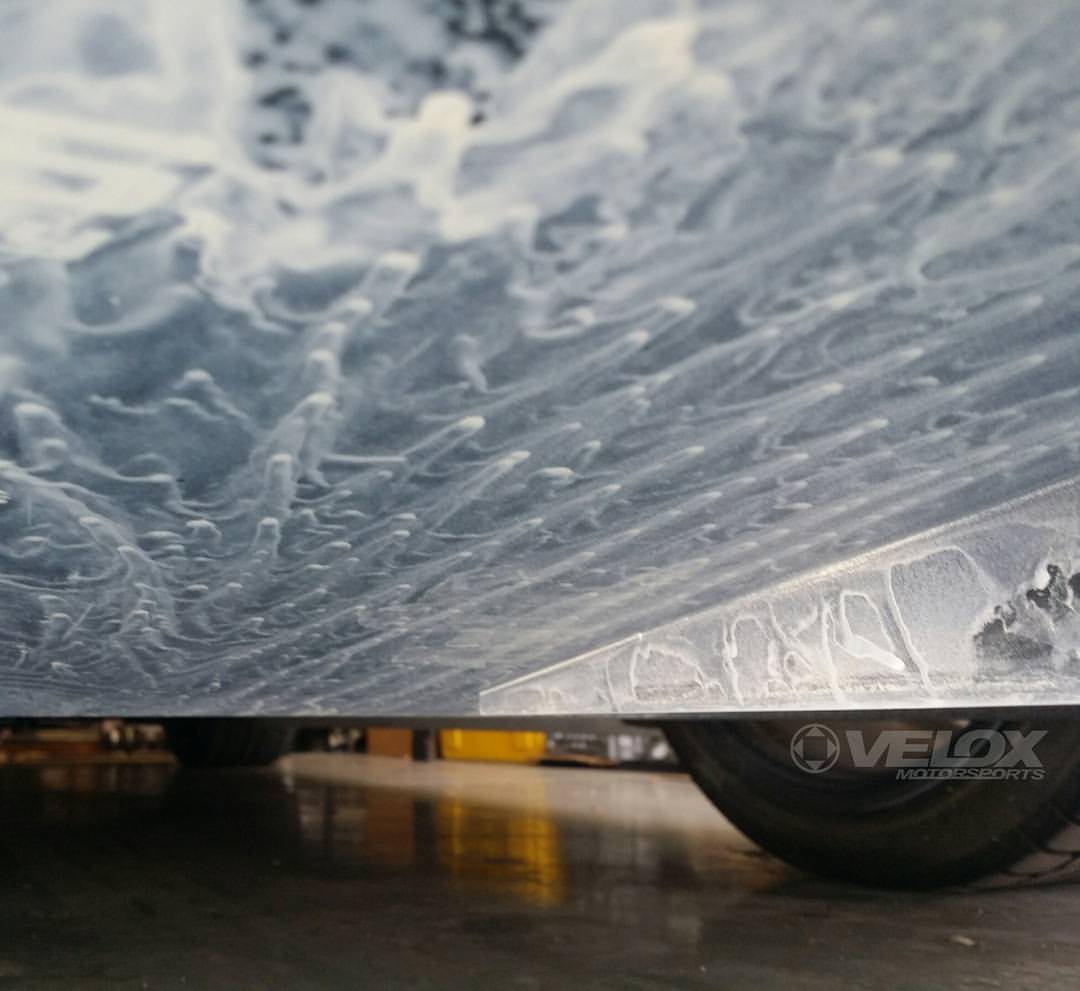 Thanks, Eric |
|
|
|
| The Following 3 Users Say Thank You to VerusEric For This Useful Post: |
|
07-12-2016, 11:06 PM
|
#511 |
|
Senior Member

Join Date: Aug 2014
Drives: 2013 FR-S
Location: Northwest Iowa
Posts: 7,354
Thanks: 454
Thanked 4,542 Times in 2,947 Posts
Mentioned: 59 Post(s)
Tagged: 5 Thread(s)
|
Ignore
|
|
|
|
07-16-2016, 04:59 PM
|
#512 |
|
Thupercharged

Join Date: Mar 2013
Drives: 2013 FR-S
Location: La Grange Park, IL.
Posts: 1,501
Thanks: 116
Thanked 751 Times in 439 Posts
Mentioned: 23 Post(s)
Tagged: 0 Thread(s)
|
Got halfway though my diffuser install and noticed I was missing the U brackets in the hardware bag
 Waiting to see how long it will take to get replacements from ft86speedfactory
__________________
2013 FRS
Vortech V3 11psi Revworks UEL - PLM Overpipe - MOTIV catted frontpipe - Invidia Q300 2019 Series.Grey STI - Stage1+ SF |
|
|
|
07-16-2016, 05:01 PM
|
#513 | |
|
Join Date: Mar 2015
Drives: BRZ, STI, GT350R, Supra, 987.2
Location: Indiana
Posts: 1,146
Thanks: 567
Thanked 2,529 Times in 780 Posts
Mentioned: 87 Post(s)
Tagged: 3 Thread(s)
|
Quote:
|
|
|
|
| The Following User Says Thank You to VerusEric For This Useful Post: | DJCarbine (07-16-2016) |
|
07-16-2016, 05:34 PM
|
#514 | |
|
Thupercharged
Join Date: Mar 2013
Drives: 2013 FR-S
Location: La Grange Park, IL.
Posts: 1,501
Thanks: 116
Thanked 751 Times in 439 Posts
Mentioned: 23 Post(s)
Tagged: 0 Thread(s)
|
Quote:
::edit Got everything sorted out thanks to VeloxEric. Going to order the diff/suspension covers in the future for sure.
__________________
2013 FRS
Vortech V3 11psi Revworks UEL - PLM Overpipe - MOTIV catted frontpipe - Invidia Q300 2019 Series.Grey STI - Stage1+ SF Last edited by DJCarbine; 07-16-2016 at 10:42 PM. |
|
|
|
|
07-17-2016, 09:12 AM
|
#515 |
|
Senior Member
Join Date: Nov 2012
Drives: 2013 SWP BRZ Ltd.
Location: Texas
Posts: 194
Thanks: 14
Thanked 18 Times in 14 Posts
Mentioned: 0 Post(s)
Tagged: 0 Thread(s)
|
Does the front splitter fit the Varis widebody?
|
|
|
|
07-17-2016, 09:29 AM
|
#516 | |
|
Senior Member
Join Date: Aug 2014
Drives: 2013 FR-S
Location: Northwest Iowa
Posts: 7,354
Thanks: 454
Thanked 4,542 Times in 2,947 Posts
Mentioned: 59 Post(s)
Tagged: 5 Thread(s)
|
Quote:
Last edited by Ashikabi; 07-18-2016 at 08:57 AM. |
|
|
|
|
07-17-2016, 01:48 PM
|
#517 |
|
Senior Member
Join Date: Nov 2012
Drives: 2013 SWP BRZ Ltd.
Location: Texas
Posts: 194
Thanks: 14
Thanked 18 Times in 14 Posts
Mentioned: 0 Post(s)
Tagged: 0 Thread(s)
|
I dont know about the durability of the Varis splitter. I want a functional splitter vs one for looks which is what i have on to protect the CF lip. I know my bumper is lower than stock and sticks out further forward. This is the reason why i ask because i want to order but i am worried it wont work.
|
|
|
|
07-17-2016, 01:52 PM
|
#518 | |
|
Join Date: Mar 2015
Drives: BRZ, STI, GT350R, Supra, 987.2
Location: Indiana
Posts: 1,146
Thanks: 567
Thanked 2,529 Times in 780 Posts
Mentioned: 87 Post(s)
Tagged: 3 Thread(s)
|
Quote:
I do not believe that the splitter will bolt directly onto the Varis bumper. Ours was designed around use with the OEM bumper. It would require work to make it fit. Thanks, Eric |
|
|
|
|
|
|
|
 |
|
|
 Similar Threads
|
||||
| Thread | Thread Starter | Forum | Replies | Last Post |
| Just Ordered the Complete StopTech Brake Package from FT86 SpeedFactory | naikaidriver | Suspension | Chassis | Brakes -- Sponsored by 949 Racing | 28 | 02-28-2017 02:48 PM |
| Single-Exit Exhaust Diffuser/Hole Problem... Solution! | Anthony | Cosmetic Modification (Interior/Exterior/Lighting) | 75 | 10-13-2016 07:40 PM |
| Front Wheel Deflectors - FT-86 SpeedFactory by Verus Engineering | VerusEric | Cosmetic Modification (Interior/Exterior/Lighting) | 25 | 09-22-2016 01:41 AM |
| DriveWay Labs Rear Diffuser - FT-86 SpeedFactory | FT-86 SpeedFactory | Cosmetic Modification (Interior/Exterior/Lighting) | 435 | 01-15-2015 07:20 AM |


