


 05-27-2013, 03:27 PM
|
#58 |
|
86-er
Join Date: May 2012
Drives: BRZ tS
Location: Laredo, TX
Posts: 970
Thanks: 195
Thanked 253 Times in 175 Posts
Mentioned: 3 Post(s)
Tagged: 0 Thread(s)
|
awesome!!
In for more pics of the cooler location and videos
__________________
2018 Subaru BRZ ts 020/500 - My Daily, work car, and track car
 |

|

|
|
05-29-2013, 01:49 PM
|
#59 |
|
Senior Member
Join Date: Aug 2011
Drives: 2013 FRS Asphalt
Location: SF Bay Area
Posts: 1,155
Thanks: 309
Thanked 335 Times in 212 Posts
Mentioned: 21 Post(s)
Tagged: 0 Thread(s)
|
Didn't know you were doing this so soon. Very Good.
__________________
2013 Scion FR-S AT Picked up 5/30/2012
|
|
|
|
|
06-20-2013, 02:42 PM
|
#60 |
|
Senior Member
Join Date: Aug 2012
Drives: FR-S
Location: IL
Posts: 2,857
Thanks: 519
Thanked 2,997 Times in 1,095 Posts
Mentioned: 159 Post(s)
Tagged: 1 Thread(s)
|
Americanizing the FR-S | S240
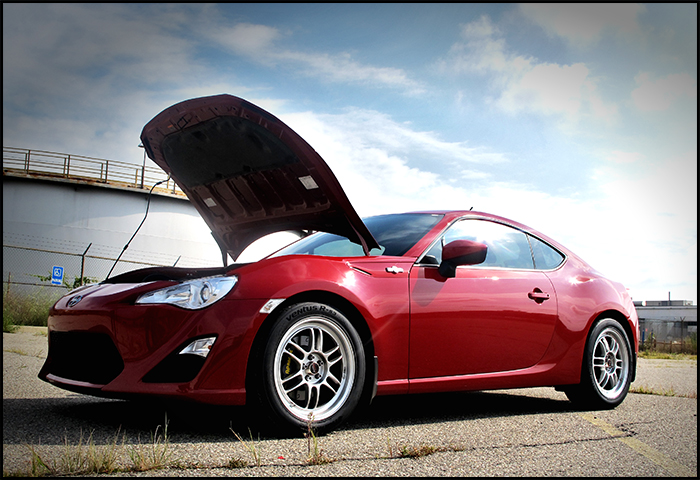
Forced Induction Installation, Testing and Review INTRO After nearly a year of living with the FR-S I have explored its strengths and faults. The strengths have kept me signed on as a driver. The exceptional handling, steering along with overall practicality year round keep me satisfied behind the wheel. With a lifetime average of 29MPG there is little to dislike.  Well of course there is a deal breaker; the car is slow, compact car slow. On the track and on the street the car is unable to pull on anything from minivans to the family sedans in a straight line. Despite what we have been sold, straight line speed is an important part of the sports car formula. Taking a step back, one thing is for sure the FR-S is a sheep in wolfs clothing. It looks the part, and feels the part up to the point when the throttle is mashed down and nothing happens.  The other weakness comes from its B-Segment interior quality. Its a marginal experience at best. To quote Harry Cash, There is not a lot of quality, but it is functional. So we have beaten the issue to death. I wanted to approach this project with a mission, not just talk and back seat drive but to put my money where my mouth is.
Some of these are subjective, some are experienced based in the end whose word do you want to take? As things have evolved on this project one thing is for certain, most all of your technical information is provided by vendor accounts. Most of those providing the hard facts are those who want your business. The questions is with 10 different vendors trying to sell you the same service online how do you know you are choosing correctly. And more importantly, who is responsible to provide the support you need? PARTS 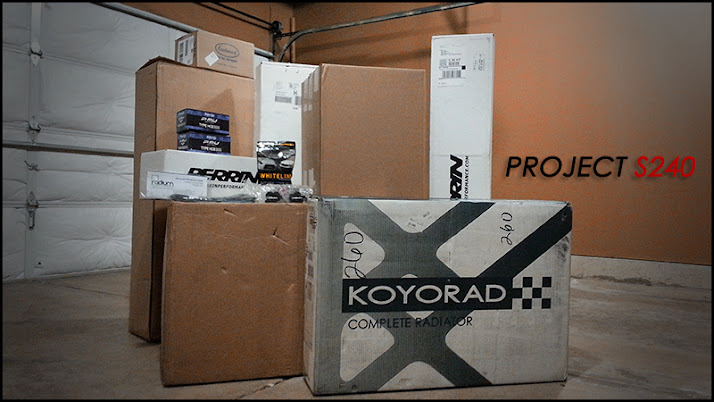 The choice to supercharge or turbocharge was easy for me. After driving an Atom 300 and Exige S there is something to be said about building a street car that is higher revving with linear power. In terms of track performance, supercharging was also ideal as most driving is done over 4000RPMs. In terms of development, Vortech had been working on their supercharger for 7 months or so, and most of the initial bugs were sorted out and tested. Since we had done testing on the stock model enough to know problem areas, we are also going to address them before the forced induction is installed. BUILD GOALS We set out to build an FR-S almost undistinguishable from the OEM model called the S240. We thought about what a performance model from Scion would look like and the cost constraints. We took a look at the market, the competition and decided based on present and past the car should not cost more than $33k if a customer were to buy it brand new. And for this amount it needed to be a car that could be driven year around. The S240 concept means supercharged 240HP, which works in two ways. With the Vortech tuner kit with ECU tuning from Perrin using an aggressive MAP the car makes 240 wheel horsepower on a dynojet. For the daily drive the car runs on map 1 of the Perrin tune which generates 240 HP at the crank or 210HP to the wheels. 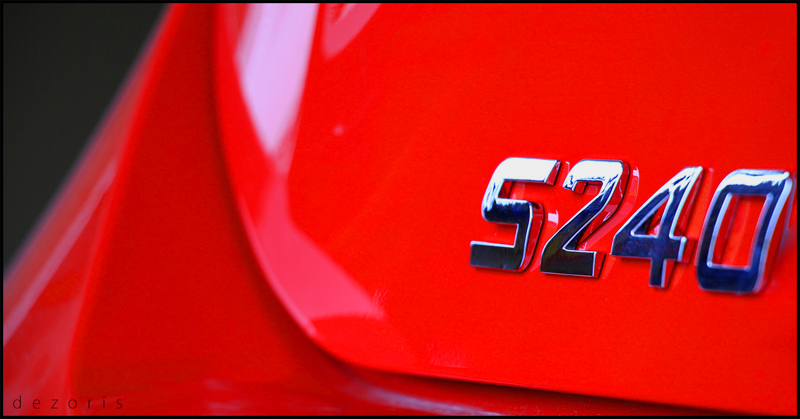 Suspension and Brakes: What is critical is slightly improving handling and braking without sacrificing ride height, stiffness or causing issues with year round drivability. Technology: The car lacks features even B-Segment cars get so we are option to spice up the interior with some Alacantara pieces and Nexus 7 Tablet integration with a custom UI. 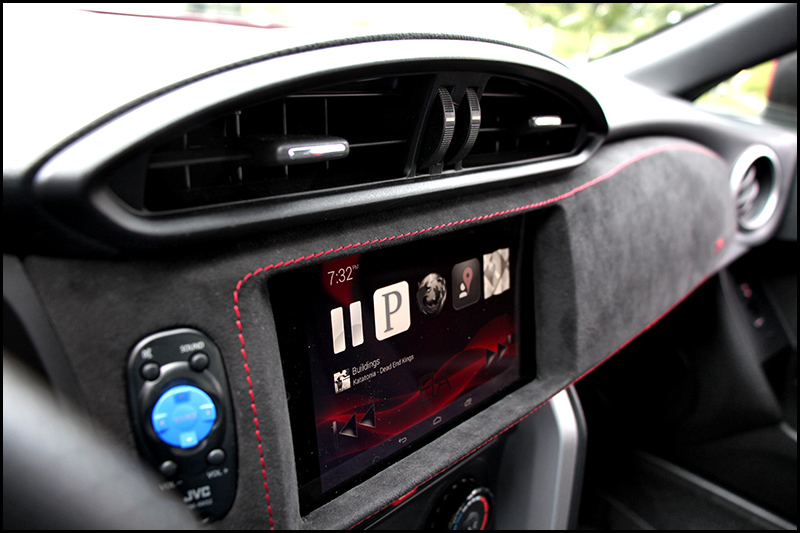 Reliability: We want a car we can drive daily and not second guess if we will be stranded, or worried about. It may be a lofty goals. VENDORS: This was a critical to our build as we are relying on remote support from all of these suppliers. Each vendor was chosen because of their direct involvement with the vehicle. We have had direct contact with all vendors listed and will provide detailed overview of how they performed at the end. Perrin (Tuner and Parts Fabricator) 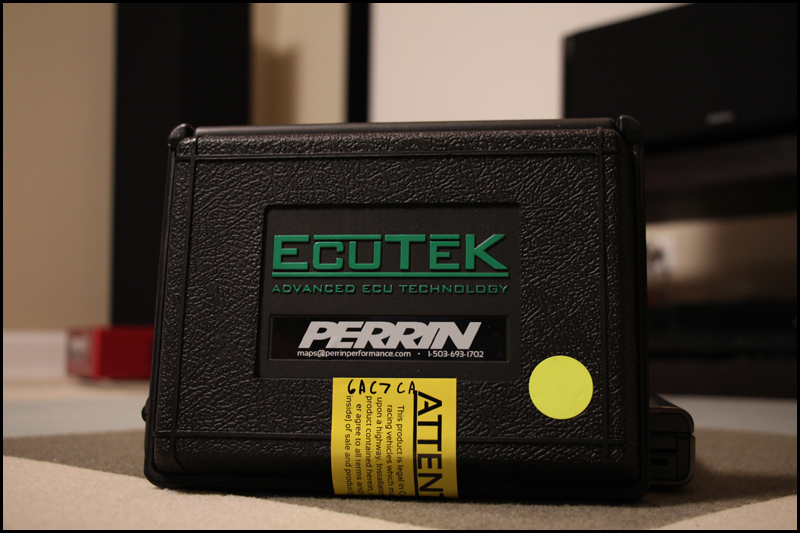 Perrin has been a top tuner in Oregon for Subaru and Mini. They were our primary choice for tuning our Vortech kit. On the internet and forums they have provided the some of the best transparency and insight to their testing methods for parts and tuning. As a tuner they have a good reputation and Jeff has a similar approach to working with cars as we do. Their parts and documentation are high quality. Contact: Jeff P. JPM Coachworks: (Interior) 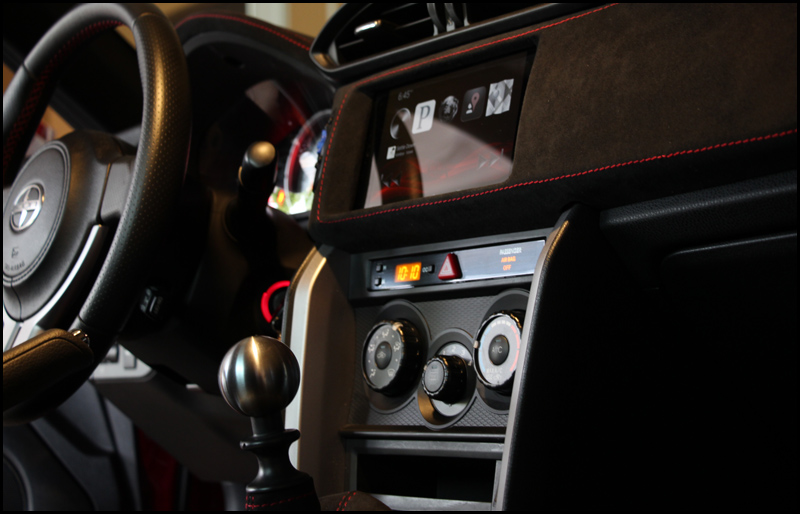 We chose JPM because they are an American shop with great skill and pride built into their work. They do custom and semi-custom dash/trim pieces for the interior of the vehicle. They produce products that will give a car the subtle yet elegant interior design we are looking for. CONTACT: Andrew L Vortech: 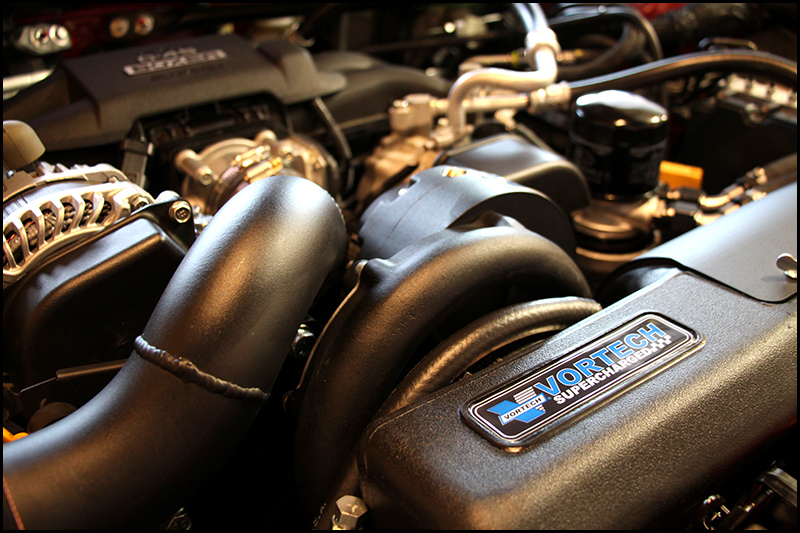 They build some of the best and most proven Supercharger kits in the business, while we dont agree with some of the marketing techniques we feel most of their engineering is spent on the blower which is which is most important in this case. CONTACT: Brian Radium Engineering: 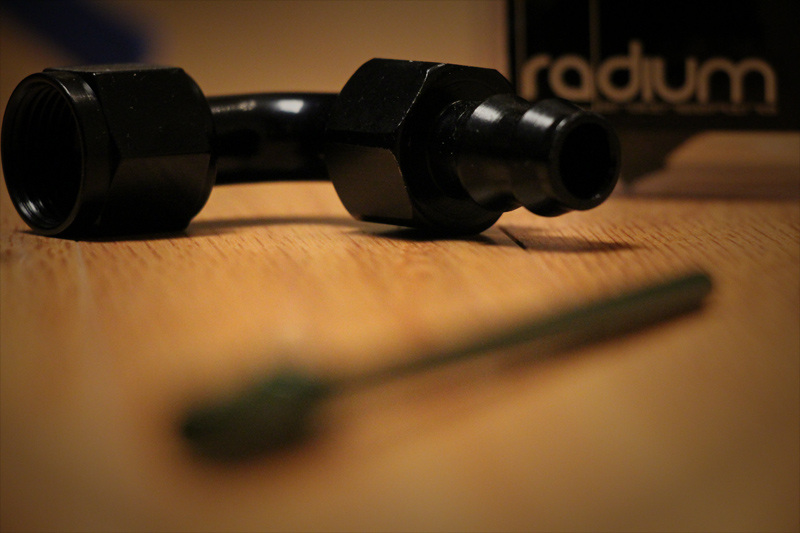 Radium is another small company from Oregon which used to focus on parts for Lotus, including catch cans, surge tanks and turbo parts. In terms of quality and engineering for the FR-S we will be using them to provide a dual catch can setup. With a supercharged car we cannot afford any PCV system leaks or pressure loss and the Radium can is designed to make sure we dont have issues while assuring no oil or fuel is blown by back into the intake manifold or intercooler. CONTACT: Tina P Counterspace Garage: We chose this small outfit because they have direct involvement in using a FR-S/BRZ for track testing. They have mastered what works in terms of brakes on the track and on the street. This experience is critical to choosing reliable parts for the street and track. CONTACT: Mike C FT86 Speed Factory One of the most comprehensive parts websites for the BRZ/FR-S on the internet not only that they have their own car for testing and building out parts. They have some of the best prices and service along with having a constant presence on the forums. We chose them for items such as brake rotors and cooling products. CONTACT Jeremy Modifying:  As this segment approached I realized I had a strong anti-modder position as a former S2000 owner. I witnessed excess spending on so many parts people drooled over that virtually made no difference to the performance of the car. This carried over to Lotus ownership. These cars were mostly about driver talent. I feel the FR-S is similar but, of course this car was left half-baked in many ways to allow the owners and aftermarket to pick up where the designers left off. It is my belief the car can be made better without killing the character. And when I say better I mean faster in every measurable way regardless of driver. Installation Part 2 and 3 We started our first modifications in Part 2 and 3 of this series which handled the following:
Alignment: We chose an aggressive street alignment using Whiteline/SPC front camber bolts which allowed us a maximum front camber of -1.4. Since the rear is non adjustable we used the Whiteline rear upper control arm eccentric bushings which gave us a similar -1.3 of camber and much more room on the table. However this is a street car we dont want to sacrifice tire wear for track levels of camber. Installation of the front bolts was a 45 minute affair. Installation of the rear kit was handled by a shop and is much longer as the old bushings need to be pressed out of the arms and the white lines pressed in. It is a 3 hour install. However the good thing about both alignment kits is the front and rear can now be adjusted on the alignment rack under load. Radiator The radiator we chose was an OTS Koyo unit designed to be plug and play for the FR-S it is about 3x the thickness of the factory radiator. One of the main reasons for this addition was that we were very unhappy with factory cooling in even the stock car during idle situations. And when we did our first autox and dyno the car seemed to have temp spikes after hard runs which caused surges of 217-220F. The factory setting of the radiator fans is set for 212F before they kick on. Often the temps would surge well beyond that before the fans dropped the temps. Clearly this is bad if you are going to run any type of forced induction. The Koyo unit may not be the highest quality to meet cooling snob requirements however the surface area and core are much larger than OEM for a very reasonable cost which means, the radiator will cooler quicker and wont heat soak as fast. 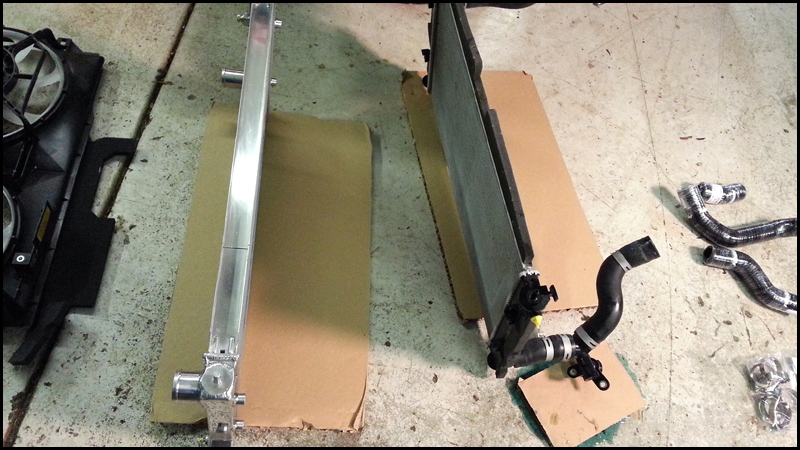 Install was a bit tedious and front bumper removal is required along with hood cable release and center support bracket had to be removed. Install took 4 hours including a radiator flush and burping of the system. We swapped the hoses for Perrin silicone pieces at the same time. Radiator fit perfectly however there was no place to re-clip the factory outside temp sensor to the new radiator so we had to zip tie it elsewhere. 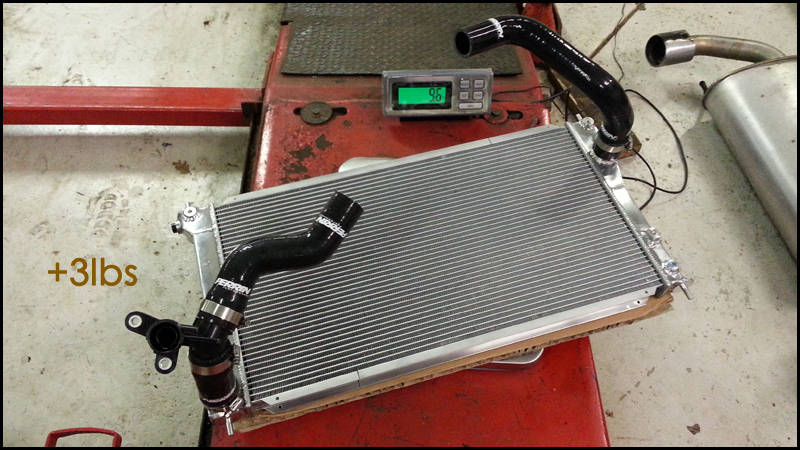 Tires: For tires we chose Hankook RS3s as these have been one of the most proven and sticky street tire. They hold up to heat better than most any other comparable model including the BFG Rival, Dunlop Star Spec Z2 and Michelin Pilot Sports. They are extreme however and in some cases maybe a bit too sticky for some. They are an absolute gravel and rock magnet, which can get annoying fast and requires mudguard install to protect paint. Tire wear is good for around 10k miles for moderate driving. Their heat range is good from 55-120F. Above and below those temps they get a bit slippery. These tires do not respond to cold wet conditions, and can be downright dangerous. Rain performance is average at best and cold weather performance is downright non-existent. Fluids: Fluids were a priority right off the bat, we chose Redline 0w-20 for performance reasons. Pentosin manual transmission fluid and Motul Differential oil along with Project Mu DOT4 brake fluid. PART 4 Modifications: Radium Engineering Dual Catch Cans: Packaging: 10 Quality of Pieces: 10 Support: 10 Documentation: 8 Hardware Included: 6 Warranty: 10 Mounting Brackets Universal: 9 Cost: 6 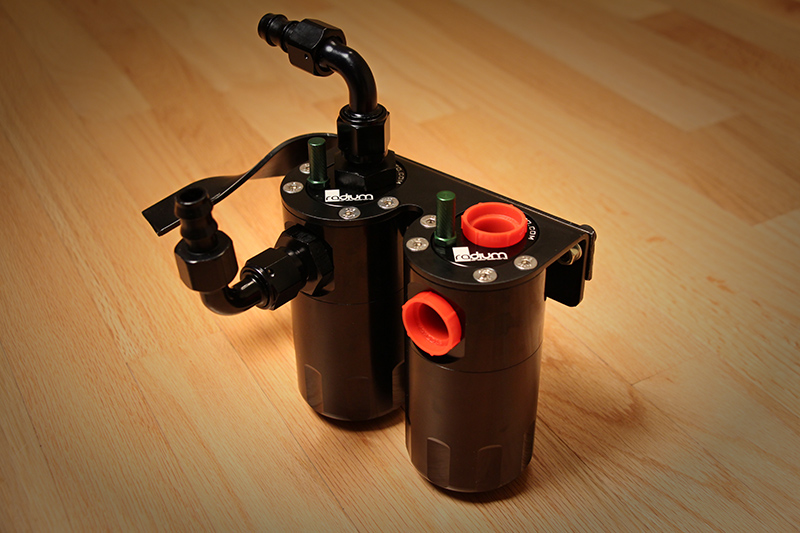 Catch cans are an often mis-understood modification. We have a detailed guide about them here: http://www.ft86club.com/forums/showthread.php?t=21079 In the case of forced induction, pressurizing air into the engine causes increased blow-by gases past the piston rings. These blow-by gases contain oil and mostly unspent fuel. Typically they are routed right back from the PCV system into the intake manifold to be recycled. The PCV line is under vacuum. The breather line is another vent to help with additional pressure that routes gasses back into the intake tube. The breather tube is not under vacuum. In a naturally aspirated car these gases can be minimal unless you are doing track level high RPM driving. Using a catch can on these lines catches the fluids and prevents them from going back into the intake where they can foul up the intake manifold over time or aid in carbon build up on intake valves which is much more prominent on direct injected vehicles. 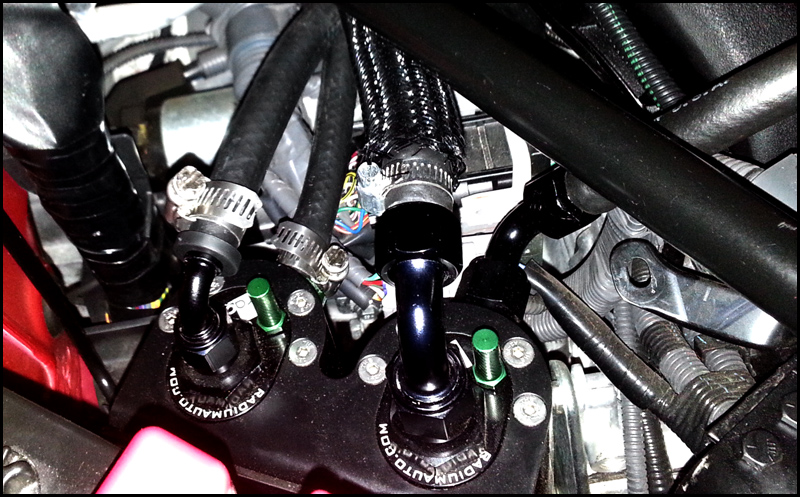 On the Vortech application it becomes more important to use a quality system on the PCV side to avoid vacuum leaks which can cause poor MPG, idle and performance issues. On the breather side its oddly more important on this car as the breather tube goes directly into the Vortech airbox un-filtered. This means the blow-by oil and gas gets sucked through the supercharger propeller and down into the intercooler where it will pool up over time. Its an initial investment to do and an extra step for the install but for the health of the supercharger and intercooler system and engine it pays off in the long term. The Radium cans are basically the best in the market, the owners like Perrin are from Oregon and these cans were originally tested on Lotus Elise, Exige and Evora for track use. They are designed to hold vacuum and also flow tested not to impede PCV flow. Draining them is as easy and separating the can or using the plug on the bottom. Radium is the only catch can to feature a dip stick to check oil level so you know when you drain them. In terms of mounting these cans unfortunately as of yet, they are a universal mount which means you have to make your own bracket. While not difficult it would be excellent to have a true solution for the FR-S and BRZ so it is a plug and play affair. You will also need to purchase the correct barb sizes and PCV lines for the kit. Perrin Headerback: In this round of modifications we are going beyond the basics, however starting simple. Most people who do their modifications start with Intake or Exhaust. Since this car does not respond to many intakes all that well, we attempted the exhaust route first. Since we knew we were going to supercharge we chose the proven Perrin 2.5 header back exhaust with a resonator and catalyst. Packaging: 10 Quality of Pieces: 9 Weight Savings: 5 Documentation: 9 Hardware Included: 10 Warranty: 10 Power Gains: 5 Sound: 9 7000RPM: 86db at 8 feet 1000RPM: 58db at 8 feet Installation was excellent and very easy which was made simple by very good documentation. The only thing we could have used was color photos and or downloadable PDF. A video install would also be very helpful but not needed. Perrin also was very good about showing TQ numbers for tightening down all fasteners. For the cost these quality and finish of the pipes and welds were about as good as you can get. The V-Band clamps are a bit tricky to work with but are excellent for alignment of the exhaust. There were no rattles or movement of the system on the stock hangers. The qualities of the fasteners were excellent, including the bolts and gaskets. There is no doubt this is a complete system and is packaged exactly the way every aftermarket product should be. This is one of the few parts there were literally zero issues with. The sound of the exhaust is mature and muted, very low pitch. The only time it can be a bit much is on initial cold start where holding idle at 1800RPM created a bass drone that can really annoy about 18db higher than stock. This only occurs on initial start up. At idle the exhaust is virtually identical on the db meter as the stock exhaust about 4 db higher. During cruising the exhaust generates a slight rumble and virtually no drone. Our SPL meter showed cruising DB at 2200RPMS was within 4db of stock exhaust. 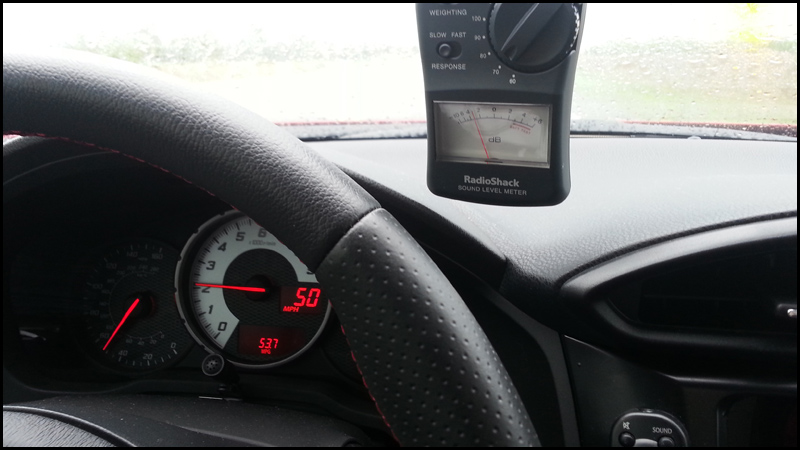 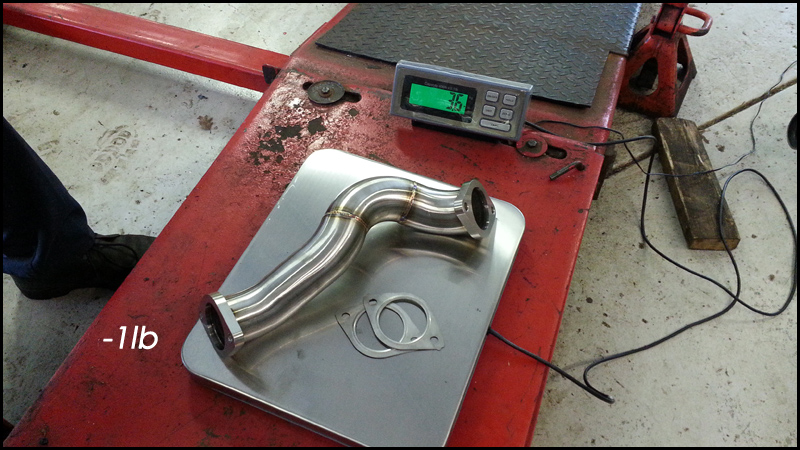 During shifts there is a bit of bass thump when you press the clutch as it maybe the throttle plate closing. The overall sound can be described as a subtle boxer rumble with near OEM sound levels. The tone at full throttle is about 10db higher than stock but it is again muted and deep. It has no raspyness or farty sound qualities. Without an ECU tune and just bolting it on, it makes some difference in power. The immediate feeling was better power in the low to mid-range on our car. The high end felt virtually identical if not worse. Our baseline dyno confirmed this feeling, as we say around 5HP gains in the midrange and improved torque but, almost no improvement up top. Near the high end the ECU starting to add fuel which cut power. 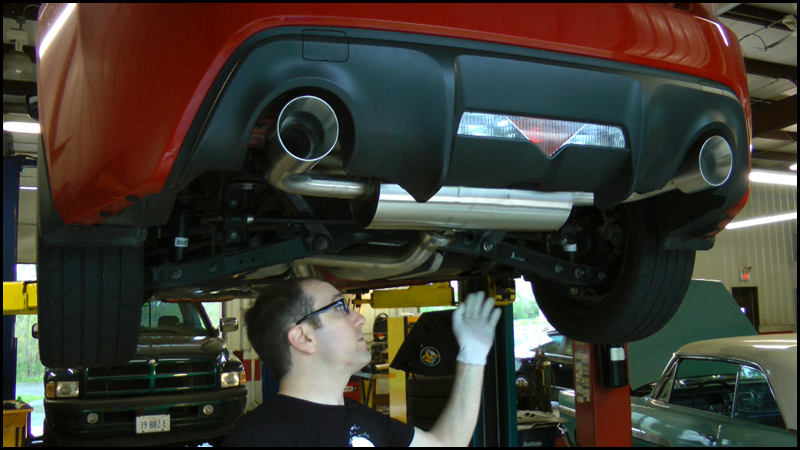 In conclusion it appears the vehicle ECU is not all that adaptive to change. The power potential would be there with a tune for certain to smooth out air to fuel ratios. For us we were using this exhaust to help with forced induction later on. If a buyer is looking for a great exhaust this is it. However lets get real for a minute. This is $1200 investment and the bottom line is gains are marginal. Weight savings were modest roughly 10lbs. The sound is very conservative catered to the more adult owner. But if you want performance from this exhaust you will need an ECU tune which now you are talking about a $2000 investment to make 10-12HP depending on your vehicle. 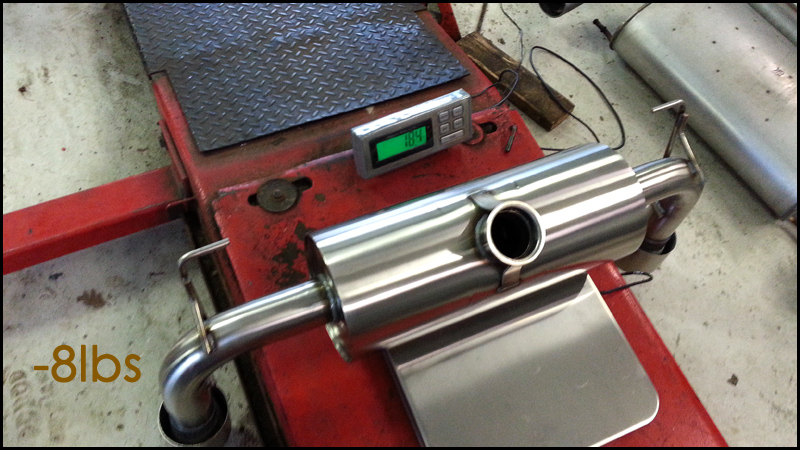 PROS: Great Build Quality Design Mature Product fit and finish Mature Sound OEM db levels Great documentation Great Warranty Great Installation CONS: Price Lack of Power without tune. Too many license plate brackets! Perrin Oil Cooler: · Packaging: 9 · Quality of Oil Cooler: 8 · Quality of Sandwich Plate: 9 · Oil Cooler Lines: 6 · Weight Savings: N/A · Documentation: 8 · Hardware Included: 10 · Warranty: 10 · Performance Gains: 10 The Perrin oil cooler was designed for either a stock FR-S /BRZ or one with a Vortech Supercharger. After Perrin did their testing it was clear at least on the dyno that the car had a bit of trouble with controlling oil temperature. Once it starts to climb past 210F degrees it will keep climbing to terminal levels, namely if used on the track. The truth is the heart of the kit is the Mocal 110 13 Row cooler with -10AN fittings. Also included is the SP1T-FA20 Mocal sandwich plate with the integrated 185F thermostat and -10AN fittings for oil lines. Mocal clearly designed this kit so plenty of tuners can make and sell their own version. Perrin was the first to market and changed just one thing and that was they developed their own sandwich plate spacer which is black and slightly more porous. They also decided to include their own lines and mounting solution for the kit. The lines they chose were the Aeroquip Socketless brand of racing hose which they use for oil lines with -10AN barbs pre-installed. Oddly enough they chose to install step less clamps on the actual hoses where the fittings attach as an apparent added security measure. 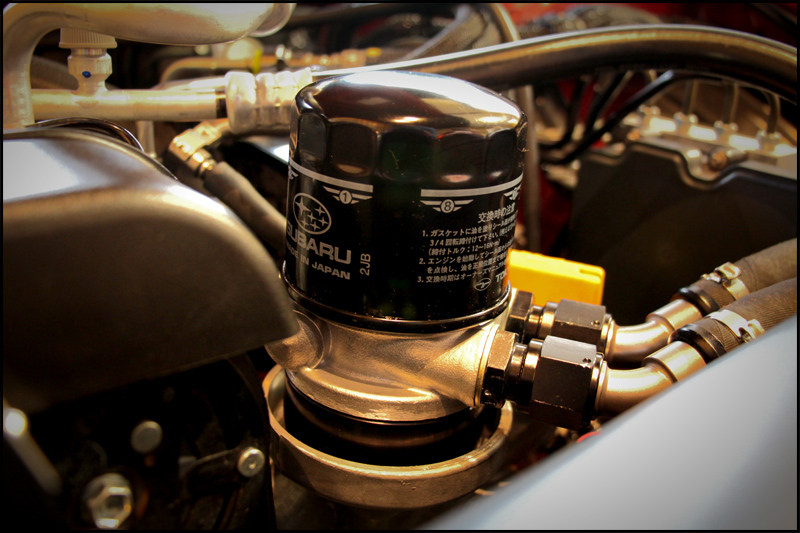 Installation instructions are very good, although the printed instructions dont have the best pictures. For a stock car without forced induction, installation would be very straight forward and routing the hoses much easier. Perrin includes a special rubberized Pyroshield hose protection to prevent abrasion or cuts into the hoses. The only problem is that this this cover does not extend the entire length of the hose, which in our case with the Vortech kit these hoses rub on not only on the Vortech airbox but also on the ABS module. The protection also falls short where the hoses run behind the bumper support where there can be metal on hose contact. In our case we had to cut our own hose protection and cover the metal bumper support and also cover the Aeroquip hose with under the hood to prevent abrasion. 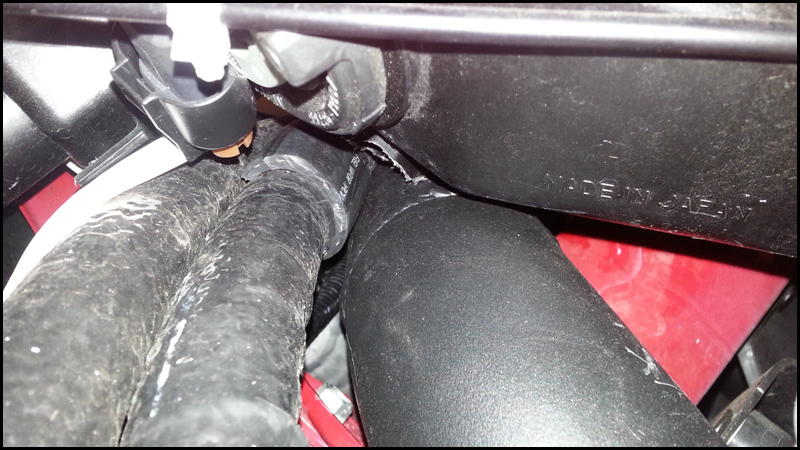 The first attempt at installation was a failure as we did not realize you could twist the ends on the hose (barbs), or rather were afraid to. The fact is you will have to rotate the barbs on the end of the hose to get the lines runs and installed and properly oriented with the oil cooler barbs and plate barbs. This should be added into the documentation. The sandwich plate installation was straight forward, although we strongly suggest getting the plate positioned where you want it angled as close to the engine oil cap as possible without interfering and then slightly tightening down the 27mm bolt on the plate before attaching the hoses. If you leave it loose your hose installation will be pulling on the plate which could create a potential for cross threading the sandwich plate bolt down. This is much more of an issue with the Vortech kit. The largest amount of time spent was making sure the hoses were run properly without kinks and without anything rubbing on them. If you own an FR-S with the Vortech kit you will need to modify the air box bracket to move the airbox closer to the front of the car to prevent lines from getting pinched. Perrin ran their lines over the top, however the headlight design for the FR-S is different and you cant do that, so this orientation is the best but tight in a way I think will not be safe in the long term. 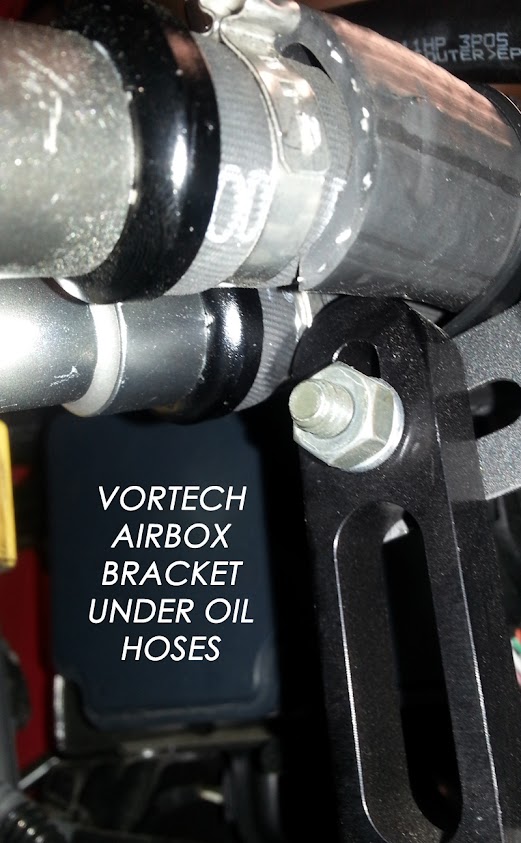 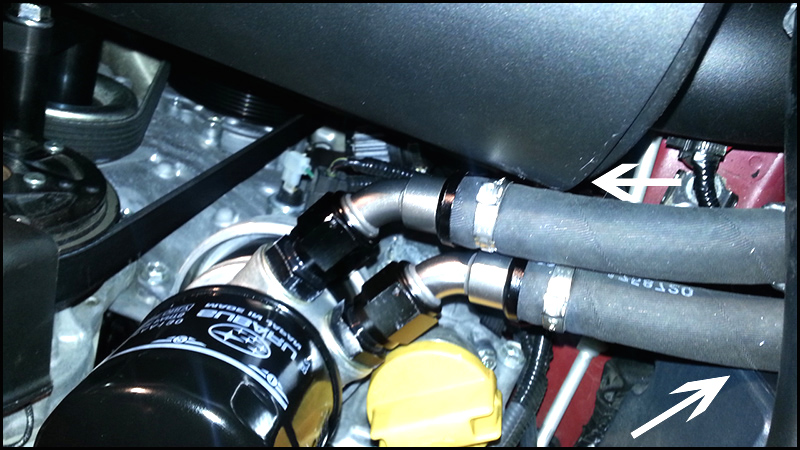 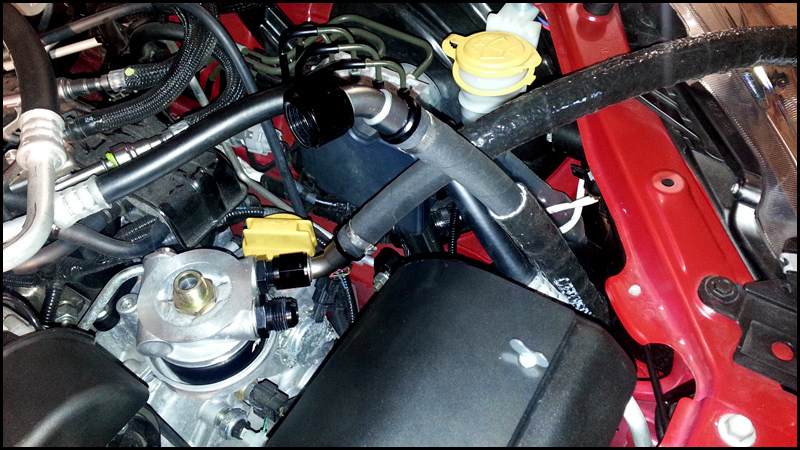 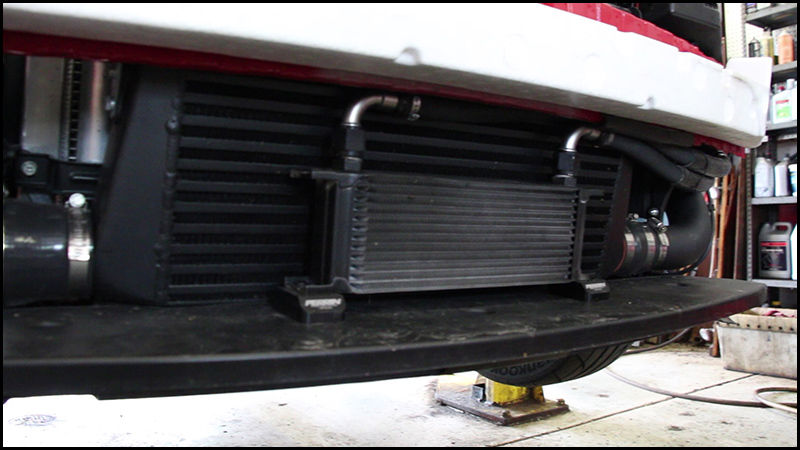 The 27mm sandwich plate nut Mocal includes is a pain to tighten. Tried several sockets and none quite fit properly. However we were able to get one on enough to torque it down to the rough spec they include. The oil cooler mounts directly to the bottom plastic shield or bumper support. Perrin did a great job of making this a plug and play kit. It will be ideal for those who want to just throw on a cooler and get on their way with basically no modification. The entire install took roughly 4 hours. After the installation Perrin documentation explains to add an extra QT of oil and then provides procedure how to prime the new oil cooler then check for leaks then start car. After driving around we checked the setup and found no leaks. However adding one additional quart was too much and we had over filled by roughly .20 QTs and had to drain oil out. On the first oil change, we got smart only added 6.1 QTs. Which turned out to be not smart as it was still over filled. As the cooler is below the sandwich plate and lines all old oil is still there. We overfilled again which was a major pain in the ass. It seems you only need to add extra oil during the original install. Subsequent oil changes use close to the stock amount. We talked to Jeff and the owner of BAT who imports Mocal, and the consensus was that there would be roughly .20QTs of oil in oil cooler at all times. However even on cold starts there will always be a trickle flow to the cooler, so you dont have to worry about old oil just sitting inside it until the thermostat on the sandwich plate opens. However, this means there will always be old oil inside. So if the owner has to do an oil change there will be no way to remove that amount of oil from the cooler and lines, so plan accordingly. A shorter oil change schedule maybe required. For those in cold weather areas like us we may need to monitor oil temps and make sure they are getting up to temperature for daily driving. If not Perrin may need to revise the mounting location or offer a block off kit as well. Of course the question is does the oil cooler help, and the answer is simple, yes. We saw our temps go from 230F on a few hard runs on the street before the cooler to around 175-210F max after installation. On the dyno we saw the exact same results which more importantly showed oil temp recovery which was not possible without the cooler. What this also means less work on the cooling system and the oils ability to remove contaminants and heat as well. According to Perrin the ECU starts to cut back on power after oil temp starts to Exceed 210F which we witnessed in the baseline dyno. It seems based on our testing the optimal oil temps seem to be about 180-230F for this motor. Anything higher and a cooler is definitely a safe guard. Now since we know this kit is mostly Mocal why spend the extra money on the Perrin kit? The short answer is they are not making a lot of margin on this kit. To put this kit together yourself with stainless lines, all the fittings and mounting solution you are looking at about $600 shipped. You may save yourself $60-100 but that means you have to assemble it all yourself and figure out mounting. Which leads to the last part of this install and that is placement of the cooler. The center mounted location is highly efficient, however very risky for damage depending on your driving habits so this maybe something to consider as well. We are using a wire mesh around the cooler to help deflect any rocks or road debris. PROS:
CONS:
Vortech Super Charger w/ Perrin Tune Packaging: 10 Quality of Pieces: 7 Weight Savings: 1 Documentation: 4 Hardware Included: 7 Warranty: Unknown Gains: 8 Sound: 7 Installation: 5 Choosing to supercharge this car was a fundamental path we took following up on our reviews. The FR-S and BRZ have one monster weakness and that is straight line speed. Sure we can all talk about how easily we can get into the corners but the reality is on the street and on the track straight-line speed is one of the largest pieces of the sports car formula. In the USA we have every day family sedans like the Accord, Camry and Sonata pushing 300HP. In the world of daily drivers even our normal mass market cars can easily hand the FR-S/BRZ its humbling papers. But this project was not just about adding power for the sake of it. Could we retain reliability and drivability, including year round performance? What about support from vendors? Clearly the idea of taking an unproven car and trashing its warranty is rolling Las Vegas odds.  After ordering from Perrin it took about a month to get everything needed to get started. Perrin shipped the ECUtek cable and 2.5 bar MAP sensor. And the Vortech Kit also shipped from Perrin. They do not ship the flash file with the kit, which was a variable I was un-aware of at first. The owner has to actually plug in the ECUtek cable and install the software on your laptop before the install to identify which ECU version the car has. This way the tuner knows which file to email you. When the parts finally arrived, everything was packed extremely well. We decided to open the Vortech Box a week before install to make sure all the major components were included; however we did not unpack everything as we did not want damage when transporting it. After my inspection we reviewed the included install PDF. It seemed straight forward but that is what scared us. Install time is advertised at 4-6 hours. So just in case we started at 10AM just to be safe. Even if it took us 12 hours we would still be done by 10PM. We unpacked the car, laid out all the parts on the alignment rack and setup the camera equipment. Before we even touched anything we decided to make sure we could flash the ECUtek tune from Perrin. We plugged set everything up and plugged in the ECUtek USB cable to the cars ECU, and the license key to the laptop. Did a quick query of the ECU to make sure we were communicating, and everything came up fine. After we started the cameras and selected the file, and low and behold we got an error message saying the software could not communicate. After playing around we could no longer communicate with the ECU. We tried the shops OBD2 scan tool and it immediately connected but flickered. It would randomly read the ECU state. We tried the laptop again and nothing. Scratching our heads we pulled out the backup laptop and started downloading the ECUtek software to it. Halfway through the download we lost connection to the server. Somehow not only could we not connect to the vehicles ECU now we lost connection to download the software we needed. We went back to our other laptop to check the Wifi connection to the shop and our phones. It now appeared we lost connection to the shops wireless. I suggested that Turbowski reset the modem. After 5 minutes we tried again and nothing. And even the phones were dead. As it turns out there was an outage for the whole complex we were in, no phone or internet. So I tethered my Verizon phone internet connection so we could at least download what we needed. Finally we had the software downloaded onto the backup laptop and ran the needed updates. We crossed our fingers this would now connect to the car. Unplugged the cable and reconnected, pulled the battery on the car just to make sure, and also check fuses. After about an hour we were ready to try again. This time things went no different, we could not connect to the ECU to flash. At this point we were joking that this maybe a sign to call it off. But we pushed ahead. Turbowski started playing with the OBDII connector and found any device we plug in flickers, either there was a short in the wiring or a bad connector. Either way we had to pull the OBDII port off the clip and re-route it so we could get to it easily. No problem except now we had to take the interior trim apart and unclip it. Turbowski struggled with the getting the connector unclipped but eventually we ran the cable so it would come out of the headunit/radio DIN spot so we could easily check wiring. 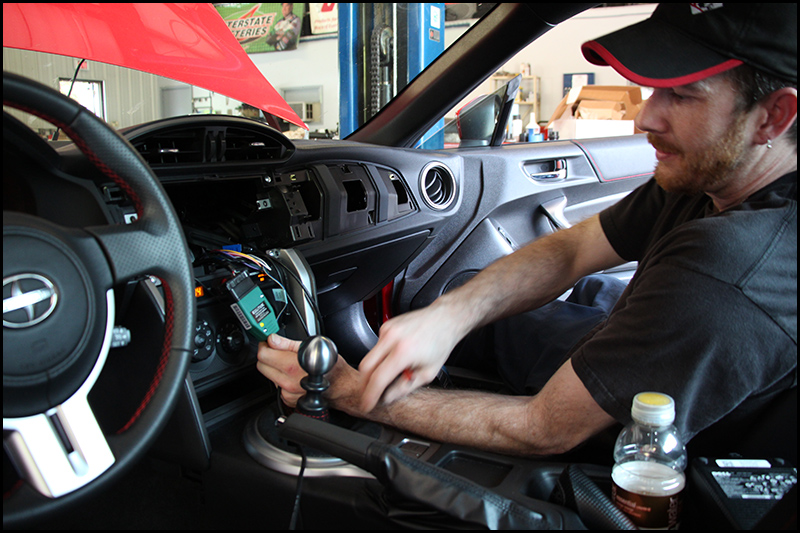 As it turns out the female pins in the OBD2 connector were stretched out. We were using the OBD2MX BT adapter for monitoring data with torque for Android and it appears the female connectors on the port are easily damaged. Unfortunately we had to take the connector apart to try and bend the connector pins tighter. 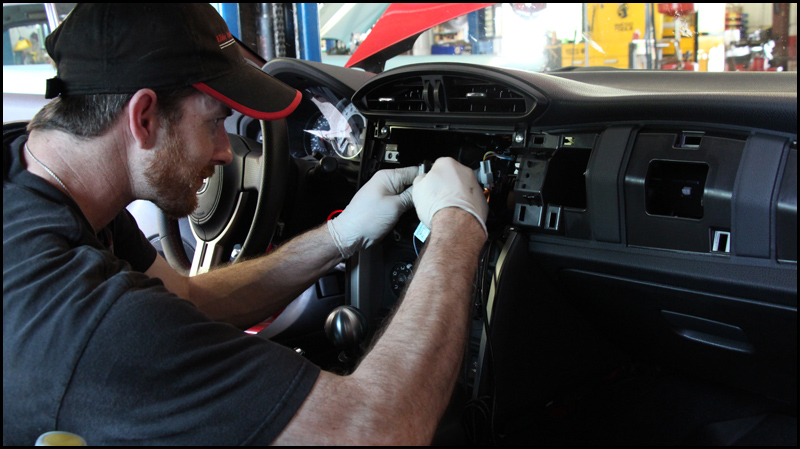 We did not have replacement OBD2 terminals available to replace the factory end. So we had basically rig the connector. After 3 hours of playing around, we finally got the ECUtek cable to communicate with the ECU to flash the car. We had to securely hold both cables in place with zip ties. This was risky as we did not want to lose communication while the flash was taking place. The flash started and completed within 10 minutes. We were relieved and decided to take a quick lunch break. This was not a good sign and we hoped this would not continue. 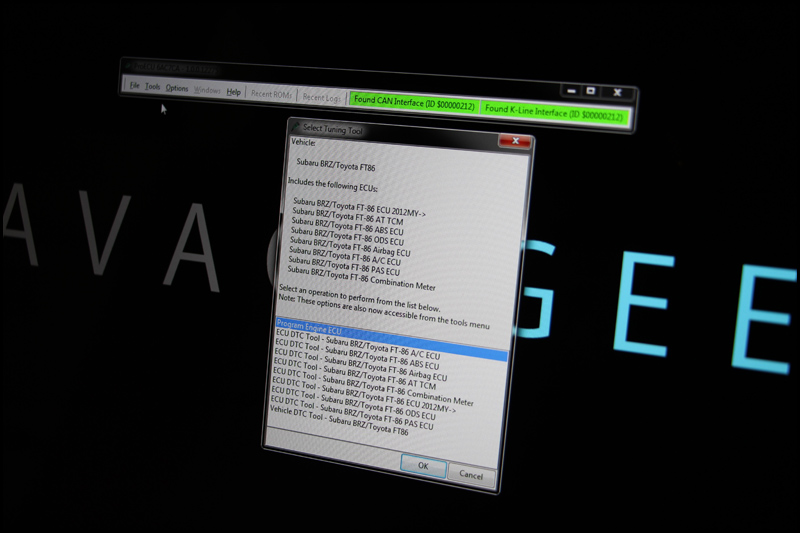 We returned to the shop to start the first couple of steps and for the most part everything was straight forward. The confusion began when we realized Vortech clearly did not spend much of their time simplifying their instructions and install procedures. One thing that annoyed me personally was having all the nuts, bolts and screws in different packaging without any labeling. To make things more confusing and frustrating, they gave you this massive parts list without any images to show exactly what all of it was. Now clearly we realized attaching images of every nut and bolt with description maybe overkill, but its something that will help cut down on install time. More importantly we expected these bags to be labeled or coded based on parts of the install which they were not. What would have made a big difference is something simple organizing and labeling the bags of bolts. For example, in BAG 1, all the bolts for the accessory belts, and brackets are included. In BAG 2, all the hose clamps for charge pipes. Thats how we envisioned it should be. Instead all the hardware is randomly separated, so they dont have to spell any detail out in the instructions. 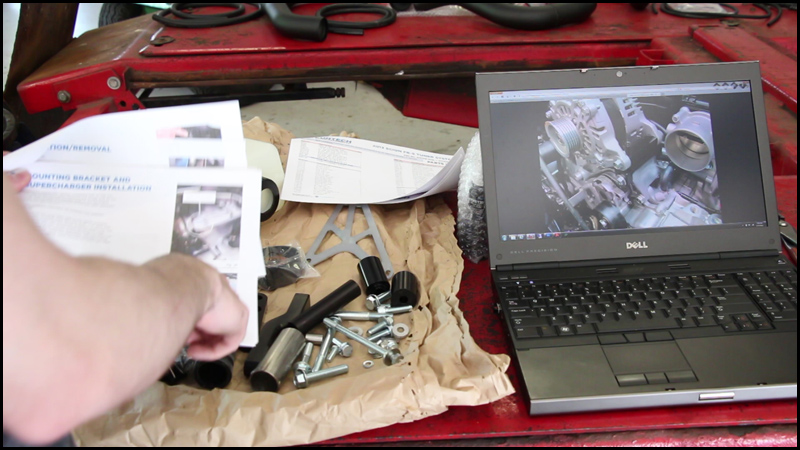 The issues with documentation continued from there. Searching through they dont even include instructions how to change the oil on the supercharger which is another glaring oversight. Also it was clear that many of the included documentation used photos from pre-production cars. Instead of taking pictures of the install step by step they just threw in whatever pictures they had after the fact. For example in this step: Behind each headlight assembly, the main electrical connec¬tor lays in a cradle extending from the assembly. Pull the connector from the assembly and place aside (do not disconnect the connector). Based on the wording and the picture we spent 10 minutes trying to find this connector behind the headlight. It turns out the connector was attached to the headlamp assembly but the wording made this ambiguous. The attached photo shows the connector gone after it had been grinded away. So we understood the after, but not the before. And why is this important? Well not everyone has installed this kit before, the instructions are presumptuous. As we moved along to mounting the blower and brackets Turbowski asked me the torque figures. And I referred to the service manual, but after about 30 minutes I was downright aggravated that I had to do this at all. Why would they not provide the most basic of installation information for something as critical as the brackets for the supercharger and more? Vortech either was lazy here or had some legal reason why not to publish this information, either way it slowed down the entire install. Turbowski constantly told me he felt stupid trying to install this, and he works on cars every day. It hit us that the instructions were written by engineers or Vortech assumes you are the Vortech Supercharger Installation Fairy. Many of the details and install steps you can get through but we will focus on the areas of difficulty: The intercooler install, was probably the most frustrating as you had to get it centered properly with no template. This step took slightly over an hour. I dont see how anyone could do this on their own without help without running the risk of it being un-even or off center. The supplied self-tapping screws were horrible and we wound up using our own. We drilled the pilot holes, but these screws would not thread no matter how we finessed them. 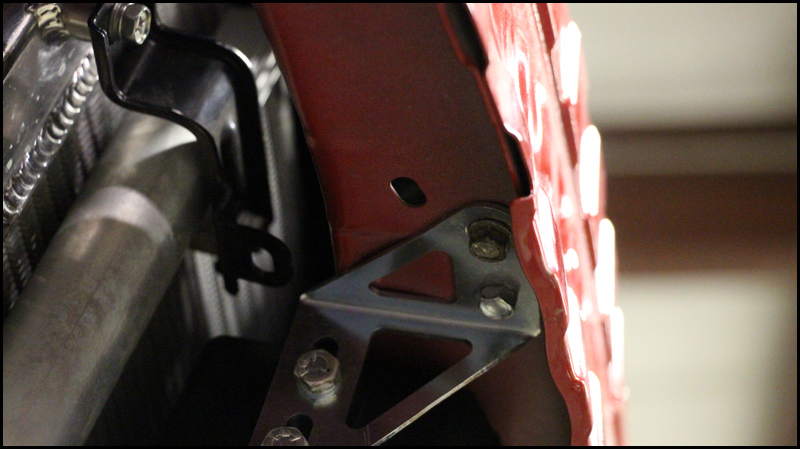 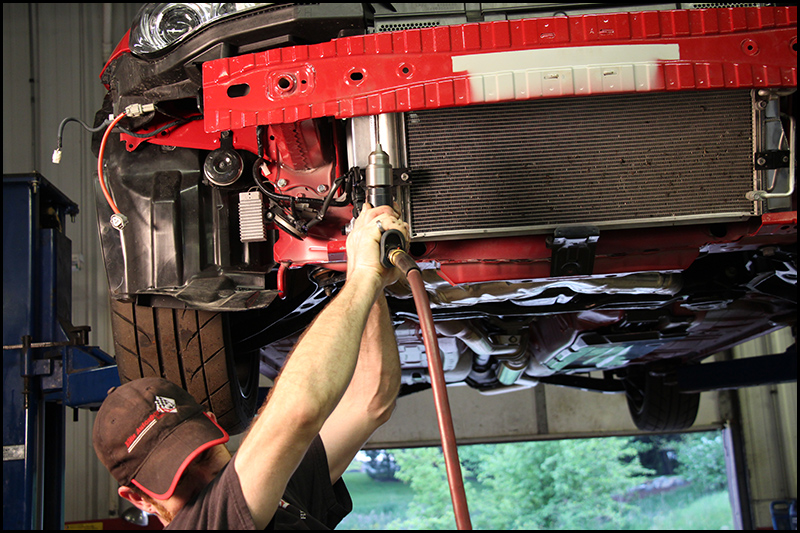 The center support bracket is also tricky as you may get it lined up but it will pop out of the bracket if you are not careful.  Prior to the installation we used Eastwood radiator paint to spray over the Vortech logo as its basically a giant billboard on the front of the car. While we understand branding, its against what we wanted to accomplish with our build.  Next, Vortech provides you a washer bottle replacement kit for the OEM unit. Problem is you have to cut the factory tank filler neck to make it work which makes it difficult to return to stock if needed. The huge flaw of the fluid bottle design, is that the pump/connector is installed at the bottom which touches the under body plastic. The danger is any impact will destroy that connector, for example driving over a pile of snow in the winter which is very common in the Midwest, not so much where the kit was designed. The other annoyance was after including the washer bottle the silly thing leaks unless you use undocumented ways to either seal it with silicone or trim gaskets. Also ours still leaks from the top of the tank where you splice the rubber hose to the factory filler neck.  The next issue was with charge pipe documentation. Vortech included non-existent details on installing the discharge pipes. The fact is they are EXTREMELY close to the bumper support beams, the clearance is so small that under larger bumps and dips the pipes will contact them. I have taken the kit apart 3 times now to adjust them. Depending on the pavement you can still hear them knocking against the frame once in a while. 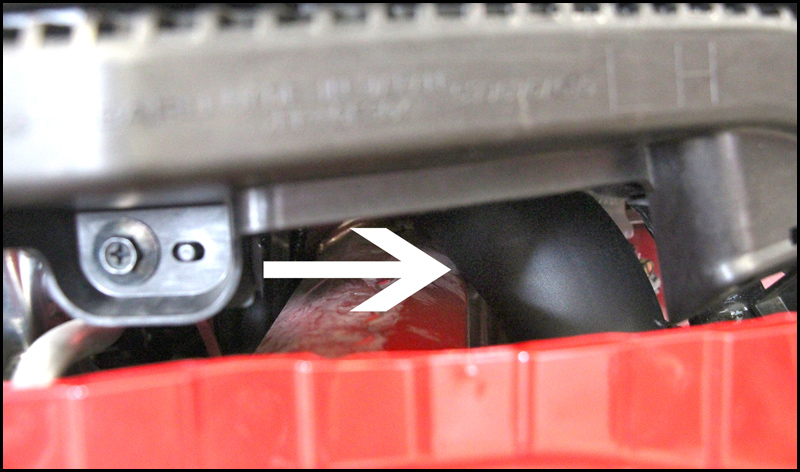 As mentioned we personally had the front end apart 3 different times to check things. None of this was ever mentioned, about clearance or alignment of pipes. Our MAF tube was also damaged out of the box, which was not a massive deal as we bent it back to get the install completed. So can we assume pipe alignment is not important? Well thats how we dealt with it. Except the last time we took the car apart the MAF tube was starting to get scored by the bumper beam. This would make it easy to wear a hole into the pipe or worse generate shaved metal which would blow into the intake. I have wrapped the MAF tube in rubber silicone near the bumper beam to avoid metal on metal contact. The throttle body tube is also obscenely close to the belt which makes adjusting the pipe in the silicone collar difficult. After about 12 hours these little things added up and confidence wore away. 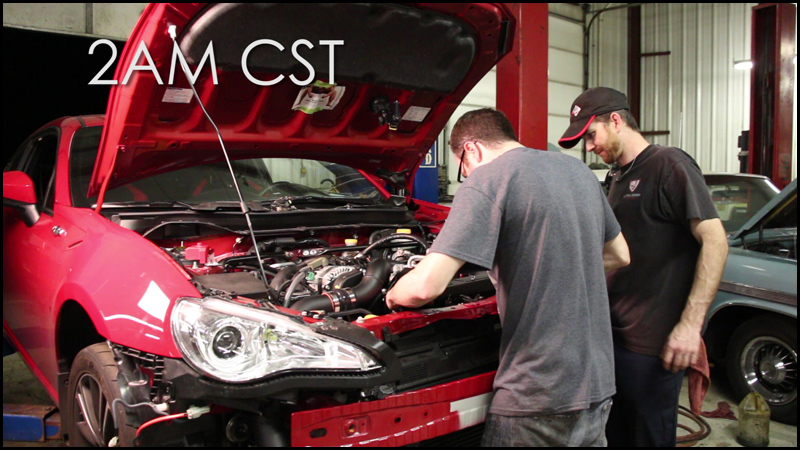 DOCUMENTATION: I explained some issues with the install to Perrin, which they contacted Vortech support for me. I also contacted Brian on the forums from Vortech. Jamie the service manager shipped out the replacement parts I needed including missing hose clamps right away. But when I asked either of them to call me to discuss documentation issues, I never got a call. When I raised the questions in email I received the following answer: So far we really havent seen or heard any issues with the installation of the FRS kits, in fact its one of the easiest kits we have to install out of our entire product line. 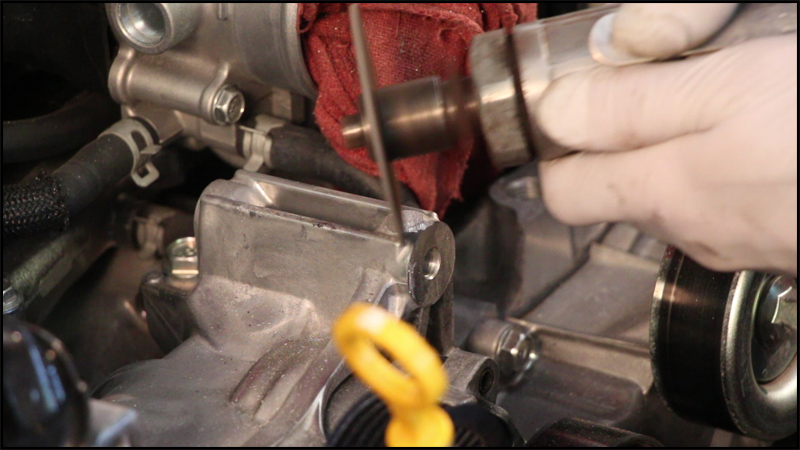 Well, I guess there is the answer. When I asked Turbowski for his review of the install procedures his answer was simple: 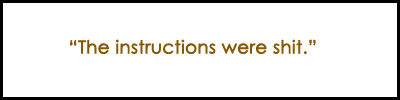 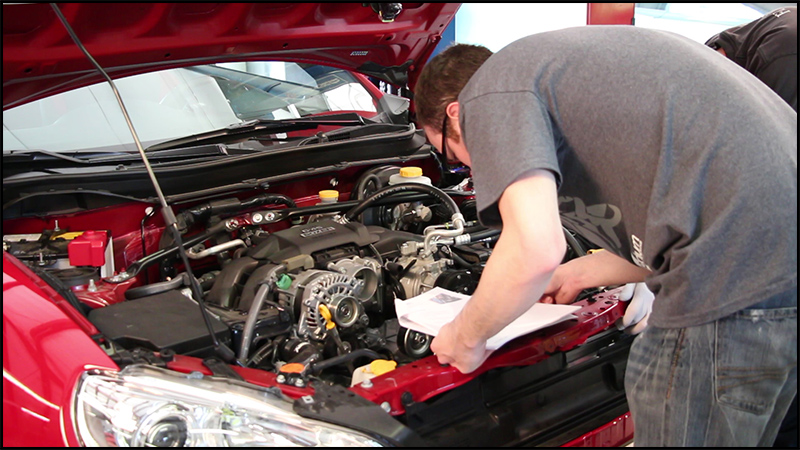 The point is the documentation needs improvement. So if you are reading this or watching the video and want to go with the Vortech kit, be prepared. Vortech press material says 4-6 hours install time, maybe with a Vortech engineer next to us. But the reality there is too much left out of the install instructions and not enough detail about things that matter. This all matters if you are installing it yourself or using a shop that has no experience with the FR-S. Our local Vortech Authorized installer is a head to tail Mustang shop. The guy is an expert and great tuner, with a history of successful racing. But he has zero experience with much anything else. He had no idea what an FR-S or BRZ was. The point being if you are going to choose this kit, we highly recommend being close to an experienced shop for install who can work with Vortech and has FA20 experience. If you dont and you are like us and chose to do it yourself make sure you have Vortech and your Tuner on speed dial. 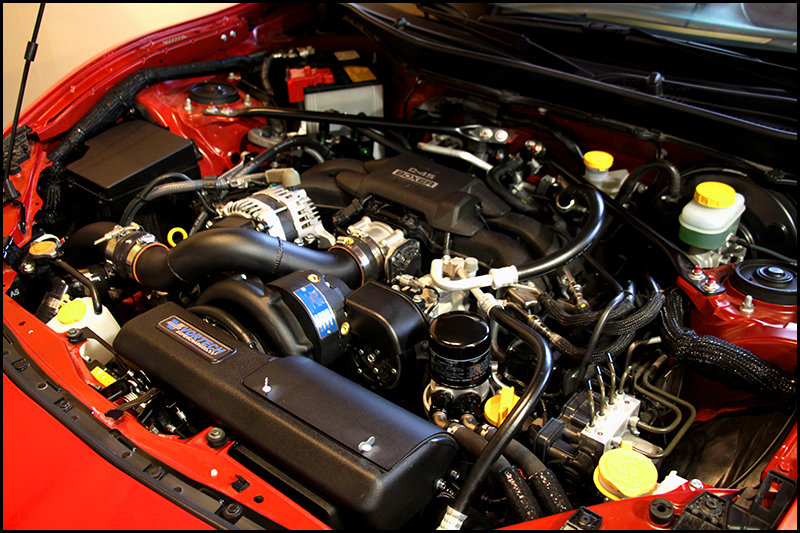 Choosing a Tuner - Perrin The most critical area is choosing a tuner. Absolutely buy it from a place who has a direct line with Vortech and a good relationship. One of the reasons Perrin was chosen was because they were one of the first testing/tuning this kit for the car. If you have problems they can and will get you help without any issue from Vortech. Jeff Perrin is also widely regarded as one of the best tuners thus far in the FA20 world and his philosophy in tuning is safety over power numbers. Their tunes are designed around those who want an everyday driver and also include maps that cater to those who want a more aggressive tune. Since our goal was reliability, the base and least aggressive map was consistently making 50HP over stock without going nuts in timing advance. This is a map that can be run on most fuels with no worry. The other critical reason Perrin was chosen was they cater to this car, you can get a full solution of parts all designed to work together and were apart of tuning, from exhaust, oil cooler, and more. They are heavily invested in the BRZ and FR-S and not just a parts re-seller. 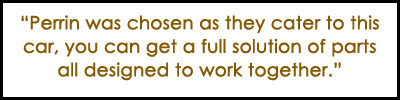 After about 60 emails to them, Chris Cone has been patient and very responsive. I only called when I needed more help or was freaking out. Even then Chris and Jeff were always respectful and patient. My initial tune sent from them had issues with long term fuel trim, which dictates how much fuel is delivered to keep the vehicle running as close to optimal air fuel ratios. The long term readings were high which meant during normal cruising the car was dumping fuel, or running very rich. Initial response from Perrin was very good. I had to do plenty of back tracking on the install however because usually when you logs show high long term fuel trim it points to a vacuum leak. Based on that information I removed my catch can, re-hosed the PCV line and check-valve, re-connected my discharge tubes and other things to rule out any leaks. Luckily installation was not the problem, it appeared to be a bug in the tune or the fact that the final intake tubing had changed from the pre-production version of the kit Perrin tested for. After checking the install follow up logs showed no change. Perrin corrected the tune in a few days, and about a week later a final tune was sent. After this I realized just how little I knew about all of this and it made me feel extremely un-easy. I bought a few e-books watched videos and reviewed logs from other owners. The reality was tuning is complicated shit, sure you can fast track your way through the basics but really getting down to the nuts and bolts is not for the technically challenged. I plan on learning more and more but for now I have to trust Jeffs reputation and Perrin as a company. And for me that is a monster leap of faith. The negatives with Perrin were their response times. After my last dyno response was on the slower side. They are a full service shop, their bread and butter is not just tuning my car online which I understand. After I sent them logs it took 2 weeks to get a reply. Now granted it was not critical but it sucks none the less. As more and more people start modifying their cars the less time tuners will have which worries me in the long run. Regardless of if you go Vortech or competitor, it boils down to one thing, your car is now at the mercy of your tuner.  At the end of the day the way the car performs depends on how your tuner programs the ECU. And remote support is just that remote support. If you need more than email and phone support, we dont suggest you attempt this kit on your own. Warranty and Long Term 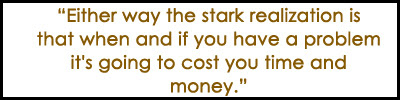 So what happens if you have a major problem, lets say like direct injector failure or trans failure. We have two options, remove everything off car bring to dealer and let it rot there until they get parts. Then have to deal with re-installing everything when done. Or order parts yourself and eat the cost. Either way the stark realization is that when and if you have a problem it's going to cost you time and money. There is virtually no long term data, there are about maybe 20 owners on the forum with the kit. The vendors and tuners will tell you go for it, the car can take it, but what specifically does that mean? How many real world miles, how much adverse weather testing was done? We can tell you less than 8 months, with cold weather and winter testing close to non-existent. There are still bugs, and ECUtek does not have all the throttle mapping unlocked according to Perrin. I found a bug after shifting from 1st to 2nd where the ECU cuts timing down to nothing that cannot be corrected. I get some minor but annoying 2800-3000RPM surging. Can it be tuned out? Don't know have to log it and send it to the tuner and wait for them to get back to you. As mentioned its a gamble and only time will tell what will happen. The Vortech Supercharger uses Vortech branded oil which must be changed every 7500 miles. This adds an additional step and maintenance routine which was unknown at time of purchase. Vortech also claims you need to replace your spark plugs every 30k miles which was also an unknown, but a major inconvenience as doing spark plugs on the FR-S and BRZ is not exactly a 10 minute project. DYNO MANIC ECU Well we learned enough from our stock dynos, exhaust dyno and finally Vortech dyno to know one thing. We take dyno numbers with a grain of salt as they are absolutely inconsistent based on conditions. The ECU pulls timing, limits power if intake air temps get too high, oil temps get too high or low, coolant temps get too high, barometric pressure is off, ambient temperature is too high. Basically the ECU has a major case of PMS all the time. With that said IF you catch the right conditions the car will make a few good passes.  On our stock dyno we got lucky and pulled 158HP after letting it sit for 20 minutes. But after that run we were getting 148, 150, 155 and several 155HP readings and back down. The exhaust dyno was worse, as we actually saw a few runs loosing peak HP over stock, and then gaining as much as 7HP in the midrange. Basically it was all over the map. The Vortech runs were similar. We had MAP1 runs down to almost 202HP at one point. For no real reason based on logs other than intake air temps went up about 10 degrees. What is more troubling is glancing online and seeing people posting up these unicorn dyno numbers. I have asked plenty of these people and tuners for logs to see exactly how they got their numbers, some sent them others did not. Many of them dont have true baseline dyno numbers either. And at the end of the day it is my belief that most of these dyno charts supplied with no logs or more data should be treated with skepticism. The repeatability in the real world is likely very difficult based on conditions. The look at me posts on the forums showing impressive dyno charts and nothing else are a trend. Final Numbers STOCK: 155.25 HP | 127.20 TQ STOCK DYNO SOUND MASTERING EXHAUST: 156.96 HP | 131.07 TQ (+7HP @ 4700RPM No ECUtek) VORTECH WITH EXHAUST: VORTECH DYNO SOUND MASTERING MAP 1: 212 HP | 176.69 TQ (+45-57HP) MAP 2: 224 HP | 178.65 TQ (+50-69HP) MAP 4: 235 HP | 184.65 TQ ( +65-80HP) 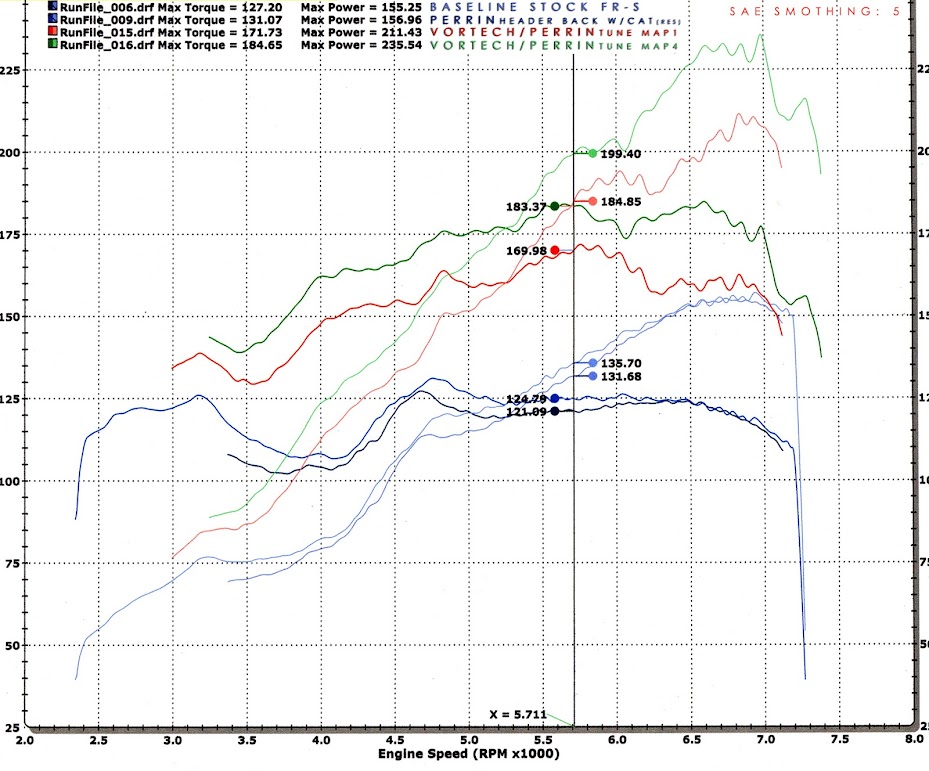 Vortech with Headerback, Oil Cooler and Radiator MAP 1-4  Driving Impressions: If I was handed this car and said go beat on it and give my opinion, it would be much different. Since I have done all the work, dealt with the issues, and have been logging and constantly re-checking everything I can no longer give that objective review on how the car behaves. Its partly because now I know all the issues and potential problems. However without question at least on the surface the Vortech kit and Perrin tune along with supporting mods does EXACTLY what it advertises. It transforms the car from slow, to moderately quick. No longer will the car be embarrassed in a straight line by mini-vans, SUVs and midsized V6 mass market sedans. Taking my jaded experience out of the mix, this is how the car should have come right from the factory. So lets answer the questions we started with: Can we trust the aftermarket reliability? The answer unfortunately is mixed. So far we can trust the vendors will support their products and stand behind them. The question is will they fix the issues and problems and how long with that take? In many ways most of these products are first generation and there will be improvements, will the early adopters get the upgraded parts or software when the time comes? We wont know until that time. Can you daily drive a forced induction FR-S/BRZ year around? This is another un-known, so far the vehicle seems to tolerate the heat. But can it function in the extreme cold? Vortech has not been forth coming in regards to the supercharger oil heat range. If I leave my vehicle outside in the winter while at work, will the oil hold up to cold starts without destroying the bearings? Running this oil cooler will also require block off to get oil up to temps in the winter or re-location. Oil temps take 15 minutes to go from 80F to 185F in 80 degree weather doing normal driving, without high RPM or boost. This will definitely be an issue as temps plunge down to freezing. What is the real cost, in terms of time, parts and drama? The amount of time, stress and headache not having an experienced local shop or support on this cannot be measured. That is what took the piss out of it for me. PARTS FOR SUPERCHARGER: Vortech Tuner Kit: $4200 (Perrin) Perrin Tune and ECUtek $950 (Perrin) Perrin Oil Cooler $620 (Perrin) Perrin Headerback Exhaust: $1200 (Perrin) Koyo Radiator: $300 (ft86speedfactory) Dyno Time: $250 LABOR/HELP :$500 MISC Parts: $100 TOTAL: $7570 TOTAL TIME: DYNO: 5 HOURS INSTALL TIME: 20 Hours FIXING INSTALL: 10 HOURS CORRECTING ISSUES: 4 HOURS LOGGING: 10 HOURS CONTACT WITH VENDORS RE-FLASHING: 4 HOURS RESEARCH TIME: 20+ HOURS TOTAL TIME: 80 HOURS OTHER PARTS: RS3 TIRES: $650 (DISCOUNT TIRE) RADIUM CATCH CANS $300 (RADIUM DISCOUNT) JPM COACHWORKS INTERIOR ($600) NEXUS 7 CUSTOM $500 (SELF) BRAKES $900 (Counterspace Garage) What type of support do we get from the prime vendors? Support has been good from all vendors, just be prepared to wait for parts for a few days if you need something. As far as tuning you are at the complete mercy of your tuner to make sure the car is working properly. Knowing about the logging process and what the warning signs are of problems would greatly help reduce any worries. Was it all worth it? Experience cannot be measured sometimes; in this case this was a lifelong lesson in patience. The overall learning experience has been vast, from understanding, timing, basics in tuning, electronics, and so many other systems including additional mechanical understanding. This was something that could not have been obtained otherwise. However, unfortunately the financial costs exceed the perceived gains of losing a warranty on an un-proven platform. This is exacerbated by POOR OEM parts availability from Subaru and Toyota for critical engine and supporting parts for repair. Availability is poor. 30+ day lead on even simple items. Not only is the owner out of pocket if and when issues rise, the costs for OEM parts are considerably higher than most cars. The truth is, you cant just bolt on forced induction on this car without installing other support mods. This FR-S cooling system, brakes, and lubrication system was not designed for 50+ extra HP and it is clear from logs and testing its something that should be done. Vendors who tell you not to worry is the equivalent of a stubborn teenager running outside in winter without hat and gloves, eventually they will get frost bite. In the end it depends on if you are ok with risking your cars health to make more HP. ALL PARTS INSTALLED: Engine: Primary Vendor: Perrin Vortech Supercharger Tuner Kit ECUTek / Perrin Tuned Rev. 9 Radium Engineering Dual Catch Can Koyo Radiator and Perrin Silicone Hose Assembly Oil Cooler Mocal / Perrin Oil Cooler Protection / Mikes Grilles Perrin 2.5 Header Back, Catted and Resonated (59db Idle) Fluids: Primary Vendor: Amazon/Other Redline 0W20 Engine Oil Pentosin Manual Trans Fluid Motul Differential Oil Project Mu DOT4 Brake Fluid Brakes: Primary Vendor: Counter Space Garage Project Mu 800HC (Street) Carbotech XP10 (Track) DBA 4000 Front Rotors Spreigler Front Lines StopTech Rear Rotors Interior: Primary Vendor: JPM Coachworks JPM Coachworks Panels and Alacantara Fabric Lathewerks Stainless Gunmetal Shift Knob Android Tablet Integration / Headunit ELA UI Last edited by Dezoris; 07-02-2013 at 12:30 AM. |
|
|
|
| The Following 3 Users Say Thank You to Dezoris For This Useful Post: |
|
07-17-2013, 05:29 PM
|
#61 |
|
Senior Member

Join Date: Jan 2013
Drives: 2016 Subaru WRX
Location: Phoenix, AZ
Posts: 979
Thanks: 235
Thanked 329 Times in 231 Posts
Mentioned: 33 Post(s)
Tagged: 0 Thread(s)
|
Very nice build thread
 One of the better ones I have seen on any forum. One of the better ones I have seen on any forum.
__________________
-2016 Subaru WRX
-2013 Scion FR-S: Wastegated Vortech V3'd, E85 SOLD |
|
|
|
|
07-17-2013, 06:21 PM
|
#62 |
|
Gundam Meister

Join Date: Oct 2011
Drives: A Gundam
Location: Westchester County, NY
Posts: 2,685
Thanks: 320
Thanked 1,010 Times in 510 Posts
Mentioned: 9 Post(s)
Tagged: 0 Thread(s)
|
Really went all the way being informative on your build. Very nice job.
|
|
|
|
|
08-14-2013, 01:47 PM
|
#63 |
|
Troll Level: Expert
Join Date: Aug 2012
Drives: '13 BRZ, '18 F150 3.5EB, '07 Cayman
Location: North Carolina
Posts: 231
Thanks: 206
Thanked 103 Times in 59 Posts
Mentioned: 0 Post(s)
Tagged: 0 Thread(s)
|
This is the best build thread I've ever read.
Carry on.
__________________
Nick K.
NASA ST5/TT5 #130 Southeast Region |
|
|
|
|
08-14-2013, 01:53 PM
|
#64 |
|
Senior Member
Join Date: May 2012
Drives: 2013 Scion FR-S, Nissan Pathfinder
Location: Calgary AB, Canada
Posts: 404
Thanks: 189
Thanked 212 Times in 96 Posts
Mentioned: 12 Post(s)
Tagged: 0 Thread(s)
|
..
Sent from my SGH-I337M using Tapatalk 4 |
|
|
|
|
08-14-2013, 01:56 PM
|
#65 |
|
Senior Member
Join Date: Aug 2012
Drives: FR-S
Location: IL
Posts: 2,857
Thanks: 519
Thanked 2,997 Times in 1,095 Posts
Mentioned: 159 Post(s)
Tagged: 1 Thread(s)
|
I have more coming some good stuff this week! Thanks for following.
__________________
|
|
|
|
|
08-14-2013, 05:07 PM
|
#66 |
|
Senior Member
Join Date: Mar 2013
Drives: whiteout gt86 2015 IS350fsport
Location: northern kentucky. cincy
Posts: 1,931
Thanks: 2,154
Thanked 697 Times in 437 Posts
Mentioned: 42 Post(s)
Tagged: 0 Thread(s)
|
this car is a total piece of poo
__________________
INSTAGRAM @Rcf_700 www.youtube.com/boostindub
|
|
|
|
|
08-14-2013, 05:18 PM
|
#67 | |
|
Senior Member
Join Date: May 2012
Drives: 2013 Scion FR-S, Nissan Pathfinder
Location: Calgary AB, Canada
Posts: 404
Thanks: 189
Thanked 212 Times in 96 Posts
Mentioned: 12 Post(s)
Tagged: 0 Thread(s)
|
Quote:
Sent from my SGH-I337M using Tapatalk 4 |
|
|
|
|
|
08-14-2013, 05:58 PM
|
#68 | |
|
Senior Member
Join Date: Aug 2012
Drives: FR-S
Location: IL
Posts: 2,857
Thanks: 519
Thanked 2,997 Times in 1,095 Posts
Mentioned: 159 Post(s)
Tagged: 1 Thread(s)
|
Quote:
Did it go as good as my guest driver? [ame="http://www.youtube.com/watch?v=4w6fyCgpv5o"]How Not to Use Launch Control - YouTube[/ame]
__________________
|
|
|
|
|
| The Following User Says Thank You to Dezoris For This Useful Post: | charged86 (08-28-2013) |
|
08-19-2013, 10:57 PM
|
#69 |
|
Senior Member
Join Date: Aug 2012
Drives: FR-S
Location: IL
Posts: 2,857
Thanks: 519
Thanked 2,997 Times in 1,095 Posts
Mentioned: 159 Post(s)
Tagged: 1 Thread(s)
|
The Essex Sprint Brake Install Video Review 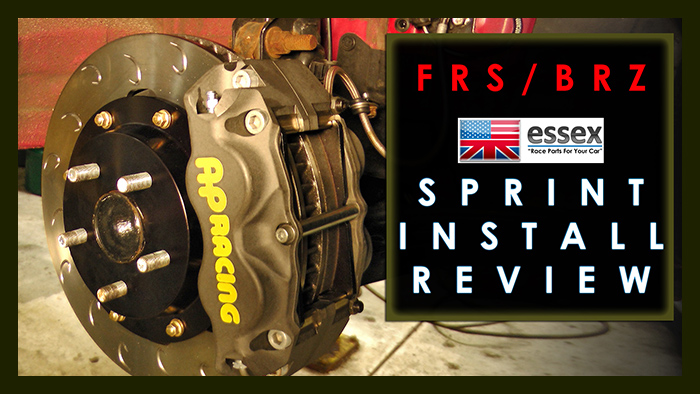 VIDEO INSTALL REVIEW: [ame="http://www.youtube.com/watch?v=E4L76zkREUE"]Scion FR-S BRZ AP Racing Brake Install Review | Essex Sprint Kit - YouTube[/ame] Welcome to the install review thread for the AP Racing Spring Brake Kit install by Essex. Included in Kit:
 The installation was the easiest of any build we have done largely thanks to world class documentation from Jeff Ritter at Essex. @JRitt 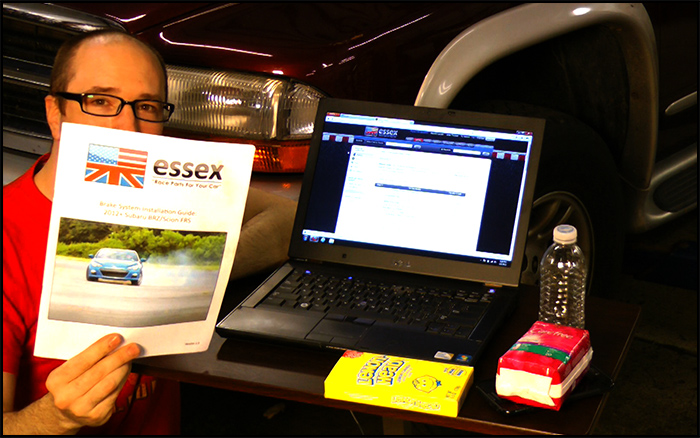  TO VIEW THE INSTALL PDF CLICK HERE We knew this kit was one of the most tested on track by guys like @csg mike and ft86speedfactory etc. so it was a safe bet that we would have zero issues with brake anxiety during our Vortech Finale track video. However one thing is different for us, we are not vendors, we have nothing to sell and we want a balanced street and track car that raises little questions. So will the AP Spring Kit fit that bill? 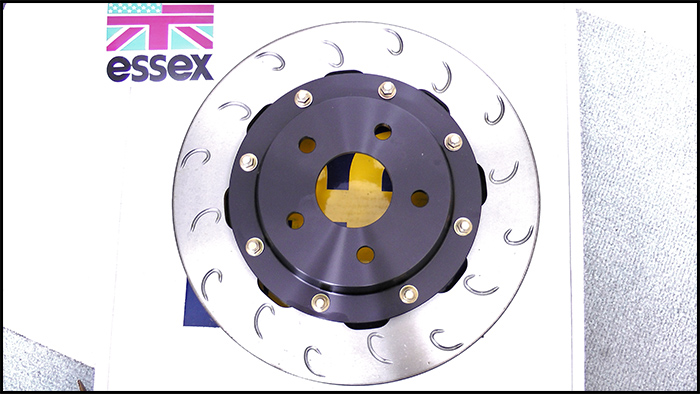 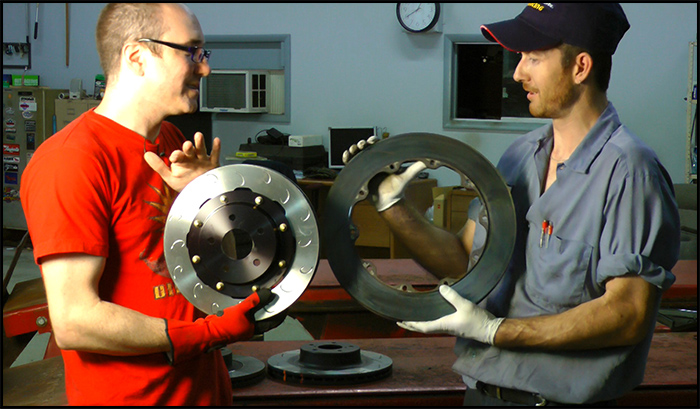 As soon as we unpacked the kit from Essex it there was a sense of relief that this was not a typical big brake kit. This was not a show car kit. While certainly it looks good, it's function over form. We quickly compared the brakes, hardware and calipers to full race setups and oem replacement rotors. We found not only was it lighter but it had the same disk width and ventilation characteristics from Turbowski's World Challenge 911 brake setup. Weight loss is 10lbs per wheel compared to the stock brakes. 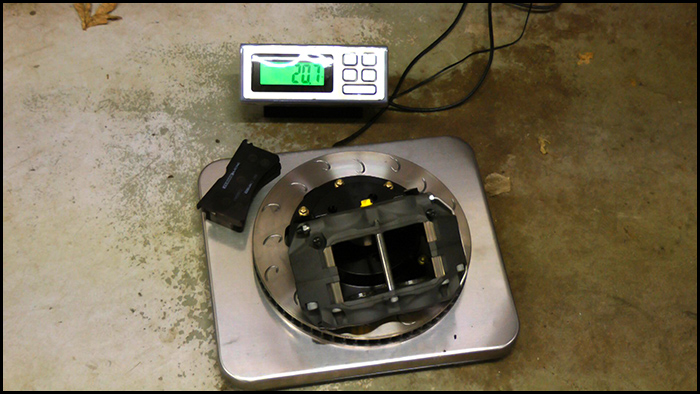 Installation was as simple as washing the rotors by hand to remove anti corrosion oils. We left them in the dishwasher rack to dry which made our GE Appliance look more professional. 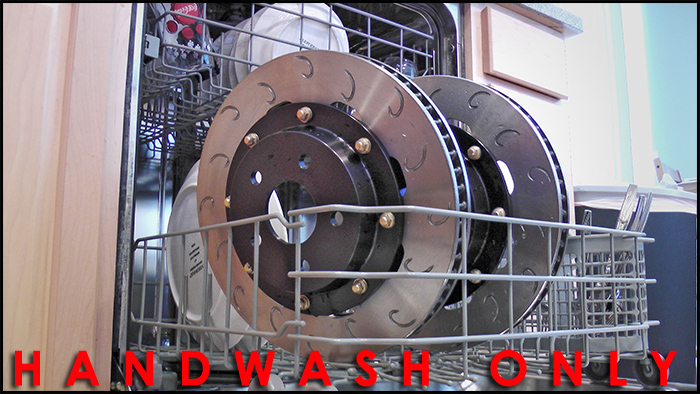 We followed the instructions and had zero issues, although we did question our brake line install a bit as we were extra careful not to have any binding which is easy while the car is in the air with no wheels but under load is more difficult. Those who install the Speigler lines take extra car to check lines while car is on the ground, doing lock to lock turns. This was the only area of the documentation that was lacking. After installation we did some research on costs of replacement parts and found that the rotors were around $160 to replace which puts you close to the cost of most higher end aftermarket pieces. Its highly unlikely you will shock these rotors enough to destroy them even running 10 track days a year. Caliper rebuilds were also affordable. Send them to Essex and it will cost you at most $120 plus shipping for factory fresh pieces. 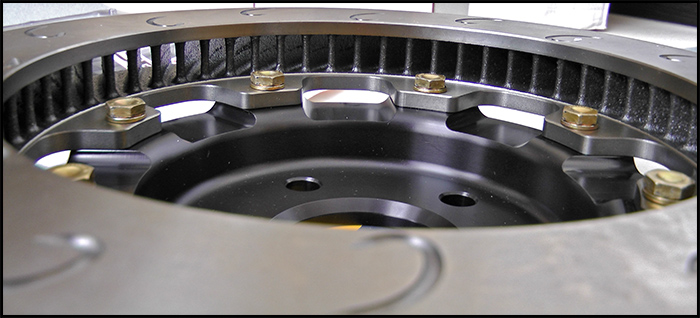 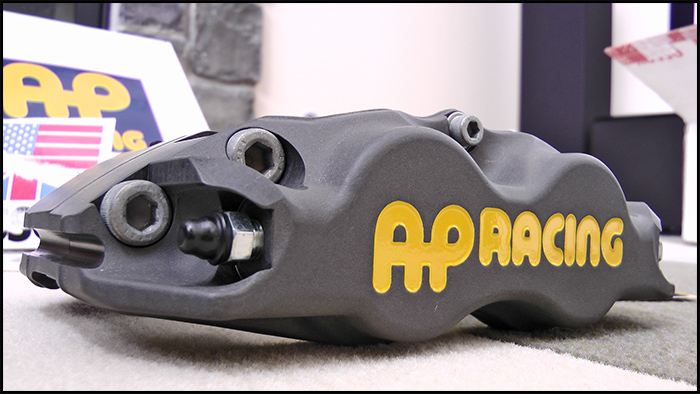 There are two bleeders on each caliper which can take more time to bleed the system however, the ease of changing pads is stupid simple as we show in the video. That said make sure you have extra brake fluid as bleeding the new AP calipers push threw 2x as much fluid when bleeding as the stock units. We Chose 3 Pads: Ferodo DS2500 as an intermediate street and track pad front and rear. Ferodo DSUno as a front track pad with DS2500 in the rear. Project Mu 999 as a race/track pad front and rear. So we have an overkill situations, and the problem remains that all of these will hold up on a track in various situations. In fact our DS2500 worked perfect for our lower speed track at Autobahn South with zero fade. However we have doubts about their ability to stay silent on the street. So we are working with Counterspace Garage to exchange our XP10s for the 1521s for street duty.  During install Turbowski is very anal about preparing the hub and cleaning the brakes. If you notice this car has a pretty nasty surface rust issue if you run it daily in moisture, or winters. It gets bad fast so if you are like us clean it up before mounting the rotors and calipers. 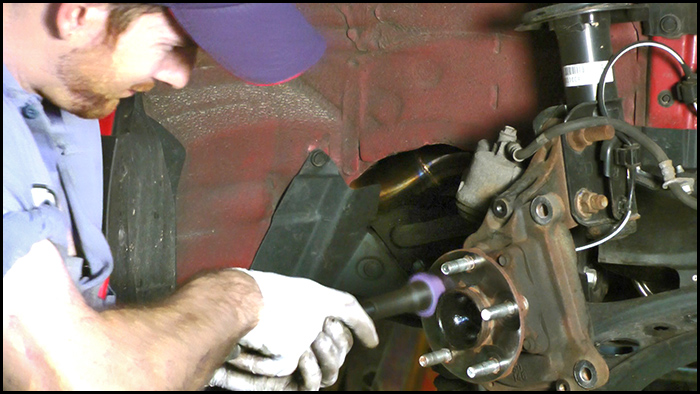 We continued to finish the install and bedded the brake pads which is critical to making sure the system works properly and quietly. Jeff from Essex has a page dedicated to how to do that. Also @Mike CSG can give you further tips for track as well as special ways to do this with race pads. Either one of these guys can help, with @JRitt being the god on the topic after countless years of experience. So after owning a Lotus Exige and Atom both with AP Racing brakes, I knew and had high expectations for this kit.  After installation and bedding, even on the street this kit was by far one of the best investments we made. Having a good pad on the factory brakes was absolutely nothing on how the AP kit feels and stops. Even with the less aggressive DS2500 pads. We now had the brakes of a real sports car. I would easily put the on par with the AP stopping power on the Exige for the street. We had Automobile Magazine drive our car for an upcoming issue and a pro driver on the track. No one, who has driven this car had anything remotely negative to say about the braking system. And it comes down to one thing. While brakes may not be the highlight of a sports car, it can certainly cripple one if they don't work properly.  During our review after 2 hours on the track and over 10 hours road testing, this kit was by far one of my favorite useful changes to the FR-S/BRZ. If anyone is in the market for brake upgrades for track. Save the money for this kit and don't waste it buying several types of rotors and pads. We did that, and no setup compared to this. Well there has to be some negatives right? You bet. The calipers do not have dust boots. What that means is if you live in an area with high levels of salt in the winter or in dusty off road conditions, you will destroy the caliper seals and will need to have them rebuilt. The question is what is the alternative?  We are going to swap back to stock front calipers for the winter which should be about an hour swap plus bleeding time. Or we could run them and rebuild them for safety in the spring. The bottom line is when you dump money on your car you want items that show a high level of return, have a story behind them and people who support and know the platform. This kit meets all of those requirements from us. We highly recommend it, no BS. 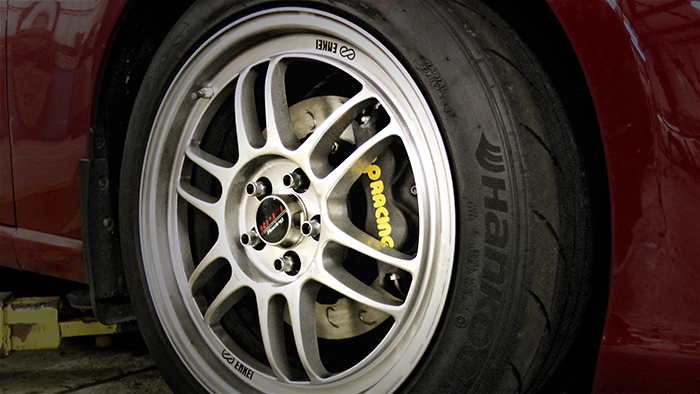 Support and Products Provided By: ESSEX WEBSITE WITH FULL PRODUCT DETAILS COUNTERSPACE GARAGE
__________________
Last edited by Dezoris; 08-19-2013 at 11:11 PM. |
|
|
|
|
08-28-2013, 02:29 AM
|
#70 |
|
Senior Member
Join Date: Aug 2012
Drives: FR-S
Location: IL
Posts: 2,857
Thanks: 519
Thanked 2,997 Times in 1,095 Posts
Mentioned: 159 Post(s)
Tagged: 1 Thread(s)
|
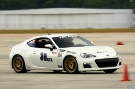
Americanizing the FR-S |Vortech Finale Track Review | Part 4 of 4
 Previous Videos in Series:  [ame="http://www.youtube.com/watch?v=YFO_gaR7ZYg"]  [/ame] [/ame] PART 4: SERIES FINALE VIDEO: 0:00 - 1:10 Intro 1:12 - 4:50 Automobile Magazine Test Drive 4:56 - 5:40 Wheels and Brakes 5:40 - 8:12 One Lap with Turbowski 8:15 - 12:13 Track Impressions with Peter J and Turbowski 12:15 - 13:05 Final Impressions on Perrin Tuning and Support 13:05 - 16:30 Post Track Fluids and Maintenance Checks 16:33 - 18:33 Final Thoughts on Vortech 18:44 - 19:30 Chasing Down Problems and Final Thoughts 19:32 Credits [ame="http://www.youtube.com/watch?v=FGVbTktgi0Y"]Scion FR-S BRZ Supercharged Track Review Finale | Part 4 of 4 - YouTube[/ame] Scion FR-S S240 Testing began in April and after nearly five months of we have concluded evaluation on street driving, auto cross and track. We have met most of our goals. Americanizing the FR-S has mostly been a success. We have attempted to help the community by providing transparent details, videos and general information about the FR-S and BRZ with little bias. We are not and will never be vendors and have no interest in selling products or services. All we want to do is to help produce meaningful content, reviews and help other enjoy the ownership experience for years to come. This approach has been successful in garnering support from owners and vendors in terms of support that would not have been possible otherwise. We are grateful for this and thank all who are involved. Goals:
 Planning for the Finale · Work with Vortech Engineering and Brian to address any final fitment issues with the kit. · Work with Jeff Perrin and Chris Cone to make sure our Perrin tuning was setup in a safe state for some of the hardest driving the car will face. · Discuss brake options with Jeff Ritter at Essex / AP Racing about solving brake anxiety. · Coordinate with Peter Jankovskis on private track sessions at Autobahn Country Club for durability testing. · Schedule and work with Automobile Magazine for testing and review for November issue. Preparation: We knew that the car was running well and with our v11 tune revision from Perrin installed, the car finally felt refined in drivability, something that was critical. We received our AP Racing Spring Kit from Essex and performed the install. We knew that for the Automobile Magazine Review we needed to address any and all brake anxiety. After owning and operating a Lotus Exige and Ariel Atom with AP Racing brakes we knew that what we wanted was something designed by brake experts that were track focused but were not obscene to replace or service. FULL INSTALL REVIEW HERE: http://www.ft86club.com/forums/showthread.php?t=44745 We bled the brakes and bedded the Ferodo DS2500 pads in preparation for the Automobile review on a Saturday in Michigan. We changed the wheels to Enkei RPF1s at 17x8 mainly because Essex designed their brake kit using these wheels and we were after only weight savings and not much else. This allowed us to switch to 235/45/17 Hankook Ventus RS3 tires. We were running the 225 RS3s and loved them. Despite knowing from the track guys that 235 width appeared to be slower our extra power output forced us to switch to them for stability. The Trip to Automobile Magazine: From Illinois to Ann Arbor Michigan we stopped for an alignment check and then at Tire Rack to have them switch the tires on our new wheels. Typically I have switched to Discount Tire for these services but they have longer lead times on tires. Of course this choice proved annoying as when Tire Rack was finished they had wrote in sharpie the wheel location on each wheel which would not come off and they wheels were not filthy with the tire lube. Normally I could care less but since the car was going for a photo shoot it pissed me off I had to stop and clean them. After arriving in Ann Arbor one thing was clear, the hotel they put us up in was quite nice which made up for the long drive.  Michigan Roads:  I have been in Michigan plenty of times and never understood why people always said their roads were bad. Well lets just say the closer you get to Detroit and Ann Arbor towards the center the more it was like entering a third world country. It was the only area in the Midwest I had been where 4 on ramps in the town connecting to major interstates were closed because of road conditions. The car was on a stock suspension, clearly Toyota and Subaru never tested the car here. It made me realize why so many people around me were in monster trucks and SUVs. This was not the place for any sport car or firm suspension setup.  Automobile Magazine Test Drive with Chris Nelson We met and I took a tour of their office, learned about the different teams involved in producing the articles and photos for e-readers and physical media. They then showed me how they lay out new issues using a white board. The entire time I thought to myself how this was my dream job when when I was in my 20s. Now that I have my own career, cars work better as a hobby. And lets face it working for a big publication means one thing: you cant be honest without losing your job. Chris and the photographer led me to an abandoned GM plant for the photos. Either they were going to tear my clothes off and leave me for dead or actually shoot the car. In this case although I have a stellar body severally oiled up, they started photo shoot of the car which was perfect for the Americanizing concept. After about 2 hours of driving in circles and doing lead follow the process ended and it was time for Chris to drive the vehicle. 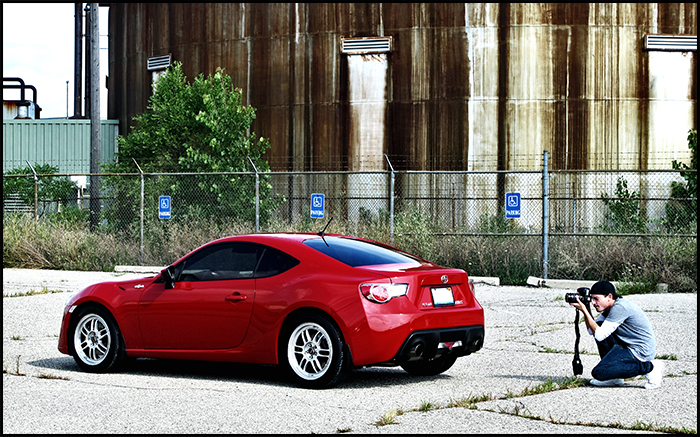 He took the wheel and started his initial driving test to familiarize himself with the car. It was then onto the highway to test some acceleration and braking. After about two hours of tooling around he started to get ballsy and wanted to launch the car which I allowed but was not very keen on. This car with super sticky tires requires a high RPM launch to get anything going. Since ECUtek has a pseudo launch control program set, I instructed him to hold the car in first with clutch down and floor it to activate it. There was clearly some communication issue as his first attempt was a rev to redline and release the clutch. The result was glazing the disk and a stench like someone burned ET with a propane torch. http://www.youtube.com/watch?v=4w6fyCgpv5o Exactly what I did not want to happen but lets face it this is to be expected when someone else goes and tests your car. His further attempts worked better but it was clear to launch the car you need clutch damaging levels of revs. After he completed the performance tests and impressions we sat down to eat and discuss the project and article. He asked me why I was doing this, and it hit me as much as I hated modifying cars it was exactly what I was doing, and I was strangely annoyed by it all. But I felt in this case I had some purpose here maybe something to prove. At the end of the day I had no idea where this would all end, but the end game in this project was to learn and help others. Chris will be writing about the tuning obsession in the November issue, but his impressions overall were simple it was a car that he would drive every day and not be embarrassed. 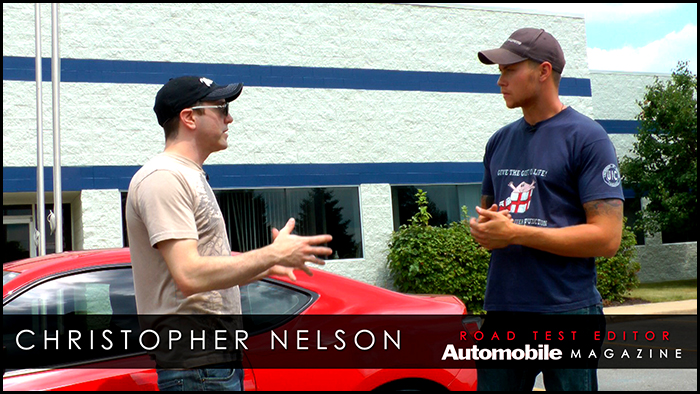 Track Testing with Peter J. Autobahn South, Joliet, IL The car was driven from Ann Arbor Michigan back to Joliet Illinois for our private track day with Peter J. After 4 hours and countless additional hours behind the wheel I was tired. But once Turbowski arrived at the garage packed with all the cover your ass tools we needed, pulling into to Peters private garage that holds his SRF fleet and Lemons BMW was a relief This garage was more of a shop/house, with living quarters upstairs, lifts and all the supplies you would need. Scott met Peter working with Elite Motorspors as a crew mechanic and from his help in World Challenge. I met Peter in Karting and he is one of those guys you rarely meet, a great guy, fast driver and very successful. 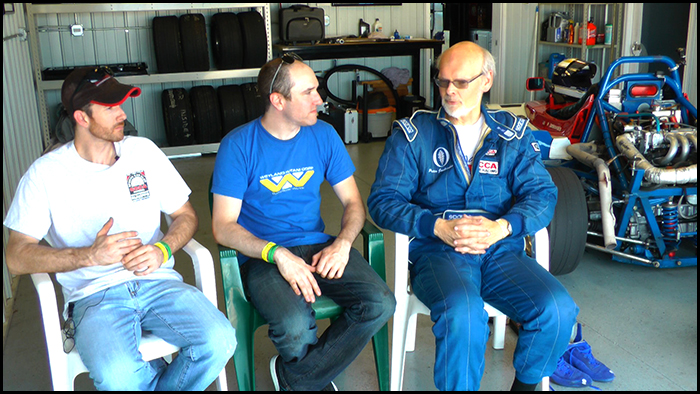 However, in karting it was a love hate relationship. He was a chess player, deadly consistent with the seat time and skill to make you pay for any mistakes. His driving style is metronome consistency. In racing, I struggled with consistency. There were times where my focus and speed were dominant but overall, I was always settling for 2nd or 3rd. Peter and Turbowski were constantly at the top. Even as Turbowski battled in the spec classes, I was always struggling to get ahead and stay ahead. But the point was we all have had seat time together and can basically run the car and come to some solid conclusions. At the end of the day this was a street car, not a race car and that is where things are much more difficult. 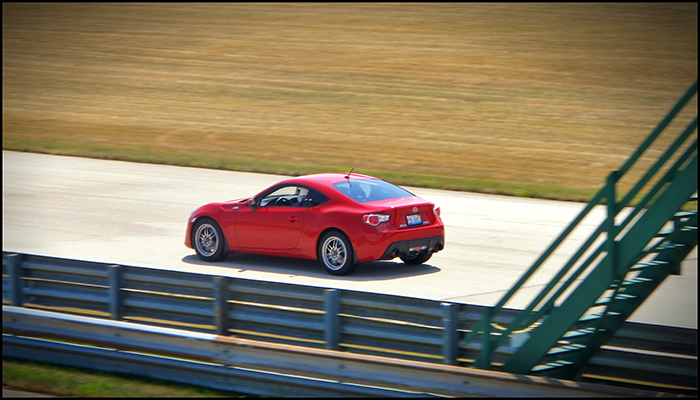 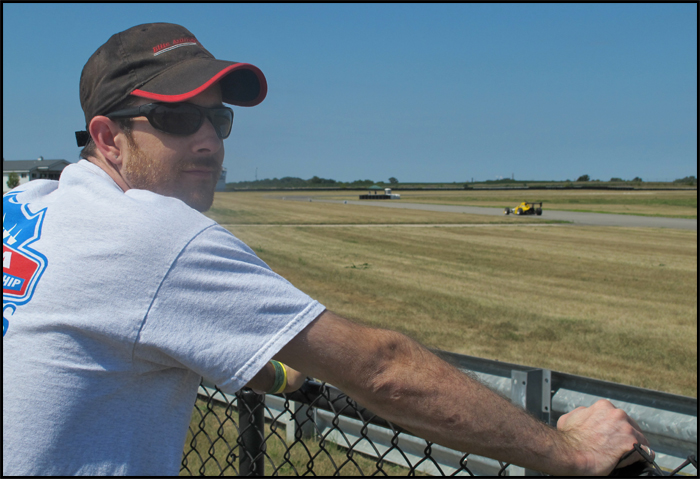 Our first three sessions were getting a feel for the car, learning the limits of the suspension, tires and braking thresholds. I made it clear this was a durability test not a ball to the wall sprint. We discovered a vibration we had only under left hand turns. We looked at everything and thought for sure it was wheel rub. After listing to our chassis/floor mounted mic it was definitely something vibration related. Problem is you cant re-create it on the street only under full load. We spent plenty of time in the shop and we believe the vibration is related to the engine moving under load causing the Perrin over pipe making contact with the Stranoparts Sway Bar. The Strano bar is probably a great choice for a stock car only doing autox. But honestly I had rubbing noise and issues from the get go. Sam the designer of the bar has 14 national championships in autox and I am on the same page with him in terms of setup. But, his bar has issues and so does his attitude about it. Its coming off for our next track test. Other than that for the last two sessions I sent Turbowski out so I could focus on video and data logging. His last session was open ended almost solo. After about 40 minutes on the track I was wondering if he was ever going to pull in. Finally he told me, Holy shit, I almost ran out of fuel or I would not have come in! The car is thirsty, blowing through roughly 10 gallons of race 93 Octane in 40 minutes.       Final Track Impressions: Engine We had zero issues with knock or performance degradation after over 2 hours on track. Performance was consistent. Turbowski wanted more power but he felt overall the car was about as perfect as you could get for a street car on track with plenty more left on the table even on stock suspension. Peter mirrored that by saying the Vortech was perfectly suited for the track as the high end was always pulling. The Perrin tune did the job here providing that safe operating window and everything felt consistent lap after lap. 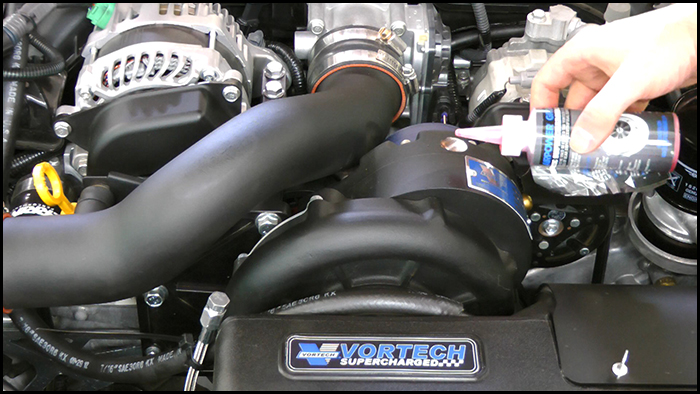 Brakes @jritt  Our AP Racing brakes were amazing. We could not get the brakes hot enough to use our full race pads from Counterspace Garage. We stuck with the hybrid Ferodo DS2500 and had zero fade. We drove them to the track and left with them. We only had to add a small amount of brake fluid back in the system. 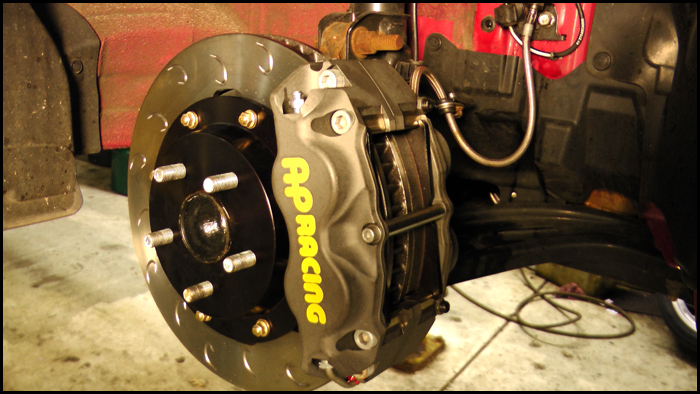 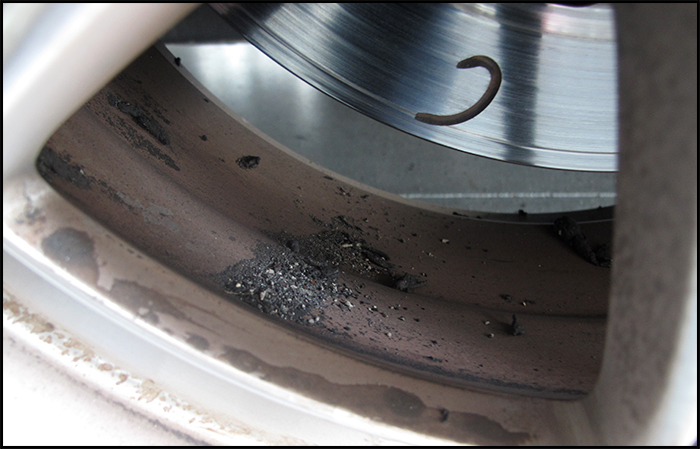 Cooling The oil cooler worked well up to 30 minutes, after that the temps went from a fairly solid 240F to 255F. After talking to Jeff Perrin he said if we were going to run frequent 40 minute sessions it was best to upgrade to a bigger core. As the coolant was now running at 210F constant. This could be the efficiency of the Koyo or just the fact the engine is generating more heat than the small oil cooler and radiator can handle. However as a work around our next test Jeff will be sending us a flash revision that cycles on the cooling fans at 200F instead of the factory 212F to see if that improved efficiency. So our 30 minute tests showed the cooling systems working well. Past that oil and coolant start to rise past stable levels. We had burned through some coolant as well due to evaporation. Suspension What was amazing here was even with the wider super sticky RS3 tires the chassis still have plenty of overhead on the stock suspension. We do have camber kits with street safe alignment levels but it was clear this car could takes so much more power than what we were feeding it. Now could we improve lap times with a properly setup suspension kit, probably. But we were left questioning why even bother when this was primarily a daily driver. The stock suspension performs so well that its actually something we are afraid to touch.   Plenty of the track guys claim this car is faster on 225 rubber. We cant quantify that but the 235 tires made this car much more stable feeling which improved confidence. Turbowskis complaint was it was too stable almost too predictable. The 235 setup however definitely slows steering response, my bet would be that a staggered 225 front and 235 rear would be optimal but at the expense of tire rotations. Sacrificing tire rotations for slightly quicker turn in response is not worth it. Post Track Analysis: We knew for a street car over 2 hours on the track is extremely high wear. We decided to change the supercharger oil, engine oil, trans oil and diff oil as well as bleeding the brakes and refilling coolant. Our alignment did not go off which was excellent news for once and all of the fluids changed without drama. Tire wear was excellent as well the car provided itself to be as reliable as we hoped. 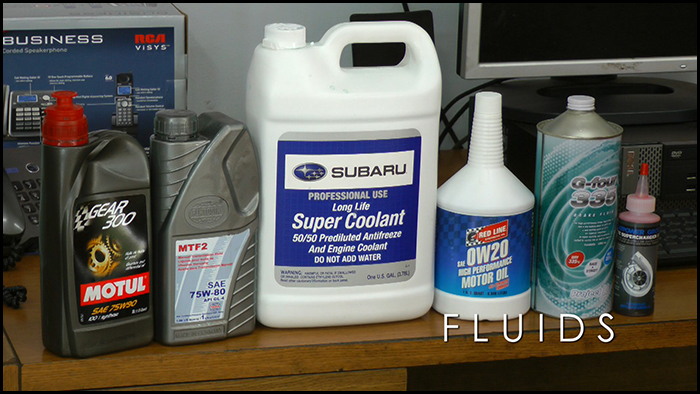 Our Radium catch cans were working as we captured a good 2oz of unspent fuel and blown by oil from the track day. Another reason for those with FI to seriously look at this. 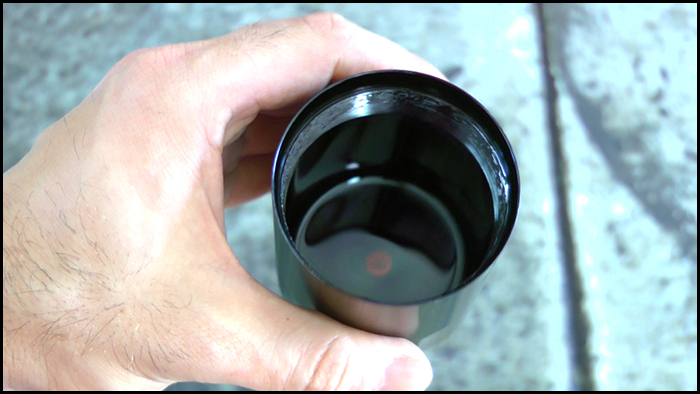 We decided to send out the engine oil for analysis to Blackstone and also the trans fluid after seeing how horrible it looked and smelled. As it turns out our engine oil after 3000 Miles with 2 hours track 30 minutes of autox and long test drives looked as perfect as it could. Our catch can was working, no wear materials and our Redline TBN was looking extremely well. It seems this motor is happy and reliable with the Vortech Kit and Perrin Tune.  ENGINE OIL 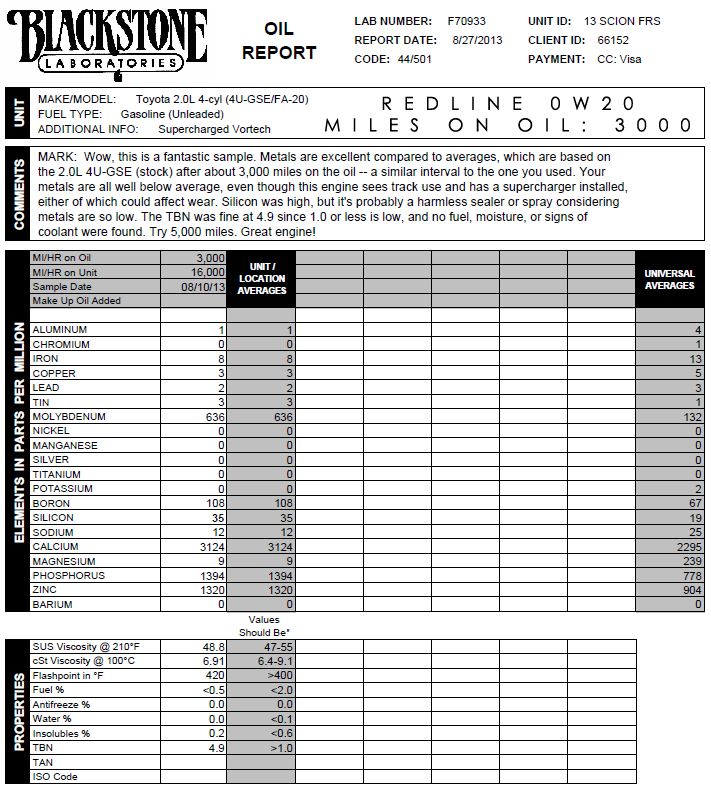 The transmission on the other hand is a caution area. After the track day the shifting was noticeably different. Gear changes felt smooth, no binding or hesitation but going into 3rd and 4th were definitely slicker. Its possible we just finally got the co-webs off or just wore the fluid down. The oil looks grey as it poured out, the fresh fluid was a near amber color. Based on the Blackstone report they said it could be from the case, or bearing wear. They dont have enough data from these transmissions to know. But suggested we send another sample to monitor the aluminum levels. TRANS FLUID 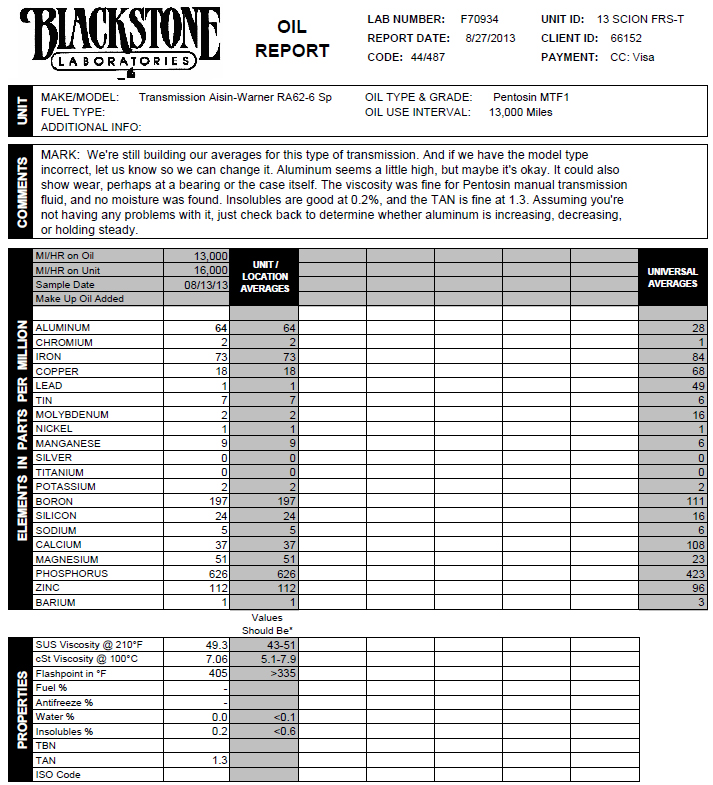 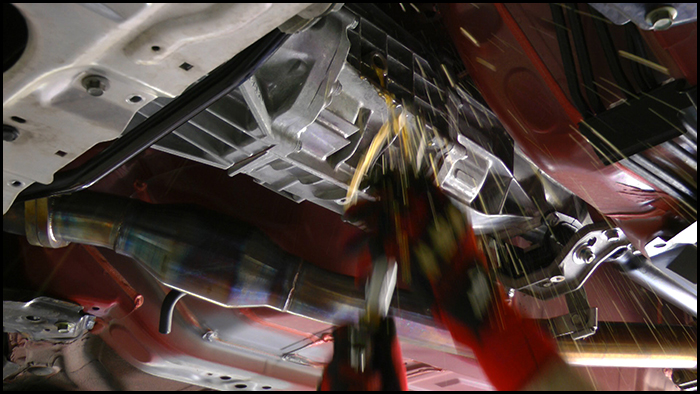 Vendors:  This project for the most part started with my contact to Jeff at Perrin. I explained what I wanted to do and he supplied me almost everything that was needed to see the project through. During the speed bumps Chris Cone supported my weekly questions in terms of issues with Vortech and the tuning process. Their customer support and reputation as a tuner and manufacturer are very good. Initially their responses to my tuning questions were slow but again this is because they have a full shop.   In terms of Vortech Supercharger there is not another major tuner who has been more involved than Perrin since the start. This is exactly why I chose them. They actually own a daily driven Vortech BRZ. What you get is a safe stable tune that has proven to work without any drama or damage to the motor thus far. If all you care about is max power you may have to go elsewhere.  We started the drama with the Vortech kit. And we stand behind our impressions that documentation was poor and some of the components were rushed to market. But lets end some of that here by saying after our video we have talked directly to Vortech including engineering about documentation to improved parts. Thus far they have been following through on all the recommendations. We are going to finally recommend this kit as the top supercharger solution for the following reasons:
Now of course not is all golden, the install can and will be a bitch for first timers until documentation is updated there are plenty of holes in instructions with room for error. The washer fluid tank is garbage bin quality, including brackets. This needs to be improved or offered as an upgrade. Vortech never intended to include it so basically they half-assed one together just to say they tried. No offense Vortech but thats the truth.  The oil change interval sucks. (7500 miles), its one of those fine print items you learn after the fact. Granted after your first few oil changes its quite easy to do and cost is low however its another item you have to deal with. The big question remains that remains is winter weather performance. For those who dont stow the car away its an unknown whether we are going to destroy bearings on cold weather starts. CONCLUSION There are a few other issues that we have detailed but we stand behind our choice to use Vortech and they have proven that they are serious about supporting this car and have went above and beyond for our project. We are confident in the kit now after testing. And now recommending it if you want a supercharger. In fact until Innovate decides to intercool and offer a proper IAT solution the Vortech is the only supercharger to consider if you plan on daily driving and running at the track reliably without making fuel system changes and adding other cooling solutions. 
__________________
|
|
|
|
| The Following 4 Users Say Thank You to Dezoris For This Useful Post: | Alfalasy (08-28-2013), forwallblakmail (08-28-2013), sprintertrueno86 (08-28-2013), Turbowned (08-28-2013) |
|
|
|
|
 |
| Tags |
| ap racing, daily driver track, dezoris, ohlins, perrin, properly built 86, vortech supercharger |
|
|
 Similar Threads
|
||||
| Thread | Thread Starter | Forum | Replies | Last Post |
| TWINCHARGED (Supercharged & Turbocharged) Widebody "WTF-86" 86/FRS *MASSIVE* build :D | WTF | Member's Car Journals | 224 | 08-18-2016 09:39 PM |
| Pneubs HKS Supercharged BRZ Build Thread | Pneub | Member's Car Journals | 62 | 03-30-2016 09:47 AM |
| (Boosted) FRS vs S2000... Dezoris strikes again. | CSG Mike | FR-S / BRZ vs.... | 156 | 09-08-2014 01:16 AM |
| Morpheus, Scion dream Build. Supercharged FR-S by TuneCast | scionsalesjay | Member's Car Journals | 51 | 07-07-2014 12:05 PM |
| Supercharged Rocket Bunny Widebody Conversion Build Thread | RWDRIFT | Member's Car Journals | 278 | 01-06-2014 12:12 AM |


