


|
||||||
| Suspension | Chassis | Brakes -- Sponsored by 949 Racing Relating to suspension, chassis, and brakes. Sponsored by 949 Racing. |
 |
|
|
Thread Tools | Search this Thread |
 07-13-2013, 05:58 PM
|
#1 |
|
Senior Member

Join Date: Nov 2012
Drives: 2013 Subaru BRZ Limited SWP
Location: Myrtle Beach, SC
Posts: 160
Thanks: 14
Thanked 85 Times in 36 Posts
Mentioned: 10 Post(s)
Tagged: 0 Thread(s)
|
Koni Install Issue
Hopefully I have the right part number, but I'm doing a rear strut install with Koni struts and RCE yellows, but the shaft of the Koni is thicker than the OEM shaft. Unfortunately the hole in my rear strut top is too narrow for the threaded portion of the Koni shaft.
Anyone run into this before? If I need to drill out the hole in the top mount, what size drill bit. Part # on box is 8041 1416SPORT I've bought another set of suspension, so the top mounts I'm using are from a FR-S and my car is still together, so I'm not stuck, but I'm getting a bit frustrated.
__________________
Derek
 2013 BRZ Limited SWP Professional driver in search of closed course.. |

|

|
|
07-13-2013, 06:36 PM
|
#2 |
|
Senior Member

Join Date: Sep 2012
Drives: White FR-S, 6M
Location: East Tennessee
Posts: 272
Thanks: 70
Thanked 92 Times in 53 Posts
Mentioned: 3 Post(s)
Tagged: 0 Thread(s)
|
Yeah, you got to drill it. I'm not sure of the size just match the bit up with Koni threads. I'm not sure on the part numbers but I remember having to drill.
__________________
|
|
|
|
|
07-13-2013, 06:44 PM
|
#3 |
|
Senior Member

Join Date: Aug 2011
Drives: 2013 FRS Asphalt
Location: SF Bay Area
Posts: 1,155
Thanks: 309
Thanked 335 Times in 212 Posts
Mentioned: 21 Post(s)
Tagged: 0 Thread(s)
|
just checked for you. same part number as mine. We didnt have to drill anything. Also on konis with RCE yellow springs. Ill go take a pic
Scratch that Im a big fat liar. I just got confirmation that the top hats were in fact drilled. I was away taking the fronts apart. Sorry for any confusion. I believe this is described in the instructions no? 
__________________
2013 Scion FR-S AT Picked up 5/30/2012
Last edited by feldy; 07-13-2013 at 07:14 PM. Reason: big fat liar |
|
|
|
|
07-13-2013, 07:21 PM
|
#4 |
|
Senior Member
Join Date: Nov 2012
Drives: 2013 Subaru BRZ Limited SWP
Location: Myrtle Beach, SC
Posts: 160
Thanks: 14
Thanked 85 Times in 36 Posts
Mentioned: 10 Post(s)
Tagged: 0 Thread(s)
|
Thanks guys, I didn't see anything in the instructions, but the Koni instructions can be a little confusing. I'll look at them again just in case I missed it. I'll just try stepping up one drill bit size until it clears.
Also on the rears, the RCE bumpstops don't fit over the spacer that is welded below the threads either, so I wound up using the OEM bumpstop cut down to the same size. I also reused the OEM gaiter as well since the OEM bumpstop wasn't wide enough to hold the RCE gaiter in position. The fronts went together easily in comparison... I've been taking a lot of pics and notes to post a DIY on the conversion... Any more feedback/suggestions are very welcome.
__________________
Derek
2013 BRZ Limited SWP Professional driver in search of closed course.. Last edited by WolfSongX; 07-13-2013 at 07:27 PM. Reason: changing response when feldy confirmed drilling was needed |
|
|
|
|
07-13-2013, 08:32 PM
|
#5 |
|
Senior Member
Join Date: Nov 2012
Drives: 2013 Subaru BRZ Limited SWP
Location: Myrtle Beach, SC
Posts: 160
Thanks: 14
Thanked 85 Times in 36 Posts
Mentioned: 10 Post(s)
Tagged: 0 Thread(s)
|
Well I had a 7/16ths and a 1/2" bit... and 7/16ths is not quite enough and the 1/2 is maybe a bit too much. I hate not having a set of metric drill bits.
 I'm waiting for the paint to dry and will try again a bit later or tomorrow depending on how I feel.
__________________
Derek
2013 BRZ Limited SWP Professional driver in search of closed course.. |
|
|
|
|
07-13-2013, 10:11 PM
|
#6 |
|
Senior Member

Join Date: Jun 2012
Drives: Scion FRS
Location: Northern Indiana
Posts: 185
Thanks: 39
Thanked 86 Times in 45 Posts
Mentioned: 1 Post(s)
Tagged: 0 Thread(s)
|
Use a 12mm drill bit per instructions
__________________
We're not happy till you're not happy 2013 Scion FRS Whiteout 6MT SCCA RTR/Konis/RPF1's/Dunlop Z2's/Strano front bar/CG Lock/Crash camber bolts/JPM shift boot and Instrument panel cover. |
|
|
|
|
07-14-2013, 07:06 AM
|
#7 | |
|
Senior Member
Join Date: Nov 2012
Drives: 2013 Subaru BRZ Limited SWP
Location: Myrtle Beach, SC
Posts: 160
Thanks: 14
Thanked 85 Times in 36 Posts
Mentioned: 10 Post(s)
Tagged: 0 Thread(s)
|
Quote:
__________________
Derek
2013 BRZ Limited SWP Professional driver in search of closed course.. |
|
|
|
|
|
07-16-2013, 06:08 PM
|
#8 | |
|
Senior Member
Join Date: May 2013
Drives: 2013 Perl White FR-S
Location: Federal Way, WA
Posts: 100
Thanks: 34
Thanked 11 Times in 7 Posts
Mentioned: 6 Post(s)
Tagged: 0 Thread(s)
|
Quote:
__________________
Jim
 |
|
|
|
|
|
07-16-2013, 06:09 PM
|
#9 | |
|
Banned
Join Date: Jan 2012
Drives: Attitude
Location: MD
Posts: 10,046
Thanks: 884
Thanked 4,889 Times in 2,902 Posts
Mentioned: 123 Post(s)
Tagged: 4 Thread(s)
|
Quote:
I used a 1/2" drill bit for the rear top hats...fits fine. Not many people on this side of the pond have metric drill bit sizes or tradesman's assortment of bits. |
|
|
|
|
|
07-22-2013, 09:51 AM
|
#10 | |
|
Hypnotic FRS Member

Join Date: May 2012
Drives: FR-S [Raven]
Location: SandyEggo
Posts: 566
Thanks: 31
Thanked 106 Times in 79 Posts
Mentioned: 4 Post(s)
Tagged: 0 Thread(s)
|
Quote:
? |
|
|
|
|
|
07-22-2013, 10:12 AM
|
#11 | |
|
Detroit Region, MI

Join Date: Apr 2012
Drives: 13 BRZ, 13 Volt, 02 WRX
Location: Some Abandoned Slab of Concrete
Posts: 738
Thanks: 20
Thanked 200 Times in 143 Posts
Mentioned: 2 Post(s)
Tagged: 0 Thread(s)
|
Quote:
In all, its a 2mm ID delta, you can always use a spacer/washer if you are that worried about it not being centered or if you are worried about the interfacing area being insufficient for the load when you go back. The rear damper doesn't play into the alignment of the rear wheel, so that tiny fraction of a degree of change you would get from +/- 1mm in each direction will be insignificant. I'm not sure why exactly you would ever want to go back to OE dampers... Koni yellows shouldn't be considered a performance modification in terms of a warranty, if that is what you are concerned about. They are basically an OE replacement damper, using very typical OE replacement damper installation methods.
__________________
Detroit / NWOR SCCA Member
2005-06: #192 ES 91 MR2 N/A Hardtop 2007-08: #54 STX 05 WRX Sedan 2009-12: #92 BSP/ASP 07 Solstice GXP 2013-14 : #192 CS 13 Subaru BRZ |
|
|
|
|
|
07-22-2013, 04:49 PM
|
#12 |
|
Senior Member
Join Date: Nov 2012
Drives: 2013 Subaru BRZ Limited SWP
Location: Myrtle Beach, SC
Posts: 160
Thanks: 14
Thanked 85 Times in 36 Posts
Mentioned: 10 Post(s)
Tagged: 0 Thread(s)
|
I took a ton of pics with doing this conversion and finally got them on the car. I didn't document the install/removal because that's been done a few times already. Hopefully my ancient computer will behave and work (I use a tablet from home now and I'm not allowed to use my work computer for image editing/uploading.) so I can get the images processed and uploaded.
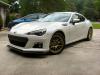
I still need to get the alignment done, so I haven't had a chance to really test things out or play with the adjustable settings on the strut. I'm running the struts on full soft at the moment, but the most noticeable thing is how smooth the weight transitions are with this car now... and stock it wasn't a slouch, so that's saying a lot. I wouldn't say that you give up a lot of comfort, but the car feels noticeably lower now and very solidly planted. Win-Win in my book.
__________________
Derek
2013 BRZ Limited SWP Professional driver in search of closed course.. |
|
|
|
|
07-22-2013, 08:41 PM
|
#13 | |
|
Banned
Join Date: Jan 2012
Drives: Attitude
Location: MD
Posts: 10,046
Thanks: 884
Thanked 4,889 Times in 2,902 Posts
Mentioned: 123 Post(s)
Tagged: 4 Thread(s)
|
Quote:
|
|
|
|
|
|
07-22-2013, 09:17 PM
|
#14 | |
|
Lap time enthusiast

Join Date: Jul 2012
Drives: Asphalt '13 FR-S 6MT
Location: South Florida
Posts: 1,332
Thanks: 725
Thanked 727 Times in 389 Posts
Mentioned: 76 Post(s)
Tagged: 5 Thread(s)
|
Quote:
|
|
|
|
|
|
|
|
|
|
|
|
 Similar Threads
|
||||
| Thread | Thread Starter | Forum | Replies | Last Post |
| KONI SHOCK VALUE SALE limited time only @ Circuit Motorsports! Lower prices all Koni | Circuit Motorsports | Brakes, Suspension, Chassis | 115 | 08-30-2013 10:29 AM |
| Need help fast - suspension issue during spring install | finch1750 | Scion FR-S / Toyota 86 GT86 General Forum | 5 | 07-08-2013 03:30 PM |
| Koni inserts or wait for full Koni replacements | Mango22 | Suspension | Chassis | Brakes -- Sponsored by 949 Racing | 18 | 05-18-2013 05:48 PM |
| KONI!! Are here! | Turn in Concepts | Brakes, Suspension, Chassis | 14 | 04-01-2013 06:38 AM |
| Pulley install issue | Boxer-86 | Engine, Exhaust, Transmission | 9 | 10-21-2012 07:37 PM |


 Faylene

 C-Street BRZ
 Arya
Arya