


|
||||||
| Member's Car Journals Car journals by our members. |
 |
|
|
Thread Tools | Search this Thread |
 02-02-2015, 10:27 PM
|
#1 |
|
Member
Join Date: Jul 2014
Drives: 2013 Firestorm FR-S
Location: Arizona
Posts: 61
Thanks: 26
Thanked 68 Times in 31 Posts
Mentioned: 0 Post(s)
Tagged: 0 Thread(s)
|
The Schlitzed FR-S Build
Edit: To see the latest updates as they come your welcome to follow me on IG @frscargo.
A Special Thanks to the folks at GoodSpeed Performance Lab in Phoenix who did an amazing job on the turbo, tune, and gauge installs. My experience with them has been incredible and their knowledge is tremendous. One of the most fair shops I have ever dealt with. I highly recommend you look into them no matter where you live but especially if you are within any reasonable driving distance. I drove 4 hours to get to them and it was worth every minute. Another thank you to Eric Li at ModBargains for awesome customer service and putting up with me. I had some interesting things happen due to delivery and he went above and beyond to make sure that I got taken care of like it was his own car. If you are going to look at buying something online I suggest you look into talking to this guy. Mods So far:
The beginning I want to start by pointing out that I am married, I have an awesome little girl, that loves cars already, who is 3 years old. One of my buddies "encouraged me" to look at the FT86 and I decided to take it for a test drive. The first time I drove it I knew it was the car I wanted. so after a couple of weeks texting my wife pictures of different FRS and BRZ builds, she was sitting next to me when I would text her, she finally said okay. Now I was skeptical when she said okay, and my response was a "really?"Mod 1 Perrin 3" CAI: For this mod I just followed the instructions that came with the Intake. Its pretty self explanatory. But this is a great step by step for the CAI install Cold Air Intake Install. Now there is something here that I ran into that I have not seen anyone touch on, and that didn't come as a warning in the documentation I received. BE CAREFUL how much you tighten the filter. I tightened the filter until it stopped slipping off the pipe, even after getting rid of all the oil from the inside of the rubber, and after a while the rubber tore. I hand tightened this with a driver as well, no ratchet or power tools. Mod 2 Perrin Inlet Tube: I did this mod at the same time I did the CAI. It was really strait forward. Just take your time and pull things out easy. Don't force it if you have to force it take a step back and look. Here is a link to the actual Perrin Instructions. I installed an amplifier in my car at one point so here is a good tip. The tube that they have you leave in and cap off, it pops right out, easy to pop back in, and if you remove it there is a perfect whole through the firewall for a 4awg wiring kit. you could also potentially use this for running wires from gauge sensors too. Be smart though and get a grommet for it or at least put some additional loom around the wire that will be resting in on the metal. Perrin 3" CAI and Inlet Tube drive by I had no additional modifications at this time. [ame]http://youtu.be/fLVqbt-EQ74[/ame] Before:  Everything installed:  Finished:  Mod 3 Perrin 3" resonated cat back: It took a long time before I decided on an exhaust. I wanted to find something that sounded good. Not obnoxious but something that sounded smooth and opened up when you got on the throttle. After listening to lots of different options i decided on the perrin resonated. The install is really easy and there really isn't much to it. The V Band clamps are great. you can find the install instructions from Perrin here http://perrinperformance.com/attachment/117368-.pdf to get an idea of what needs to happen. One thing that I don't like about the exhaust is the fitment is ALMOST perfect. It doesn't sit perfect in the middle of each cutout in the factory diffuser but its close. I think that I can adjust it but that will have to wait when for when I get it back. I will give it a go and provide some details if everything comes out right. Recommendation: Have a buddy help you, and have 4 jack stands. It will make this install much easier. Parts  Stock and Perrin side by side  Installed:  here is a video of what the exhaust sounds like. [ame]http://youtu.be/vTb_dWyYCsM[/ame] Last edited by schlitzed; 02-29-2016 at 09:32 PM. |

|

|
|
03-14-2015, 12:46 AM
|
#2 |
|
Member
Join Date: Jul 2014
Drives: 2013 Firestorm FR-S
Location: Arizona
Posts: 61
Thanks: 26
Thanked 68 Times in 31 Posts
Mentioned: 0 Post(s)
Tagged: 0 Thread(s)
|
Mod 4 Tein StreetFlex Coilovers + Megan Racing LCA:
I decided on adjustable coil-over because I wanted to be able to adjust my ride height mostly, and other things as i get more familiar with the adjustments. I found a very helpful post that got me through the install fairly easily. You can find the guide i used here http://www.ft86club.com/forums/showthread.php?t=12864 big thank you to GrimmSpeed for putting that together. One thing that I noticed was missing from the guide, and this is for people like me that have never done it before, is this; Disconnect the sway bar linkage on both sides of the vehicle before you install a set of coil-overs. The reason for this is that the coil-overs are going to be shorter than the factory assembly. So if you do not disconnect both sides first you will essentially increase the distance the sway bar has to reach. This will make it very very difficult to connect the linkage back up to the new coil-over. When you do this you are going to want to do a good lower control arm for the rear as well to make sure that you can adjust your camber as needed. here are some pictures of my install. Lastly DO NOT go driving around trying to check out how the new suspension feels after you install it right away. Plan on the cost of a good alignment before you do anything else. When you take it for a drive to let it settle, take it easy. There is a good chance that all of your wheel will be pointing in different directions. It will feel like you are riding on the back of a snake, and the faster you go the more exaggerated this will become and it can be dangerous. Once you let it settle verify the height on all of your wheel wells to the center of your hub then, i know i am saying this again, GET IT ALIGNED! Factory assembly in the front:  Factory Assembly in the rear  Up on stands and ready to be taken apart  Couldn't ask for better help than this.  Comparisons   All Finished   1.2" drop with stock wheels at this point 
__________________
My Build and Journal
How I made MY 86 IG @frscargo Last edited by schlitzed; 03-22-2015 at 03:51 PM. |
|
|
|
|
03-14-2015, 01:01 AM
|
#3 |
|
Member
Join Date: Jul 2014
Drives: 2013 Firestorm FR-S
Location: Arizona
Posts: 61
Thanks: 26
Thanked 68 Times in 31 Posts
Mentioned: 0 Post(s)
Tagged: 0 Thread(s)
|
Mod 5 FORCED INDUCTION
So I decided that I wanted to do forced induction. Saw videos of FI on the twins, and it is just bad ass. I also watched a couple race with FI, and a guy in town put a SC on his. I looked and looked and decided on the FullBlown stage one kit. It definitely seemed like one of the most comprehensive kits out there. It also puts some great numbers down on the dyno I will get into all the parts I got with the kit, what I upgraded, why, and things I ran into with the kit that I didn't find on the forums and what I decided to do as a workaround. I went through modbargains to order my kit and their service was awesome. A buddy of mine got some mods through them, he had a good experience so I went with them and was not disappointed. Here is a picture of the Full-blown kit when I took inventory after delivery. 
__________________
My Build and Journal
How I made MY 86 IG @frscargo |
|
|
|
| The Following User Says Thank You to schlitzed For This Useful Post: | raven1231 (03-22-2015) |
|
03-14-2015, 09:56 AM
|
#4 |
|
Senior Member

Join Date: Oct 2013
Drives: Silver FRS
Location: Charlotte
Posts: 181
Thanks: 105
Thanked 154 Times in 57 Posts
Mentioned: 2 Post(s)
Tagged: 0 Thread(s)
|
I like where this is heading! subscribed for updates!
|
|
|
|
| The Following User Says Thank You to Thornley For This Useful Post: | schlitzed (03-14-2015) |
|
03-22-2015, 02:09 PM
|
#5 |
|
Member
Join Date: Jul 2014
Drives: 2013 Firestorm FR-S
Location: Arizona
Posts: 61
Thanks: 26
Thanked 68 Times in 31 Posts
Mentioned: 0 Post(s)
Tagged: 0 Thread(s)
|
Mod 5 FORCED INDUCTION Parts
One of the things that I really wanted to know when i was searching for kits was everything that came in the kit. what it looked like etc.. So Thats what this list is. There is a picture above of the kit. Here is a list of everything that I got in the kit and the things that I ordered extra after doing some research. I will go into lessons learned ordering this kit and what my recommendation is based on what I learned. Take it or leave but keep in mind that I am a novice at the time of writing this and I would recommend finding a reputable shop/mechanic that is willing to give you advice on parts for your application and goals. If you do this don't be a tool, and make sure you give them a tip for their time, especially if you are going to do the install yourself. FullBlown Motorsports Base stage1 kit contents: Manifold Downpipe Dump Tube GTX3076R (I upgraded to this) Precision 39mm wastegate Tial 50mm BOV 270LPH Fuel Pump Bosch 500cc injectors Plug and play adapters (For Injectors) Oil Feed kit Oil Return Line Turbo/Intercooler Hardware Intercooler Intake Pipe Turbo Coolant lines Intake Manafold Tee Coolant reservoir mounting kit 2 Slim Fans USB with Instructions and base map (7psi) Welded oil pan ECUTek Cable and License (I added this) 4Bar Map Sensor (I added this) Additional Items that I ordered for my Forced Induction setup: Mishimoto oversized radiator Mishimoto Baffled catch can. AEM TruBoost gauge GoodSpeed E85 conversion kit w/ round ethanol content gauge. ATI Tripple Meter Gauge pod for FRS/BRZ Turbo Blanket (I had GoodSpeed pick the best one for me) Heat Wrap Motul 300v gear oil 5w-30 engine oil (I went motul i like their product.) Custom GoodSpeed Tune Deatschwerks DW65c Fuel Pump Nvidia Overpipe Nvidia Resonated Test Pipe
__________________
My Build and Journal
How I made MY 86 IG @frscargo Last edited by schlitzed; 03-22-2015 at 03:52 PM. |
|
|
|
|
03-22-2015, 02:53 PM
|
#6 |
|
Member
Join Date: Jul 2014
Drives: 2013 Firestorm FR-S
Location: Arizona
Posts: 61
Thanks: 26
Thanked 68 Times in 31 Posts
Mentioned: 0 Post(s)
Tagged: 0 Thread(s)
|
MOD 5 Forced Induction Extras and Why
Here is a breakdown of the list above and why I decided to go with these extras. I will try to add some references for my decisions later. Mishimoto oversized radiator - Well a Turbo Generates lots and lots of heat, I wanted a DD and Track car that is reliable. If you can i recommend getting an oil cooler too. I will be doing this later. Basically anything to beat the heat is a good idea. I read lots of posts and saw some first hand issues with guys tracking/autocrossing their cars after FI and heating being a real problem. Mishimoto Baffled catch can. - Boost will produce more blow-by gasses and it will reduce the octane rating of your fuel if it enters your intake manifold. Be smart invest in this BEFORE you install any forced induction setup on these cars. maintaining fuel quality is going to help you a lot. I installed my catch can about a month before my turbo install, and for that month nothing was showing up in my catch can. One week after the turbo kit this is what I got.  AEM TruBoost gauge - I don't think i need to explain why i got this. Whatever kind you get, you will want a boost gauge. GoodSpeed E85 conversion kit w/ round ethanol content gauge. - Because more boost! Ethanol will help tremendously with knocks and pings with a boosted application in a high compression engine like the FA-20. Ethanol is much cheaper that pure race fuel too WIN WIN. ATI Tripple Meter Gauge pod for FRS/BRZ - have to be able to hold/mount gauges somewhere. Turbo Blanket (I had GoodSpeed pick the best one for me) - Again this is for heat. a good turbo blanket will help keep the temp down in your engine bay. Heat Wrap - Well... HEAT is bad no reason to add more in the engine bay. Motul 300v gear oil - Extra horse power = more wear on transmission and Rear diff. I opted for good gear oil to help with temps, lubrication, etc.. and just about anything is better than stock. The difference before and after I would recommend this even if you don't ever do anything to your car. 5w-30 engine oil (I went motul i like their product.) - Everything I have read with an FI application a heavier oil is recommended. This seems to be the average that people go with and its what Goodspeed recommended as well and they know what they are doing. Custom GoodSpeed Tune - Don't cheap out... If you are doing this get it tuned right. People blow their stuff up when they don't. Find a good tuner, and get some dyno time for the tune. Deatschwerks DW65c Fuel Pump - The FBM Fuel Pump that came in the kit... well it didn't fit EXACTLY like the factory one, rather than modding the fuel pump assembly I went with a fuel pump that fit 1:1, thanks again to GoodSpeed. Nvidia Overpipe - More Airflow, for better spool Nvidia Resonated Test Pipe - More airflow, for better spool, and resonated to reduce nasty noise. I wanted mine to sound clean and aggressive, and then silly when i got on it.
__________________
My Build and Journal
How I made MY 86 IG @frscargo Last edited by schlitzed; 04-06-2015 at 07:17 PM. |
|
|
|
| The Following 2 Users Say Thank You to schlitzed For This Useful Post: | LucidMomentum (03-22-2015), raven1231 (03-22-2015) |
|
03-22-2015, 03:39 PM
|
#7 |
|
Member
Join Date: Jul 2014
Drives: 2013 Firestorm FR-S
Location: Arizona
Posts: 61
Thanks: 26
Thanked 68 Times in 31 Posts
Mentioned: 0 Post(s)
Tagged: 0 Thread(s)
|
Turbo Install TIME
So I did a lot of thinking and debating on what I was gong to do regarding the install. I really wanted to take a week off and install it myself. I knew that no matter what I wanted to have it tuned. Now, I have installed lots of different things int to lots of different cars, custom fabrication etc.. But, I have never installed a turbo. Also I live about 2 to 4 hours away from shops for this kind of stuff that can do a solid tune using a dyno. Ultimately I decided to have it done right the first time and not deal with having to trailer the car, or drive it on a base map for along period of time. It just wasn't something I wanted to worry about. SO I called around to a TON of shops asked questions, and I got lots of different results. There is a place where I live, Sierra Vista AZ, called Desert Automotive and I was thinking to have it done somewhere locally. I went and talked to them and they are an awesome shop and crew. After talking with them they told me they could do it, but, that it would be the first time doing it with my car, and that they thought it might be best for me to find a shop that has some experience with my car. After calling around one of the most honest shops, reasonable, and professional was GoodSpeed Performance in Scottsdale AZ. These guys know what they are doing. I wish I could have gotten more pictures of the install but they did some amazing work and were focused on getting id done right. If you are going to have anything done and you can I recommend that you give them a call. Here are some pictures of everything. Packed up and ready to head to Phoenix! Headers had to sit in the front seat but it all fit   GoodSpeed had it apart and on the lift in minutes.  Turbo Bolted In:  Finished Install:  I am going to go take some more pictures of the Install and some key points to discuss lessons learned, and my review of the turbo kit.
__________________
My Build and Journal
How I made MY 86 IG @frscargo |
|
|
|
|
03-22-2015, 03:48 PM
|
#8 |
|
Member
Join Date: Jul 2014
Drives: 2013 Firestorm FR-S
Location: Arizona
Posts: 61
Thanks: 26
Thanked 68 Times in 31 Posts
Mentioned: 0 Post(s)
Tagged: 0 Thread(s)
|
Almost forgot... here is one of the dyno runs
[ame="https://www.youtube.com/watch?v=znZGCNTZJPU"]FullBlown FRS with GTX3076R Dyno Run - YouTube[/ame]
__________________
My Build and Journal
How I made MY 86 IG @frscargo |
|
|
|
|
03-22-2015, 06:11 PM
|
#9 |
|
Member
Join Date: Jul 2014
Drives: 2013 Firestorm FR-S
Location: Arizona
Posts: 61
Thanks: 26
Thanked 68 Times in 31 Posts
Mentioned: 0 Post(s)
Tagged: 0 Thread(s)
|
After the Install
Here are some shots of the install after it was all complete. And my review of the kit what I learned etc.. 1. Build Quality of the kit was really good, welds looked great, fitment was awesome especially considering that it was build without my car present. Hats off to FBM on the offerings for this kit. 2. Missing Parts When I received my last package and did inventory I noticed that the compressor wheel was missing. I had the turbine housing, but not the compressor. Now the way that the listing was for packaging, they are not called out separately, so I didn't know what to expect per shipment. Additionally the turbo bolts and gaskets were not present. I did not notice this, and GoodSpeed ended up getting me taken care of but still the turbo hardware was missing to bolt the Turbo halves together. Imagine my surprise when I got a call asking if I forgot to bring that up with the car. So make sure that EVERYTHING is there. Make sure that all the parts can fit together, and be fastened before you go to have it installed, or start installing it yourself. Now this might sound like a bad thing, but considering how many parts there are in this kit I was amazed that this was all that I was missing, and ModBargains made sure that I got taken care of. This is the hardware that was missing for the turbo:  3. Problems with the Injectors. FBM was pretty responsive but there was information that I was looking for that just didn't come with the injectors. Not sure what the specific deadtimes are on them, no flow rates, nothing like that and at the end of the day, I decided to hold off on the injectors as I would likely go to a 750cc anyway. So with the direct port injection I decided to stay with the stock injectors for now. The injectors from Fullblown are bosch and to get the exact flow rates and spec for each injector I tried to get the serial numbers. Unfortunately the serial numbers for some reason were removed. Injectors with filed off serial numbers?? odd.  Image Place Holder 4. Fitment! When everything was said and done fitment was pretty good. a little bit of trimming was needed on my install to include a little bit more than what I was expecting.  5. Tight Fit! There were a couple of things about the kit that GoodSpeed pointed out to me. Basically here were some parts that were super close to heat or pulley's. I am going to come up with something different soon and I will post what I decided to do. Here are some captioned images of the main takeaway's.  MAF Cable 
__________________
My Build and Journal
How I made MY 86 IG @frscargo Last edited by schlitzed; 03-28-2015 at 05:46 PM. Reason: Mis written paragraph. |
|
|
|
|
10-21-2015, 07:05 PM
|
#10 |
|
Member
Join Date: Jul 2014
Drives: 2013 Firestorm FR-S
Location: Arizona
Posts: 61
Thanks: 26
Thanked 68 Times in 31 Posts
Mentioned: 0 Post(s)
Tagged: 0 Thread(s)
|
Whats Next and More Lessons Learned
6000 Miles down the road with the FullBlown Turbo Kit. Everything running great, except the stock clutch, and now its time to get some more parts, and get them installed. The next items to go on are going to be ascetic mostly. With the exception of the clutch, and Hood, I hope that it will provide some cooling, But i will get into that in a little bit later. these are the parts that will be coming in the next week or so and I will post progress of them going on as frequently as possible. Huge thanks to Eric and Alan at Modbargains.com yet again for all of their help and making sure I am taken care of. with that here is the next list of things. Seibon VS Vented Carbon Fiber Hood TRD Style Carbon Fiber Spoiler CS Style Bottomline Front bumper lip CS Style Bottomline side skirts CS Style Bottomline rear bumper aprons Valenti Tail lights Glow Shift Vent Pod VEI Oil Pressure + Temperature gauge ACT Fullface Clutch kit with lightweight flywheel I can't wait to get these on the car to make it a little more aggressive and a stronger clutch. Stay tuned, I am going to try to do some videos as well to cover things in a little better detail.
__________________
My Build and Journal
How I made MY 86 IG @frscargo |
|
|
|
|
10-25-2015, 12:23 AM
|
#11 |
|
Member
Join Date: Jul 2014
Drives: 2013 Firestorm FR-S
Location: Arizona
Posts: 61
Thanks: 26
Thanked 68 Times in 31 Posts
Mentioned: 0 Post(s)
Tagged: 0 Thread(s)
|
New Clutch Kit Installed
Clutch kit installed. The car feels so much different. The engagement is tight and there is no longer power loss. I like the way this setup feels so much that if i had known I would do it no matter what kind of build I went with.
The Factory clutch was pretty beat up after 6000 miles with the turbo but everything feels better now. The response is awesome and I can't wait to see what it does at the track. There is a little bit of chatter when I am turning from a stop but its not to bad. Other than that I have not noticed anything negative about the setup. It is fun getting use to the car again. Stock clutch gone  ACT Flywheel  Assembled Kit Ready for Transmission to be put back. 
__________________
My Build and Journal
How I made MY 86 IG @frscargo Last edited by schlitzed; 10-25-2015 at 02:27 AM. Reason: Typo |
|
|
|
|
10-25-2015, 11:13 AM
|
#12 |
|
Member
Join Date: Jul 2014
Drives: 2013 Firestorm FR-S
Location: Arizona
Posts: 61
Thanks: 26
Thanked 68 Times in 31 Posts
Mentioned: 0 Post(s)
Tagged: 0 Thread(s)
|
Tail Light Install
installing the tail lights is probably the easiest thing I have ever done. It is 4 bolts and two harnesses. It literally took 30 minutes and that was with taking pictures and video. I went with the Valenti tail lights. I must say the build quality of the lights are incredible. The stock ones feel like a cheap knock off in comparison. O highly recommend these lights so far. I know that lots of people like these lights too so it is definitely not a bad choice.
Stock Lights  When I removed these lights I found that they need to be pulled strait out. Do not tilt them. There are some Tabs on the outside edge that need to be pulled strait or they will break. Also There are some zip ties that I found did not fit on the new bolts. I have no idea why since the thread pattern is the same but, be aware that they will probably not fit. After the install: Video to come. 
__________________
My Build and Journal
How I made MY 86 IG @frscargo |
|
|
|
| The Following User Says Thank You to schlitzed For This Useful Post: | Rifle (10-25-2015) |
|
10-25-2015, 12:46 PM
|
#13 |
|
EX-86 Supercharged God

Join Date: Aug 2015
Drives: '16 Series.HyperBlue BRZ
Location: Philadelphia->Montana
Posts: 766
Thanks: 220
Thanked 479 Times in 253 Posts
Mentioned: 16 Post(s)
Tagged: 1 Thread(s)
|
Car looks good. Keep up the work! Have to say, I am a little jealous... :P I've been looking into the same turbo kit. What are the numbers from the dyno?
__________________
Sprintex 210 Supercharged HyperBlue BRZ "HI MOM"
295WHP/220TQ |
|
|
|
| The Following User Says Thank You to Rifle For This Useful Post: | schlitzed (11-14-2015) |
|
11-14-2015, 11:44 PM
|
#14 | |
|
Member
Join Date: Jul 2014
Drives: 2013 Firestorm FR-S
Location: Arizona
Posts: 61
Thanks: 26
Thanked 68 Times in 31 Posts
Mentioned: 0 Post(s)
Tagged: 0 Thread(s)
|
Quote:
Here is the dyno sheet, Stock before everything was done I was around 160 wheel horse power. Let me know if you have any questions. 
__________________
My Build and Journal
How I made MY 86 IG @frscargo |
|
|
|
|
|
|
|
|
|
|
|
 Similar Threads
|
||||
| Thread | Thread Starter | Forum | Replies | Last Post |
| Beginner STX Build Whiteout FRS Build Thread | Hachi86Roku | Tracking / Autocross / HPDE / Drifting | 21 | 03-31-2020 07:52 PM |
| My 2JZ Build - Last post w/ dyno (565whp/435wtq) updated 14 Apr 16 | slicktop | Member's Car Journals | 253 | 12-02-2016 06:26 PM |
| No build date on passenger side sticker, how to determine build date? | BBYZILA | Scion FR-S / Toyota 86 GT86 General Forum | 5 | 01-20-2015 10:14 PM |
| My build... well some of it | cruzinbill | Electronics | Audio | NAV | Infotainment | 41 | 04-01-2013 04:02 PM |
| My BRZ build | brztj | Mid-Atlantic | 3 | 09-08-2012 05:52 PM |


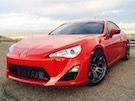
 2013 Scion FR-S
 My wife isn't the type, but i thought it was going to be one of those do whatever the hell you want situations, but it wasn't so I have a kick ass wife. So I am going to jump into everything that I have done, from pickup to where I am now and then what I plan to do later.


