


 11-22-2018, 08:31 AM
|
#1289 | |
|
Senior Member
Join Date: Nov 2016
Drives: 2017 BRZ
Location: USA
Posts: 655
Thanks: 326
Thanked 258 Times in 177 Posts
Mentioned: 3 Post(s)
Tagged: 0 Thread(s)
|
Quote:
From reading the forums it seems many favor CC's, while some don't run them and don't report any issues. Some have mentioned that it may be variance in the PCV from car-to-car. I was averse to installing one initially, but if the MAF is getting dirty prematurely and I don't have an oiled air filter, then I think this must be the issue. I rubbed the MAF housing with my fingers when cleaning it, trying to tell if there was a film of any sorts on it, but it didn't seem dirty. However, hitting it with the spray cleaner did fix the car right up. I'm going to wait a few more miles and see if the P0172 code comes back, and if so will put a can on the PCV side. |
|

|

|
|
11-23-2018, 03:08 PM
|
#1290 |
|
Member
Join Date: Jul 2018
Drives: Cosworth ('17 BRZ, '76 Vega)
Location: Ohio
Posts: 28
Thanks: 21
Thanked 20 Times in 9 Posts
Mentioned: 1 Post(s)
Tagged: 0 Thread(s)
|
I've gotten the radiator mounted, however the front of the left side is touching up at the top end of the radiator. Even the slightest touch causes it to knock against the metal in front of it. I can only imagine that if the car were running/driving, the natural vibrations of such would cause a loud rattle. Any suggestions? The right side, however, seems to have plenty of clearance.
|
|
|
|
|
11-23-2018, 03:50 PM
|
#1291 | |
|
Member
Join Date: Dec 2015
Drives: GT86
Location: UK
Posts: 35
Thanks: 3
Thanked 7 Times in 4 Posts
Mentioned: 2 Post(s)
Tagged: 0 Thread(s)
|
Quote:
Lastly put some adhesive foam on bumper where it will hit, at least you know it wont rattle! |
|
|
|
|
|
11-24-2018, 05:09 PM
|
#1292 |
|
Member
Join Date: Jul 2018
Drives: Cosworth ('17 BRZ, '76 Vega)
Location: Ohio
Posts: 28
Thanks: 21
Thanked 20 Times in 9 Posts
Mentioned: 1 Post(s)
Tagged: 0 Thread(s)
|
Gently twisting at the radiator mounts provided enough clearance so that it seems that it shouldn't rattle while running.
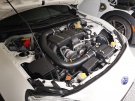
Now that I'm on step 8, I'm running into an issue with hose 10 (LTR bleed). As mine is a left-hand-drive car, I installed the intercooler services assembly on the right hand side. I still need to cut hose 1 down to its proper length, though hose 10 doesn't seem as though it will reach its tank, as it looks like it's only long enough to reach where it would be installed on the left side for a RHD car. Does anyone have any good pictures for how they routed their hoses on a LHD car? Thanks |
|
|
|
|
11-24-2018, 05:29 PM
|
#1293 | |
|
Senior Member

Join Date: Dec 2015
Drives: 2016 Cosworth 2.2 BRZ
Location: TN
Posts: 302
Thanks: 81
Thanked 185 Times in 112 Posts
Mentioned: 10 Post(s)
Tagged: 0 Thread(s)
|
Quote:
When you go to bleed the system, it will be foamy for awhile until you get all the air out. I found that opening the bleeder screws on the back of the IC and squeezing the hoses got a lot of the air out. I had to top off the reservoir for about 1 day after the install so keep a bottle of antifreeze with you and check it often. When you get to putting the intake on, I highly recommend removing the 3 bolts that hold on the AC compressor. It's easy to get to now and if you move it out of the way, it will make putting the intake on much easier. Also use hose clamps on every hose. The kit doesn't come with enough for everything but I found that was the source of my lean code I mentioned earlier. The PCV hose, EVAP hose and crankcase breather hose (located under the AC compressor) all need hose clamps. Also, don't overtighten the hose clamp on the air box or you will deform it and get a leak. |
|
|
|
|
| The Following User Says Thank You to sly For This Useful Post: | Cosworth_0686 (12-10-2018) |
|
11-25-2018, 02:24 PM
|
#1294 | |
|
Senior Member
Join Date: Oct 2015
Drives: BRZ Cosworth SC MY16
Location: Poland
Posts: 108
Thanks: 30
Thanked 73 Times in 45 Posts
Mentioned: 1 Post(s)
Tagged: 1 Thread(s)
|
Quote:
I have ordered a smaller pulley today.
__________________
|
|
|
|
|
|
11-25-2018, 02:27 PM
|
#1295 | |
|
Senior Member
Join Date: Oct 2015
Drives: BRZ Cosworth SC MY16
Location: Poland
Posts: 108
Thanks: 30
Thanked 73 Times in 45 Posts
Mentioned: 1 Post(s)
Tagged: 1 Thread(s)
|
Quote:
__________________
|
|
|
|
|
|
11-25-2018, 05:39 PM
|
#1296 | ||
|
Senior Member
Join Date: Nov 2016
Drives: 2017 BRZ
Location: USA
Posts: 655
Thanks: 326
Thanked 258 Times in 177 Posts
Mentioned: 3 Post(s)
Tagged: 0 Thread(s)
|
Quote:
I think the restrictive stock filter plus the air the supercharger is trying to move with the hbp and CS400 is creating a lot of vacuum in the intake tract, and possibly pulling extra vapor through the crankcase and/or PCV hoses. I can't think of how else the MAF would be getting dirty. I went to swap the stock air filter for a high flow one, but was sent the wrong part so will have to wait again to test. I'm kind of glad the part was wrong because the air filter is smaller than I was expecting (measured ~9.3" x ~4.5" = 41.6 sq in, I was expecting ~50 sq in, ignoring the pleats), so I'm going to need a CAI regardless. Quote:
Last edited by gtengr; 11-25-2018 at 06:27 PM. |
||
|
|
|
|
11-25-2018, 05:46 PM
|
#1297 |
|
Member
Join Date: Jul 2018
Drives: Cosworth ('17 BRZ, '76 Vega)
Location: Ohio
Posts: 28
Thanks: 21
Thanked 20 Times in 9 Posts
Mentioned: 1 Post(s)
Tagged: 0 Thread(s)
|
I spent a while today reworking just how I was planning to route the hoses (or, at least some of them..) and using the un-numbered one in place of 10 certainly helped. As for hoses 8 and 9, mine seemed like they were going to be kinking a lot, but it ended up that the header tank bracket had been upside down (working off of a black and white print of the instructions can be a pain, lol). Once I flipped that, hoses 8 and 9 seemed to line up better, though 1 and "10" seemed like they were still going to kink a lot. Rather than cutting them down as the instructions mention, I let them loop around a bit more than visually-pleasing, though I don't think they'll kink. My dad said that in the past, he's bent some new brake line into the shape he wanted and then worked a radiator hose around it so that it could keep the desired shape without kinking, though I'm not sure about doing that for this project.
Hose 11 looks like it's in the right spot, though hose 12 differs from where the line is pointing in the instructions on page 38. |
|
|
|
|
11-25-2018, 06:31 PM
|
#1298 | |
|
Senior Member
Join Date: Dec 2015
Drives: 2016 Cosworth 2.2 BRZ
Location: TN
Posts: 302
Thanks: 81
Thanked 185 Times in 112 Posts
Mentioned: 10 Post(s)
Tagged: 0 Thread(s)
|
Quote:
Hose 11 is your PCV hose that connects to the throttle body that will go on the back of the engine. You have this hose routed to the driver side for now but it will also be on the passenger side. Once your intake manifold is on and the throttle body is in place, there is a hose barb on the passenger side of the throttle body that this hose attaches to. So you might want to move hose 11 back toward the firewall temporarily as it will be connected later to the throttle body. Also, use hose clamps on both ends of this hose. It will have vacuum on it from the engine and you don't want a vacuum leak. Your hose "10" has more than enough length. I ended up cutting mine and still have enough silicon hose left over for installing my Oil Catch Can next weekend. Hose "10" routed to the back of the engine and is laying on the bell housing of the transmission. One important thing to note is that hoses 3 and 4 need to be on the inside of the intercooler. Hoses 5 and 6 will be on the outside. Right now you have hose 4 all the way on the driver's side. It will actually connect more toward the middle, just to the left of hose 5. So hose 4 on the left and hose 5 on the right from the picture. Hose 6 on the left and hose 3 on the right. |
|
|
|
|
|
11-26-2018, 01:45 PM
|
#1299 | |
|
Senior Member
Join Date: Aug 2012
Drives: 18 BRZ tS, 27 GRMN 86
Location: Canada
Posts: 455
Thanks: 444
Thanked 289 Times in 137 Posts
Mentioned: 5 Post(s)
Tagged: 0 Thread(s)
|
Quote:
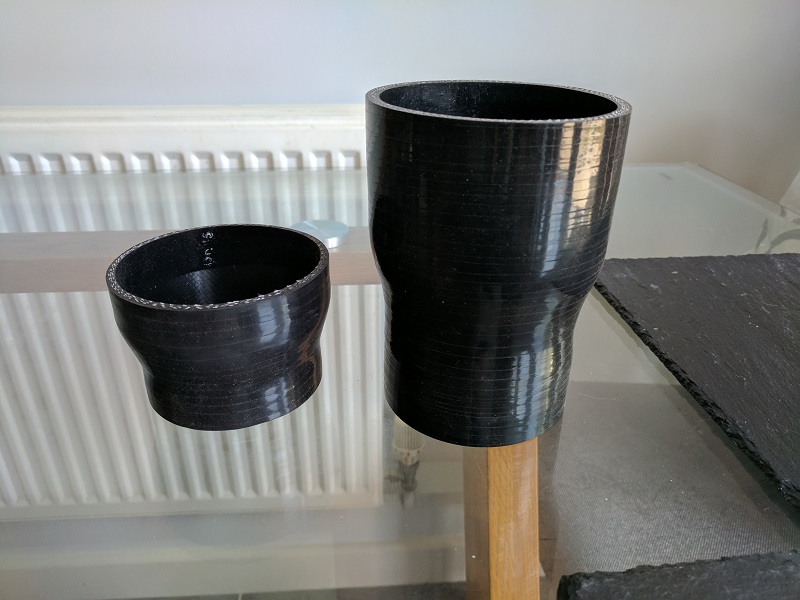
Would 60mm (2.35") work? Most Japanese made cat-back are 60mm in diameter. I want to save my eardrums too and I prefer a quiet exhaust too, Thanks! Would any of these work? or They are still "restrictive"? Thanks! Fujitsubo Authorize R  https://www.ft86motorsports.com/exha...-s-brz-86.html Blitz C-TI  https://www.ft86motorsports.com/exha...-fr-s-brz.html Greddy Supreme SP  https://www.ft86motorsports.com/exha...-fr-s-brz.html HKS Legamax  https://www.ft86motorsports.com/exha...-2013-brz.html Thanks |
|
|
|
|
|
11-26-2018, 01:54 PM
|
#1300 | |
|
Airborne at your service

Join Date: Sep 2014
Drives: '17 BRZ Series.Yellow
Location: El Paso, Texas
Posts: 6,325
Thanks: 4,528
Thanked 5,586 Times in 2,928 Posts
Mentioned: 33 Post(s)
Tagged: 2 Thread(s)
|
Quote:
__________________
|
|
|
|
|
| The Following User Says Thank You to weederr33 For This Useful Post: | botbs (11-26-2018) |
|
11-26-2018, 01:55 PM
|
#1301 | |
|
Member
Join Date: Dec 2017
Drives: 2017 BRZ Premium
Location: Georgia
Posts: 67
Thanks: 11
Thanked 27 Times in 17 Posts
Mentioned: 1 Post(s)
Tagged: 0 Thread(s)
|
Quote:
Sent from my SM-N960U using Tapatalk |
|
|
|
|
| The Following User Says Thank You to gahooligan For This Useful Post: | gtengr (11-26-2018) |
|
11-26-2018, 03:11 PM
|
#1302 | |
|
Senior Member

Join Date: Oct 2012
Drives: UK GT86
Location: UK
Posts: 3,040
Thanks: 185
Thanked 1,629 Times in 1,112 Posts
Mentioned: 155 Post(s)
Tagged: 1 Thread(s)
|
Quote:
__________________
.: Stealth 86 :.
Abbey Motorsport/K47 Tuned Sprintex 210 Supercharger Kodename 47 DJ: Soundcloud / Instagram / Facebook |
|
|
|
|
| The Following User Says Thank You to Kodename47 For This Useful Post: | gtengr (11-26-2018) |
|
|
|
|
 |
| Thread Tools | Search this Thread |
|
|
 Similar Threads
|
||||
| Thread | Thread Starter | Forum | Replies | Last Post |
| Kraftwerks Supercharger Owners Thread | projek_01 | Forced Induction | 4306 | Today 06:23 PM |
| Jackson Racing Supercharger Owners Thread | enivid | Forced Induction | 6004 | 03-19-2024 02:16 PM |
| HKS Supercharger owners thread | wbradley | Forced Induction | 1048 | 10-12-2023 08:03 PM |
| Phantom FTS Electric Supercharger Owners Thread | TM | Forced Induction | 1206 | 12-15-2019 02:33 PM |
| Supercharger Kits! Vortech/Cosworth | RallySport Direct | Forced Induction | 61 | 06-29-2015 11:26 AM |


 BRZ
BRZ

