


|
||||||
| DIY (Do-It-Yourself) Guides For all DIYs. |
 |
|
|
Thread Tools | Search this Thread |
 01-26-2013, 09:36 PM
|
#1 |
|
Member

Join Date: Jan 2013
Drives: 07 Hyundai Tiburon SE
Location: Saint Louis, MO
Posts: 74
Thanks: 5
Thanked 21 Times in 15 Posts
Mentioned: 0 Post(s)
Tagged: 0 Thread(s)
|
DIY: FR-S/BRZ Illuminated Door Speakers
DESCRIPTION: This DIY will give you a step by step instruction on how to place LED strips inside the door speaker and wire it into your already installed footwell kit.
DIFFICULTY (0-10): 3 TIME REQUIRED: About 1 - 1.5 hours per door TOOLS NEEDED: -4 x RGB LED strips (I used the Diode Dynamics footwell kit with the rear footwell add-on) -RGB controller -2 x 3 meter RGB extensions -Phillips screwdriver -flat head screwdriver -extra zip ties -3m adhesive tape -knife INSTRUCTIONS: (assuming you already have the front footwell kit installed) 1. Remove plastic tab and screw highlighted by red circle. 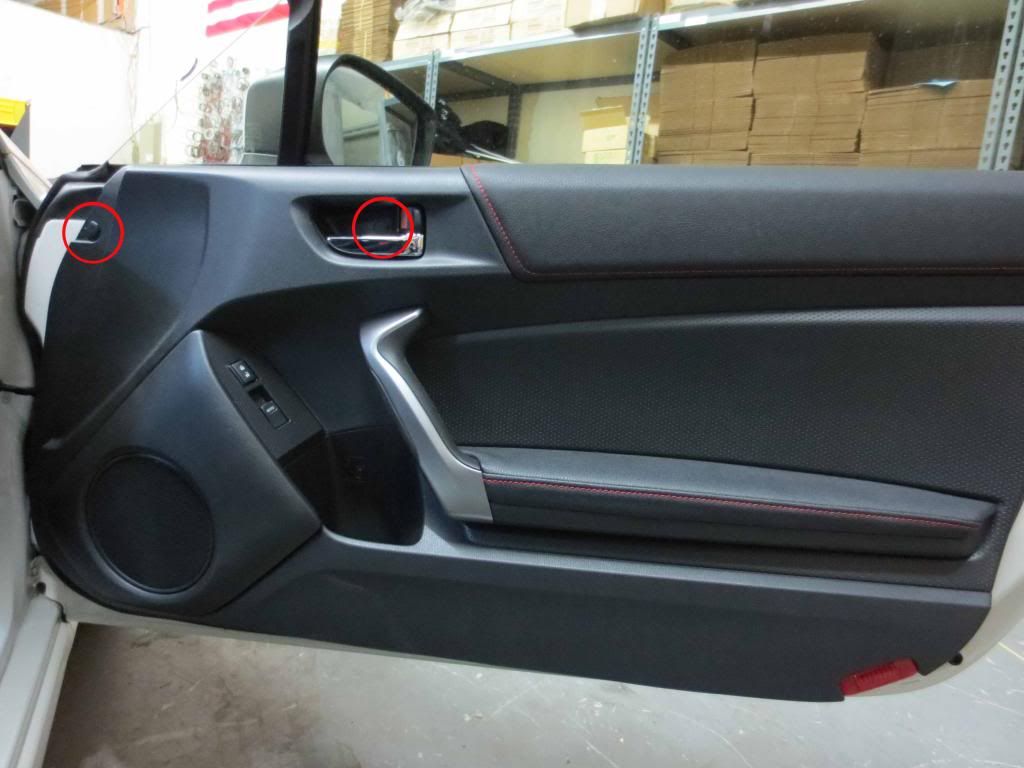 2. Remove silver accent piece on door handle. Use a flathead screwdrive to pry it off from the bottom. Once you get the bottom clip off, it will be very easy to get off. 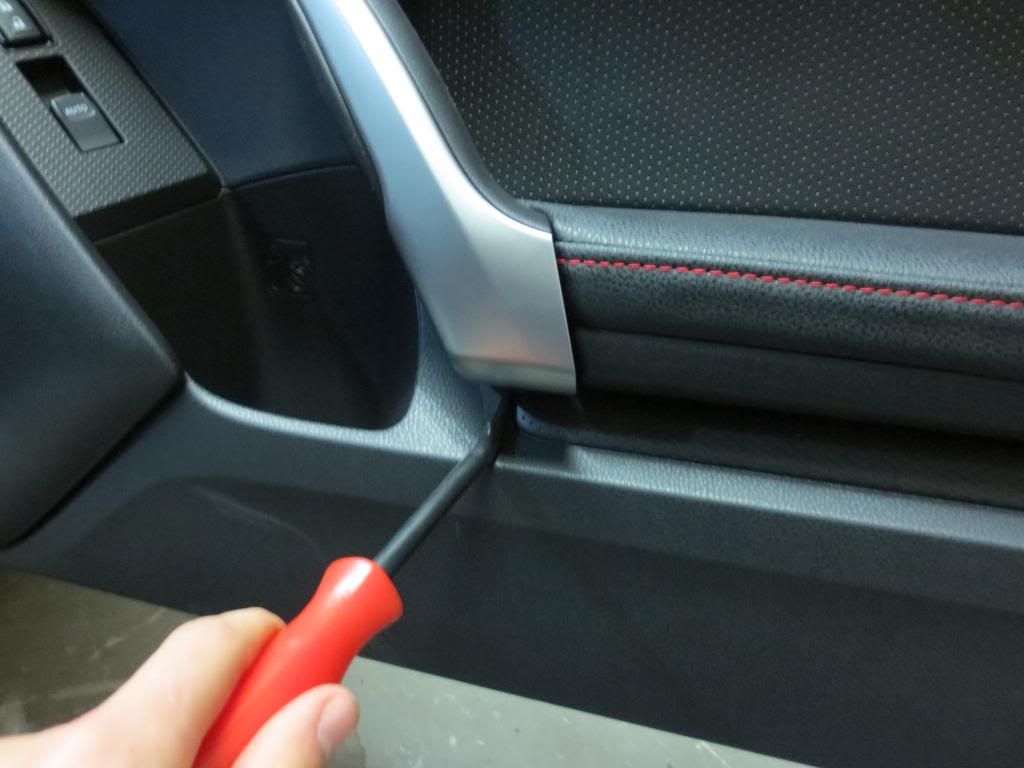 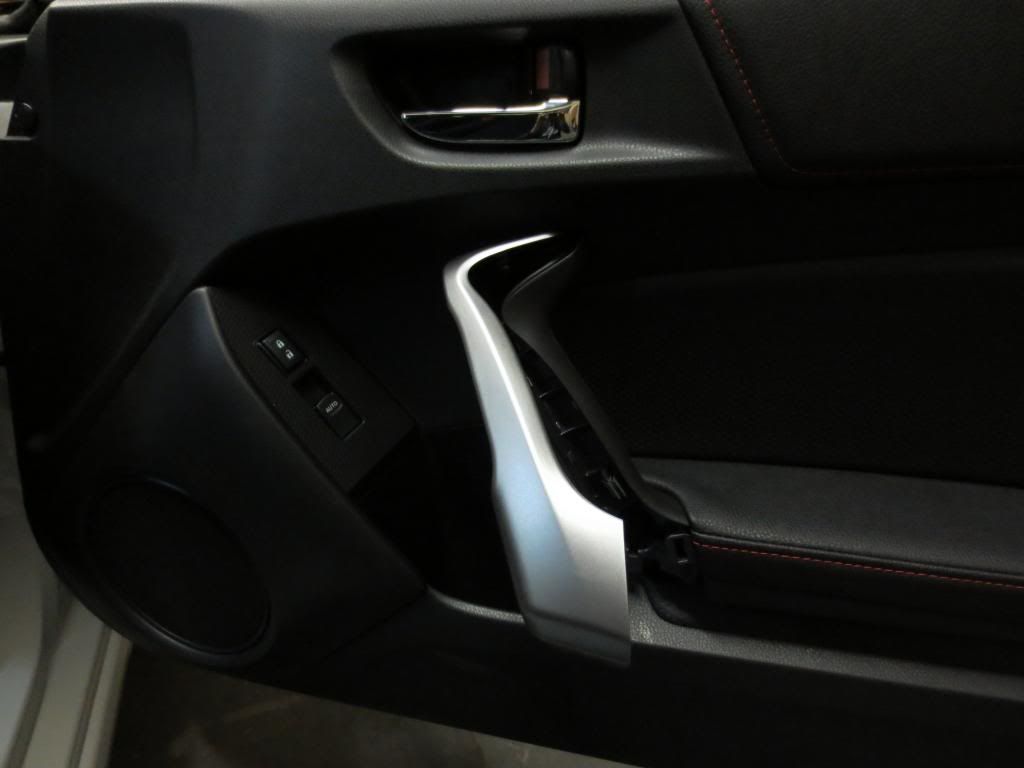 3. Remove the two screws highlighted by red circles. 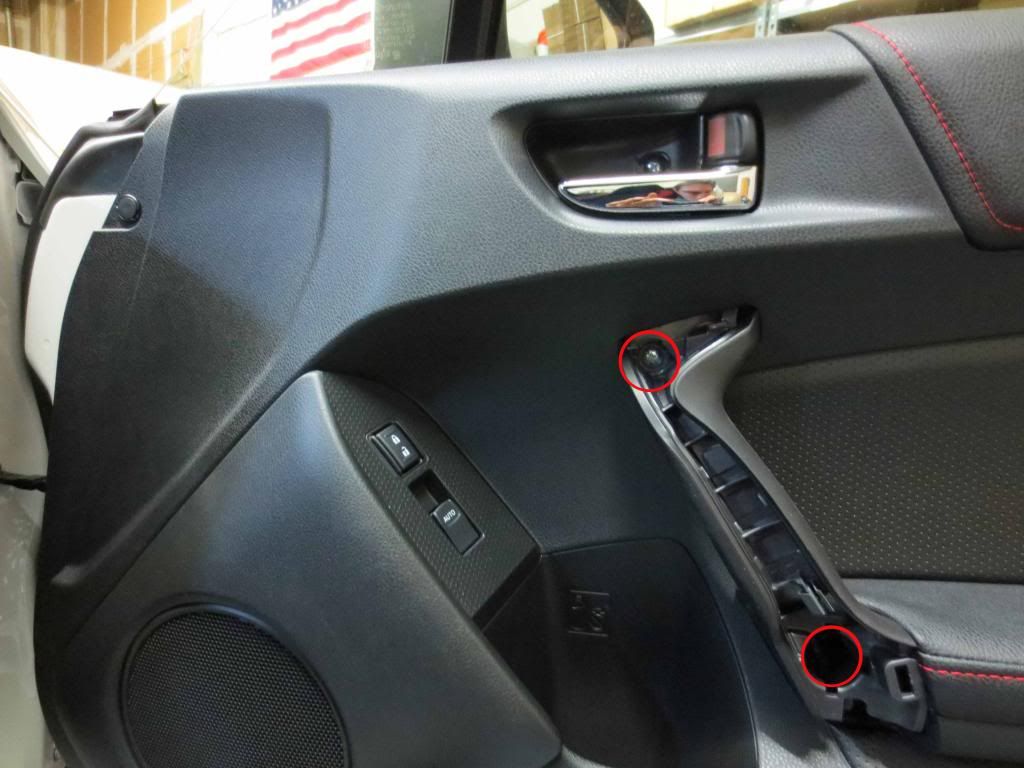 4. There are several plastic tabs holding the door in place, Use your hand starting at the inside part of the door and make your way down the bottom to the outer part of the door. 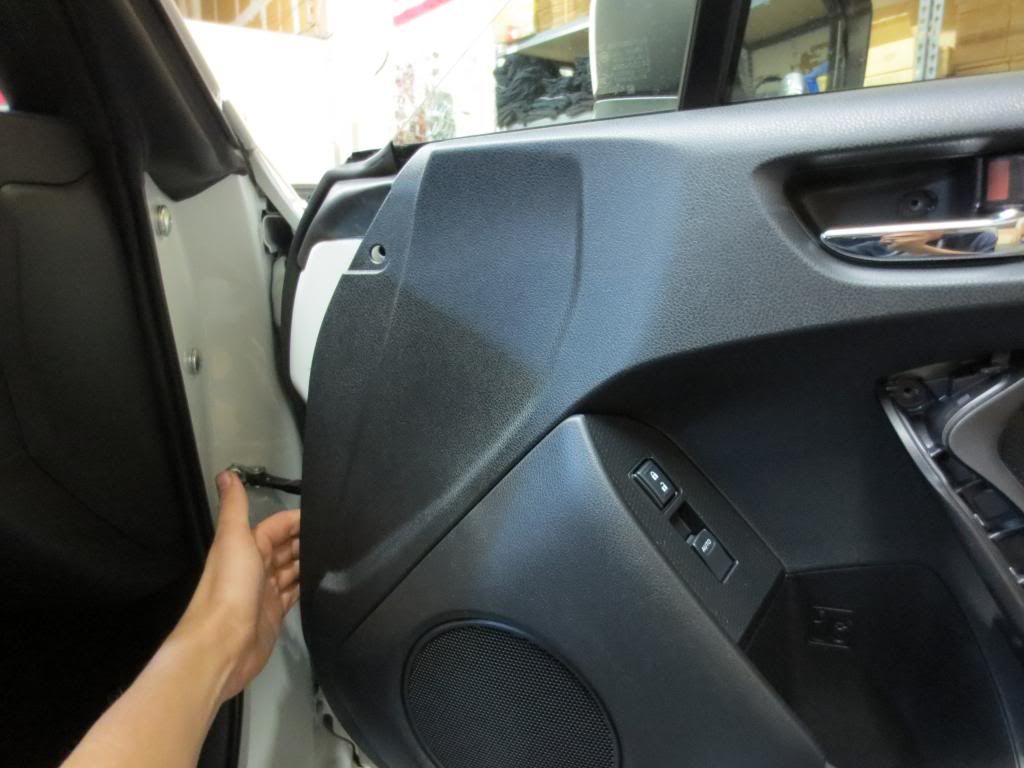 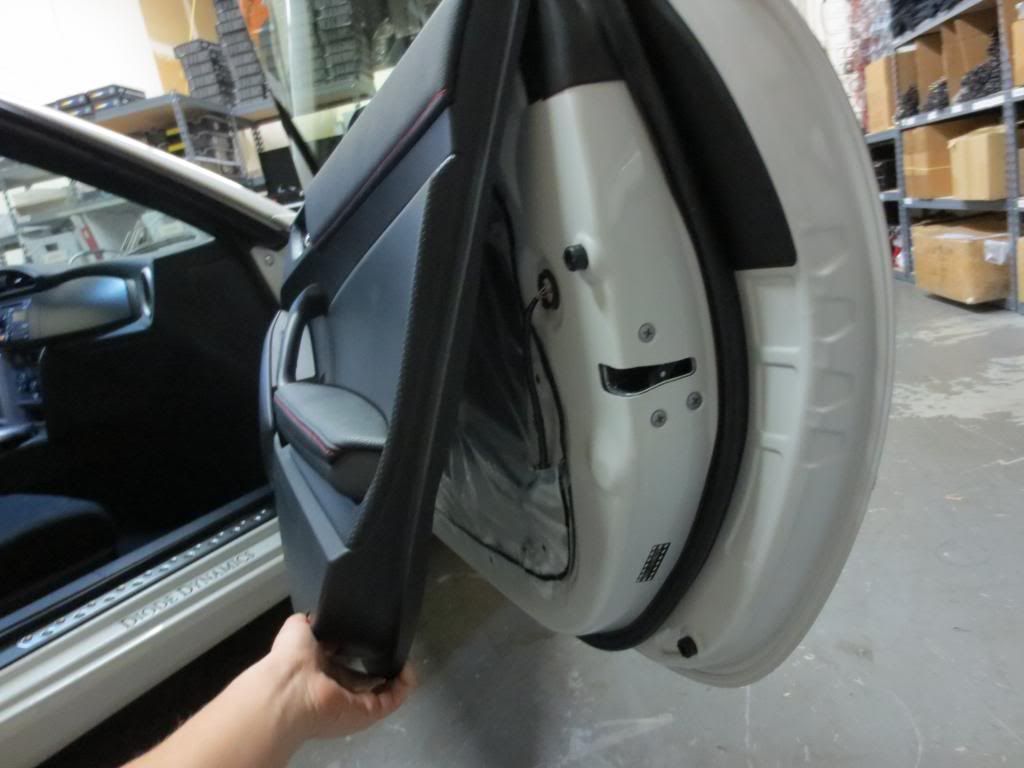 5. Now, remove the rest of the door panel by lifting the entire panel up. 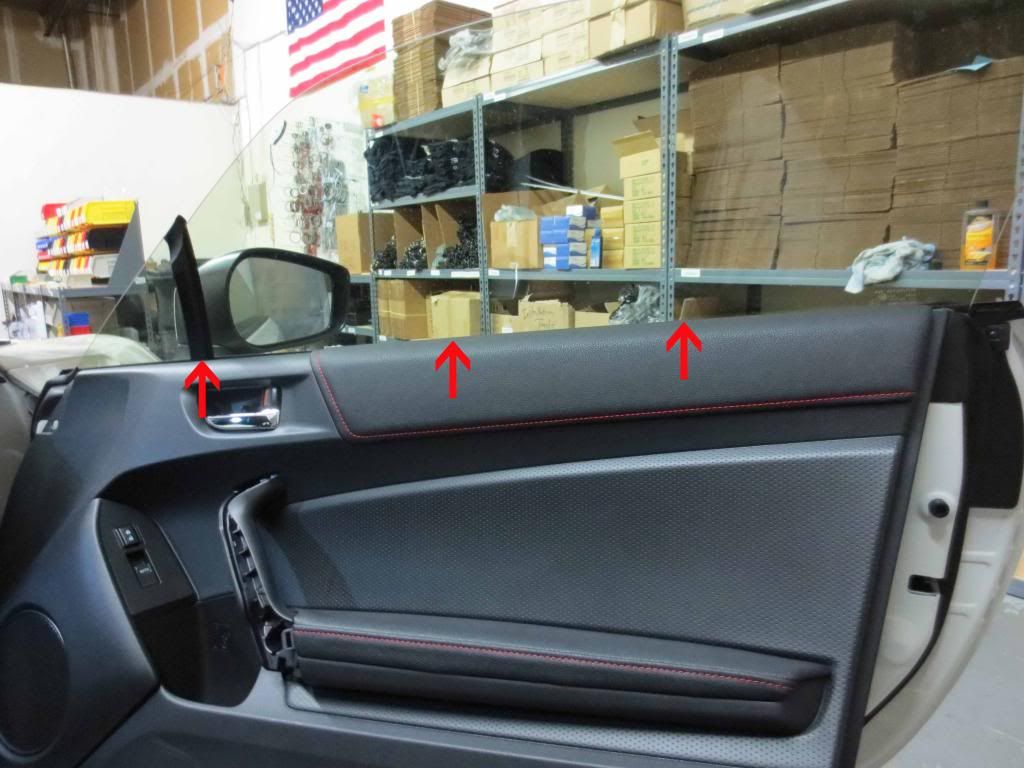 6. There are two cables (Make a mental note on how these are hooked up) and a wire coupling still holding the panel to the rest of the door (highlighted in red). Remove these. 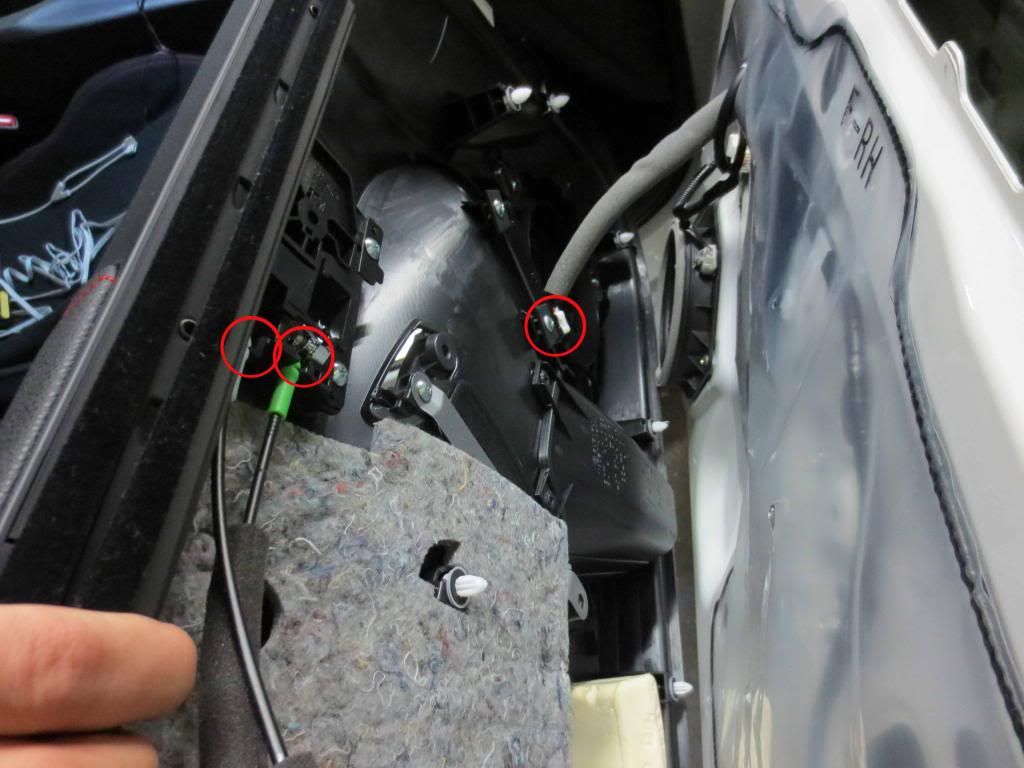 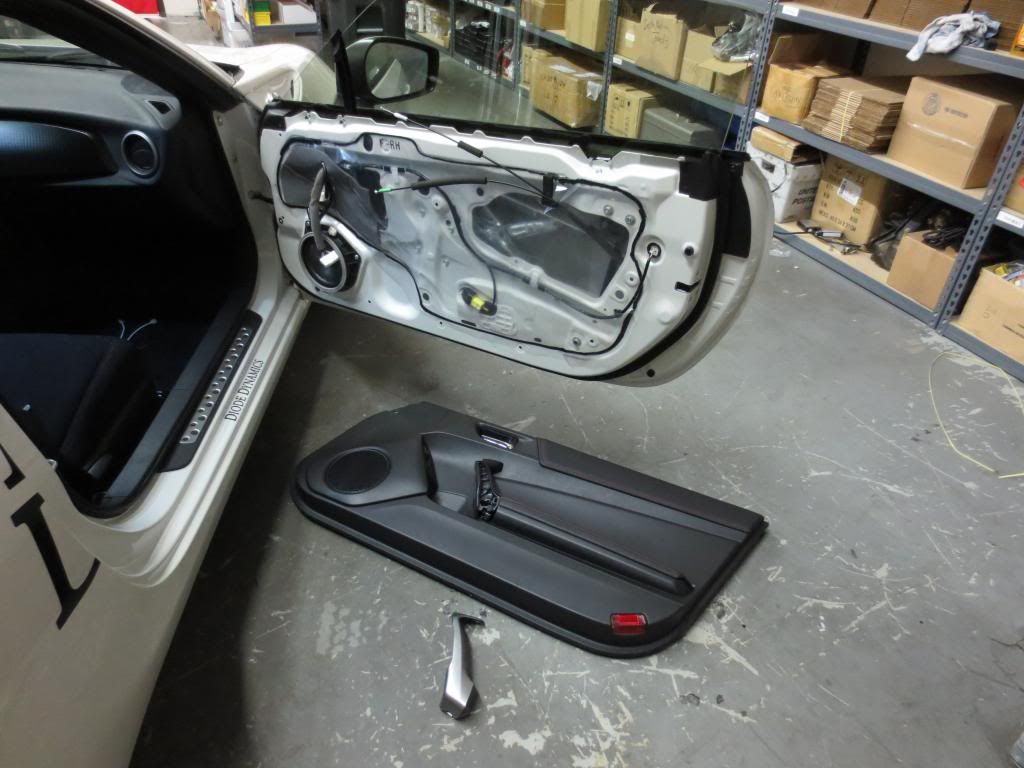 7. Flip the separated door panel over. Use a microfiber or towel to wipe off any dust or other debris inside the speaker vent and use the adhesive backing to stick the LED strip around the perimeter of the housing. 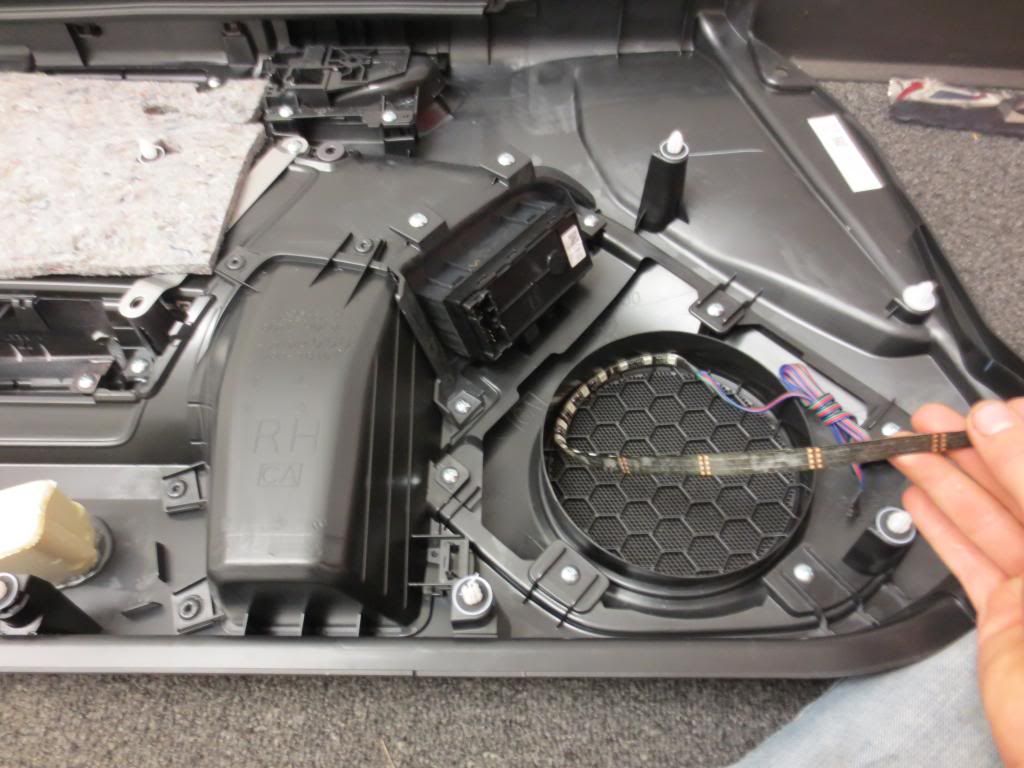 8. Use some 3m tape to hold the excess wiring in place above the vent. 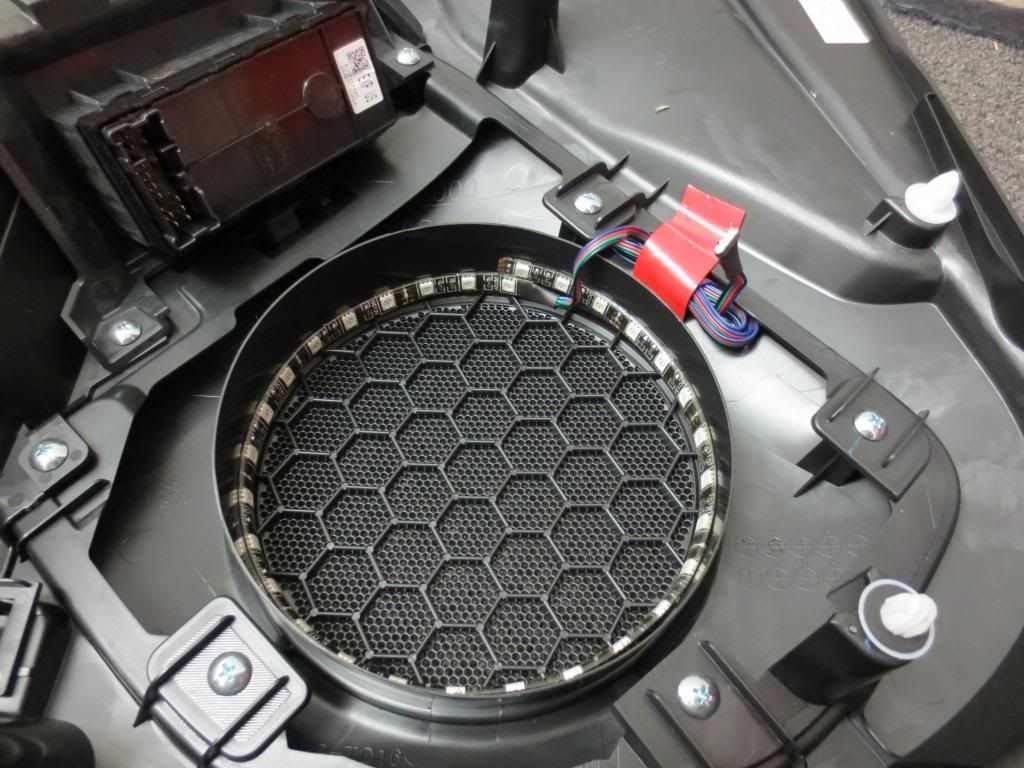 9. Back to the door frame. You need to access inside the door frame to feed the wiring, use a knife to cut into the plastic along the dotted red line. 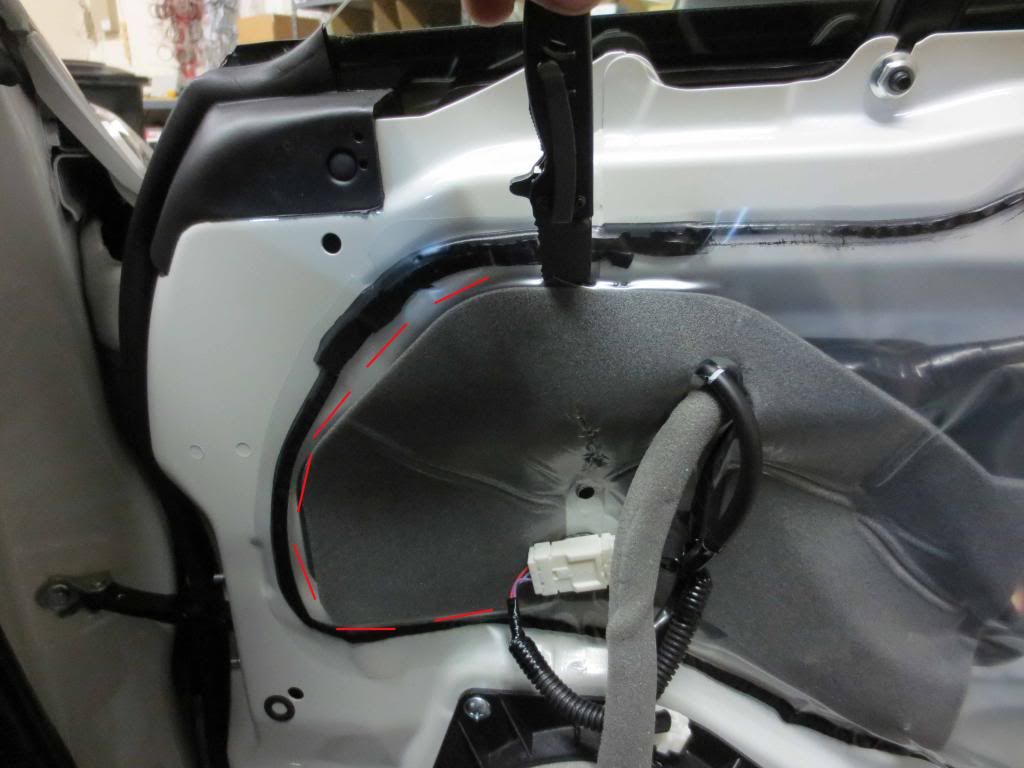 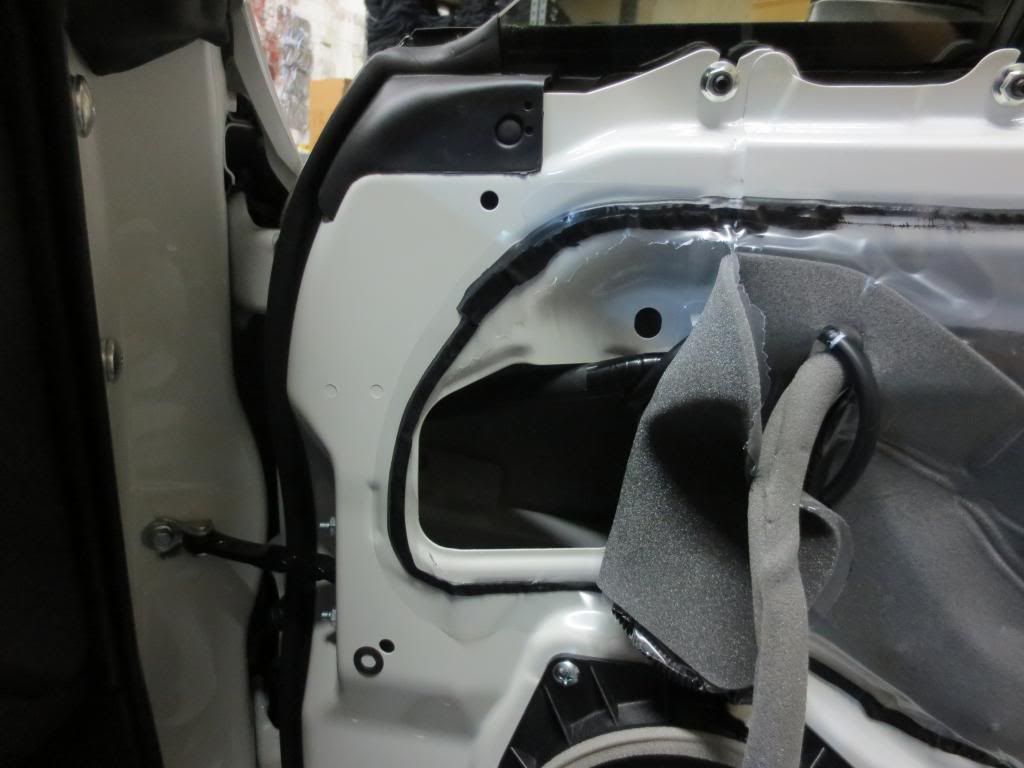 10. Inside the door frame you will see a rubber gromit used to chanel wiring from the door frame into the cabin. Use your knife to cut a hole into this gromit. You need to cut this hole so you can feed the extension wire through into the cabin. 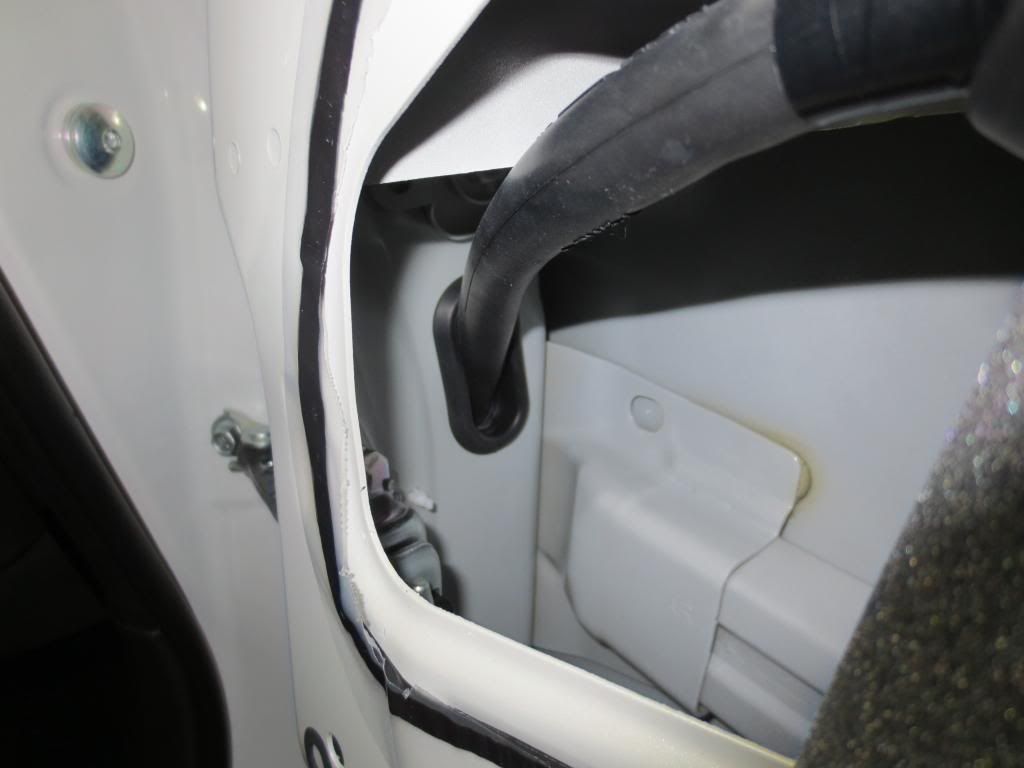 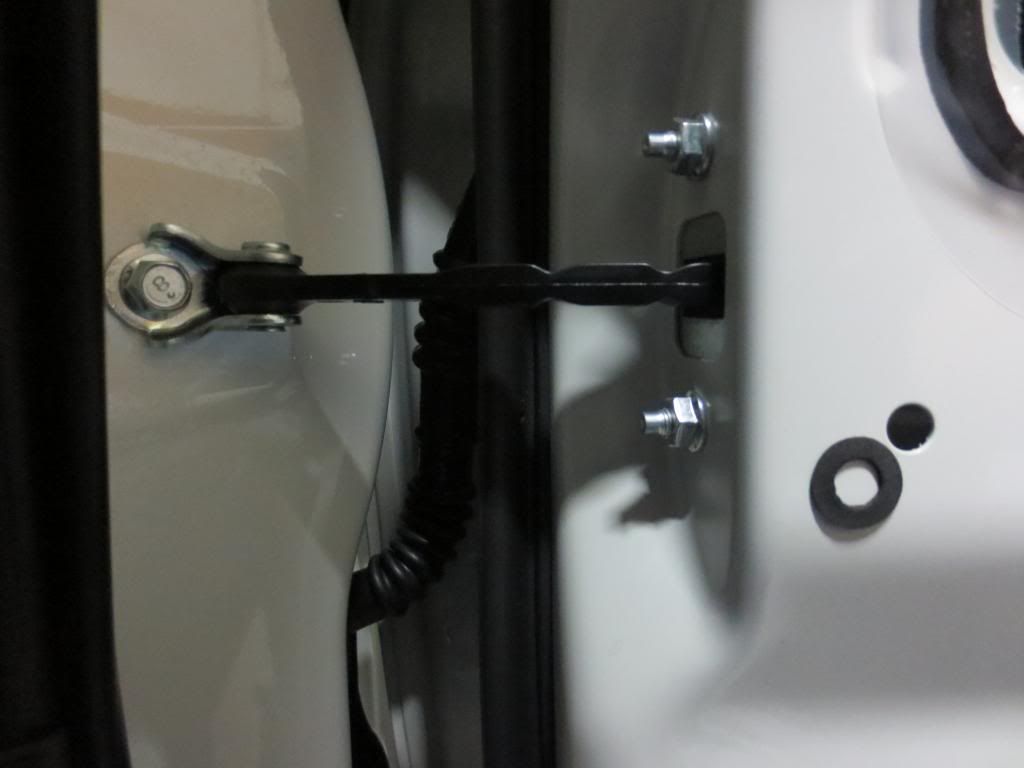 11. Now we need to be able to access the other side of that rubber hose inside the cabin. Pry the door sill off using a flat head screwdriver, this is held in only plastic clips. 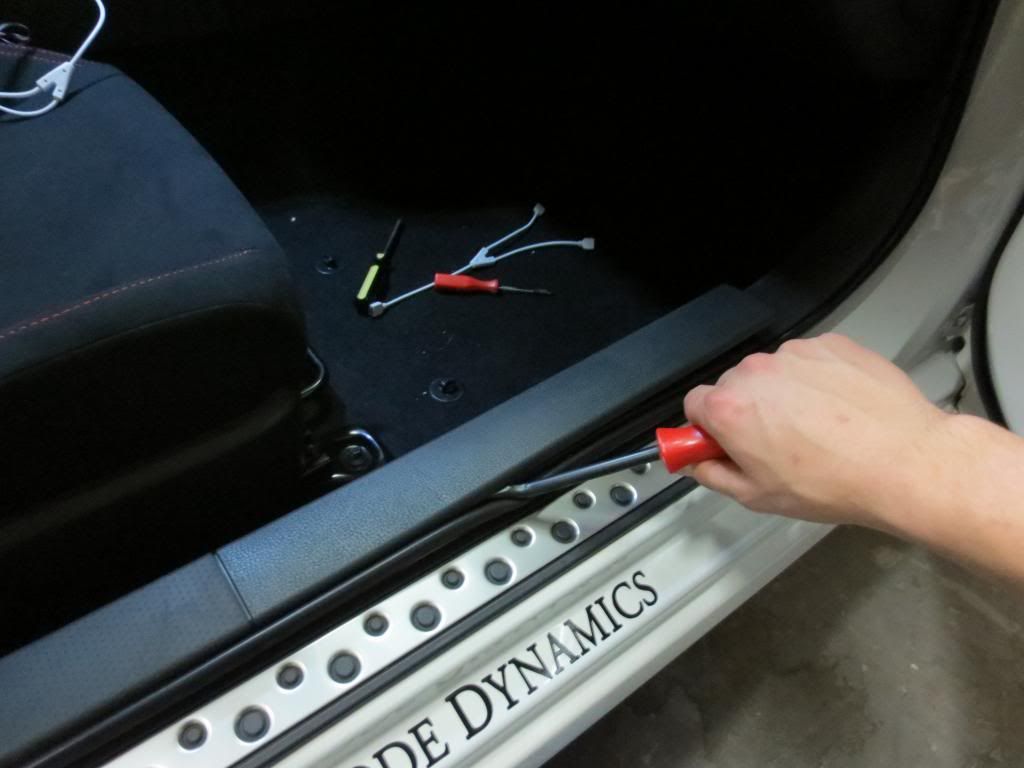 12. Remove the corner piece underneath the dash, this is held in place by 1 plastic clip highlighted in red. 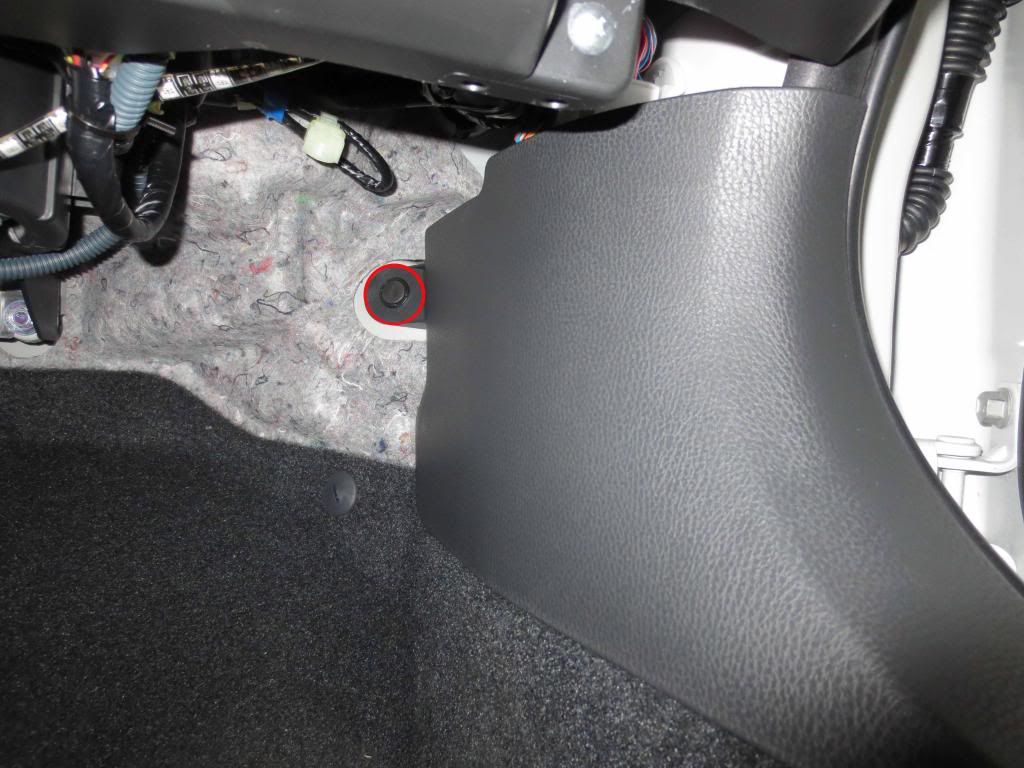 13. Once you can access the rubber gromit that leads into the cabin, poke a hole in it. Now comes the tricky part, you have to feed the extension wire through the two rubber gromits so that the female end will be in the door frame and the male end will be inside the cabin. This is the most difficult part of the DIY because its not easy feeding the wire through the gromits. I would recommend using a screwdriver or something with a hook on it to help pull the wire through the gromits. There isn't a whole lot of room to work with your hands. If you need to make the hole in the gromit larger, that is also acceptable. 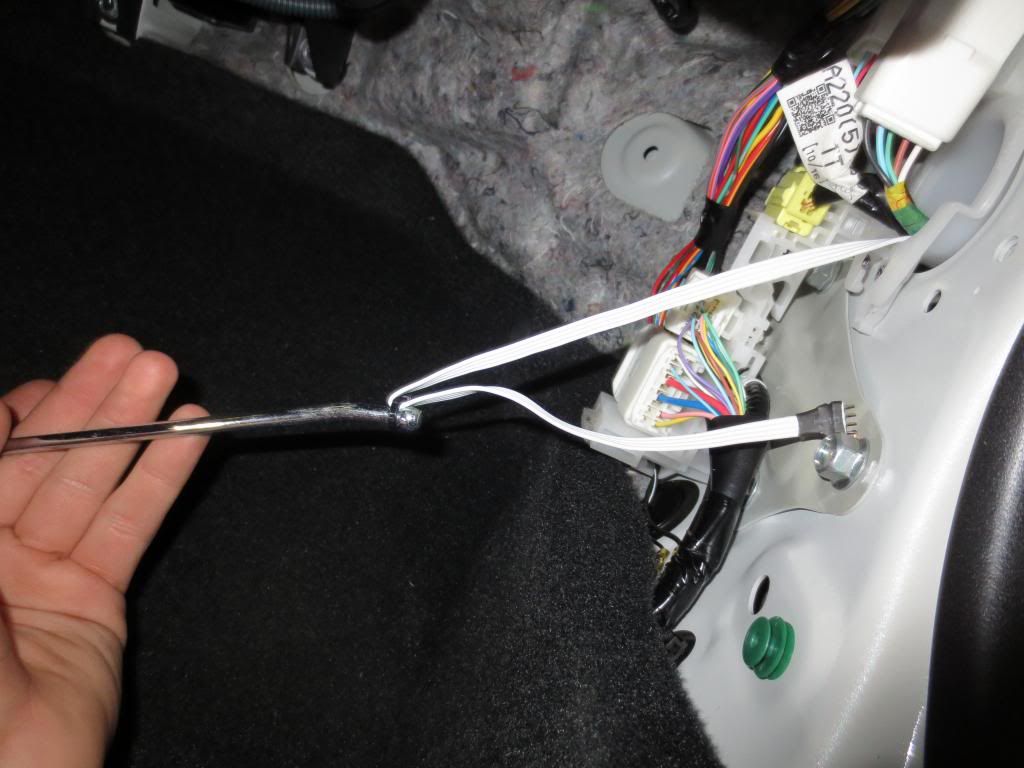 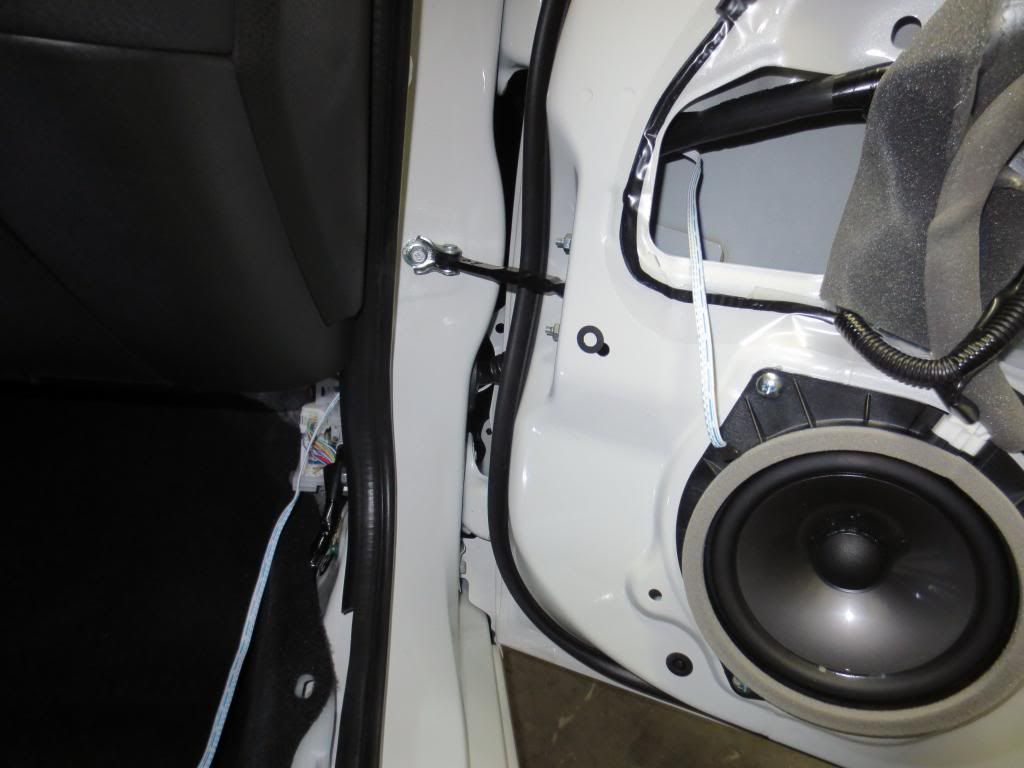 14. On the door frame, Use some 3m tape to hold the plastic insulation back into place. 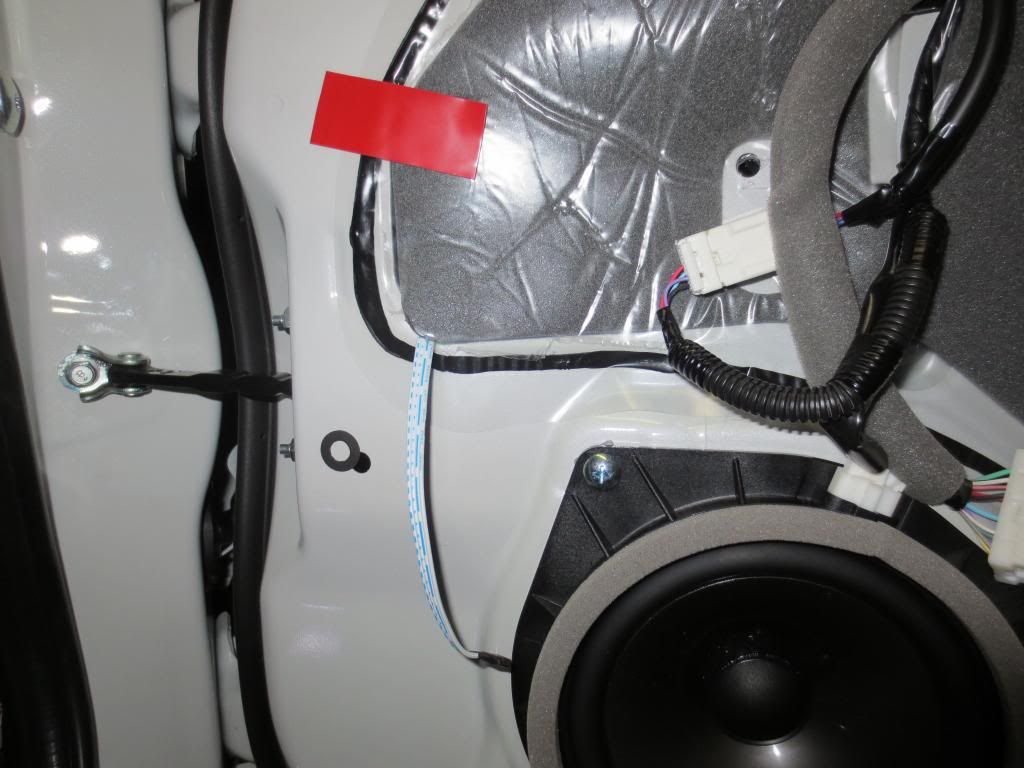 15. Hold the door panel back up to the door frame and re connect the two cables that actuates the locking mechanism. Test the door handle and lock before mounting to ensure the cables are connected correctly. 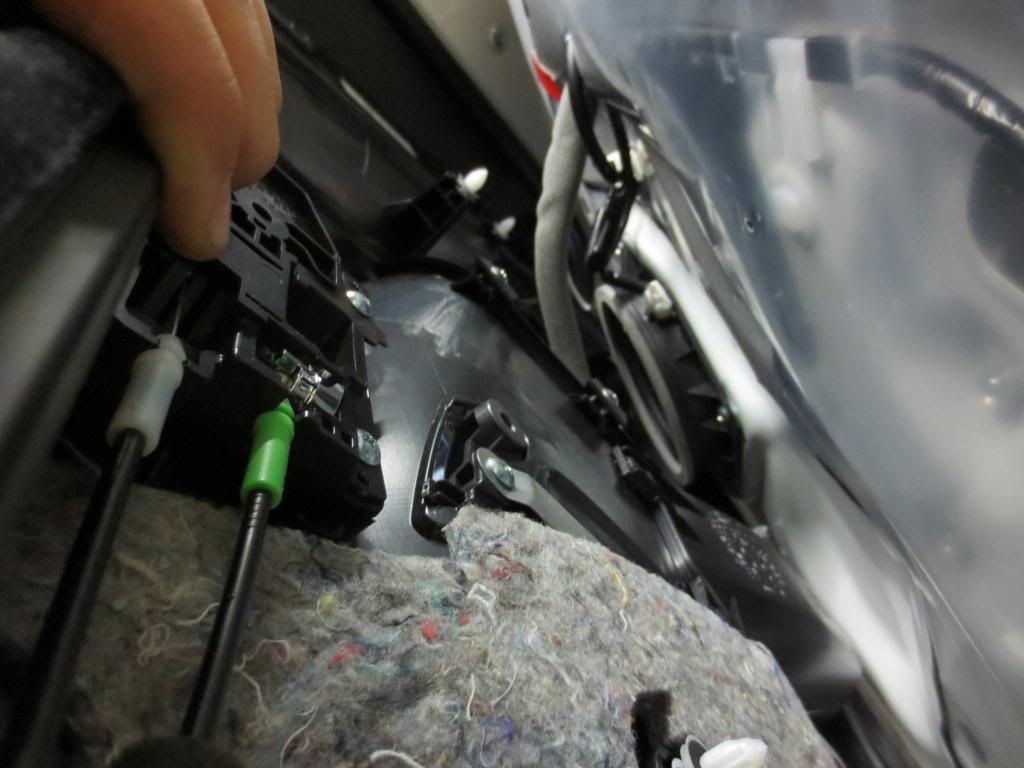 16. Re-attach the wire coupling for the electronic window and lock panel.  17. Hang the door panel back onto the window pane. Crawl underneath the door. Lift slightly to connect the extension wire to the LED strip. 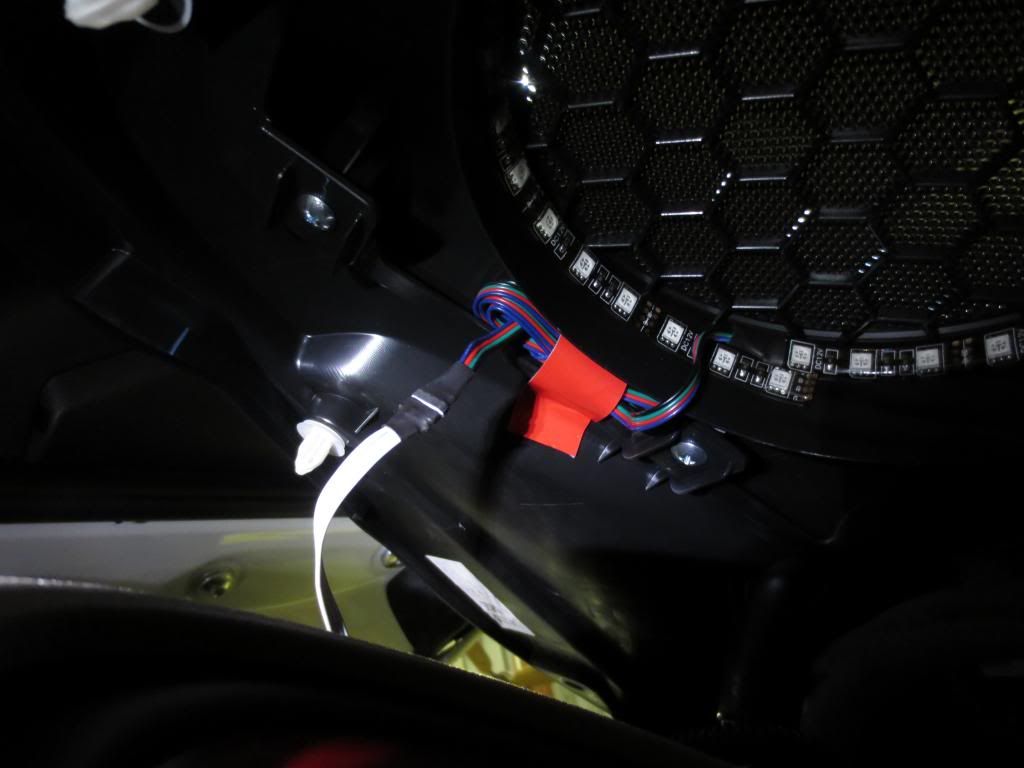 18. Hold the door panel back into place and press firmly all over the panel to push in the plastic tabs. 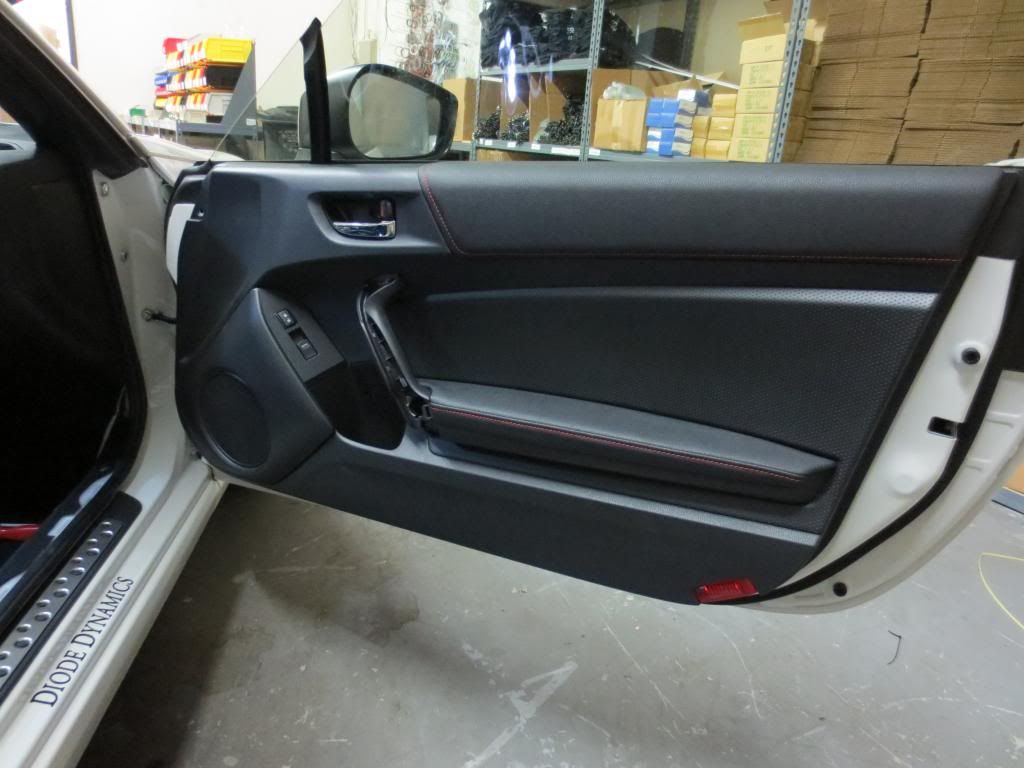 19. Re-attach the three screws and plastic tab. Then snap the silver accent piece back into the handle. 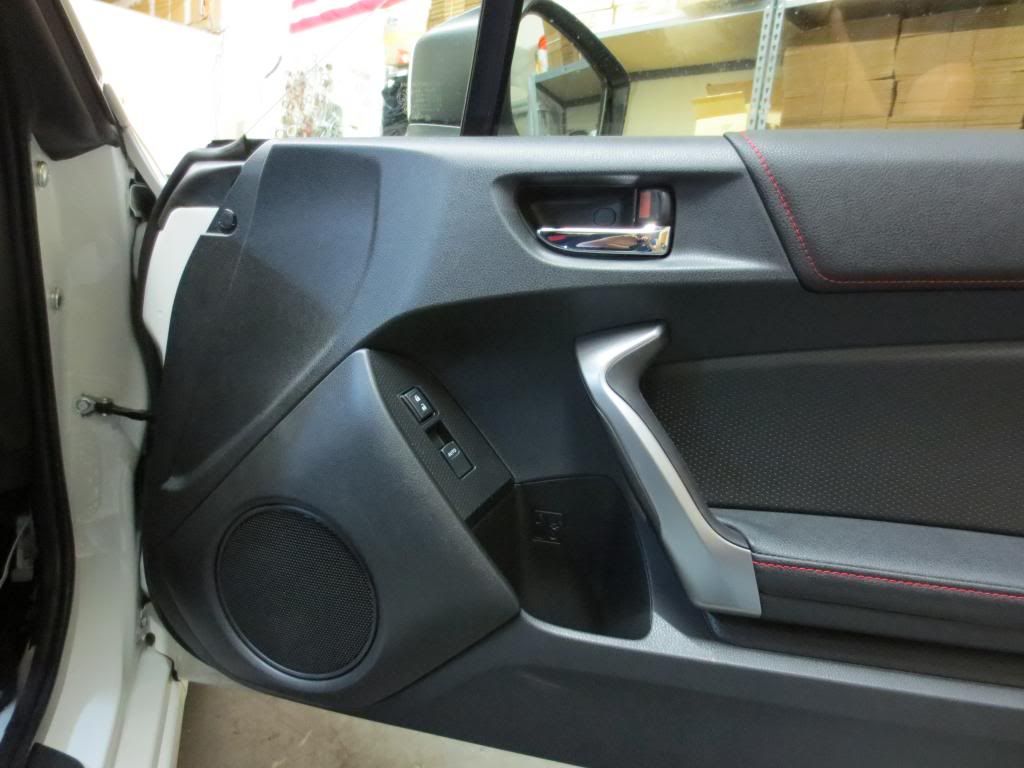 20. Re-assemble the plastic corner piece and door sill. 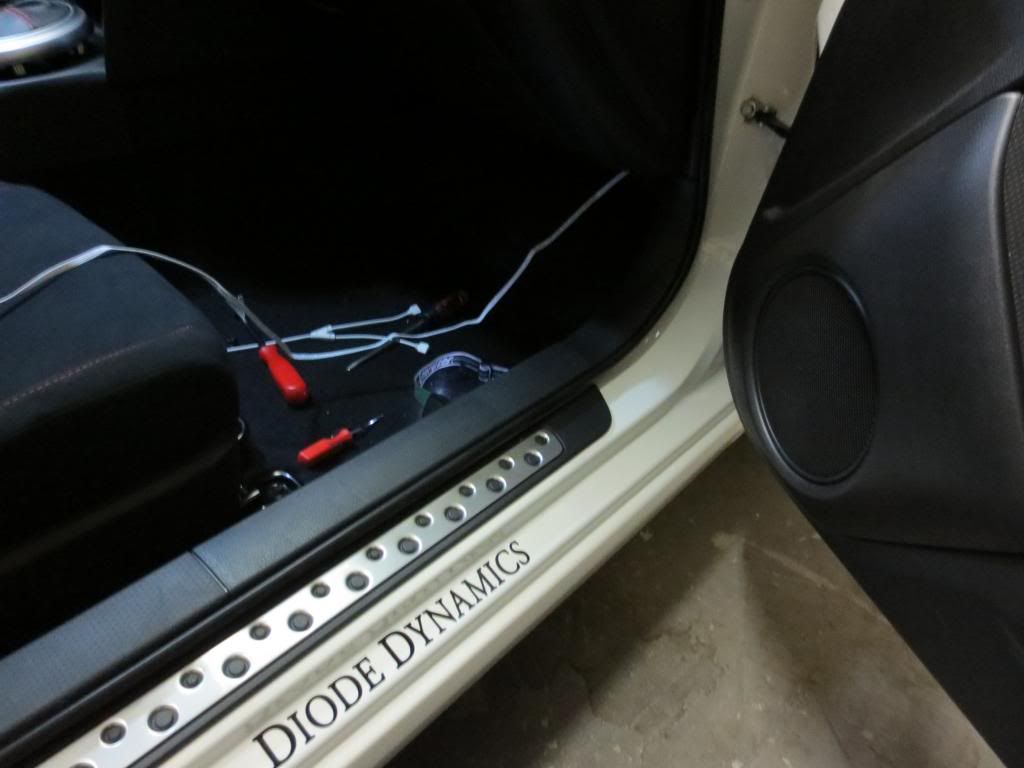 21. Feed the extension wire underneath the glove box (use zip ties to hold the wire up) and through the center console. The shift boot frame is just held in my plastic clips, It can be removed by prying it off with a flat head screwdriver. 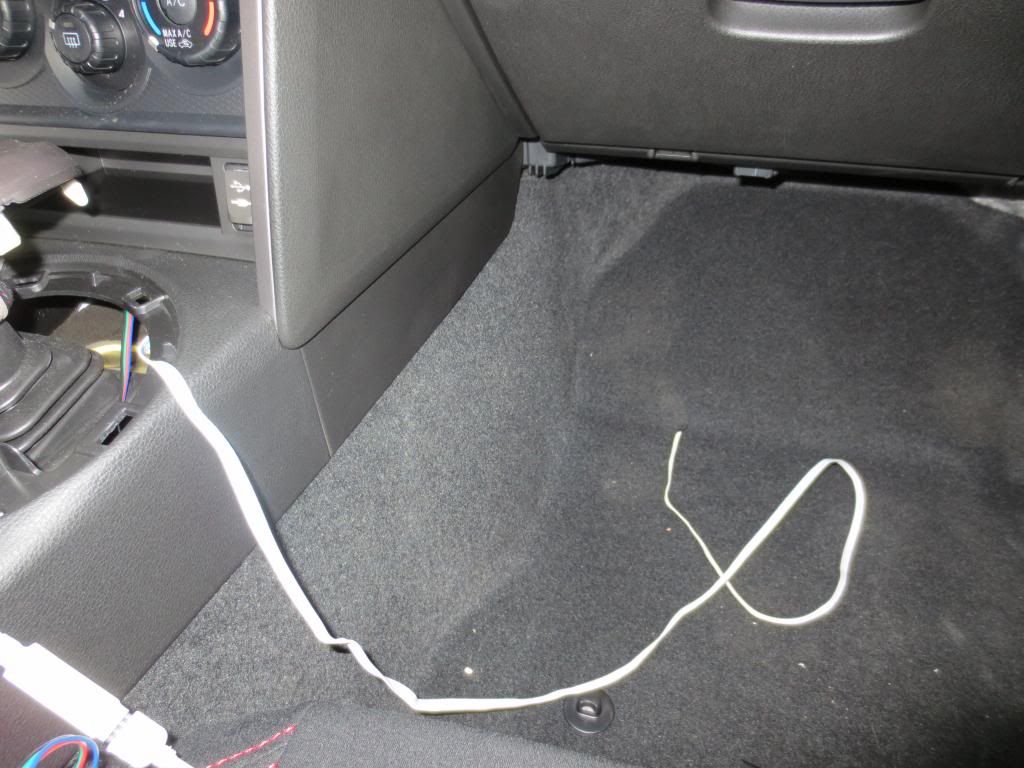 22. Attach the RGB ends into the supplied splitters, then into the RGB controller. 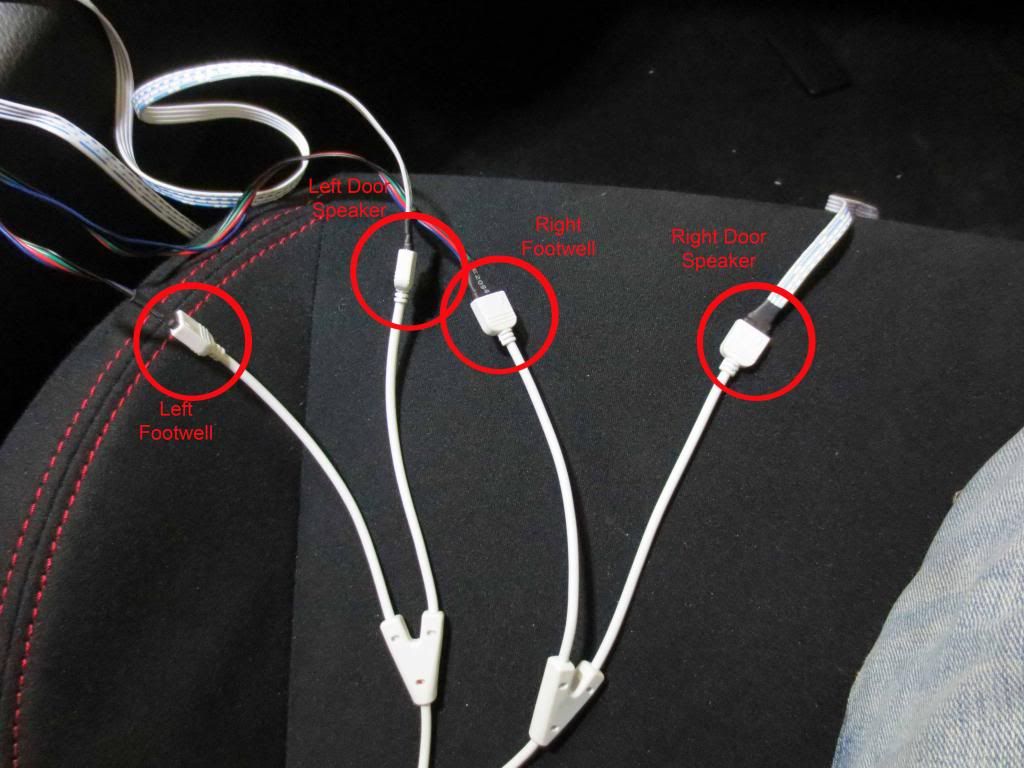 23. Stuff all the excess wiring into the center console pocket above the cigarette lighter but below the shifter. Re assemble the shifter. 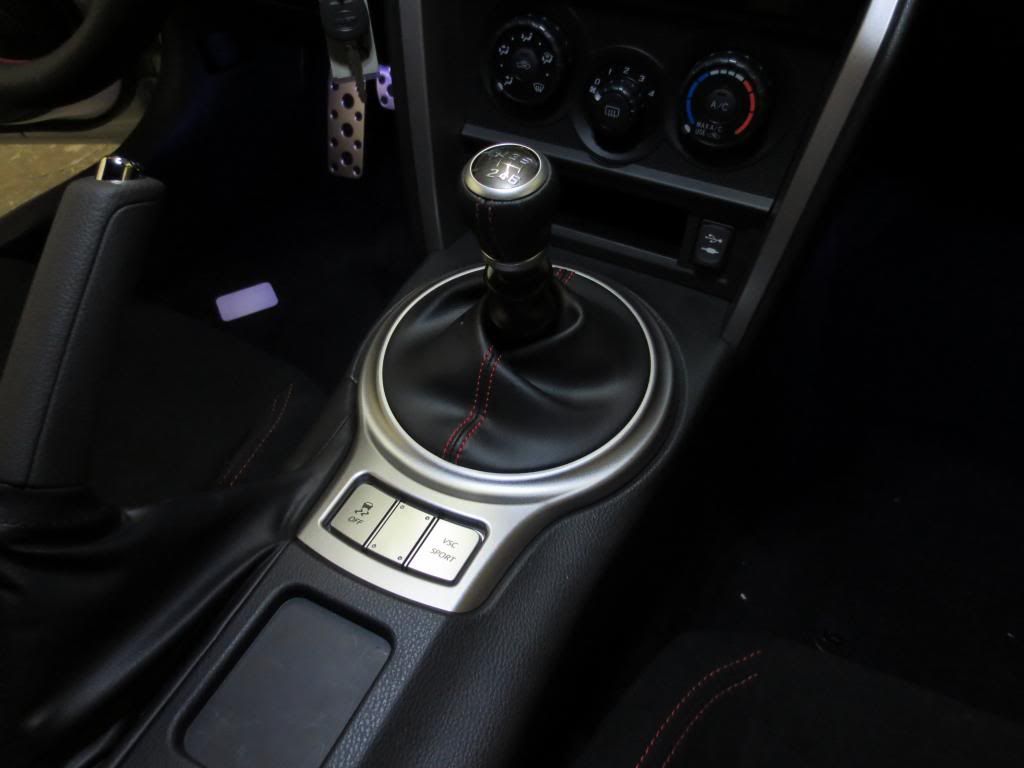 24. Repeat steps for opposite door! Enjoy your new illuminated door speakers! If you have any questions, just ask! 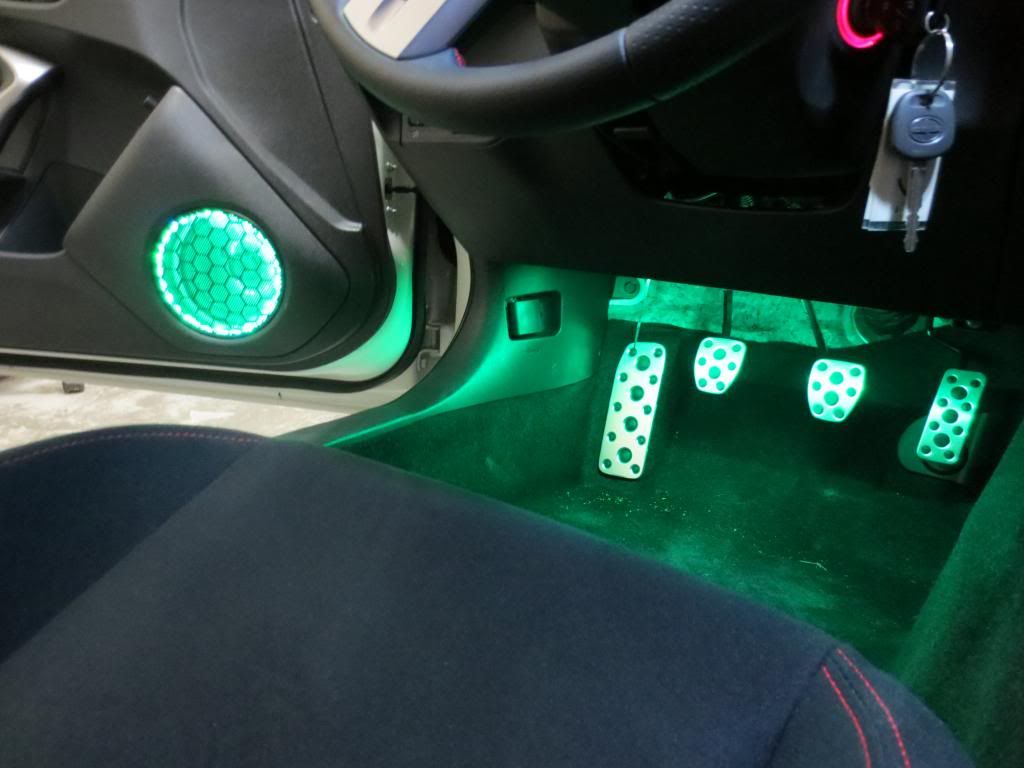 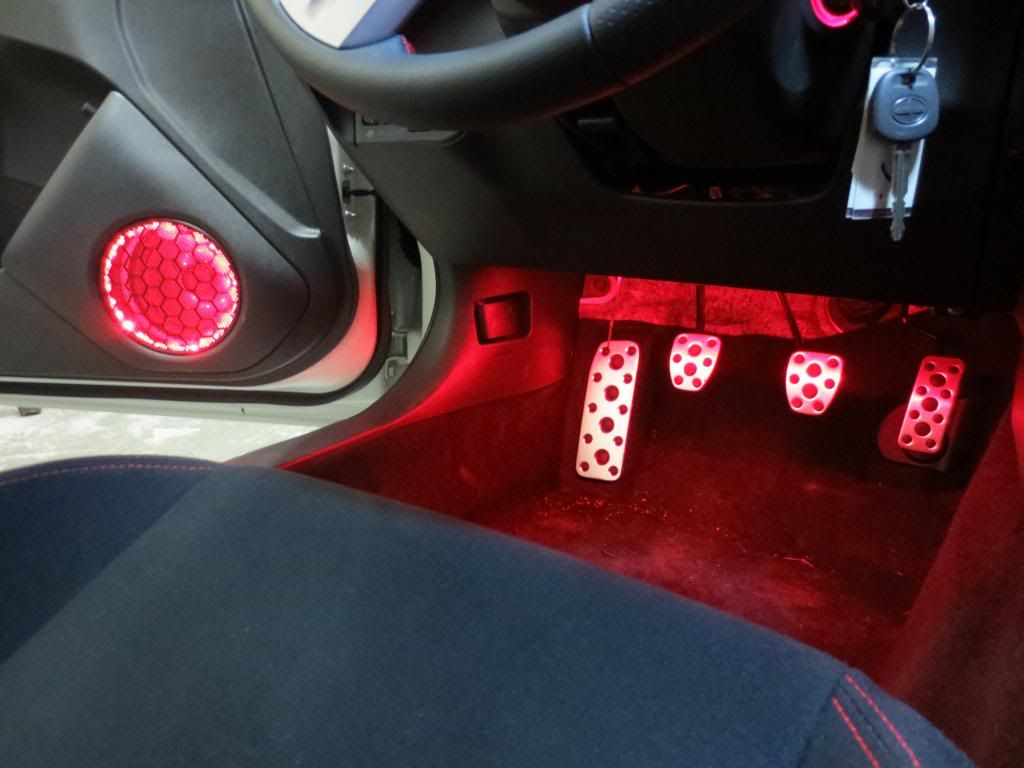 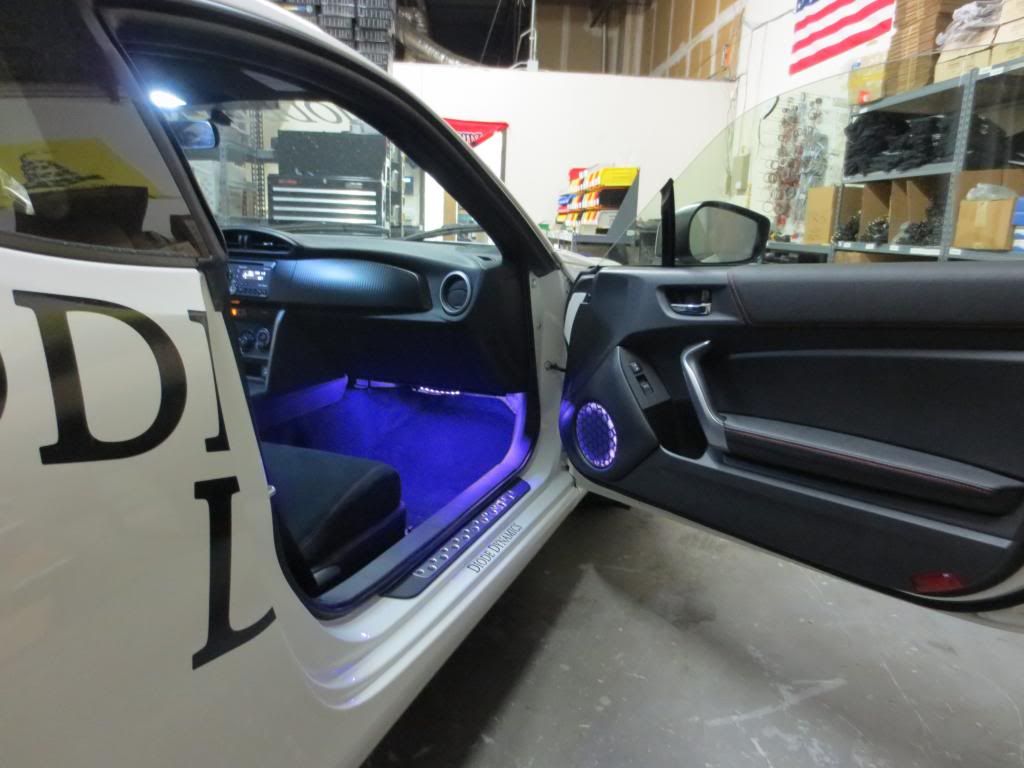
|

|

|
|
01-26-2013, 09:52 PM
|
#3 | |
|
Member
Join Date: Jan 2013
Drives: 07 Hyundai Tiburon SE
Location: Saint Louis, MO
Posts: 74
Thanks: 5
Thanked 21 Times in 15 Posts
Mentioned: 0 Post(s)
Tagged: 0 Thread(s)
|
Quote:
|
|
|
|
|
|
01-26-2013, 09:56 PM
|
#4 | |
|
Senior Member

Join Date: Jun 2012
Drives: 2013 Scion FR-S
Location: Santa Rosa
Posts: 549
Thanks: 474
Thanked 115 Times in 60 Posts
Mentioned: 1 Post(s)
Tagged: 1 Thread(s)
|
Quote:
|
|
|
|
|
|
01-26-2013, 10:12 PM
|
#5 | |
|
Member
Join Date: Jan 2013
Drives: 07 Hyundai Tiburon SE
Location: Saint Louis, MO
Posts: 74
Thanks: 5
Thanked 21 Times in 15 Posts
Mentioned: 0 Post(s)
Tagged: 0 Thread(s)
|
Quote:
|
|
|
|
|
| The Following User Says Thank You to Vanga For This Useful Post: | Mo707 (01-26-2013) |
|
01-26-2013, 10:17 PM
|
#6 |
|
Banned
Join Date: Oct 2012
Drives: Asphalt AT
Location: Midwest
Posts: 813
Thanks: 324
Thanked 608 Times in 262 Posts
Mentioned: 10 Post(s)
Tagged: 0 Thread(s)
|
Do you work for Diode? What would it cost me to drop my car off at your shop and have this installed along with footwells?
|
|
|
|
|
01-26-2013, 10:24 PM
|
#7 | |
|
Member
Join Date: Jan 2013
Drives: 07 Hyundai Tiburon SE
Location: Saint Louis, MO
Posts: 74
Thanks: 5
Thanked 21 Times in 15 Posts
Mentioned: 0 Post(s)
Tagged: 0 Thread(s)
|
Quote:

|
|
|
|
|
|
01-27-2013, 01:08 AM
|
#9 | |
|
Member
Join Date: Jan 2013
Drives: 07 Hyundai Tiburon SE
Location: Saint Louis, MO
Posts: 74
Thanks: 5
Thanked 21 Times in 15 Posts
Mentioned: 0 Post(s)
Tagged: 0 Thread(s)
|
Quote:
|
|
|
|
|
|
02-28-2013, 04:05 PM
|
#10 |
|
Junior Member
Join Date: Jan 2013
Drives: GT86 (Aero Kit)
Location: New Zealand
Posts: 9
Thanks: 0
Thanked 0 Times in 0 Posts
Mentioned: 1 Post(s)
Tagged: 0 Thread(s)
|
You are the man! I have been waiting for someone to post something like this for a few months now!
 Can you please give me more information about the RGB strips and RGB controller? Links to the items please??? Thanks heaps!!! Last edited by Deathkaos; 02-28-2013 at 04:18 PM. |
|
|
|
|
03-01-2013, 08:20 PM
|
#11 | |
|
Member
Join Date: Jan 2013
Drives: 07 Hyundai Tiburon SE
Location: Saint Louis, MO
Posts: 74
Thanks: 5
Thanked 21 Times in 15 Posts
Mentioned: 0 Post(s)
Tagged: 0 Thread(s)
|
Quote:
|
|
|
|
|
|
03-01-2013, 09:05 PM
|
#12 |
|
Senior Member
Join Date: Nov 2011
Drives: ex500r
Location: AR
Posts: 859
Thanks: 13
Thanked 105 Times in 77 Posts
Mentioned: 2 Post(s)
Tagged: 0 Thread(s)
|
Do you think you we can make that little reflector functional on the door?.
__________________
 |
|
|
|
|
03-02-2013, 12:11 PM
|
#13 |
|
Banned
Join Date: Jan 2013
Drives: 13 DGM BRZ Ltd
Location: Williamsburg, VA
Posts: 974
Thanks: 294
Thanked 470 Times in 255 Posts
Mentioned: 17 Post(s)
Tagged: 4 Thread(s)
|
You didn't have to cut the moisture barrier... it has that black goop/gummy stuff that will allow you to pull off the moisture barrier and stick it back on.
|
|
|
|
|
03-03-2013, 09:38 PM
|
#14 | |
|
Member
Join Date: Jan 2013
Drives: 07 Hyundai Tiburon SE
Location: Saint Louis, MO
Posts: 74
Thanks: 5
Thanked 21 Times in 15 Posts
Mentioned: 0 Post(s)
Tagged: 0 Thread(s)
|
Quote:
|
|
|
|
|
|
|
|
|
|
| Thread Tools | Search this Thread |
|
|
 Similar Threads
|
||||
| Thread | Thread Starter | Forum | Replies | Last Post |
| door speakers not working | number1Tango | Electronics | Audio | NAV | Infotainment | 23 | 04-03-2022 07:03 PM |
| wire routing for door speakers | derka-derka | Electronics | Audio | NAV | Infotainment | 6 | 12-13-2012 09:49 PM |
| Front door speakers. | Calum | Electronics | Audio | NAV | Infotainment | 5 | 08-11-2012 04:49 PM |
| Just replace door speakers? | industrial | Electronics | Audio | NAV | Infotainment | 0 | 08-02-2012 02:57 PM |
| Installed new in-dash, lost sound from door speakers | Nitro | Electronics | Audio | NAV | Infotainment | 2 | 06-04-2012 08:53 PM |


 Snow White


