


|
||||||
| DIY (Do-It-Yourself) Guides For all DIYs. |
 |
|
|
Thread Tools | Search this Thread |
 02-01-2015, 01:01 AM
|
#15 |
|
Senior Member
Join Date: Apr 2013
Drives: 2013 FR-S, Hot Lava; 2012 Z1000 CBO
Location: Minnesota, USA
Posts: 539
Thanks: 1,650
Thanked 253 Times in 165 Posts
Mentioned: 7 Post(s)
Tagged: 0 Thread(s)
|
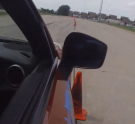
These should help. This is how my defroster circuit is wired on the right passenger footwell, behind the cover plate. You can see the seal for the door on the right edge. The wire going through the door goes to one end of the heater coil for the mirror, and the other goes to the same point on the left mirror, passing behind the shifter trim.
 Here's a shot of how I grounded the turn signal and the heated part. I should probably have used a crimped connector, but I didn't have one on hand. 
__________________
|

|

|
| The Following User Says Thank You to JohnJuan For This Useful Post: | 6spd (02-13-2015) |
|
02-13-2015, 03:17 PM
|
#16 |
|
Senior Member

Join Date: Feb 2014
Drives: 2013 Raven FR-S
Location: WA
Posts: 120
Thanks: 37
Thanked 24 Times in 20 Posts
Mentioned: 3 Post(s)
Tagged: 0 Thread(s)
|
Do you have to add relay and fuse? or just tap into the rear defroster wire?
Last edited by 6spd; 02-13-2015 at 03:32 PM. |
|
|
|
|
02-13-2015, 05:17 PM
|
#17 | |
|
Senior Member
Join Date: Apr 2013
Drives: 2013 FR-S, Hot Lava; 2012 Z1000 CBO
Location: Minnesota, USA
Posts: 539
Thanks: 1,650
Thanked 253 Times in 165 Posts
Mentioned: 7 Post(s)
Tagged: 0 Thread(s)
|
Quote:
__________________
Last edited by JohnJuan; 04-20-2021 at 04:31 PM. |
|
|
|
|
| The Following User Says Thank You to JohnJuan For This Useful Post: | 6spd (02-16-2015) |
|
|
|
|
|
|
|
 Similar Threads
|
||||
| Thread | Thread Starter | Forum | Replies | Last Post |
| DIY: Auto dimming rear view mirror install | Longhorn248 | DIY (Do-It-Yourself) Guides | 64 | 01-21-2021 06:17 PM |
| DIY: APR Door Mirror Install | RallySport Direct | DIY (Do-It-Yourself) Guides | 53 | 04-26-2019 03:08 PM |
| DIY JDM frameless mirror install | ayau | DIY (Do-It-Yourself) Guides | 8 | 01-10-2014 08:36 PM |
| Part number request for heated seat switch trim | azian_advanced | Cosmetic Modification (Interior/Exterior/Lighting) | 1 | 09-13-2013 11:02 PM |
| How to install Homelink mirror? | Grimlock | Electronics | Audio | NAV | Infotainment | 10 | 06-10-2012 06:07 PM |


