


|
||||||
| Engine, Exhaust, Transmission Discuss the FR-S | 86 | BRZ engine, exhaust and drivetrain. |
 |
|
|
Thread Tools | Search this Thread |
 10-11-2012, 01:54 AM
|
#1 |
|
Photo Specialist

Join Date: Feb 2012
Drives: 2013 Toyota 86 DGM 6MT
Location: Texas
Posts: 1,152
Thanks: 587
Thanked 1,802 Times in 420 Posts
Mentioned: 94 Post(s)
Tagged: 0 Thread(s)
|
Perrin Headerback Exhaust System
Haven't installed it yet, but will have full feedback and video once it's done. My goal is to fill out the damn bumper cutout, add a little bit of power, and sound discrete.
Thanks to @PERRIN_Jeff and @PERRIN_Chris for developing this well built system and providing nice bits like gaskets, and nuts and bolts. The research y'all done and the community feedback is outstanding. I have more Perrin number plate frames than I know what to do with now. Talked to Chris over the phone and he's a quality human. Thanks to Jeremy/Yo at @FT-86 SpeedFactory for helping me with my questions, ordering, and tracking down the parts when they were on backorder. Again quality humans to work with. Wall of pictures ahead. Resonated Brushed Steel Catback, with Catted Front Pipe. Should clear up anyone's question about the build quality of the exhaust. It's damn impressive. Flanges are thick, the resonated pipe has a flexible end, the clamping collars look great. The Catback system is packed well also. My only negative comment is that while the welds on the overpipe and front pipe look pretty, the catback welds aren't so nice visually, but they look beefy. Judge for yourself! Catback packaging with foam injection 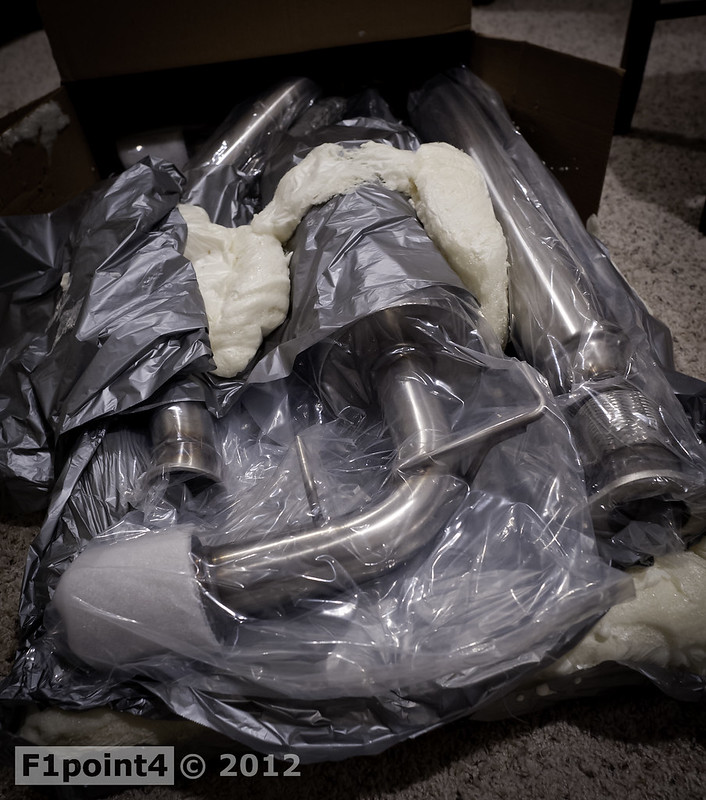 20121010-PerrinHeaderback-001 by VictorN07, on Flickr System laid out 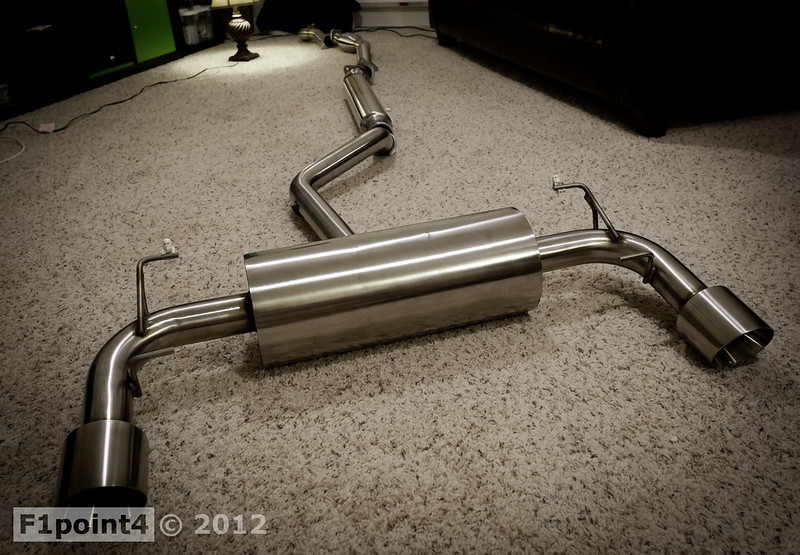 20121010-PerrinHeaderback-002 by VictorN07, on Flickr  20121010-PerrinHeaderback-003 by VictorN07, on Flickr Overpipe 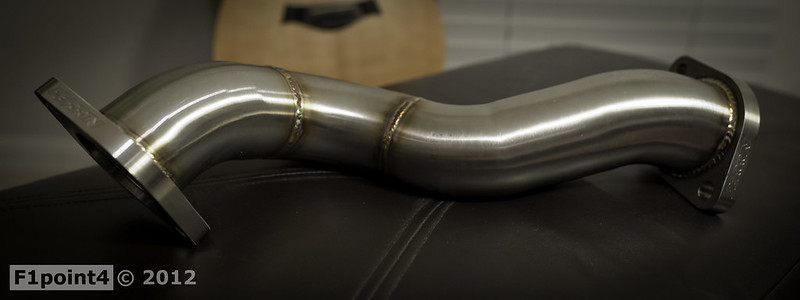 20121010-PerrinHeaderback-004 by VictorN07, on Flickr 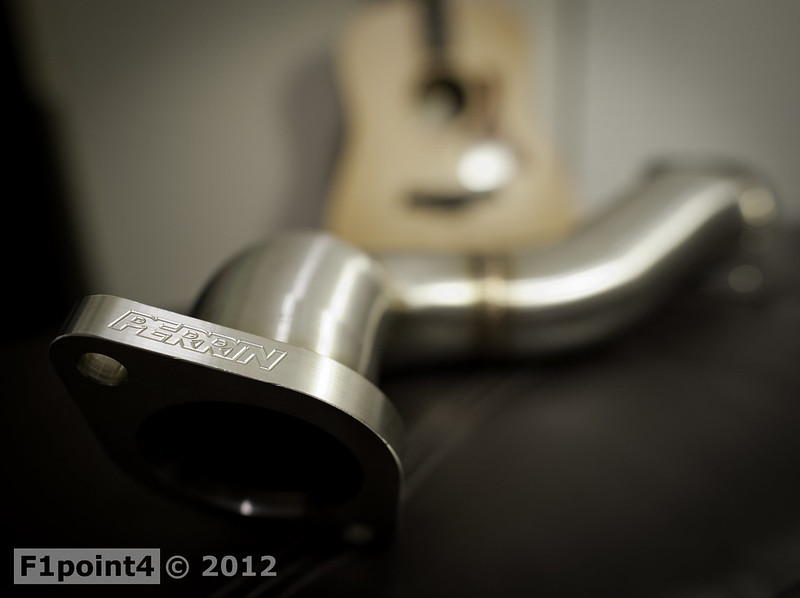 20121010-PerrinHeaderback-005 by VictorN07, on Flickr Dem Welds - second favorite photo. 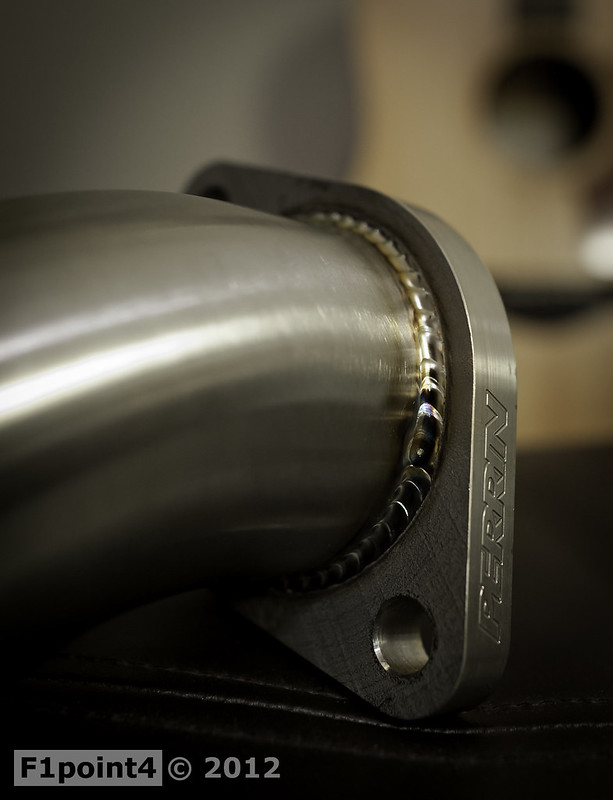 20121010-PerrinHeaderback-006 by VictorN07, on Flickr Front Pipe with Catalytic Converter 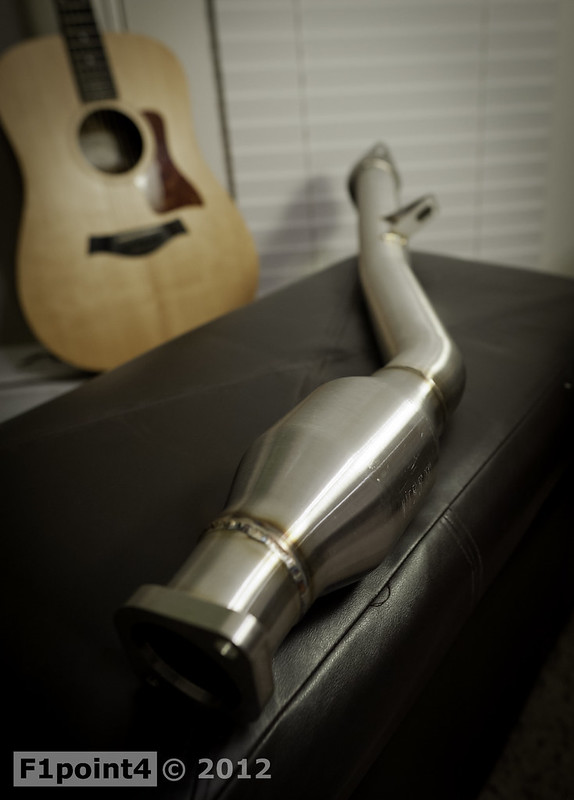 20121010-PerrinHeaderback-007 by VictorN07, on Flickr 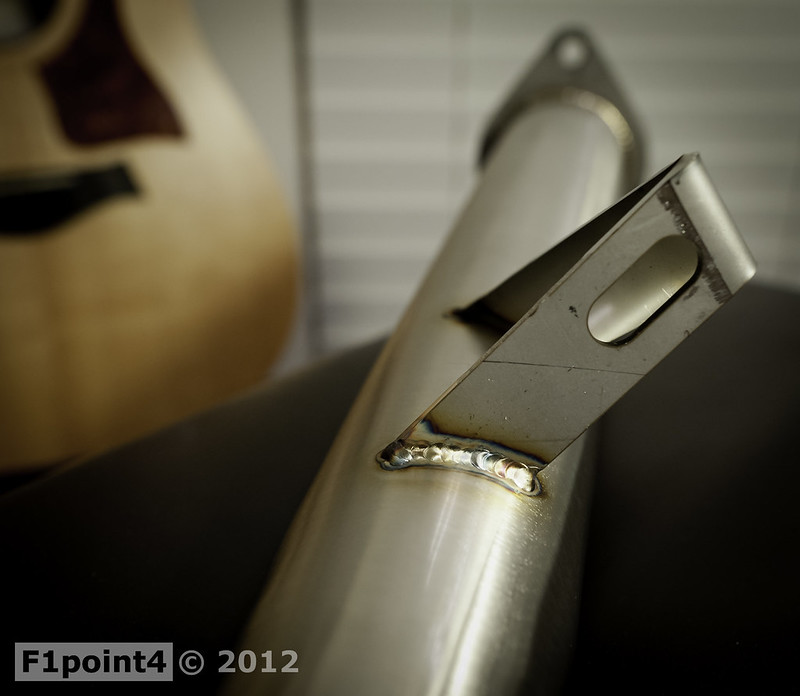 20121010-PerrinHeaderback-008 by VictorN07, on Flickr Inside of Cat. It's a high flow cat. 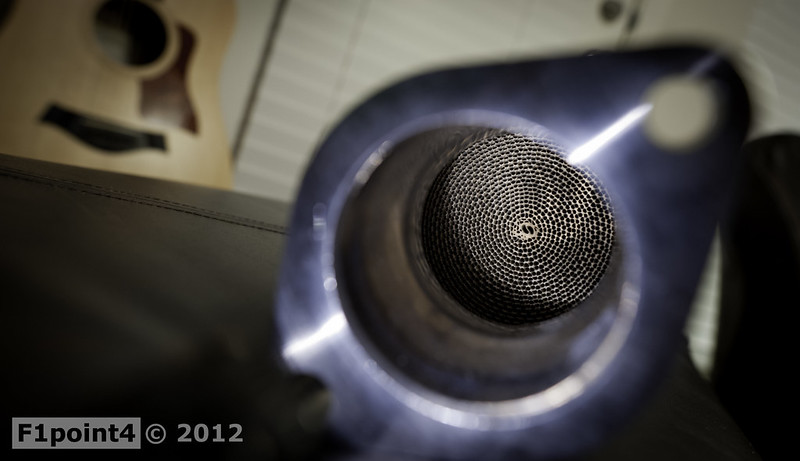 20121010-PerrinHeaderback-009 by VictorN07, on Flickr Resonated Pipe with Flexible End  20121010-PerrinHeaderback-010 by VictorN07, on Flickr 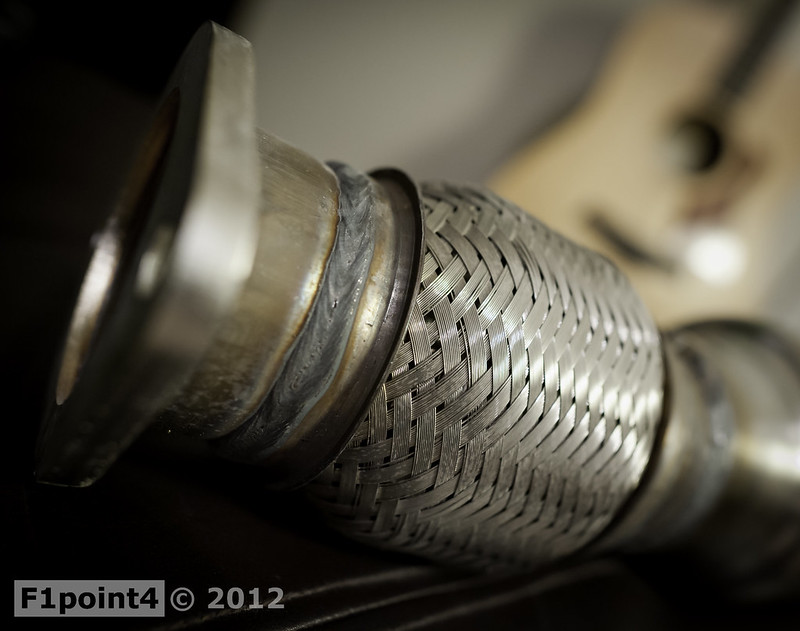 20121010-PerrinHeaderback-012 by VictorN07, on Flickr  20121010-PerrinHeaderback-015 by VictorN07, on Flickr Welds are a different style here 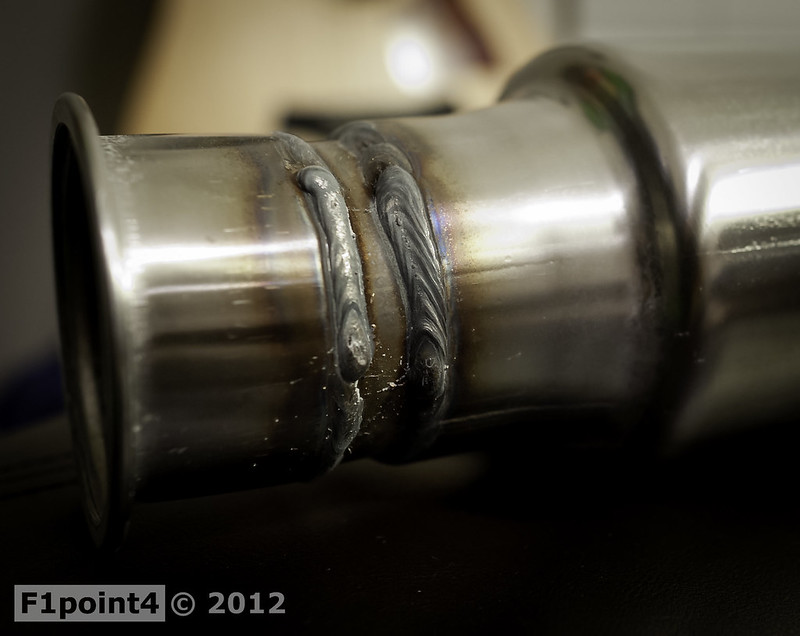 20121010-PerrinHeaderback-013 by VictorN07, on Flickr Inside of the Resonator 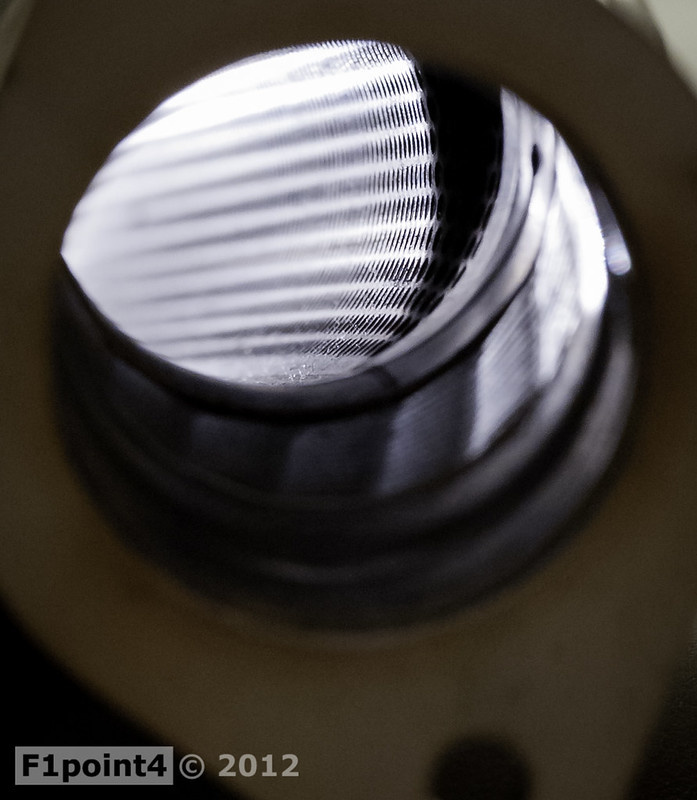 20121010-PerrinHeaderback-014 by VictorN07, on Flickr Pipe in the Catback System 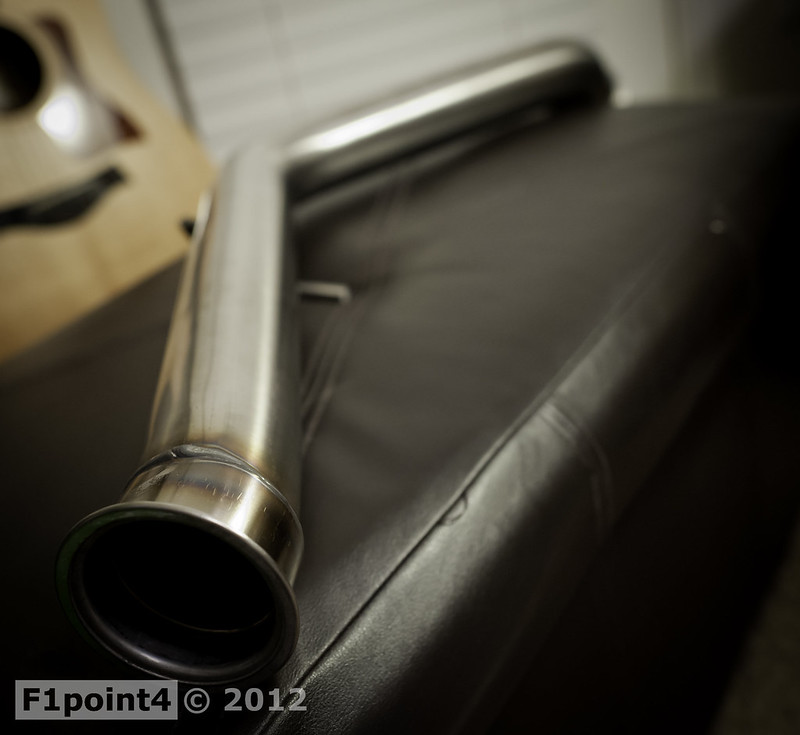 20121010-PerrinHeaderback-016 by VictorN07, on Flickr 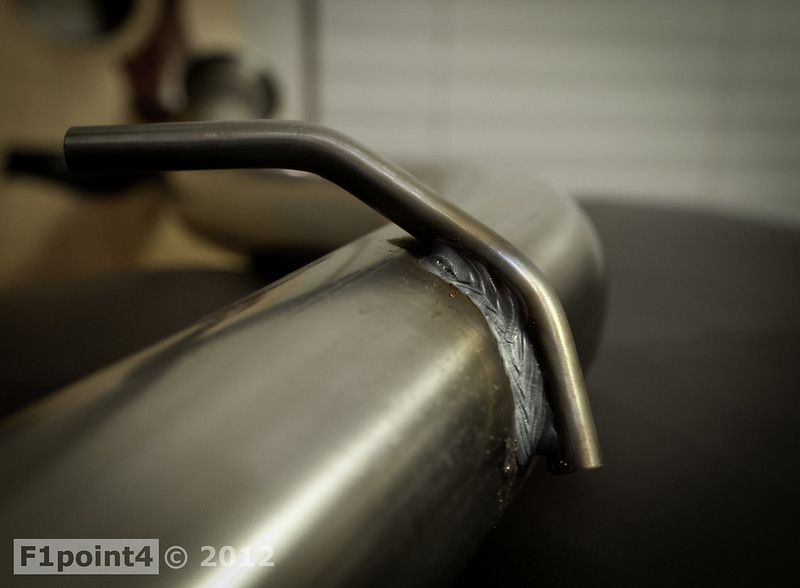 20121010-PerrinHeaderback-017 by VictorN07, on Flickr  20121010-PerrinHeaderback-018 by VictorN07, on Flickr 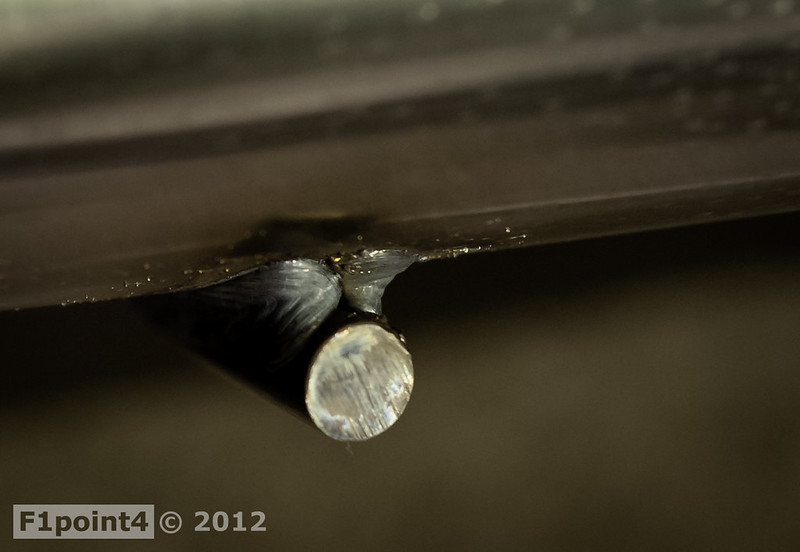 20121010-PerrinHeaderback-019 by VictorN07, on Flickr Axleback - This one is the winner.  20121010-PerrinHeaderback-020 by VictorN07, on Flickr 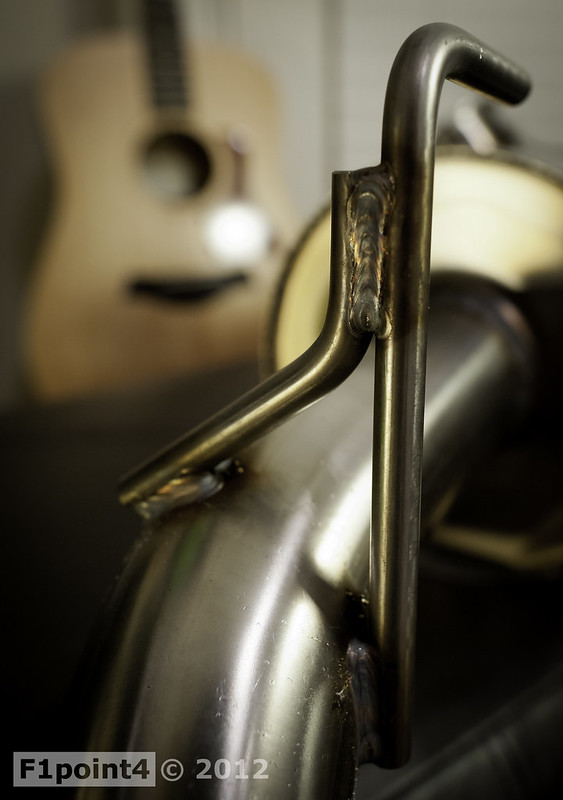 20121010-PerrinHeaderback-021 by VictorN07, on Flickr  20121010-PerrinHeaderback-022 by VictorN07, on Flickr  20121010-PerrinHeaderback-023 by VictorN07, on Flickr 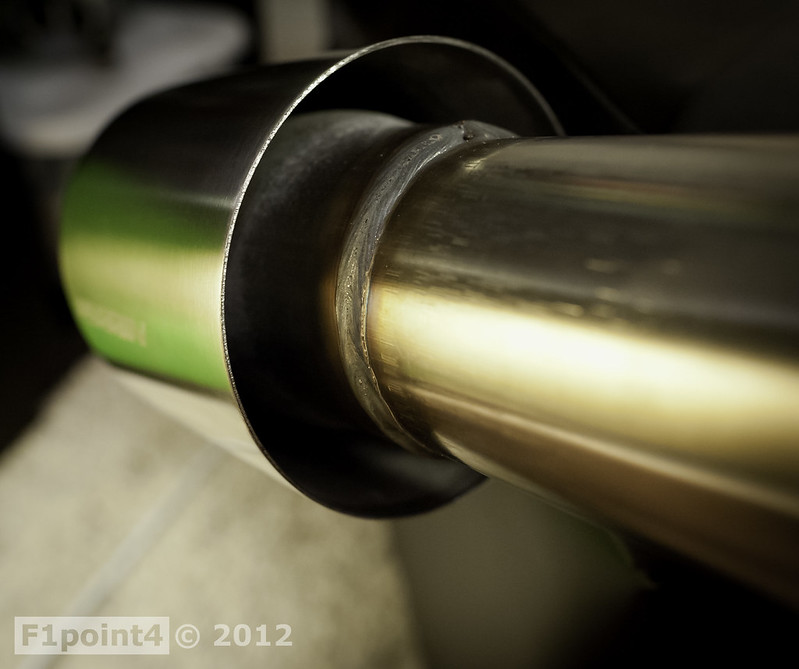 20121010-PerrinHeaderback-024 by VictorN07, on Flickr Clamping Collars 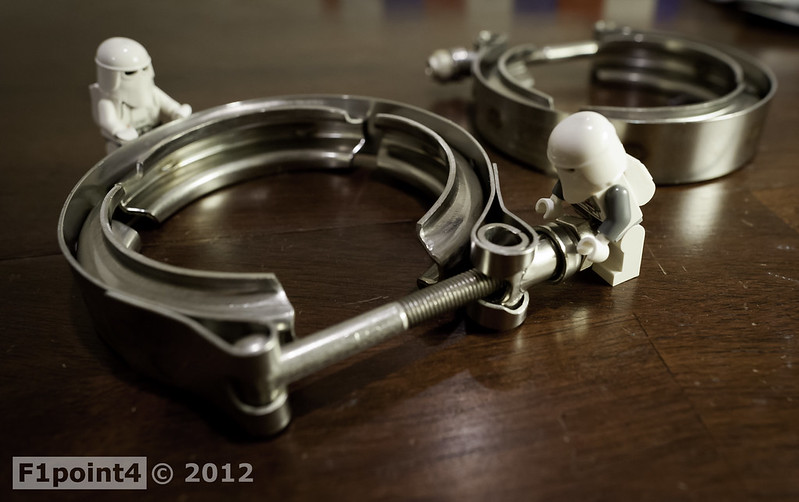 20121010-PerrinHeaderback-025 by VictorN07, on Flickr Exhaust should be music to my ears lol Last edited by F1point4; 10-11-2012 at 03:44 PM. |

|

|
| The Following 17 Users Say Thank You to F1point4 For This Useful Post: | Astroboy (09-10-2013), ATL BRZ (10-11-2012), Chewie4299 (10-14-2012), flippy (10-16-2012), FT-86 SpeedFactory (10-11-2012), ft86Fan (11-23-2012), Guff (10-17-2012), Jayp (10-11-2012), nubbster927 (10-17-2012), Okami (10-13-2015), PERRIN_Chris (10-11-2012), Slartibartfast (10-29-2012), StarsGarrador (10-11-2012), Techfl3x (04-25-2013), tintumz22 (10-11-2012), Turbowned (10-16-2012), Tylub (10-11-2012) |
|
10-11-2012, 01:55 AM
|
#2 | ||
|
Photo Specialist
Join Date: Feb 2012
Drives: 2013 Toyota 86 DGM 6MT
Location: Texas
Posts: 1,152
Thanks: 587
Thanked 1,802 Times in 420 Posts
Mentioned: 94 Post(s)
Tagged: 0 Thread(s)
|
This is a factual description of my experience installing and using the headerback system. We did face some issues which will be highlighted below. All of the challenges were overcome. Please note that while I faced issues, @PERRIN_Chris and @PERRIN_Jeff will work to resolve them so you may have a smoother experience in the future. I will leave it up to you to formulate your own judgments. Thanks!
Installation @cobrabyte, @post_break and I were installing the Perrin Rear Shifter Bushing and Whiteline Transmission bushing into our cars. We had to remove the front pipe (Cat and Resonator) to access the bolts. While removing the nut to separate the OEM front pipe from the overpipe this happened... Sheared that bolt right off. The nut wouldn't come off so we old school impact drivered it off. It worked sort of. We did use PB Blaster to loosen but on mine it wouldn't budge. Thank goodness we didn't break the studs off the header. Will be a pain, but not impossible to reinstall the OEM exhaust Top Tip: Use PB Blaster well in advance of removing exhaust components Top Tip: Use anti-seize on the threads when installing any hardware to prevent these difficulties in the future 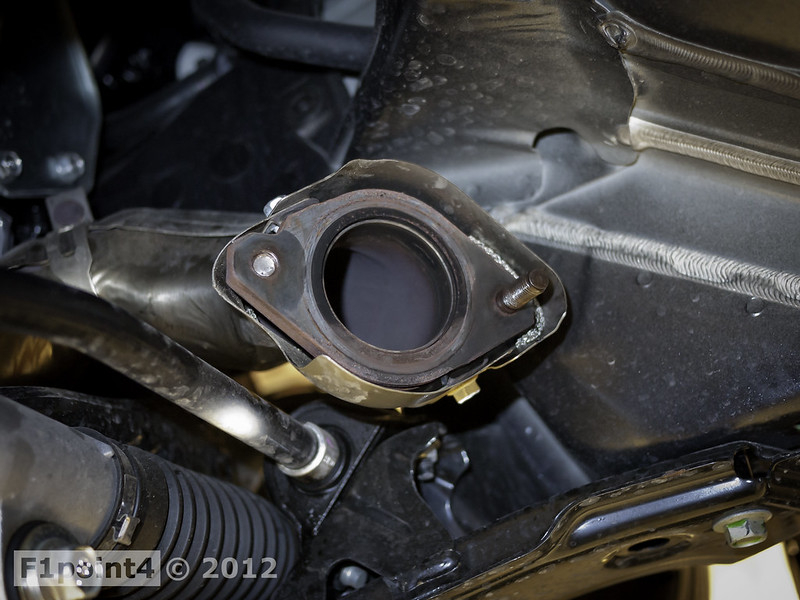 20121012-WhitelinePerrinBushing_Headerback-1 by VictorN07, on Flickr 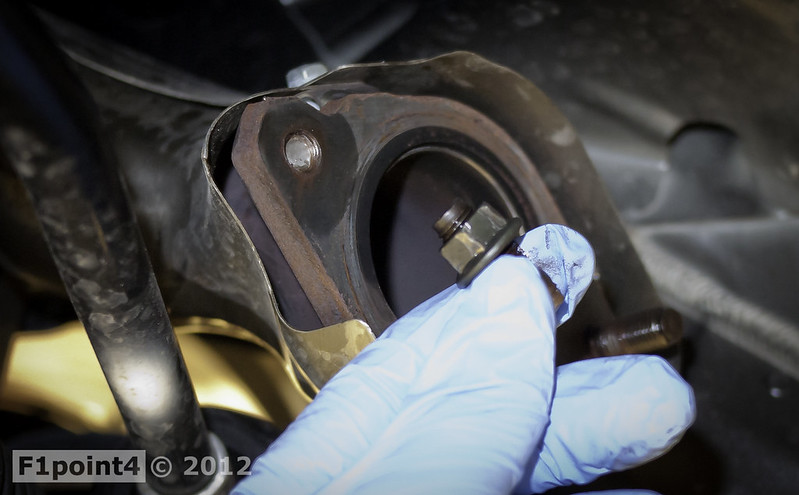 20121012-WhitelinePerrinBushing_Headerback-2 by VictorN07, on Flickr Since I couldn't put my OEM exhaust back on, it was the catalyst for the header back install. We installed the system on the lift which made it 100x easier. People are scared about jacking up the engine to remove the overpipe. We followed @GrimmSpeed DIY for exhaust removal and took off half the shield. Then it was easy to snake it loose without damaging the car. His DIY is here http://www.ft86club.com/forums/showthread.php?t=8121 EDIT: we did not need to jack up the engine when installing the Perrin Overpipe. You can snake it right in. The heat shields are not reused. Hopefully nothing melts in there. We found it strangely odd that all the hardware that came in the headerback was in standard units of measurement. For an import car we were puzzled. We had the tools so it wasn't a big deal. If I recall correctly, the only tools you need to do the install are 9/16" combination wrench 9/16" socket 7/32" Hex Key It was super nice that Perrin includes all the installation hardware needed to replace the exhaust. Extra nice that gaskets are included. However after calling @PERRIN_Chris with questions, I determined I did not have all the gaskets. He was kind enough to overnight the required hardware to me. This gesture, and his willingness to support myself and the community, makes me believe the Perrin Organization is made of high definition organisms of the human species. Bravo. Update: Here is a parts list for those who are concerned. Perrin includes hardware as if you are installing each piece individually. There will be some leftover. Here is everything I used in my install Quote:
The instructions could stand to be more clear about which gasket to use, and where to use them. Collectively we had experience taking apart 86 exhausts, therefore we didn't have too much trouble and we completed the job in a few hours. Header to Overpipe connection. We used an OEM Subaru Crush Gasket here. The headerback system comes with three OEM Crush Gaskets. In total we only used one. None of the new hardware was used. The OEM system has studs that are stuck into the flanges; no bolt to replace. Here we just reused OEM hardware. 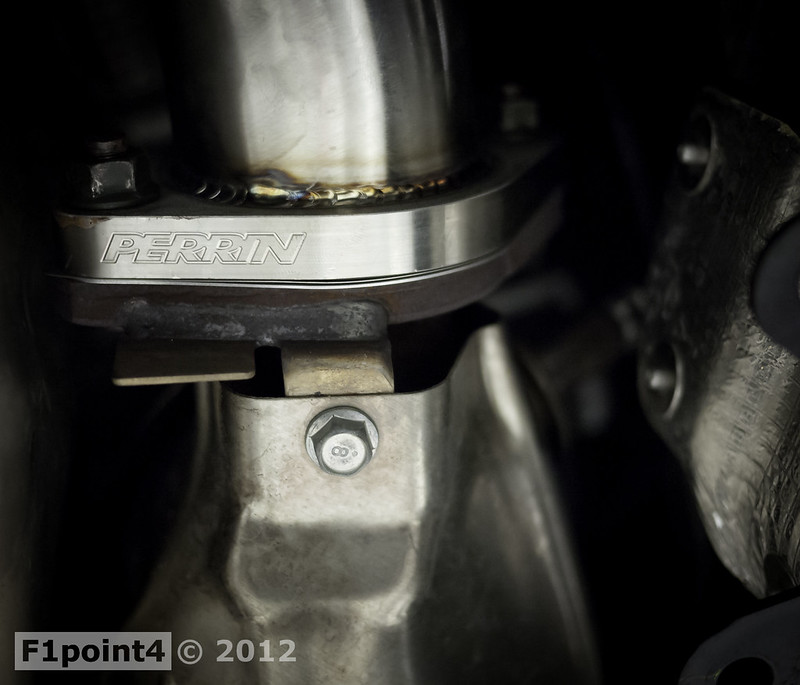 20121012-WhitelinePerrinBushing_Headerback-3 by VictorN07, on Flickr Overpipe to Front Pipe connection. We used a graphite gasket here. The headerback system comes with two graphite gaskets. We used both of them  20121012-WhitelinePerrinBushing_Headerback-4 by VictorN07, on Flickr Catted Front Pipe. Notice the Whiteline transmission bushing. My goodness that piece of rubber is amazing. I'll save that for another post 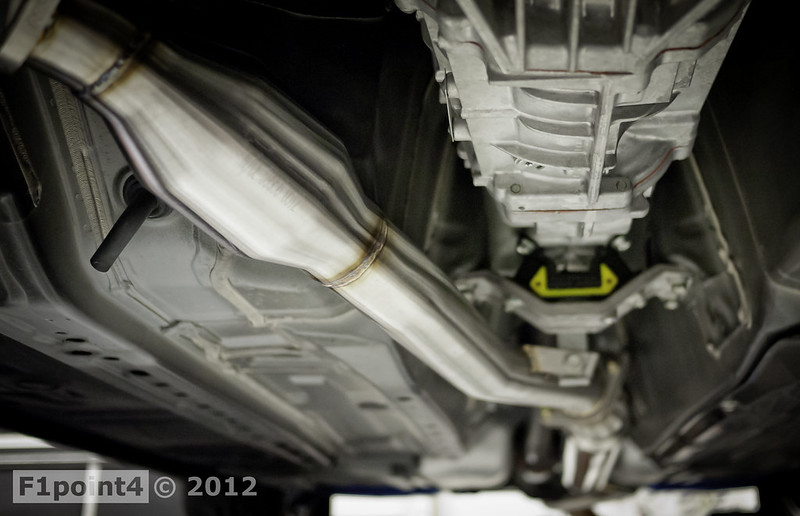 20121012-WhitelinePerrinBushing_Headerback-5 by VictorN07, on Flickr 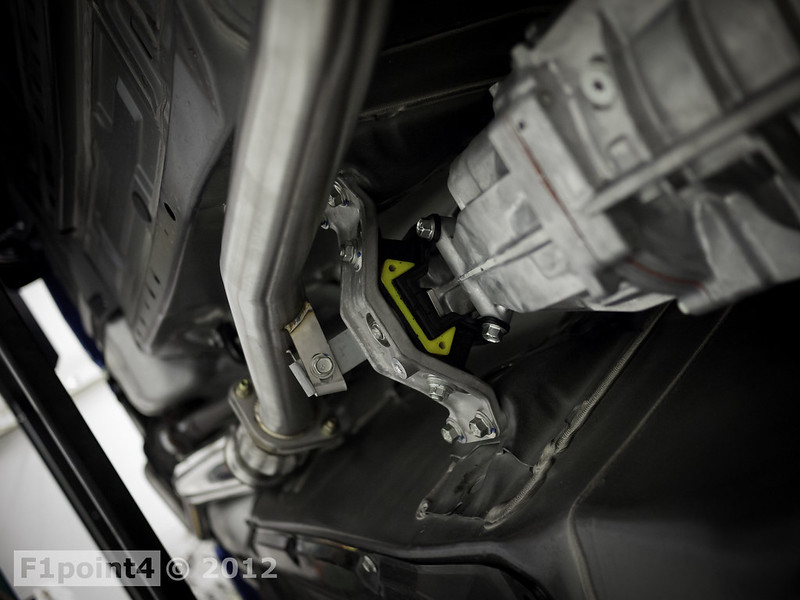 20121012-WhitelinePerrinBushing_Headerback-6 by VictorN07, on Flickr Front Pipe to the flex pipe/resonator of the catback. We used a graphite gasket here. The steel braided bit flexes to improve fitment success rate. Very nice touch. 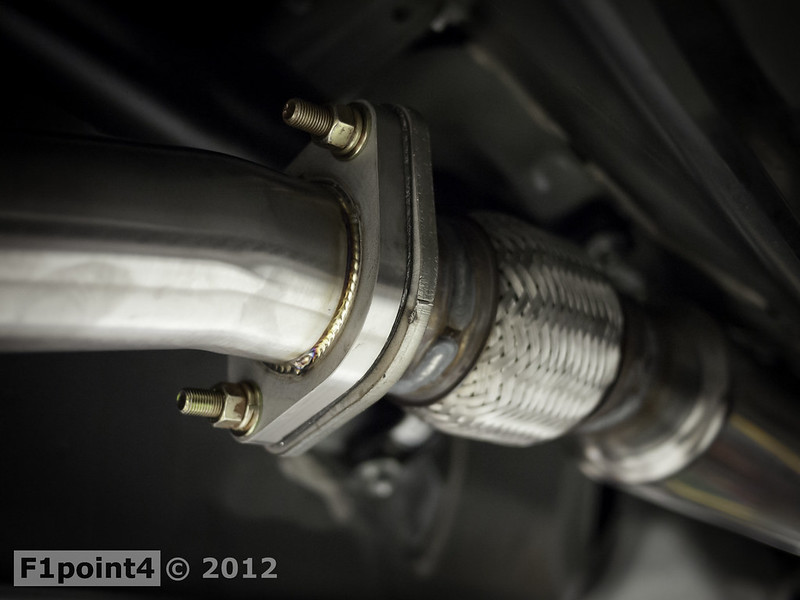 20121012-WhitelinePerrinBushing_Headerback-7 by VictorN07, on Flickr Front this point on, the rest of the connections are made using V-Band clamps. There is one connecting the resonator to the aft pipe, then the aft pipe to the muffler. These clamps are amazing in the sense that they give you rotational adjustment so you can fix your alignment of tips and fit the system together. The system fit in the car on the first try and we have perfect alignment on the tips. I was worried about the lack of gaskets here causing leaks, but @cobrabyte assured me that there is none to worry. He also commented his fancy of V-bands; he had many fitment issues on his BRZ exhaust system which uses all flanges. He was very impressed with the whole setup. 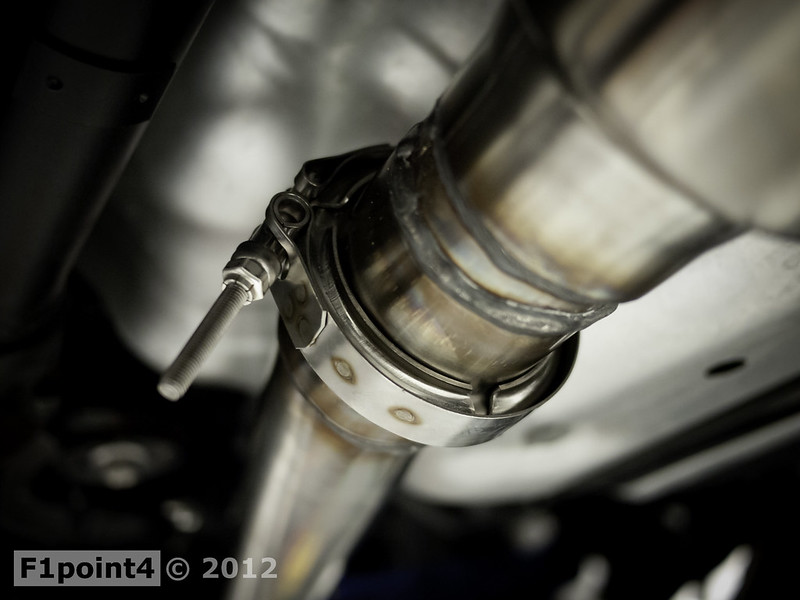 20121012-WhitelinePerrinBushing_Headerback-8 by VictorN07, on Flickr Tips. The entire system is brushed stainless steel. I didn't get a picture of the hangers, but Perrin system instills confidence in the installation. They include mini v-band clamps that slide on to the exhaust hanger studs. Prevents the exhaust from slipping off from vibration. It's not going down unless we have structural compromise in the OEM rubber bushings.  20121012-WhitelinePerrinBushing_Headerback-9 by VictorN07, on Flickr 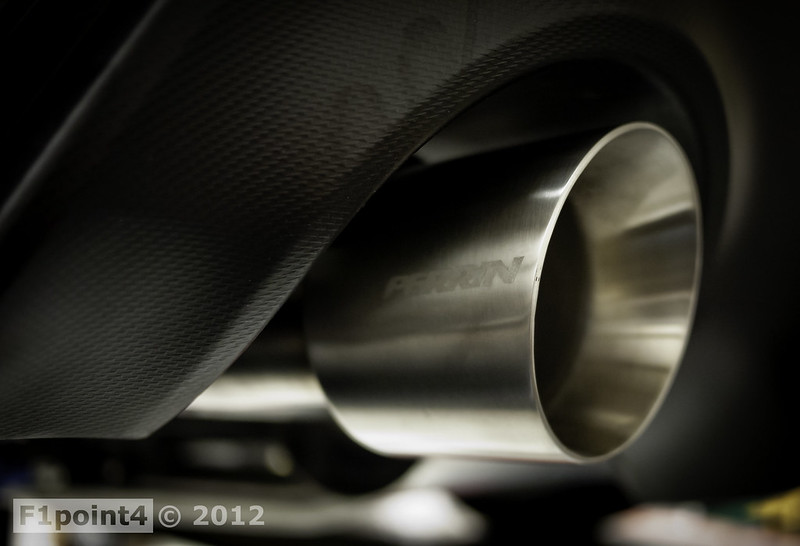 20121012-WhitelinePerrinBushing_Headerback-10 by VictorN07, on Flickr Here is what it looks like before  20121005-RCEYellow-CuscoLCA-16 by VictorN07, on Flickr Some shots in the garage. Much better look over OEM. That is a Lotus Europa. The smile suggests the Lotus gods approve 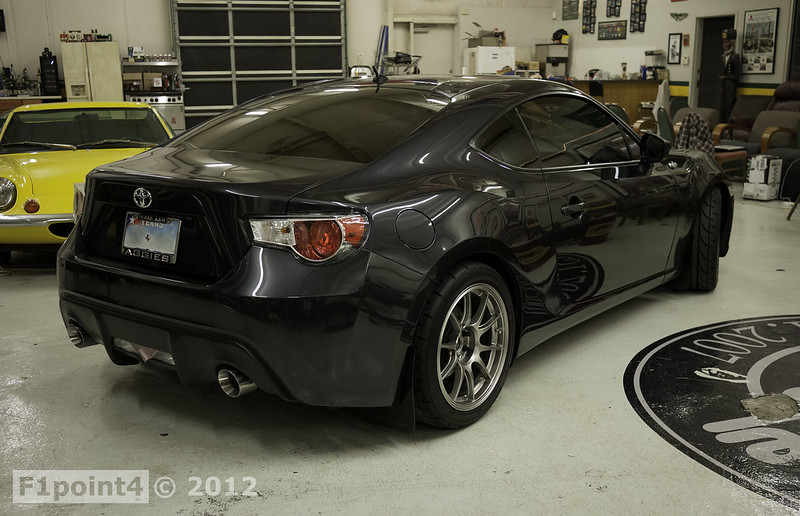 20121012-WhitelinePerrinBushing_Headerback-11 by VictorN07, on Flickr 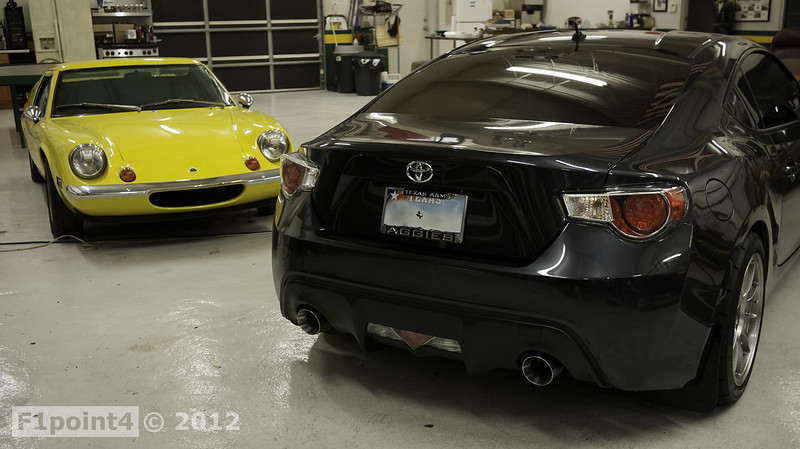 20121012-WhitelinePerrinBushing_Headerback-12 by VictorN07, on Flickr 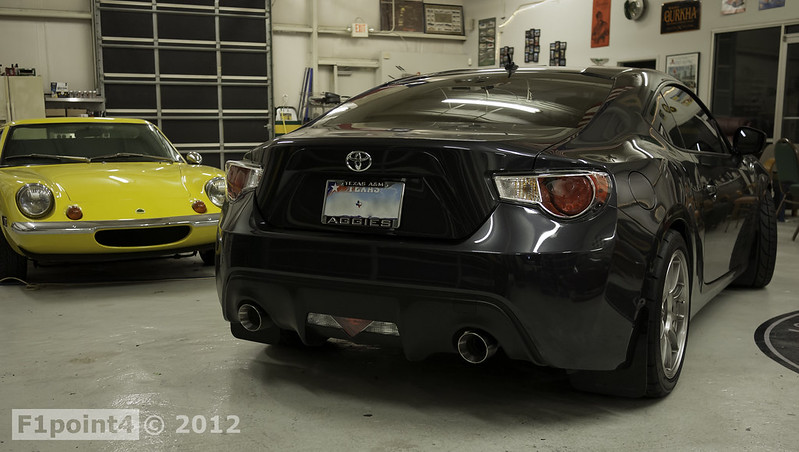 20121012-WhitelinePerrinBushing_Headerback-13 by VictorN07, on Flickr 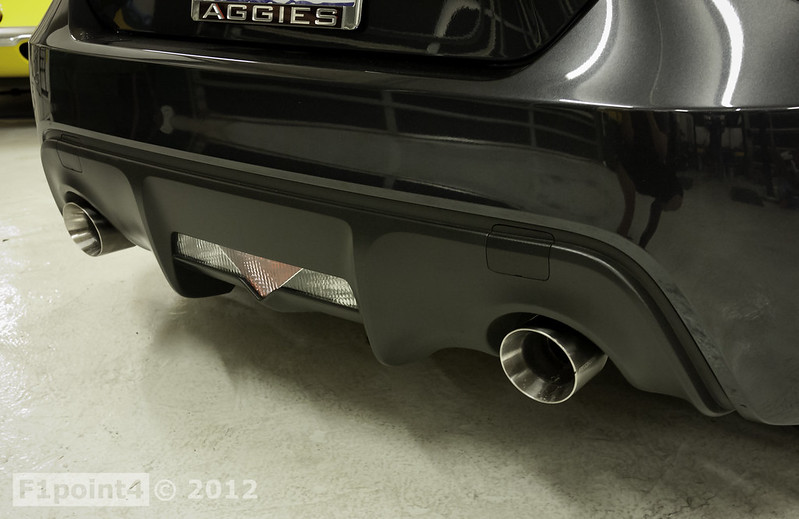 20121012-WhitelinePerrinBushing_Headerback-14 by VictorN07, on Flickr Good times with friends. The Whiteout 86 belongs to @post_break  20121012-WhitelinePerrinBushing_Headerback-15 by VictorN07, on Flickr Driving Feedback The system fulfills my fantasies of replacing the ill fitting tips of the OEM system. Sure I could of done so with different tips, or an axleback/catback. However, I believe in doing things the right way (well what I believe in) and I couldn't help but resist DEM WELDS in the Perrin overpipe and front pipe. In all seriousness, the OEM overpipe is very restrictive I felt compelled to replace it. After driving 250 miles on it, the car feels transformed. Gone is the tenor raspy tone of the OEM system and here comes the baritone thunder akin to the Norse God Thor. Like your father of yesteryear, this system commands respect without having to be forceful, loud, or intimidating. The discrete, masculine tone suits the goals I seek for my motoring experience. It is not burbly, gargly. Just a smooth deep tone. Update: This morning I made the herculean climb up my parking structure. Stuck in 2nd gear, I'll just say I finally understand what it is like to drive a sports car through a tunnel. The audible response the system makes my heart smile. Igniting the air/fuel mixture after a temporary driving sabbatical, and rev match downshifting are things that make you appreciate motoring that much more. I know I'm in for a treat when I turn that key, whether its grand touring, or going to market. The system is very quiet when cruising. Absolutely zero drone in my daily driving RPM range (0-4100 RPM). I find the most useful driving setting is 70MPH in 6th gear. For us that's at 3000rpm, and this is the when the system is the most quiet. Very good for that grand tour. I also believe exhausts can help you and motivate you to drive better; throttle input awakens the beast, and communicates to you exactly what the car is doing. I definitely want to hone my rev match downshifts just to conduct the beautiful symphony of internal combustion. It's hard to quantify the performance gain, but improved throttle response is definitely there. I normally don't drive in the torque dip range so I do not have feedback there, however I will say it is very easy to speed. Going 85-90mph feels effortless. It is easier to blip the throttle in downshifts. Just great overall. Perhaps a few hooning sessions and I might be able to tell if the dip is smoothed out. I believe this system uses a well thought out design, employs high quality material, put together well, and carries out what it's designed to do: increase performance. Good bit of kit. Feedback from other humans + Not obnoxious + You can hear in cabin conversations at all speeds + Not raspy + Tasteful + You make me want to buy a sports car now, dammit. + Youngin: It sounds like a true sports car. **UPDATE**: Had the exhaust on for 3 days now with 400 miles. I think I can quantify the power gain. Prior the car felt like it had to work to make its way up the powerband. Due to this, I short shifted < 3K RPM in my daily driving. Not sure if this is the honeymoon phase, or true extra power, but in the same time between shifts, I'm now hitting my rev indicator (4100RPM). I often say to myself, "I never hear this shift light!" Second gear also pulls much harder; using the same gas pedal force in a 1->2 shift, my car surges forward with power akin to a predator hunting its prey. I need to be more careful before I rear end someone. Ruh Roh In the significant amount of the 250 miles, I noticed that when waiting at lights, my shifter/ebrake area would vibrate in such a way all the glass in Apple stores would break. It was not a good sound. @cobrabyte and made sure everything was torqued down from the exhaust/bushing installs and did further diagnosis. Here was the vibration I was hearing. I may have been exaggerating about shattering 2" thick glass panes. Embed failure? "http://www.youtube.com/watch?v=BgMj-Dq-qKM&list" [ame="http://www.youtube.com/watch?v=BgMj-Dq-qKM"]20121014 PerrinHeaderbackAdjustmentRattle - YouTube[/ame] Observations: The vibration noise only happened when its the car is warm. This is why we didn't catch it initially. It did not happen all the time The transmission tunnel under the ebrake got SUPER HOT. After a few test drives, we discovered the resonator in the catback was vibrating against the transmission tunnel! More specially the piece of metal that holds the collar to support the drive shaft. 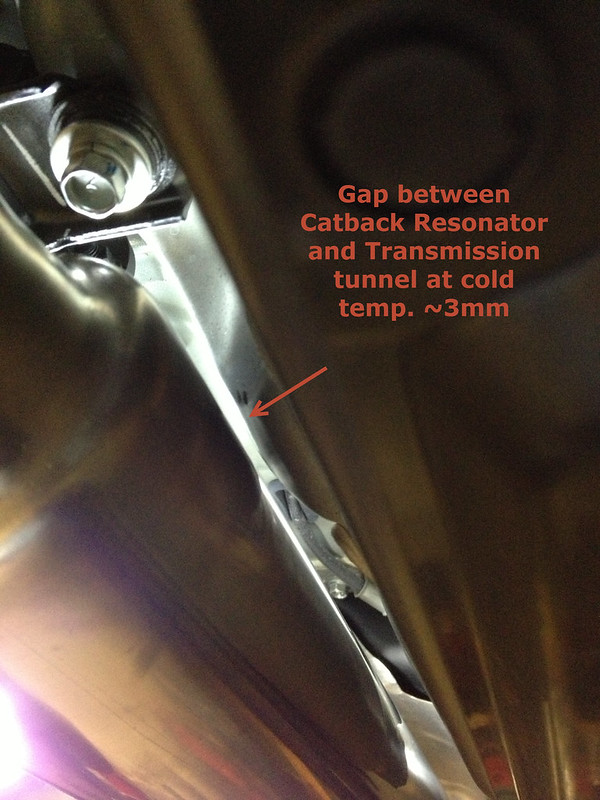 20121014-PerrinHeaderbackAdjustment-01 by VictorN07, on Flickr  20121014-PerrinHeaderbackAdjustment-02 by VictorN07, on Flickr Not my best photo but gives you indication of the OEM gap 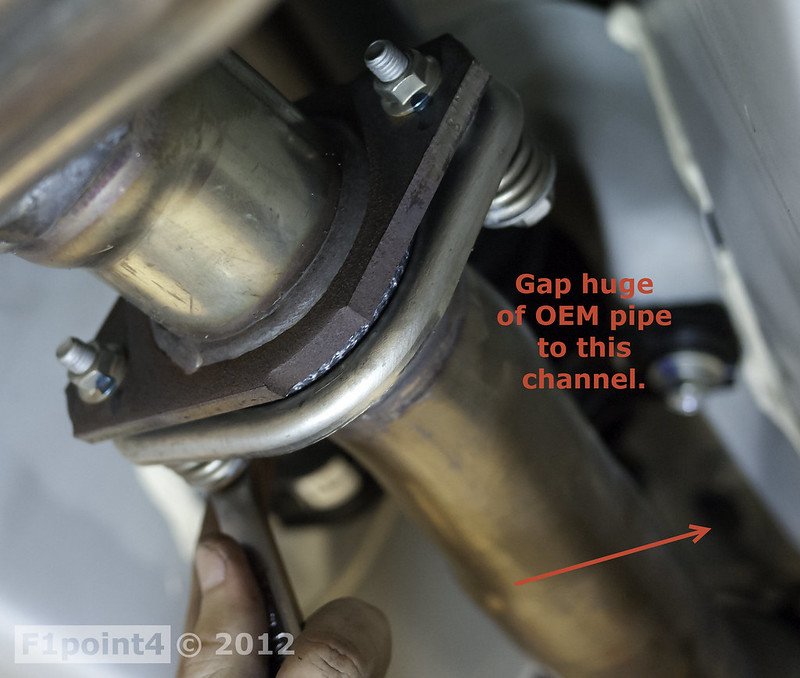 20121014-PerrinHeaderbackAdjustment-09 by VictorN07, on Flickr 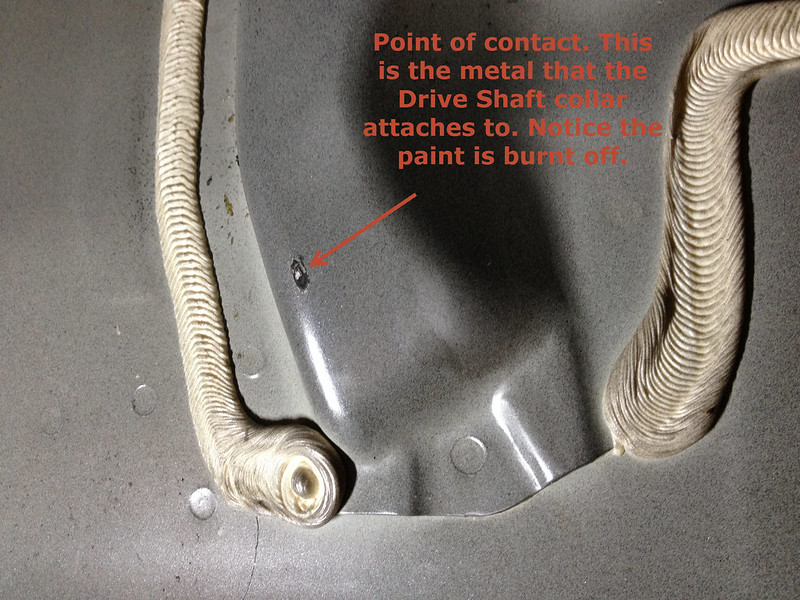 20121014-PerrinHeaderbackAdjustment-03 by VictorN07, on Flickr The system fit perfectly together. It was just close to the transmission tunnel. I don't blame the design completely. Sure the resonator could be thinner, however I truly believe it was just how things fit together on this particular car. Rather than painfully sending the system back to Chris, we are about to create more space. Despite holding the driveshaft collar, we feel that hammering on this ballooned piece of metal is safe because it is just spot welded and held in place with epoxy. It is possible we are approaching this wrong, however we felt like this was the best course given the situation we were in. Remember to use eye and ear protection!!!!!! Clarification: I wanted to say that the path was designed to keep the resonator away from the driveshaft…by design both will clear, and the non-resonated version will have more space. On my particular car it was close. The bracket we banged simply supports the driveshaft loop, so long as the driveshaft loop is properly secured before you start beating on it, there will be no structural deformation at the bottom where we created the u-shaped channel. What we banged seemed over-designed anyways, too much pillowing and dead air space in that design. I did this fix without consulting Perrin first; It was the weekend, I was excited and wanted to get on the road. Still happy even with this additional mod. 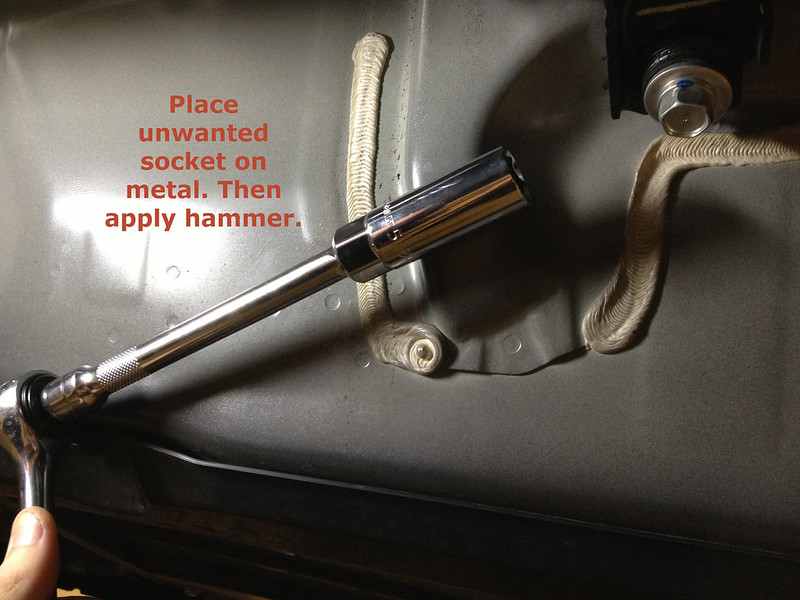 20121014-PerrinHeaderbackAdjustment-04 by VictorN07, on Flickr 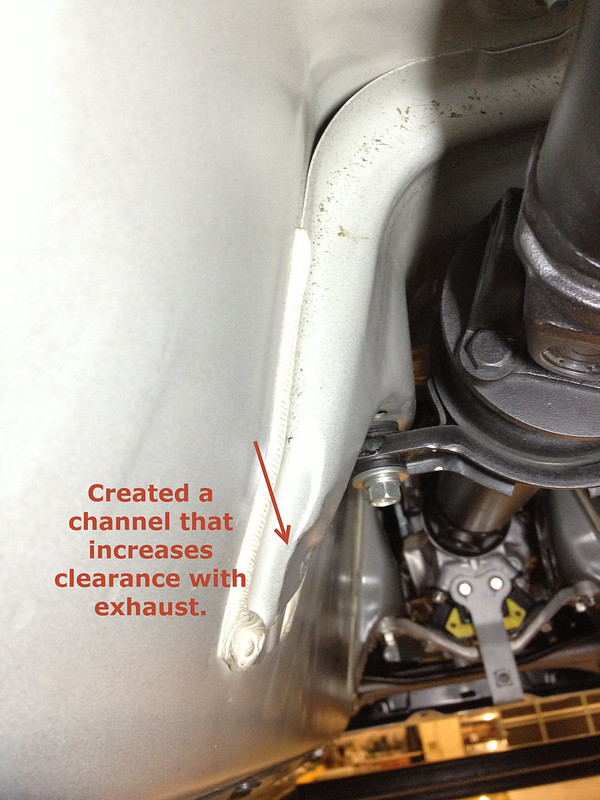 20121014-PerrinHeaderbackAdjustment-05 by VictorN07, on Flickr 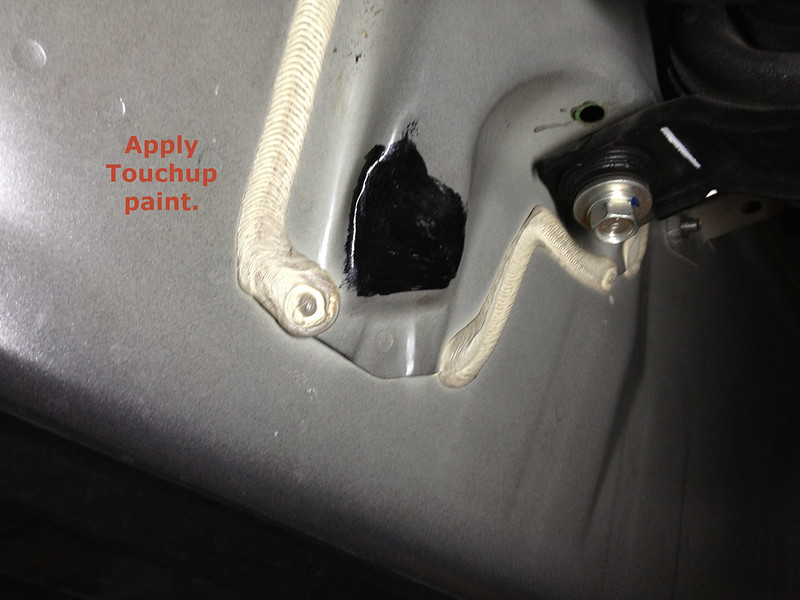 20121014-PerrinHeaderbackAdjustment-06 by VictorN07, on Flickr  20121014-PerrinHeaderbackAdjustment-07 by VictorN07, on Flickr 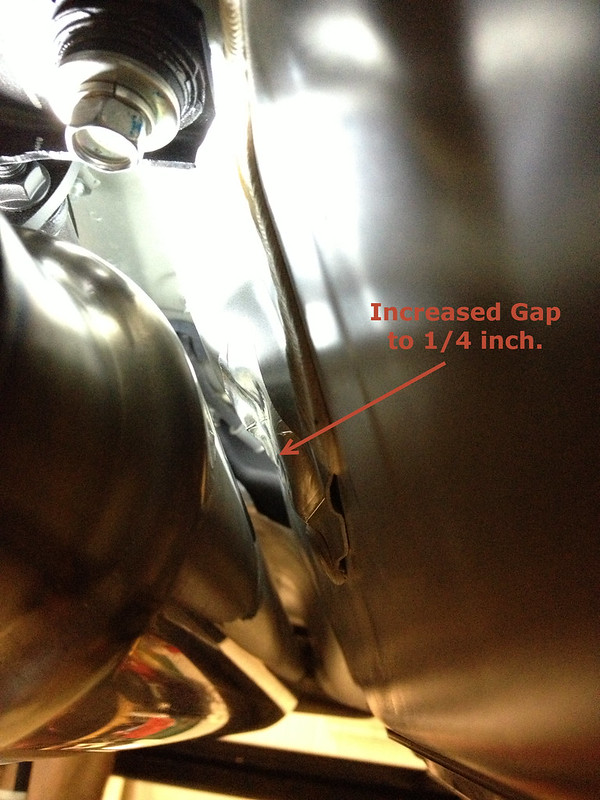 20121014-PerrinHeaderbackAdjustment-08 by VictorN07, on Flickr Here is @cobrabyte's take Quote:
This definitely fixed the rattling noises!!! The fix wasn't a major alteration to the vehicle so I am happy now everything is fine. Guess I can't ever be 100% stock ever again heh. Thanks @cobrabyte for spending a significant amount of time helping me diagnose and fix the issue. If anyone has any feedback on this install, please let us know so others will benefit in the future! I implore anyone who installs an aftermarket exhaust system to make sure there is proper clearance in the whole system and that there is room for expansion/natural vibration in the exhaust. Should you decide to use this alteration, I am not responsible for any damage done to your vehicle! The three of us were impressed with the whole system in general. We appreciate the support @PERRIN_Chris and @PERRIN_Jeff have given and developing this quality system. Hopefully this feedback is incorporated into the instructions to further improve the user experience. Last edited by F1point4; 10-17-2012 at 09:36 PM. Reason: Put review, cleaning up language, grammar, parts list |
||
|
|
|
| The Following 14 Users Say Thank You to F1point4 For This Useful Post: | ahausheer (01-14-2013), Anthonytpt (02-01-2013), Bonburner (12-07-2012), Chewie4299 (10-14-2012), chrisp1992 (04-03-2014), flippy (10-16-2012), Gabzor (09-24-2016), gms (10-14-2012), Guff (10-17-2012), nubbster927 (10-29-2012), number1Tango (11-09-2012), Okami (10-13-2015), Superhatch (10-16-2012), Tylub (10-16-2012) |
|
10-11-2012, 02:08 AM
|
#3 |
|
Senior Member

Join Date: Apr 2012
Drives: 86 ZN6
Location: SF Bay Area, NorCal
Posts: 4,682
Thanks: 1,317
Thanked 2,072 Times in 1,222 Posts
Mentioned: 126 Post(s)
Tagged: 1 Thread(s)
|
very nice system!
total cost?? |
|
|
|
|
10-11-2012, 02:20 AM
|
#4 |
|
Senior Member

Join Date: Jul 2012
Drives: Whiteout FR-S
Location: Arkansas
Posts: 4,154
Thanks: 1,666
Thanked 1,627 Times in 997 Posts
Mentioned: 72 Post(s)
Tagged: 0 Thread(s)
|
Nice pics, i've never heard the term "quality human" used in such a way though lol.
|
|
|
|
|
10-11-2012, 08:14 AM
|
#5 | |
|
Senior Member

Join Date: Jul 2012
Drives: 2013 Asphalt FR-S Manual
Location: Whitby, ON, Canada
Posts: 6,716
Thanks: 7,875
Thanked 3,351 Times in 2,134 Posts
Mentioned: 99 Post(s)
Tagged: 1 Thread(s)
|
Quote:
I think they're selling for about $1500 header back?
__________________
Light travels faster than sound, so people may appear to be bright until you hear them speak... flickr |
|
|
|
|
|
10-11-2012, 08:43 AM
|
#6 |
|
Join Date: Jul 2012
Drives: 2013 Scion FR-S
Location: Des Moines, IA
Posts: 7,694
Thanks: 1,298
Thanked 3,578 Times in 1,253 Posts
Mentioned: 341 Post(s)
Tagged: 5 Thread(s)
|
Thanks @F1point4 . That Perrin System is such nice quality. Love it!
PS- Lego Storm Troopers are nice touch! |
|
|
|
| The Following 2 Users Say Thank You to FT-86 SpeedFactory For This Useful Post: | F1point4 (10-11-2012), Sportsguy83 (10-11-2012) |
|
10-11-2012, 09:13 AM
|
#7 | |
|
Photo Specialist
Join Date: Feb 2012
Drives: 2013 Toyota 86 DGM 6MT
Location: Texas
Posts: 1,152
Thanks: 587
Thanked 1,802 Times in 420 Posts
Mentioned: 94 Post(s)
Tagged: 0 Thread(s)
|
Quote:
|
|
|
|
|
|
10-11-2012, 09:47 AM
|
#8 |
|
Banned
Join Date: Aug 2012
Drives: VortechSC,BorlaEL,Perrin,GCRace
Location: HighHeatHighAltitudeAZ,USA
Posts: 2,254
Thanks: 458
Thanked 669 Times in 394 Posts
Mentioned: 9 Post(s)
Tagged: 2 Thread(s)
|
I have the pictured system above, and dig your photos!
|
|
|
|
|
10-11-2012, 11:00 AM
|
#9 |
|
Senior Member

Join Date: Jul 2012
Drives: BRZ 6MT
Location: Ohio
Posts: 122
Thanks: 53
Thanked 22 Times in 15 Posts
Mentioned: 1 Post(s)
Tagged: 0 Thread(s)
|
Anyone go with the Black option? I haven't seen anyone with it yet.
|
|
|
|
|
10-11-2012, 11:09 AM
|
#10 | |
|
Photo Specialist
Join Date: Feb 2012
Drives: 2013 Toyota 86 DGM 6MT
Location: Texas
Posts: 1,152
Thanks: 587
Thanked 1,802 Times in 420 Posts
Mentioned: 94 Post(s)
Tagged: 0 Thread(s)
|
Quote:
http://www.ft86club.com/forums/showp...9&postcount=97 |
|
|
|
|
| The Following User Says Thank You to F1point4 For This Useful Post: | sharris721 (10-11-2012) |
|
10-11-2012, 11:59 AM
|
#11 |
|
Senior Member
Join Date: Jul 2012
Drives: BRZ 6MT
Location: Ohio
Posts: 122
Thanks: 53
Thanked 22 Times in 15 Posts
Mentioned: 1 Post(s)
Tagged: 0 Thread(s)
|
Wow that looks awesome, makes me want to get the rear diffuser as well. Now i need to decide if I want the resonator or not. I want to get headers eventually and that may be a little loud lol
|
|
|
|
|
10-11-2012, 12:41 PM
|
#12 |
|
Senior Member
Join Date: Jul 2012
Drives: 2013 Asphalt FR-S Manual
Location: Whitby, ON, Canada
Posts: 6,716
Thanks: 7,875
Thanked 3,351 Times in 2,134 Posts
Mentioned: 99 Post(s)
Tagged: 1 Thread(s)
|
Apparently the non resonated one with headers is quite loud. All depends on your definition of loud though, for a track car I'm sure it would be quiet. For a daily driver, probably bordering on obnoxious.
__________________
Light travels faster than sound, so people may appear to be bright until you hear them speak... flickr |
|
|
|
|
10-11-2012, 02:29 PM
|
#14 |
|
Senior Member
Join Date: Jun 2012
Drives: Ultramarine frs
Location: The OC
Posts: 319
Thanks: 4
Thanked 66 Times in 51 Posts
Mentioned: 0 Post(s)
Tagged: 1 Thread(s)
|
Which of the pipe (over pipe or front) creates the most hp? Can we pass smog by replacing anyone of these (if we get cat on front pipe, a I'm guessing there's no cat on over pipe)?
These look really nice. Tap'd from my G-Nex
__________________
 |
|
|
|
|
|
|
|
|
| Tags |
| exhaust, headerback, perrin |
| Thread Tools | Search this Thread |
|
|
 Similar Threads
|
||||
| Thread | Thread Starter | Forum | Replies | Last Post |
| Perrin Catback Exhaust vs Nameless Performance Exhaust. | vignesh | Engine, Exhaust, Transmission | 201 | 06-05-2013 09:47 PM |
| NEW! Perrin SS Catback Exhaust System Up to +9rwhp | In-Stock| FREE S&H! | AJ@ECSMotorsports | Engine, Exhaust, Bolt-Ons | 31 | 04-06-2013 09:05 AM |
| Brand New SRT Headerback Exhaust System | prest1ge | Southwest | 5 | 10-16-2012 06:06 PM |


