|
Member
Join Date: Feb 2013
Drives: WRB Subaru BRZ
Location: Bay Area
Posts: 36
Thanks: 10
Thanked 12 Times in 9 Posts
Mentioned: 0 Post(s)
Tagged: 0 Thread(s)
|
Installing Shorai Lightweight Battery and #Lighterisbetter CNC Machined Tray
Hi all,
I hadn't intended to create a DIY out of this (so don't have a lot of pics as I only took them after the fact), but I ended up struggling through some things (and had a lot of questions floating around in my head) and so thought I'd at least give some pointers to other people out there who attempt this.
Apologize in advance if I leave anything out or if anything's unclear; if I do or it is, then please let me know and I'll update or clarify this.
Anyways.. to the DIY:
The kit I bought: http://www.ft86club.com/forums/showthread.php?t=50947
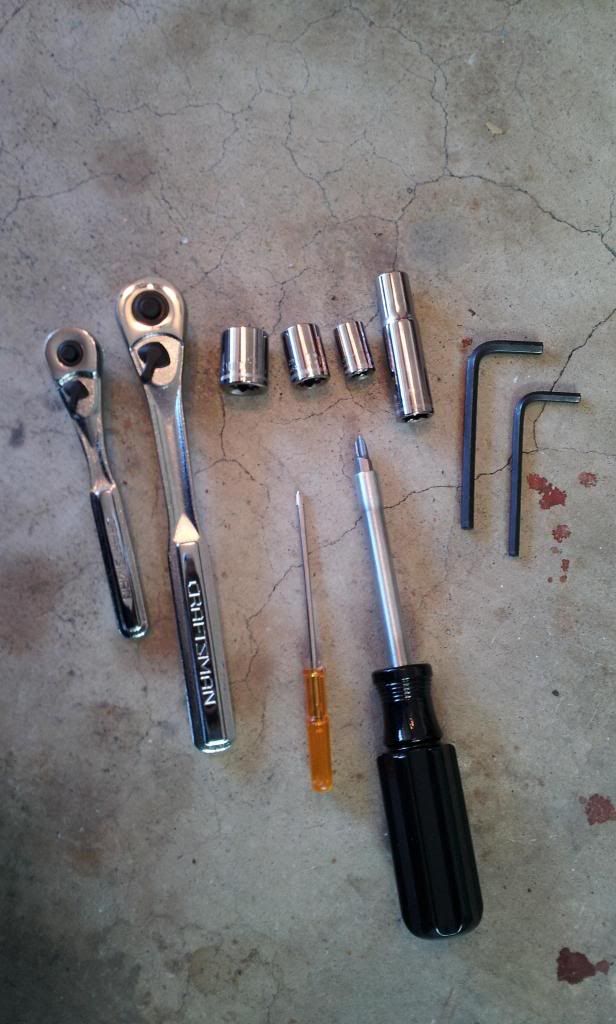
- Tools I Needed
- 4mm hex wrench
- 5mm hex wrench
- 10mm socket
- 10mm deep socket (or at least a longer one)
- 12mm socket
- 15mm socket
- normal phillips head screwdriver
- super tiny phillips head screwdriver
- ? small socket wrench
- 3/8 socket wrench
- Remove Stock Battery:
This should be fairly straight forward. Used my 10mm socket wrench to detach the positive (red) then negative terminals. Undid the battery tie-down (just unscrew the little nuts so that the rods/hooks come loose, then you can unhook 'em - no need to unscrew the nuts off all the way). Once the tie-down is off, remove it out of your way and then prepare to pull your stock battery out (it's a heavy mofo though, so be careful since it's kind of an awkward position to get it out intially). Once the battery's out, remove the black battery tray that's underneath it and you're golden.
- Put the Shorai Battery Together:
There's two things that I had to do for this..
- Make it a working battery:
In order to ship the battery, the Shorai people have to make sure stuff isn't really connected (a complete circuit I presume). Anyways, you'll pretty much follow the diagram they have both in the instructions and as a sticker on the battery. I used my normal screw driver and my super tiny screw driver to complete this step. You should be able to find a small plastic bag of what you need, but it essentially it's the metal plate that you place across two contacts that are secured via washers/screws, and then just a plastic cover which is secured with 4 smaller screws.
- Add the "Z" bracket extensions:
(*edit* I just saw the product picture again and it DOES have the "Z" brackets installed! Look carefully at the product pic in step 4.)
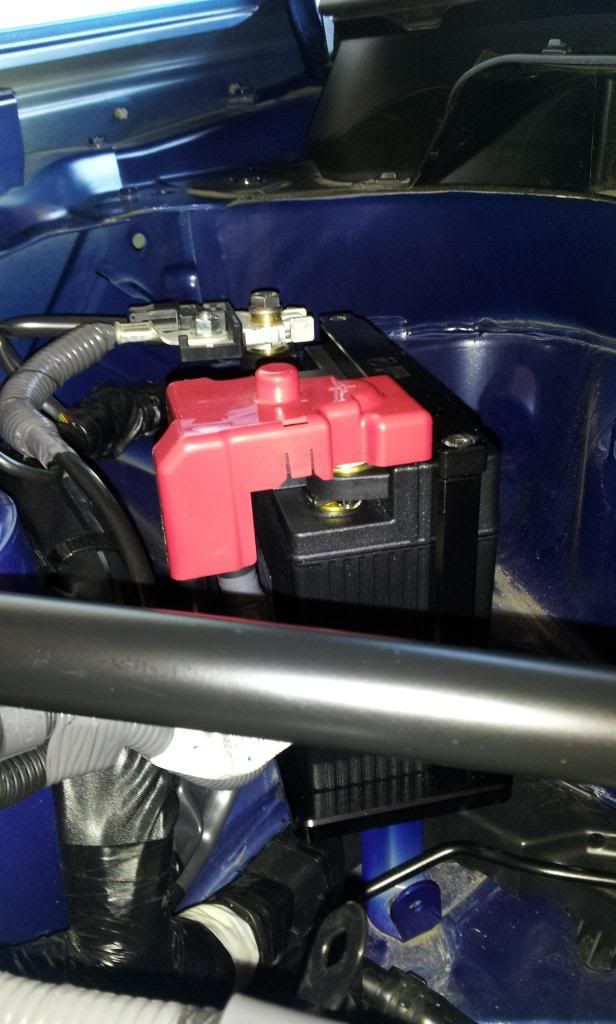
While I don't know if everyone needs to do this (the pictures I've seen of other installs were no help), I definitely did because when I tried to put the contacts on the terminals, I didn't have enough clearance, and therefore, the contacts didn't seat all the way down on the terminals. The square contacts (that are part of the car) hit parts of the plastic casing of the battery... so it just didn't fit. I suppose you could use some spacers all the same.. but I just used what I had available to me. Anyways, with the battery, there should be "L" and "Z" bracket extensions and their associated hardware (and in case you're curious, I chose the "Z" because it still allows for the terminals to sit up as opposed to on its side. To do this section, I needed a 4mm hex wrench, 5mm hex wrench, and super tiny screwdriver. The diagrams in the directions are pretty helpful, so look there - but essentially you'll be first be mounting the "Z" bracket in place with a small screw, and then actually secure it with the larger, round screw (not bolt) provided. Once you've attached the "Z" bracket, attach the terminal on the free side of the bracket using the 5mm hex wrench. When attaching the terminal, I faced the flat side towards the back of the battery so that in the event it turns, the flat side of the terminal will butt up against the flat wall of the battery and not spin.
Here's a side shot of the battery installed.. but you can see how the terminal is elevated with the Z bracket.
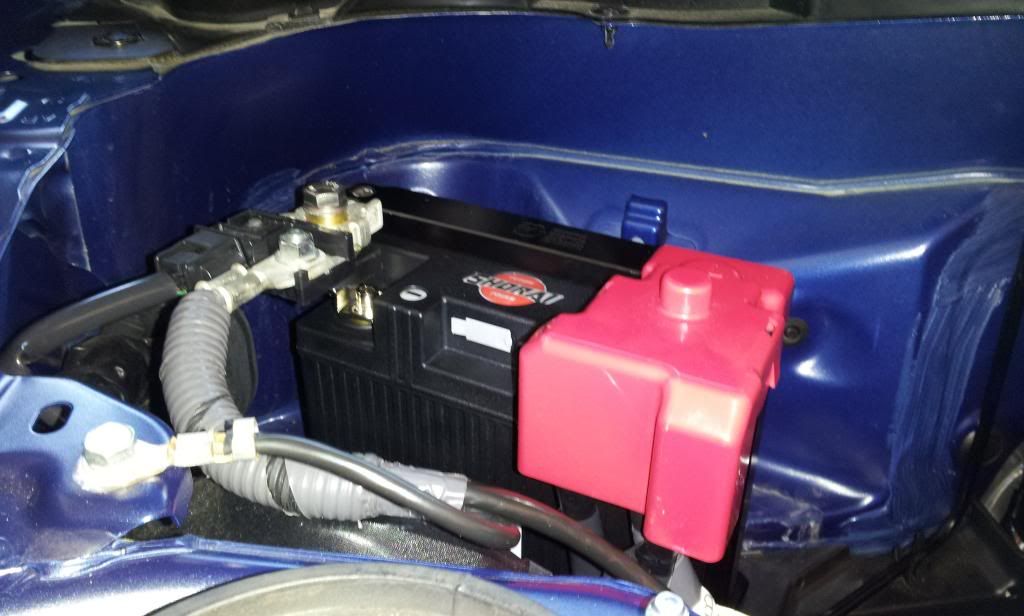
And a font-ish view:
- Put the new battery tray together:
This is fairly straight forward as well (only really 5 parts), but what got me was what the hell was the silver brackety thing for? Since there were no instructions provided, I was just guessing a whole lot.
(for reference, the silver bar I'm talking about is the silver thing in front of the battery and tray, next to the screws).

Anyways, that silver thing is for later, so put that aside.. I'll show you in a bit how it attaches.
The other thing that confused me was which screws to use where. There were a pair of screws with the circular heads that you use the 5mm hex wrench for - those were clearly for the securing the top bracket of the tray (stamped with Kinetic Custom's logo) and 4 which use the 4mm hex wrench, two of which are slightly longer than the other two. Long story short (and I hope this is right), I used the two longer screws to assemble the sides/uprights of the tray and the two shorter screws to attach the silver bar thing to the bottom of the tray (but don't do this part yet).
- Attaching the new tray to your car:
This was the other really confusing part. I spent a long time trying to figure out how the hell you attach the tray to the car. Well, I'll tell you what it's not; it's not putting the tray on top of the OEM tray or balancing it in the car somewhere and securing with the OEM tie-down. No, it's much clever than that.. and it's well designed.. but way not obvious if you're a going in blind, like me.
Here's what it is:
There's a bracket (circled in green) already installed in your car that the OEM tray rested on before. You're going to remove it and place the silver bar UNDER it for later. To detach it, you're going to need your 12mm socket wrench and unscrew the bolts holding it in place (circled in red). However, for me, it wasn't that simple... there was this metal line that's in your way which you have to move (dotted yellow line).
(pic so far - but you'll have to ignore some things since I've already installed the silver bracket under the bracket you have to remove first on the car)
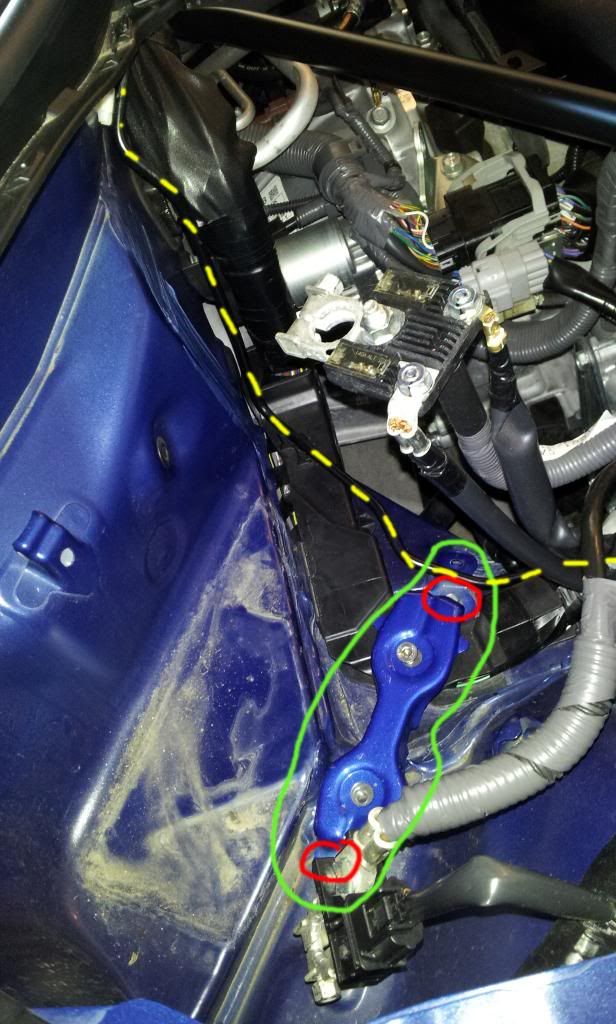
To get access to that right bolt, you're going to have to un-clip the line in several places. 3 (circled in red) and 1 on the firewall of the car (not pictured). Only then, can you move the metal line in the way and access the bolt.
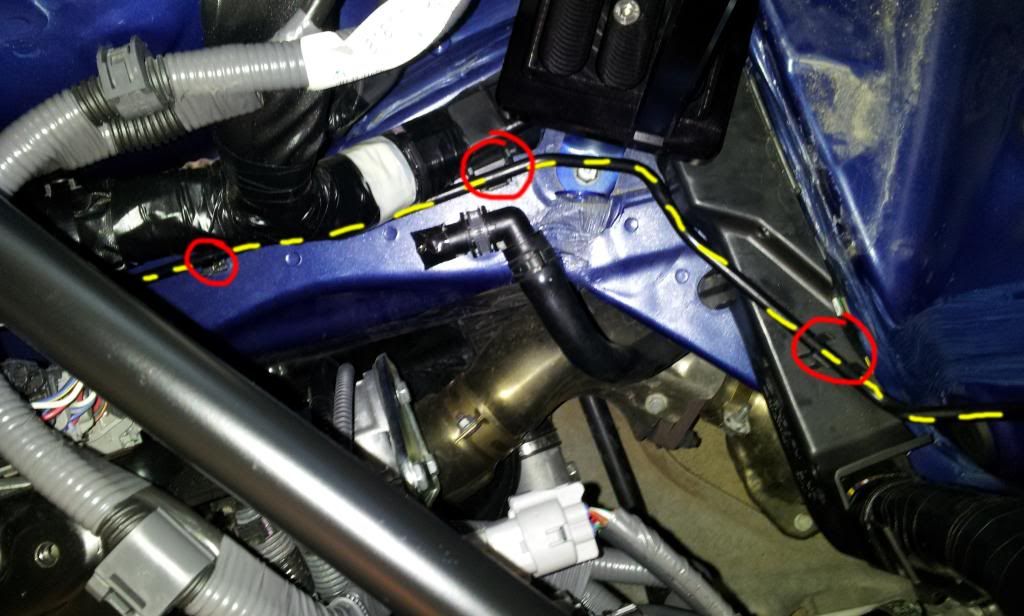
Once you pull the bracket out, you're going to need to slide the sliver bar below it and then re-attach the bracket you just pulled out (blue for me, since my car's blue) with the bar underneath it. As a note, I screwed in the screws I would eventually use to secure the tray to the bracket such that I could move it around and position it while it was under the blue bracket. (you can see the screw in the picture above that I'm talking about).
So, if that doesn't quite make sense, hopefully this picture will make better sense. Please note, don't actually fasten the tray to the car bracket yet.. otherwise you can't put the car bracket back in since the tray will be in the way.
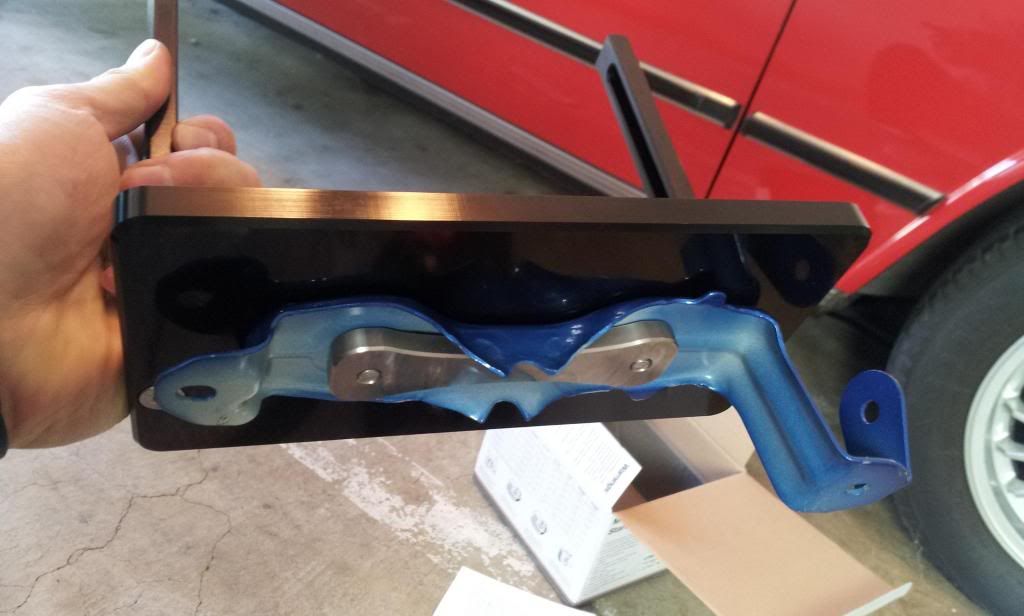
Now that the silver thingie is under the (blue) car bracket, re-attach the bracket. Once it's attached, go ahead and take the two short screws, your 4mm hex wrench and attach the tray to the (blue) car bracket.
- Installing the battery:
So now's the easy part. Slip in the battery, put the top-bar of the tray on top of the battery, take your 5mm hex wrench and two remaining screws and secure the top-bar.
From there, reconnect the leads onto the terminals (positive then negative).. and then finally, I added the additional two bolts that came with the car terminal adapters in place. Take your 15mm socket and put those in place. Once done.. you're golden. Start car and enjoy your weight loss.
My overall impression is that everything is made well.. it's just there're hardly any instructions (and I still don't really know if I did it right). So, to @ KCMachine, I would say make some directions and ship it with your product... cuz that would've made things way easier.
Anyways, hope this helps someone else.
|


 Similar Threads