


|
||||||
| Member's Car Journals Car journals by our members. |
 |
|
|
Thread Tools | Search this Thread |
 08-22-2014, 10:41 PM
|
#15 |
|
Senior Member
Join Date: Dec 2013
Drives: 2013 FRS
Location: NL, Canada
Posts: 179
Thanks: 35
Thanked 35 Times in 27 Posts
Mentioned: 6 Post(s)
Tagged: 0 Thread(s)
|
Ok finally some updates. Lots of updates!
This is the last time I used the car before pulling it apart for the build. Getting some lumber lol.  Here's the car getting its underside and wheel wells cleaned up before the big install.  I started off by getting the car up on 4 jackstands. I then worked on removing the transmission for a clutch/flywheel install. Getting the transmission apart from the engine was a royal pain. Here's when I finally got a little gap to start to open up.  Here's a shot of the oem clutch/flywheel with the trans out.  I dropped the transmission alone and it was a bit of a job without a proper trans jack. I used my leg to support the tailshaft while taking most of the weight on my chest.  Here's the oem clutch/flywheel/pressure plate compared with the new setup. I went with a Clutchmasters FX400. It's rated to 500 wtq.  Here it is all ready for final assembly. All surfaces all clean with brake cleaner first!  All torqued down and ready to go! 
|

|

|
|
08-22-2014, 10:54 PM
|
#16 |
|
Senior Member
Join Date: Dec 2013
Drives: 2013 FRS
Location: NL, Canada
Posts: 179
Thanks: 35
Thanked 35 Times in 27 Posts
Mentioned: 6 Post(s)
Tagged: 0 Thread(s)
|
Ok so here we are with the transmission back in, but with the engine bay pretty much 100% stock aside from the HDR (Home Depot Racing) sound tube delete.
 Stripping things down. Intake, oem exhaust mani, etc removed.  Test fitting the manifold.  Turbos! Precision 4854. T3 flanged so I can move up to something a bit more walrusy later.  Test fitting the turbo/mani/crash bar. Sorry for the crappy quality on the pics... Cell phone   The treadstone intercooler really looks like a nice unit.  3.5" thick core.  Bolted up. 
|
|
|
|
|
08-22-2014, 11:11 PM
|
#17 |
|
Senior Member
Join Date: Dec 2013
Drives: 2013 FRS
Location: NL, Canada
Posts: 179
Thanks: 35
Thanked 35 Times in 27 Posts
Mentioned: 6 Post(s)
Tagged: 0 Thread(s)
|
Wastegate, downpipe, and overpipe.
 The turbosmart stuff that MAP provides seems nice and solid. I've always used Tial for my bovs and WGs but these seem pretty nice indeed. Eager to see how it all performs.  Hot parts bolted up.  The oil pan ended up being a bitch of a bitch to modify. Because of the turbo location the MAP kit uses, you really can't just weld a bung on the steel oem pan without doing some hefty modding. The oil return position requires a flat vertical surface on the front of the engine like the aftermarket pan MAP sells. I started to work on chopping up the original pan using a dremel and air body saw. I drilled a hole in the middle of the flap I created to serve as a pilot hole for the step bit I'll use in a minute to create the hole for the -10 return bung.  Here's the hole opened up to accept the -10 bung.  The plan...  And here it is all welded up, being torture tested in the most scientific of laboratories. I left the water in there for a few hours just to make sure I didn't have any pinholes in the welds or the like.  View from the bottom. Excuse the welds, I went over things a couple of times to try to ensure there'd be no pinholes so it doesn't look as great as it would with a single bead.  All painted back up!  RTV'd and ready to install. 
|
|
|
|
|
08-22-2014, 11:35 PM
|
#18 |
|
Senior Member
Join Date: Dec 2013
Drives: 2013 FRS
Location: NL, Canada
Posts: 179
Thanks: 35
Thanked 35 Times in 27 Posts
Mentioned: 6 Post(s)
Tagged: 0 Thread(s)
|
Here's how it looks in the car.
 The front aluminum part of the engine was interferring with the 45 degree -10 fitting on the oil drain. This pic shows how I had to clock the fitting away from the turbocharger to keep the line away from the engine's front case.  I wasn't a big fan of the setup above, so I managed to get a 5/8" JIC straight swivel male to female coupler which is the same as -10AN. This spaced the drain like out ~ .75 inches from the pan to give just enough clearance to run a totally straight vertical drain from the turbine housing to the oil pan. Much better!  This are really starting to come together in the engine bay...  Bumper back on. Nice view of the treadstone core.  As I buttoned up under the car, I refilled the trans with Pentosin MTF2.  As I got to the catch can install, I modified the check valve as per MAP's instructions. I ended up finding it futile banging on the valve with a hammer like the turbo kit instructions suggest. I instead hit the bottom of the fitting with the grinder to pull of a bit of material, allowing the valve and spring to simply drop out. Here's the valve modified for reinstall.  Blowoff valve, catch cans, feed line and turbo blanket installed.  Catch cans, Delicious Tuning map sensor, all intake manifold lines clamped. I pulled the throttle body to get the evap solenoid out from under the IM to clamp its lines.  Delicious map sensor  Delicious tuning 3 port by Infamous Performance  @sales@delicioustuning.com @DeliciousTuning Everything pretty much buttoned up.  Wideband sensor heating up for free air calibration.  All calibrated! NGK AFX unit  AEM digital boost AEM digital boost Pretty much ready to go. Just need a revised ECUTek map from Delicious with the wideband 0-5v input set to come feed in through the rear o2 wire. Once that's flashed on I can start this puppy
|
|
|
|
| The Following 2 Users Say Thank You to mhiscott For This Useful Post: | Lonewolf (08-23-2014), MAPerformance (08-23-2014) |
|
08-23-2014, 12:16 AM
|
#19 |
|
Member

Join Date: Aug 2014
Drives: 2015 FRS :)
Location: Orlando, Fl
Posts: 14
Thanks: 2
Thanked 3 Times in 1 Post
Mentioned: 0 Post(s)
Tagged: 0 Thread(s)
|
Dude....awesome.
__________________
 A work in progress: 5% tint all around On the way: Spyder smoked LED taillights, Smoked bumper side marker lights, Spyder smoked projector headlights, Spyder smoked style fog lights |
|
|
|
|
08-23-2014, 05:17 PM
|
#20 |
|
Senior Member

Join Date: Aug 2014
Drives: BRZ
Location: Palos Verdes, Cali
Posts: 119
Thanks: 0
Thanked 43 Times in 21 Posts
Mentioned: 1 Post(s)
Tagged: 0 Thread(s)
|
Tasteful mods and the title fits well!
|
|
|
|
|
08-23-2014, 05:23 PM
|
#21 |
|
Senior Member
Join Date: Aug 2012
Drives: Asphalt FRS
Location: Cottage Grove, MN
Posts: 1,272
Thanks: 669
Thanked 981 Times in 540 Posts
Mentioned: 84 Post(s)
Tagged: 3 Thread(s)
|
Yes yes yes!!! Looks like you have done a fine job sir. Congrats, and can't wait to see this finally running
|
|
|
|
|
08-23-2014, 08:32 PM
|
#22 |
|
Senior Member
Join Date: Oct 2012
Drives: 2013 fr-s
Location: cincinnati
Posts: 248
Thanks: 164
Thanked 147 Times in 71 Posts
Mentioned: 3 Post(s)
Tagged: 0 Thread(s)
|
Well holy crap. Totally wasn't expecting this when I clicked the link!
__________________
|
|
|
|
|
09-14-2014, 08:42 AM
|
#23 |
|
Senior Member
Join Date: Dec 2013
Drives: 2013 FRS
Location: NL, Canada
Posts: 179
Thanks: 35
Thanked 35 Times in 27 Posts
Mentioned: 6 Post(s)
Tagged: 0 Thread(s)
|
Little update.
I've moved to HRI Tuning, and James has been doing a great job of tuning the car. Tuning on 91 is done with the boost at 8 psi. I'm in the midst of installing an aquamist hfs3 kit now which is a progressive methanol injection setup which uses injector pulsewidth as the basis for how much methanol to inject. I had this setup in my Evo X and it worked great.  Once I finish up the install James will be working on a secondary map which will be 10-11 psi /w a much more aggressive ignition timing map. Will update soon! |
|
|
|
| The Following 2 Users Say Thank You to mhiscott For This Useful Post: | charged86 (09-14-2014), MAPerformance (09-18-2014) |
|
09-21-2014, 07:24 PM
|
#24 |
|
Senior Member
Join Date: Dec 2013
Drives: 2013 FRS
Location: NL, Canada
Posts: 179
Thanks: 35
Thanked 35 Times in 27 Posts
Mentioned: 6 Post(s)
Tagged: 0 Thread(s)
|
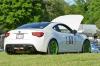
Here's a quarter mile time from today
 Stock suspension and garbagy 800 treadwear tires made for some troublesome times getting it off the line. It kept wheel hopping, so I'd have to backoff to keep the diff in one piece lol. |
|
|
|
|
09-22-2014, 10:48 AM
|
#25 | |
|
Senior Member
Join Date: Aug 2012
Drives: Asphalt FRS
Location: Cottage Grove, MN
Posts: 1,272
Thanks: 669
Thanked 981 Times in 540 Posts
Mentioned: 84 Post(s)
Tagged: 3 Thread(s)
|
Nice! Is this on the base 8psi map, or the secondary one?
Quote:
|
|
|
|
|
|
09-22-2014, 01:32 PM
|
#26 |
|
Senior Member
Join Date: Dec 2013
Drives: 2013 FRS
Location: NL, Canada
Posts: 179
Thanks: 35
Thanked 35 Times in 27 Posts
Mentioned: 6 Post(s)
Tagged: 0 Thread(s)
|
That's the base 7-8 psi map on 91 pump. The other map will be closer to 11 psi on 91 + meth.
|
|
|
|
| The Following User Says Thank You to mhiscott For This Useful Post: | MAPerformance (09-22-2014) |
|
01-31-2016, 07:44 PM
|
#27 |
|
Senior Member
Join Date: Dec 2013
Drives: 2013 FRS
Location: NL, Canada
Posts: 179
Thanks: 35
Thanked 35 Times in 27 Posts
Mentioned: 6 Post(s)
Tagged: 0 Thread(s)
|
I had originally planned to simply pull the rear hubs for an ARP wheel stud install, but things ended up spiraling out of control as they usually do when you start making "well seeings as how it'll be apart" upgrades.
I ended up being unable to remove the original rear hubs without damaging them as they were corroded into the hubs badly. This is after only four months of total winter use the life of the car. Argh! See the rusty bolt in bearings. They finally came out with significant amounts of heat, and the knuckles removed and bolted into a vice. Significant smacks with a large sledge were needed to unseat the rust's hold. Here's a shot of the old bearings. The reason they need to come out is the ARP extended studs cannot thread in from the back while the bearing is attached to the hub due to their length.  I ended up ordering new NTK bearings (OEM supplier for this car's bearings) from autopartsway. Before they arrived, however, I got myself an amazing deal on a full low mileage pullout from an FRS at the local scrap yard. There was no rust on this rear end and the hubs ended up popping right out with no hammer even needed lol.  In addition to getting the bearings I needed (I have since returned the other two new ones to autopartway for a refund), I ended up with a new subframe, upper control arms, an LSD differential and housing with drive axles, and ABS sensors. Great snag I went about ordering all new whiteline parts for the whole car. This falls into the "while it's apart" category that always gets me.  Included are: Adjustable rear toe arms (no more cam bolt BS!) Front and rear swaybar bushings Rear diff bushings Rear subframe bushings Rear trailing arm bushings Rear upper control arm bushings Front LCA bushings What a nice new subframe I have to work on! The original is still in the car.  Also a nice new differential! This will be great to have so I can install my new LSD I plan on picking up without having extra downtime in the summer during the install. 
|
|
|
|
|
01-31-2016, 07:51 PM
|
#28 |
|
Senior Member
Join Date: Dec 2013
Drives: 2013 FRS
Location: NL, Canada
Posts: 179
Thanks: 35
Thanked 35 Times in 27 Posts
Mentioned: 6 Post(s)
Tagged: 0 Thread(s)
|
I started by drilling out the centers of the subframe and diff bushings using a medium sized drill bit and cutting between the holes with a body saw. I then burned off the remaining rubber with FIREEEEEEEEEE!
 After scraping all the burnt up rubber out of the bushing casings, I got to work cutting the sleeves to fully remove the oem bushing assemblies. The picture below has one finished (bottom left). The other three are still awaiting removal.  Lastly, here's a shot of the underside of the car. You can see things like the hardware and diff housing rusting. Luckily there is no body rust. I am pulling the rear bumper, and working from the rear to the front of the car removing everything and scrubbing all the crud away and replacing all OEM hardware to get rid of the rusties. The car will never be used in the winter again, so it should last this time. 
|
|
|
|
|
|
|
|
|
| Thread Tools | Search this Thread |
|
|
 Similar Threads
|
||||
| Thread | Thread Starter | Forum | Replies | Last Post |
| So my key FOB was put in the washing machine.... | Kayzer Soze | BRZ First-Gen (2012+) -- General Topics | 11 | 06-07-2013 11:43 AM |
| Ryeong86's Ultramarine SOLO Machine | Ryeong86 | Member's Car Journals | 0 | 04-26-2013 04:19 PM |
| Local machine shop (NoVA/DC/MD)? | swift996 | Mid-Atlantic | 2 | 03-28-2013 07:34 AM |
| Mike at Czp | _F-R-S_ | User/Vendor/Sponsor Reviews, Feedback, Comments | 0 | 12-01-2012 09:01 PM |
| FR-S TIME MACHINE - THOUGHTS? | Davyator | Scion FR-S / Toyota 86 GT86 General Forum | 26 | 07-20-2012 12:32 PM |


 919
919


