


|
||||||
| DIY (Do-It-Yourself) Guides For all DIYs. |
 |
|
|
Thread Tools | Search this Thread |
 06-26-2013, 06:55 PM
|
#1 | |
|
Ghost

Join Date: May 2012
Drives: FR-S (Whiteout)
Location: Illinois
Posts: 144
Thanks: 7
Thanked 74 Times in 40 Posts
Mentioned: 2 Post(s)
Tagged: 0 Thread(s)
|
Toyota USDM fog light kit install
This is NOT a full fog light install walkthrough! Refer to this DIY for videos explaining the basics of the fog and bezel install as well as where to ground your harnesses.
YOU WILL NEED: - Flat drive screwdriver - Phillips drive screwdriver - Socket wrench - 10mm socket - 11mm socket - Needle nose pliers I recommend removing your bumper though it isn't necessary. At the very least, be able to raise your car on stands and have plenty of clearance to work safely. You need to be able to reach the side marker harness plug, remove the center lock, and insert a new harness pin into it. I cannot recommend enough removing the front bumper to do this.  The Toyota USDM fog light kit includes 2 fog lights, 2 bezels, 2 harnesses, 2 mounting brackets, dash panel with push button switch, and mounting hardware.  The biggest difference between this kit and others is the mounting bracket required. The brackets are marked L and R, and they mount between the bumper and the fog light. The right bracket R installs on the passenger side of the vehicle, and the left bracket L installs on the driver's side. MOUNTING THE LIGHTS  - Begin by attaching the mounting brackets to each light. The lights are universal and it does not matter which bracket mounts to which light. - Face the fog light away from you, and push the bracket onto the front/glass side of the light. The fog glass should be facing away from you, and the white L or R label facing toward you. - Flat screwdriver: Using (2) of the small screws provided, screw the bracket onto the light from the rear. There should be one remaining open hole (the last hole is filled by a tab on the bracket). - Seat the fog light and bracket into the bumper.  - Like all other fog light DIYs, you need to make sure these tabs are secure in place. Watch the video in the link at the top of this guide. - 10mm socket: With the fog light in place, insert (1) long bolt into the remaining hole. On the reverse side, secure the bolt with (1) of the locking nuts.  - Check that your mounted light looks like the above picture. - Repeat for the other side. INSTALLING THE DASH SWITCH  The dashboard pieces are a quick swap. To remove the OEM dash trim piece:  - Flat screwdriver: On the bottom of this dash piece on the driver's side is a small opening. Insert a screwdriver and pry GENTLY to remove it.  - Phillips screwdriver: Remove the bottom screw shown above. - Flat screwdriver: Push into the yellow tab with a flat drive screwdriver to separate the lower dash piece. - On the inside of the trim piece are four large tabs, squeeze them to remove the trim piece from the dash. - Unplug each of the connectors from the trim piece and remove them from the trim.  - Insert each button into the new trim piece. You can see I chose to move the trunk out of the way to the right, giving the fog light priority. - Connect the fog light connector (here with yellow heat shrink) to the fog light button. - Insert the new trim piece into the dash. Reconnect the cluster light and trunk wires.  - Following the trunk wire back you will find a bundle of wiring with an UNUSED connection taped to the bundle. Mine was taped in white and is indicated in the above photo. - Connect this connector to the fog light connector coming from the back of the button. - Replace the dash pieces.  Here's the installed trim piece and button. The trunk button is a lighter grey than the new button and trim piece, that's a little irritating. Oh well. Here it is with the cabin lights on:  Pretty! It lights up and dims with the cabin lights on the dimmer wheel. Cool!  With the low beam headlights on, pressing the button displays the fog light indicator in the cluster. CONNECTING THE LIGHTS To connect the fog lights, first watch these videos for the ground locations and how to ground the harnesses. Ground them using the ring terminal connectors on the provided harnesses. The remaining pin connector on the harness needs to be connected to the indicator harness plugs. Quote:
Reference: Imravenit's simplified fog light install: http://www.ft86club.com/forums/showthread.php?t=34169 Juanito08's fog light install: http://www.ft86club.com/forums/showthread.php?t=27581
__________________
 Last edited by Grey; 06-27-2013 at 06:42 AM. |
|

|

|
| The Following 15 Users Say Thank You to Grey For This Useful Post: | 2014scionfrs (01-01-2014), Anthonytpt (02-13-2014), Beyer Subaru (06-30-2013), Dadhawk (07-05-2013), DAEMANO (01-08-2015), idreamofdrifting (04-27-2014), MJones_RB (05-19-2015), mush (07-01-2013), Outlander (07-12-2020), PANDA86 (06-28-2013), R2RO (07-01-2013), Squishy86 (07-01-2013), subwaynm (01-10-2014), Thedishdoc (01-30-2019), Wes (08-06-2013) |
|
06-26-2013, 11:11 PM
|
#2 |
|
Ghost
Join Date: May 2012
Drives: FR-S (Whiteout)
Location: Illinois
Posts: 144
Thanks: 7
Thanked 74 Times in 40 Posts
Mentioned: 2 Post(s)
Tagged: 0 Thread(s)
|
The Toyota part no. for this kit is PT413-18130.
These fog lights are available from any of the Toyota dealership vendors here on the forums. My local Toyota dealership met the best price on the forum with no charge for shipping. I paid $350 out the door for this kit. Yes, it is more expensive than some other kits. Yes, some other kits use OEM parts and they look exactly the same. I justify the cost of this kit and rank it higher than the others because of the OEM dash trim and button, plain and simple. No aftermarket switch uglying up your dash, no screwing around with the stalk and steering column.
__________________
Last edited by Grey; 06-27-2013 at 07:07 AM. |
|
|
|
| The Following User Says Thank You to Grey For This Useful Post: | PANDA86 (06-28-2013) |
|
06-27-2013, 01:08 AM
|
#3 |
|
Ghost
Join Date: May 2012
Drives: FR-S (Whiteout)
Location: Illinois
Posts: 144
Thanks: 7
Thanked 74 Times in 40 Posts
Mentioned: 2 Post(s)
Tagged: 0 Thread(s)
|
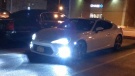
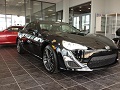
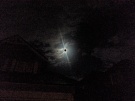
Install pictures! (ignore the winter wheels, I haven't had time to have my TSWs put back on)
    Woah, ugly bulb color!  Already have an order in to HID Powerhouse for some 5000k replacements! Already have an order in to HID Powerhouse for some 5000k replacements!
__________________
Last edited by Grey; 07-01-2013 at 05:02 AM. Reason: Pictures! |
|
|
|
| The Following User Says Thank You to Grey For This Useful Post: | Anthonytpt (02-13-2014) |
|
06-27-2013, 06:48 AM
|
#4 |
|
Ghost
Join Date: May 2012
Drives: FR-S (Whiteout)
Location: Illinois
Posts: 144
Thanks: 7
Thanked 74 Times in 40 Posts
Mentioned: 2 Post(s)
Tagged: 0 Thread(s)
|
Updated, DIY finished. I has pictures.
__________________
|
|
|
|
| The Following User Says Thank You to Grey For This Useful Post: | Anthonytpt (02-13-2014) |
|
06-28-2013, 10:18 AM
|
#5 |
|
Senior Member
Join Date: Apr 2013
Drives: White 2013 Scion FR-S
Location: Westchester
Posts: 478
Thanks: 1
Thanked 87 Times in 70 Posts
Mentioned: 2 Post(s)
Tagged: 0 Thread(s)
|
is the fog light lamps glass or plastic?
|
|
|
|
|
06-28-2013, 03:42 PM
|
#6 | |
|
Ghost
Join Date: May 2012
Drives: FR-S (Whiteout)
Location: Illinois
Posts: 144
Thanks: 7
Thanked 74 Times in 40 Posts
Mentioned: 2 Post(s)
Tagged: 0 Thread(s)
|
Quote:
__________________
|
|
|
|
|
| The Following User Says Thank You to Grey For This Useful Post: | Anthonytpt (02-13-2014) |
|
06-28-2013, 11:04 PM
|
#7 |
|
Senior Member
Join Date: Apr 2013
Drives: White 2013 Scion FR-S
Location: Westchester
Posts: 478
Thanks: 1
Thanked 87 Times in 70 Posts
Mentioned: 2 Post(s)
Tagged: 0 Thread(s)
|
i stick with my outback plastic fog lamps then... glass can break very easily here in new york...
|
|
|
|
|
06-28-2013, 11:13 PM
|
#8 |
|
Senior Member

Join Date: Apr 2012
Drives: 86 ZN6
Location: SF Bay Area, NorCal
Posts: 4,682
Thanks: 1,317
Thanked 2,072 Times in 1,222 Posts
Mentioned: 126 Post(s)
Tagged: 1 Thread(s)
|
are there individual Part numbers for these? or just one?
|
|
|
|
|
06-29-2013, 01:56 AM
|
#9 | |
|
Old School Status
Join Date: Dec 2012
Drives: .
Location: .
Posts: 255
Thanks: 150
Thanked 407 Times in 197 Posts
Mentioned: 13 Post(s)
Tagged: 0 Thread(s)
|
Quote:
would love to get the part# for this switch panel....
__________________
|
|
|
|
|
| The Following 3 Users Say Thank You to PANDA86 For This Useful Post: |
|
06-30-2013, 03:29 PM
|
#10 |
|
Senior Member
Join Date: Aug 2012
Drives: 2013 Raven FRS MT
Location: KY
Posts: 857
Thanks: 351
Thanked 302 Times in 185 Posts
Mentioned: 4 Post(s)
Tagged: 0 Thread(s)
|
So, I see you can only turn these on when the low beams are on. Looks like wiring to the parking/DRLs is the best bet. Also, I would recommend getting fog light lamp protectors as the glass will shatter with a rock flying into from interstate driving.
What is neat about this is that the dash was built to be ready for a fog light addition. Hence the fog light symbol built in. I have also noticed the smart key icon in the speedo during day light. Maybe that will be an option down the road. It's like the headliner having the wiring available to add a homelink mirror. |
|
|
|
|
06-30-2013, 03:35 PM
|
#11 |
|
Senior Member
Join Date: Jan 2013
Drives: Awesome
Location: Vancouver, BC
Posts: 295
Thanks: 167
Thanked 78 Times in 61 Posts
Mentioned: 0 Post(s)
Tagged: 0 Thread(s)
|
i would love to get the panel button but toyota has put in the led button for the alarm on that spot.
__________________
 |
|
|
|
|
06-30-2013, 05:47 PM
|
#12 |
|
Ghost
Join Date: May 2012
Drives: FR-S (Whiteout)
Location: Illinois
Posts: 144
Thanks: 7
Thanked 74 Times in 40 Posts
Mentioned: 2 Post(s)
Tagged: 0 Thread(s)
|
There were no individual part numbers on anything; there was a barcode and reference number on one of the bags that contained the wires, but it was for the overall kit. You could try taking the picture to a dealer?
__________________
|
|
|
|
|
06-30-2013, 07:22 PM
|
#13 | |
|
Senior Member

Join Date: Jun 2012
Drives: 2013 FRS 10 Series #81 of 2500
Location: Houston, TX
Posts: 951
Thanks: 358
Thanked 395 Times in 240 Posts
Mentioned: 13 Post(s)
Tagged: 0 Thread(s)
|
Quote:
my GS is the same, we have the fog light symbol but my car doesent have fog lights as for the smart key, dont hold ur breath on that, i dont think toyota will ever come out with a kit for that |
|
|
|
|
|
06-30-2013, 07:51 PM
|
#14 | |
|
Senior Member
Join Date: Aug 2012
Drives: 2013 Raven FRS MT
Location: KY
Posts: 857
Thanks: 351
Thanked 302 Times in 185 Posts
Mentioned: 4 Post(s)
Tagged: 0 Thread(s)
|
Quote:
|
|
|
|
|
|
|
|
|
|
|
|
 Similar Threads
|
||||
| Thread | Thread Starter | Forum | Replies | Last Post |
| TOYOTA emblem... JDM vs USDM | lbroskee | Cosmetic Modification (Interior/Exterior/Lighting) | 89 | 08-15-2013 03:00 PM |
| Has anyone install a light weight flywheel? | 20valvewynn83 | Engine, Exhaust, Transmission | 44 | 08-08-2013 09:52 PM |
| Custom Third Brake Light Install (incl. Pics) | Skorov | AUSTRALIA | 14 | 07-27-2013 04:04 AM |
| Glovebox LED light Install | Tech | DIY (Do-It-Yourself) Guides | 0 | 03-26-2013 07:21 AM |
| OEM Fog Light install! ON and working! | 86design | FR-S & 86 Photos, Videos, Wallpapers, Gallery Forum | 38 | 07-04-2012 07:11 PM |


 Ghost
Ghost


