


 06-02-2013, 10:08 AM
|
#1 |
|
Red is Fastest

Join Date: Dec 2012
Drives: 13 FRS 6MT Firestorm
Location: Central Kentucky
Posts: 439
Thanks: 85
Thanked 242 Times in 120 Posts
Mentioned: 11 Post(s)
Tagged: 0 Thread(s)
|
DIY Alignment
After adding some springs and dropping the height a bit I decided to do my own alignment. Hours of research on the internet and FRS specific info here I began getting parts and equipment with this goal in mind.
Let me preface this with this is not an easy thing to do. I've done lots of work to vehicles over the years and this one ranks way up there with testing my patience. Unless you are very meticulous and confident in your abilities go have a pro do it. I also recommend that you verify your alignment with a pro afterward. I haven't yet but soon will. I'm also going to note that this doesn't cover so much the extra parts I installed to get the alignment settings to where I wanted them but in how to setup and actually do alignment measurements. It also only covers measuring/setting the camber and toe. Stuff you need: 3 pieces of 1/2 conduit. I bought 3 -10 ft pieces and cut them down. String - strong, relatively small diameter, visible - I used strong fishing line. 4 Jack Stands Masking tape Cinder blocks Floor Tiles - about 20 dependent on floor level. I used ceramic but vinyl is probably better. A few of the ceramic cracked. Food Coloring See through Pitcher about 15' clear vinyl tubing Bubble level Oil/Grease Camber Gauge A good Scale Calipers Various tools to lift and adjust the suspension. In all I spent about $300 to do this alignment. The majority being in the digital camber gauge. I also have about $500 in the parts that allowed me to change camber and toe. Whiteline front camber bolts, SPC Rear LCA's and toe arms. Getting Started: You need a relatively level area to do this. Also enough room around the vehicle to work. Room front and rear to put the jack stands to string it. Its also a good time to check you tire pressure. Get all of them equal. Park the car in the place you'll be working it on. Place tape at each wheel to mark where it will sit. 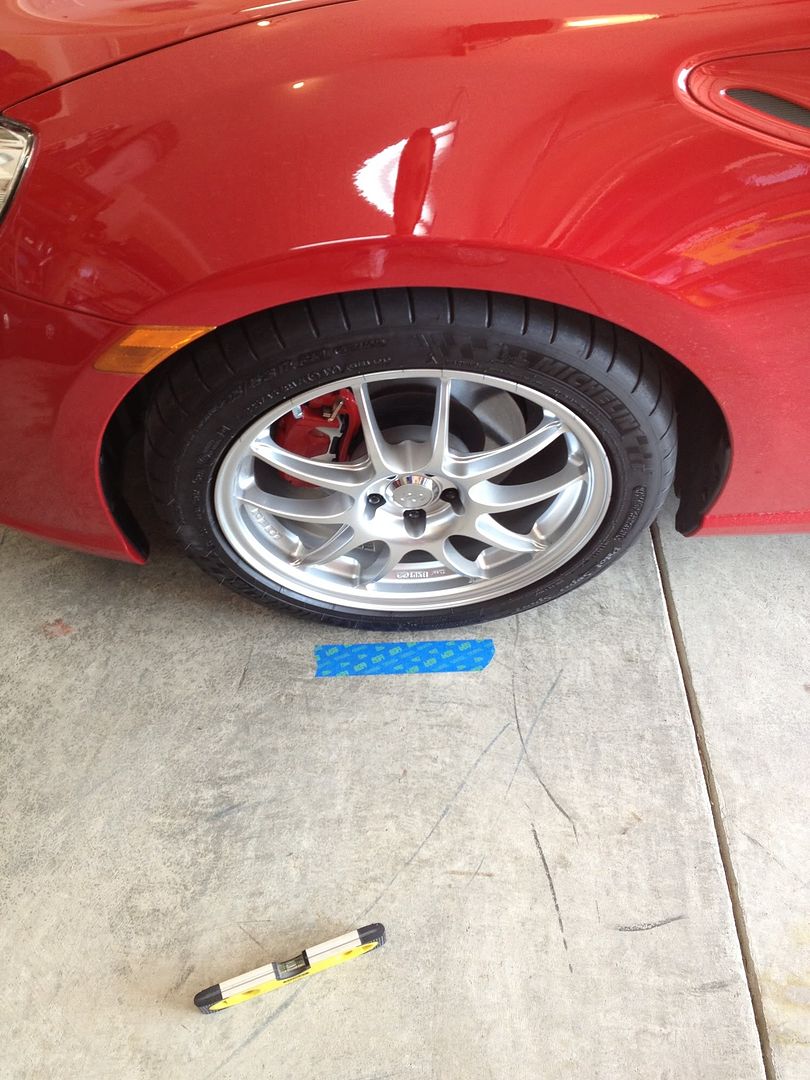 After taping the location, roll the car as straight back as you can and park it. We now need to setup level pads for it to sit on. Because the car is so low started off with 4" cinder blocks as foundations. Place the cinder blocks in line with the tape lines on the floor. On top of each block put 2 tiles. Now we have to get them all level to each other. 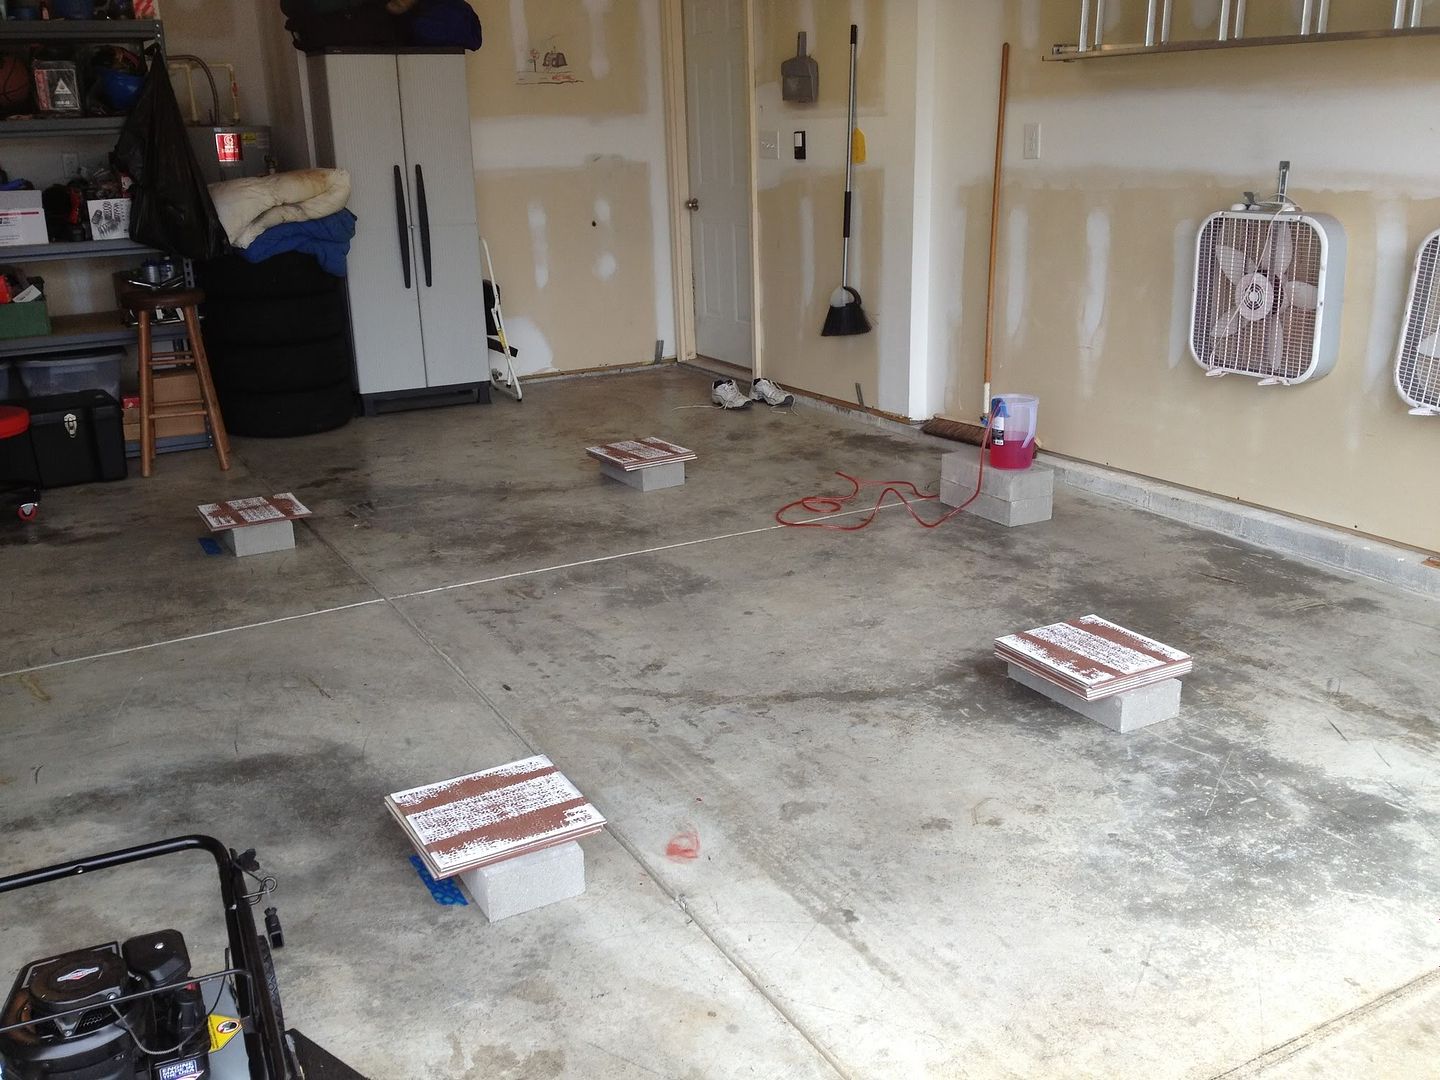 Leveling the Pads: To align as accurately as possible, the car needs to be sitting level. So the pads need to be the same height. Most garage floors, mine included, aren't very level at all. They are swept to let water run out of the garage. I really over thought how to go about getting this done. First thoughts were a laser level or similar. In my web searching I came up with a simple water level. Its cheap, Accurate and fast. It worked out great. Fill a see through pitcher about 1/2 to 3/4 full and add some food coloring. Take one end of your clear vinyl tubing and stretch it across the entire length of your scale. Tape it so that you can see the graduations running beside the tubing. The end of the tubing should be at one end of the scale. Put the other end of the tubing into the pitcher of colored water. Tape it to the pitcher so that this end can't come out of the water. Now siphon the water from the pitcher into the tube until all the bubbles are out of the tubing. Set the pitcher at about the same height as your pads. See the picture above. Now take the scale and place on your pads. Each pad should have the one cinder block and two tiles on it. Find the highest one. By taking the scale/level around to each pad, add tile shims to the lower ones until the water level reads about the same number on the scale. All the pads will then be level to each other. Within 7 ft in my garage floor level was as much as 2 inches different from high point to low point. First time I did this I didn't have any food coloring so I made some tea  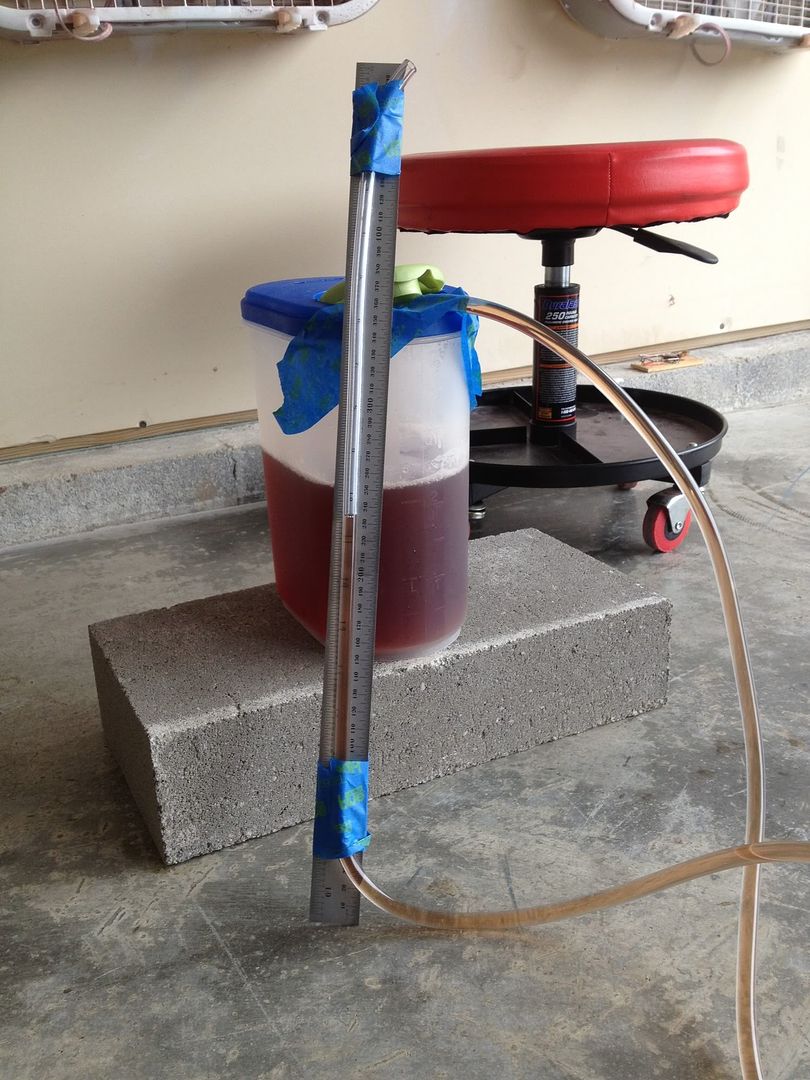 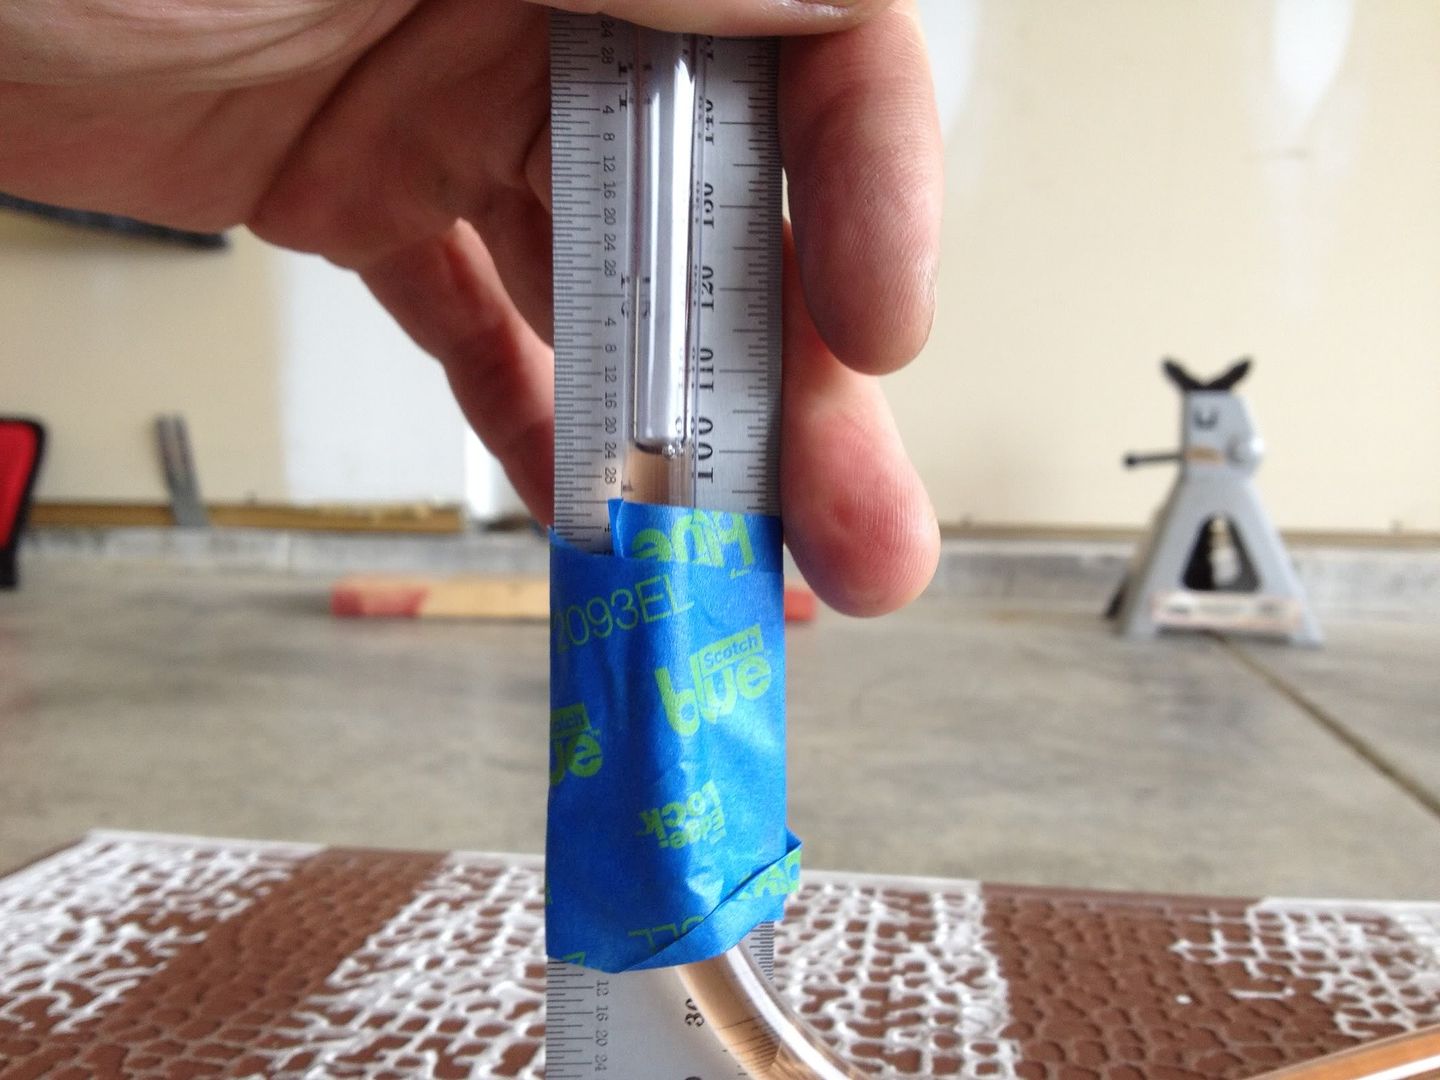 Slide Plates: Now that you have your pads leveled up its time make the top two tiles slide plates. I considered buying some slide plates but they are damned expensive. Researching the internet saved me again. When you set the car on the pads you want the suspension to be able to move/settle. Slide plate allow this to happen. Remove the top tile from each stack and put some grease/oil on top of the plate. Then put the plate back on top and spread it around. Just be aware that when the car is on top of the pads a good shove could push the car off the pads. Now that you have the pads completed, keep them together and move them out of the way. Pull the car back into the spot using the tape on the floor to position it correctly. Pay attention to getting the steering wheel straight. Carefully jack up the car, place the pads under each wheel and gently set the car onto each wheel. Pop the trunk and hood. Find a place to press down on the suspension front and rear to settle the suspension. I verified car level once once on the pads. 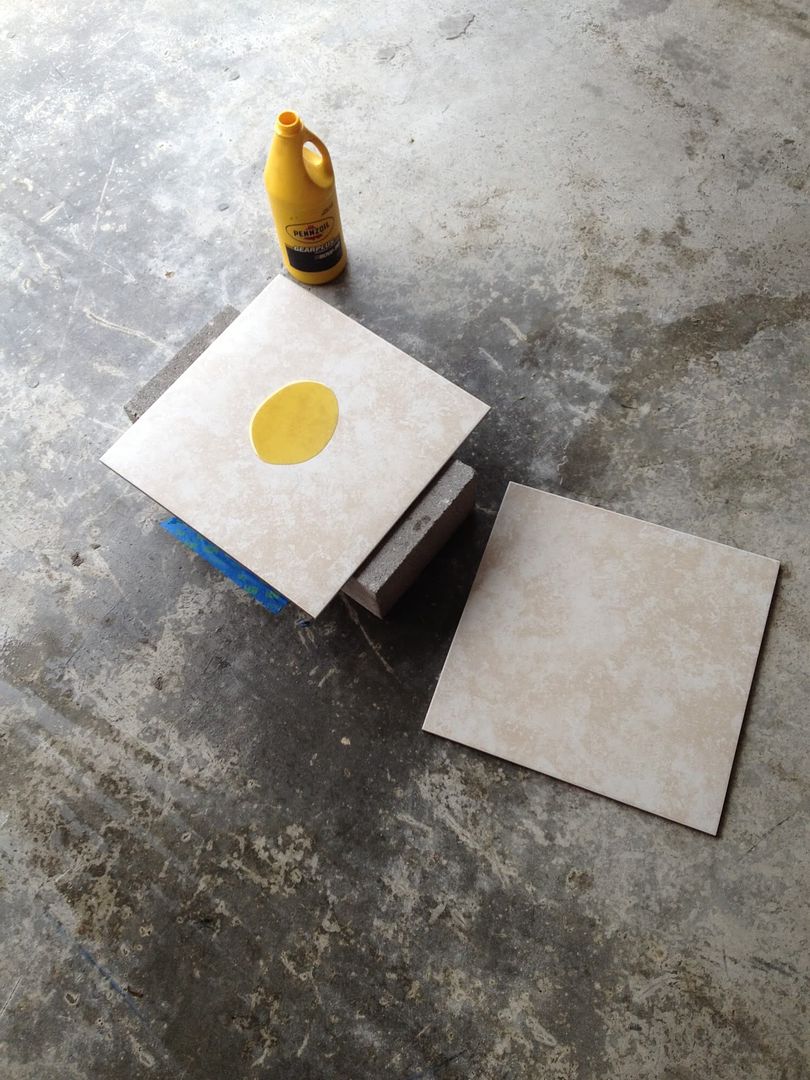 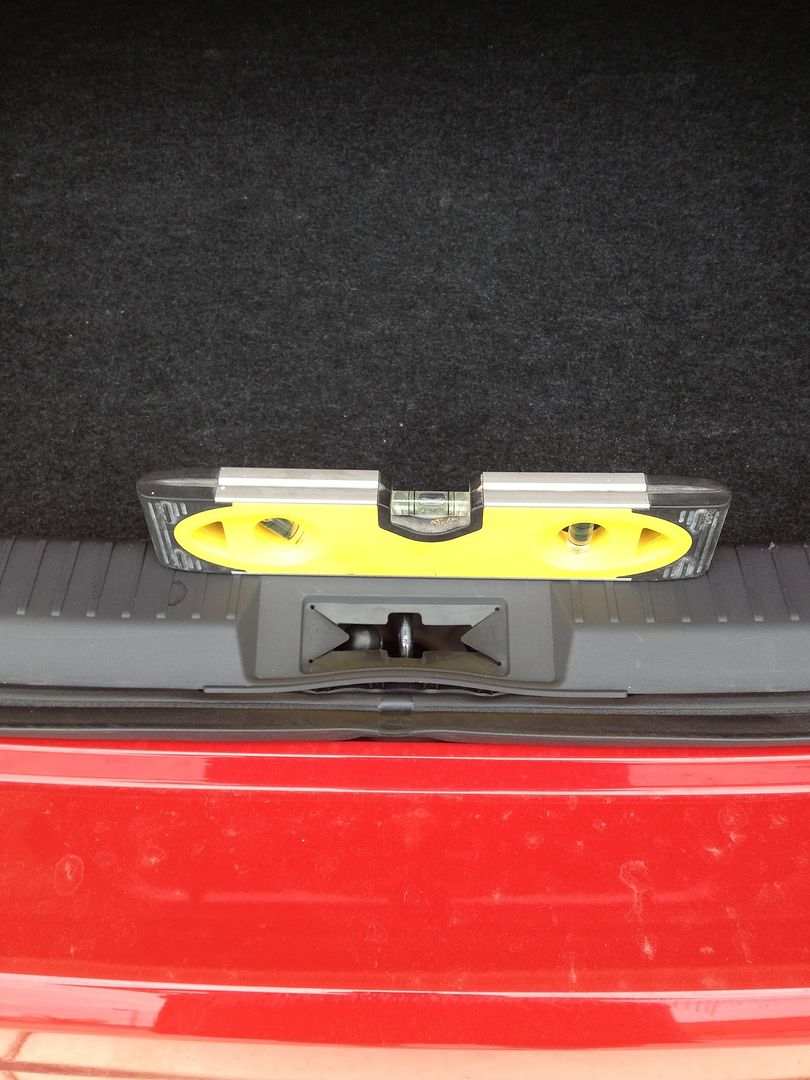 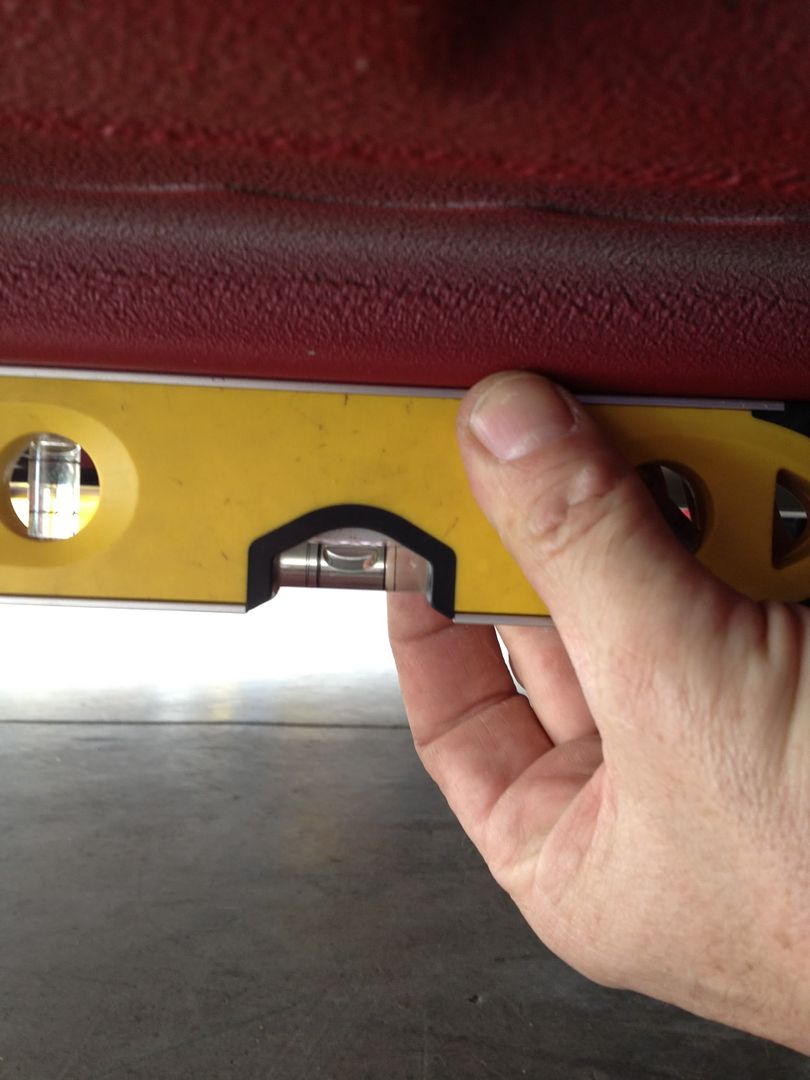 The car resting on the pads. If you look at the tile under the tire you can see it slid out allowing the suspension to settle. I'll also note that I used ceramic tiles. Some of them cracked under the weight of the car but everything still worked. 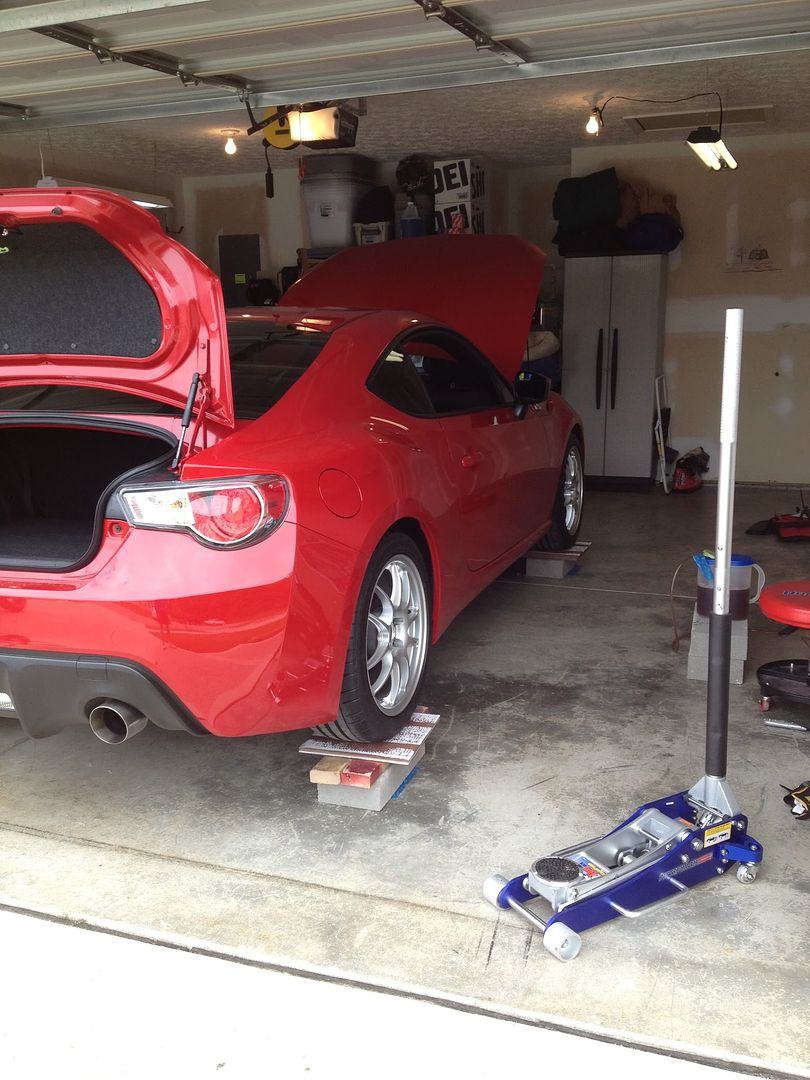
Last edited by FRSFirestorm; 06-09-2013 at 07:13 AM. |

|

|
| The Following 12 Users Say Thank You to FRSFirestorm For This Useful Post: |
|
06-02-2013, 10:09 AM
|
#2 |
|
Red is Fastest
Join Date: Dec 2012
Drives: 13 FRS 6MT Firestorm
Location: Central Kentucky
Posts: 439
Thanks: 85
Thanked 242 Times in 120 Posts
Mentioned: 11 Post(s)
Tagged: 0 Thread(s)
|
Camber:
Checking/setting camber is easy with a digital camber gauge. We'll reading the camber is. Its a bit more involved adjusting it. As I'd said earlier. Camber on the FRS is fixed front and rear. Non adjustable. Other than lowering/raising the ride height. I have a set of Whiteline front camber/crash bolts installed, along with SPC adjustable rear LCA's. A few months ago I bought a QuickTrick digital gauge. Its as simple as adjusting the arm to fit your wheel, placing the digital gauge in front of the wheel and zeroing it. then placing it on the camber arm then vertical to the center of the wheel and reading the camber angle. With the front camber bolts you loosen the strut bolts, turn the whiteline unit, re-tighten, bounce the car up and down. Measure the camber. Rinse and repeat till you get it where you want it. In the rear with the SPC unit, you loosen a couple bolts, adjust the cammed bolt, re-tighten, bounce the car up and down and measure the camber. Rinse and repeat till you get it where you want it. Factory settings for camber are Front - 0 degrees +/- .75 degrees. Right/Left difference .75 degree or less. Rear: -1.2 degrees. +/- .75 degrees. Right/left difference .75 degree or less. 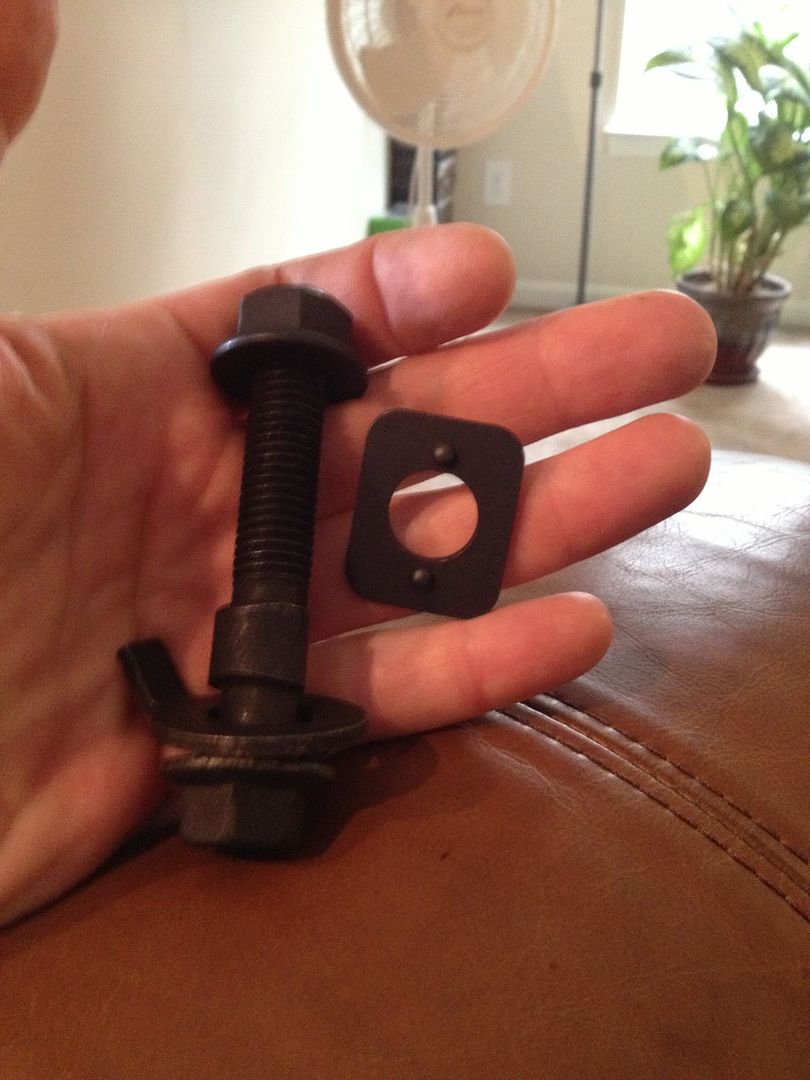 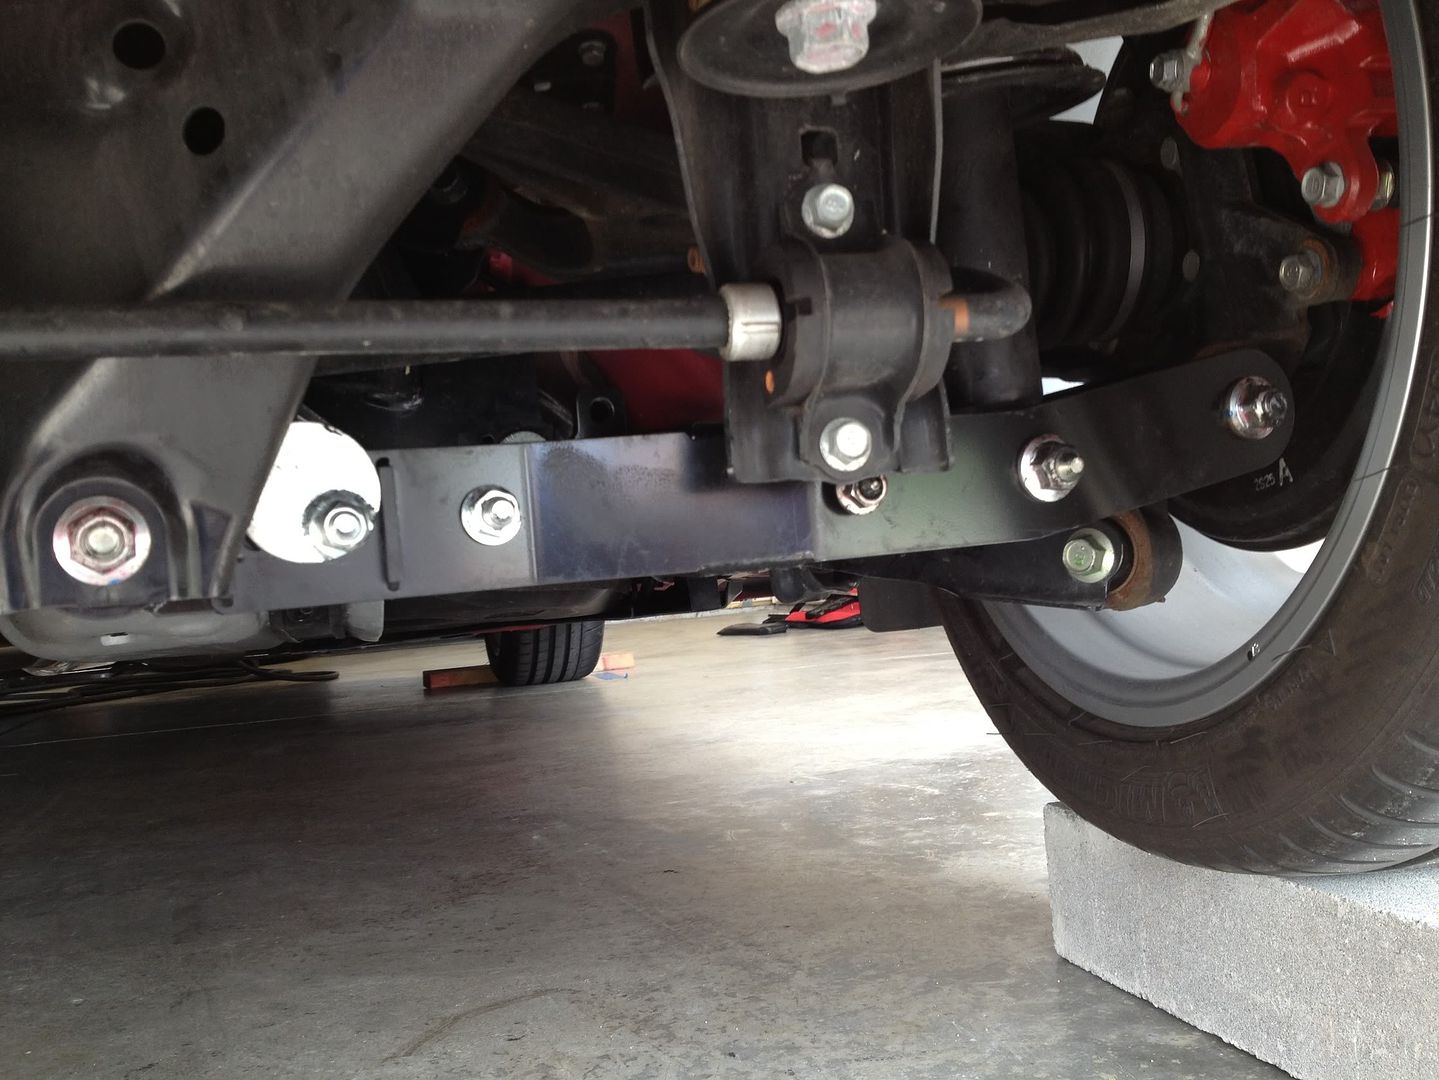 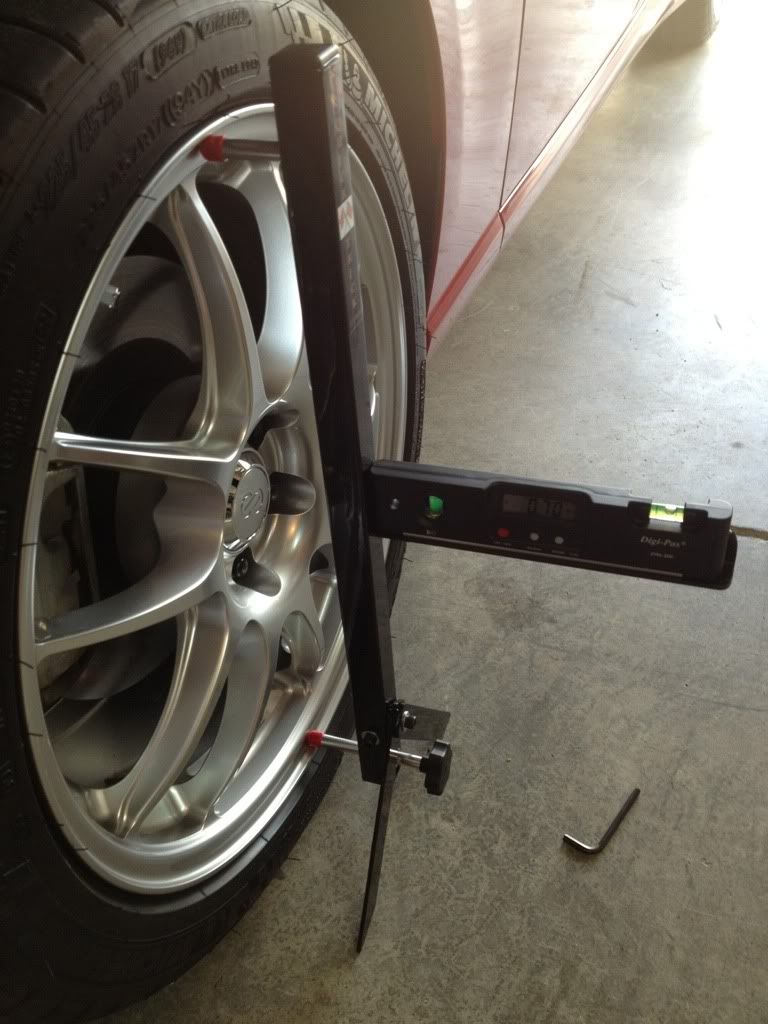
Last edited by FRSFirestorm; 06-02-2013 at 09:09 PM. |
|
|
|
| The Following 4 Users Say Thank You to FRSFirestorm For This Useful Post: |
|
06-02-2013, 10:10 AM
|
#3 |
|
Red is Fastest
Join Date: Dec 2012
Drives: 13 FRS 6MT Firestorm
Location: Central Kentucky
Posts: 439
Thanks: 85
Thanked 242 Times in 120 Posts
Mentioned: 11 Post(s)
Tagged: 0 Thread(s)
|
Setting Toe:
Unlike camber and caster. Toe is adjustable on FRS from the factory. There are cam bolts at one end of the rear toe arm and of course the front tie rods. Any change in camber will effect the toe. So you want to set camber first and finish with setting the toe. I am no expert on suspension and alignments but my research tells me that toe is probably the most important setting there is in an alignment. Effecting tire wear, stability, thrust angle and turning. To measure and set toe I used the "string" method. You are basically building a rectangular box around the car with strings perfectly parallel down the sides of the car at center height to the axles. Building the "Box": First order is preparing 2 of the pieces of conduit. These will be placed at each end of the car on jack stands to set the width of the strings. The goal here is to get the strings at exactly the same distance apart front and rear of the car. I laid a tape measure at the end of the car to determine how long the pieces of conduit need to be. They need to be wider than the outside of the wheels. Not to long but not to short. I wound up cutting them each to 212cm. As exact as possible. Then from the ends of each piece I measured inward exactly 10cm and drilled a small hole. Again as exact as possible. These holes are for threading the string into. This gave me a string width of (212-20) 192cm. The number isn't really important. What is is that the width of the holes is the same on each piece of conduit. Before stringing up the car you also need to lock the steering wheel as dead center as possible. This is another trick I came up with on the internet. Cheap and effective. With the 3rd piece of conduit I cut it to 6ft I believe. Enough to pass through the interior of the car and rest on each door sill. Use tie wraps to strap the wheel to the pole on each side. This picture tells the story. 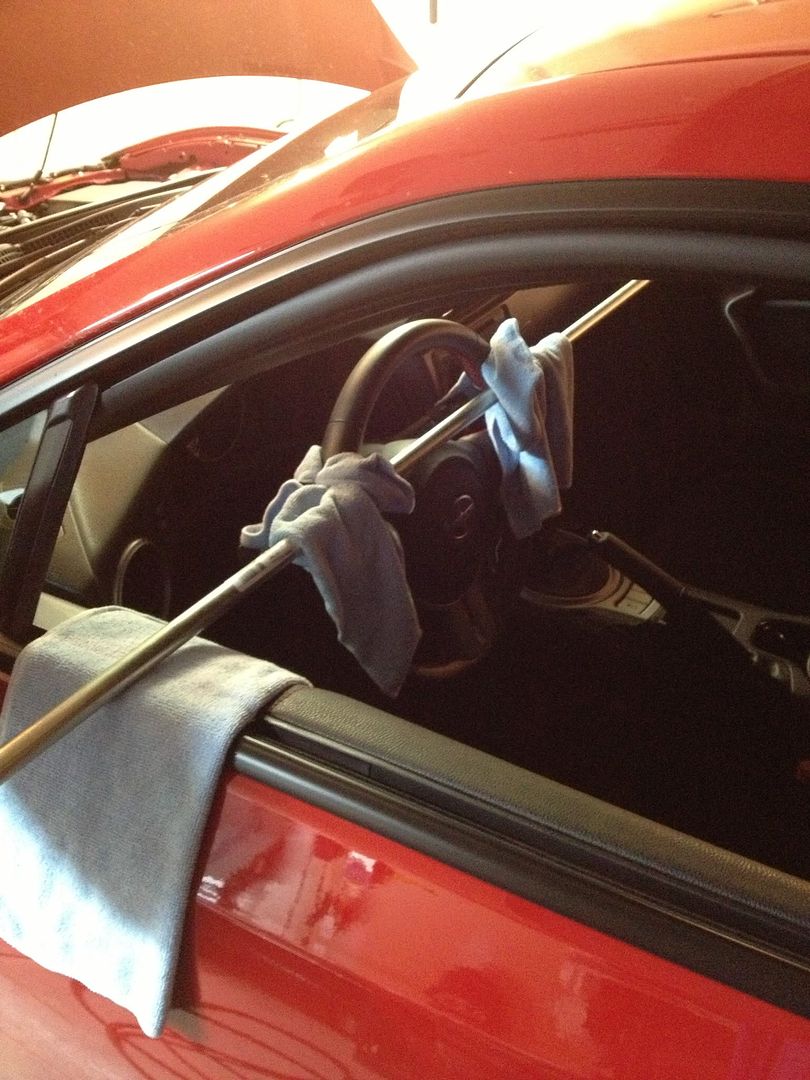 Now its time to string the car. Place 2 jack stands at each end of the car. Lay your pieces of conduit onto them. Now thread your string through each hole of the conduit and stretch it as tight as possible down the side of the car. Do this on both sides obviously. Adjust the height of the jack stands to get the string as near center of each wheel as possible. Once you have this set up you now must get the car centered to them. Adjust the pieces of conduit from side to side with the goal of getting the string the same distance from the wheel center on each side. It doesn't matter what the number is just so long as they are equidistant. IE: front LH/RH distance = 103mm, Rear LH/RH distance = 103mm. This will take a considerable amount of time but it is uber important to get them as accurate as you can. I started rough with a scale then move on to a set of calipers. My goal was to get them within .2mm of each other. Once you have this done be very careful not touch anything while working around the car. If you do you'll have to re do it. Also many times during adjusting the toe I'd re-check the center of the wheel to make sure the string hadn't moved.  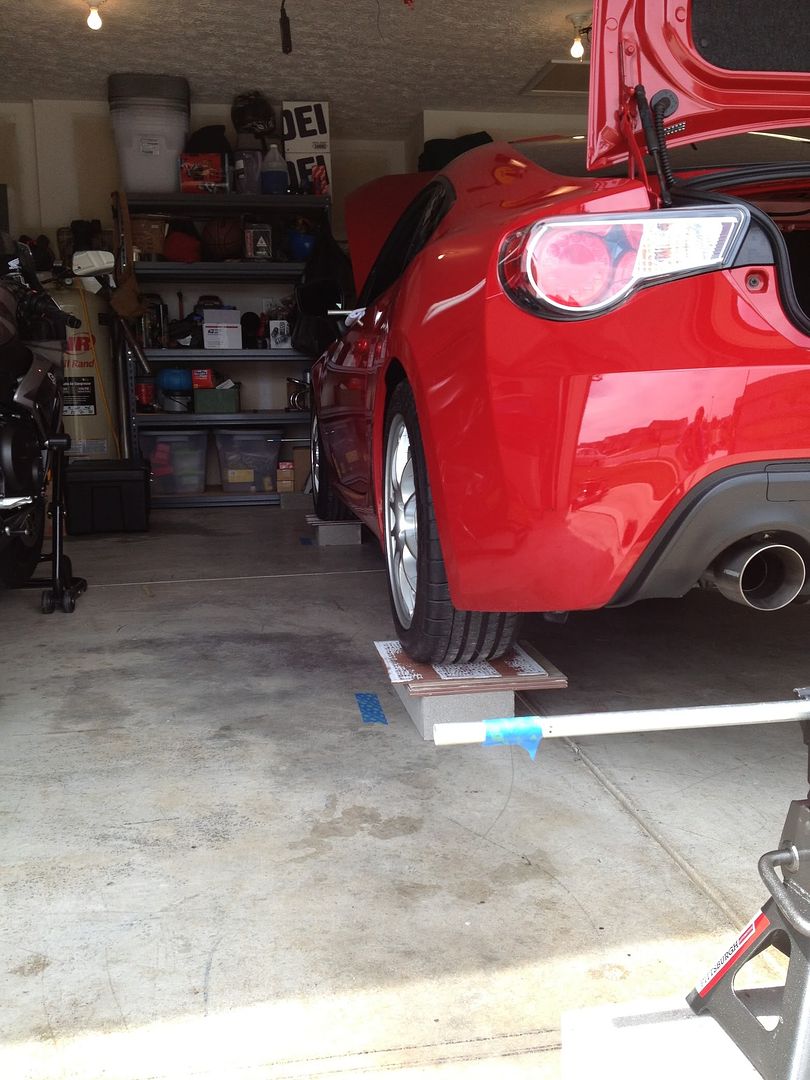  Now that you have the car stringed you can begin to measure toe. This is done by measuring the distance to the string to the right side and left side of the wheel. Again I use the caliper's for this. Do one wheel at a time. Measure left side, jot the number down, then measure right side and jot the number down. As an example if you read 82mm on the left side and 83mm on the right side. 82-83=-1mm toe in. I actually made a spreadsheet to do the calculations. So its measure, adjust the toe via the tie rod turn buckle, bounce the car up down, measure again. Rinse and repeat until you get it where you want it. Factory specs for Toe are Front: Toe (Each Wheel): 0°00' +/- 0°11' (0.00° +/- 0.19°) Toe (Total): 0 +/- 3.0 mm (0 +/- 0.1181 in.) Rear: Toe (Each Wheel): C + D: 0°10' +/- 0°15' (0.16° +/- 0.24°) Toe (Total): 2.0 +/- 3.0 mm(0.0787 +/- 0.1181 in.) A note with this picture. First time I did the alignment I measured at this point in the picture. Second time around I went to the outer lip. There is room for error measuring where I did in this pictue. A couple slight radius. Not so on the outer lip. 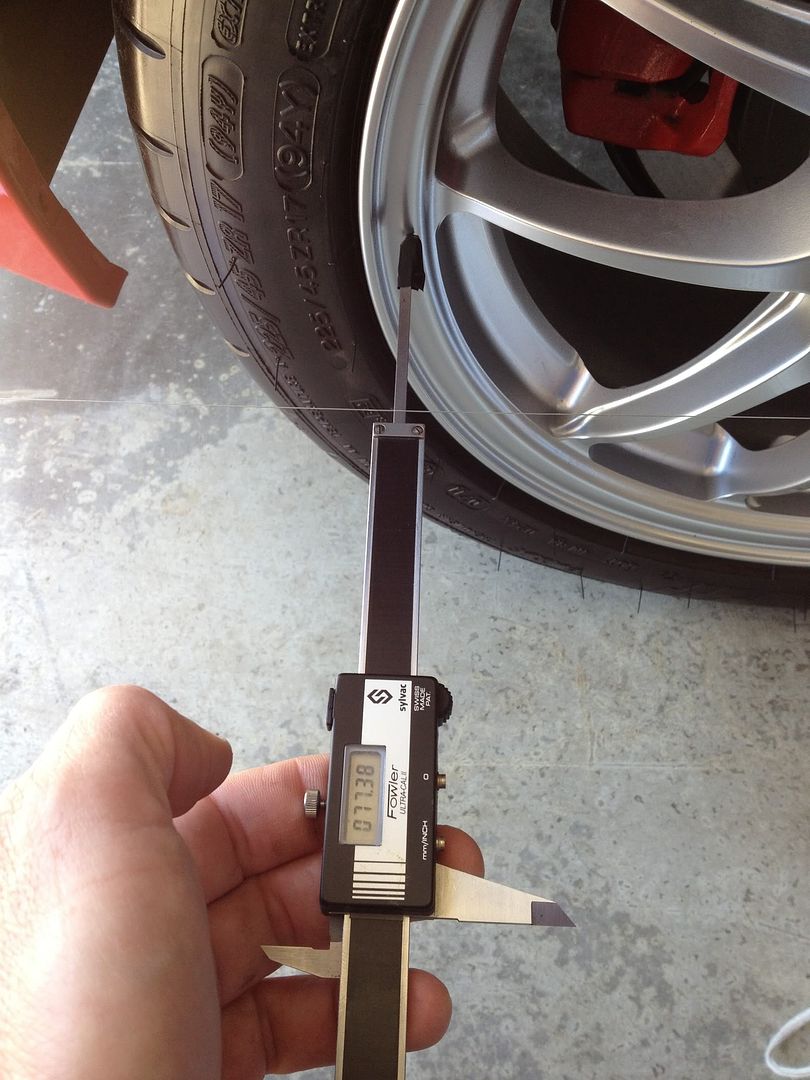 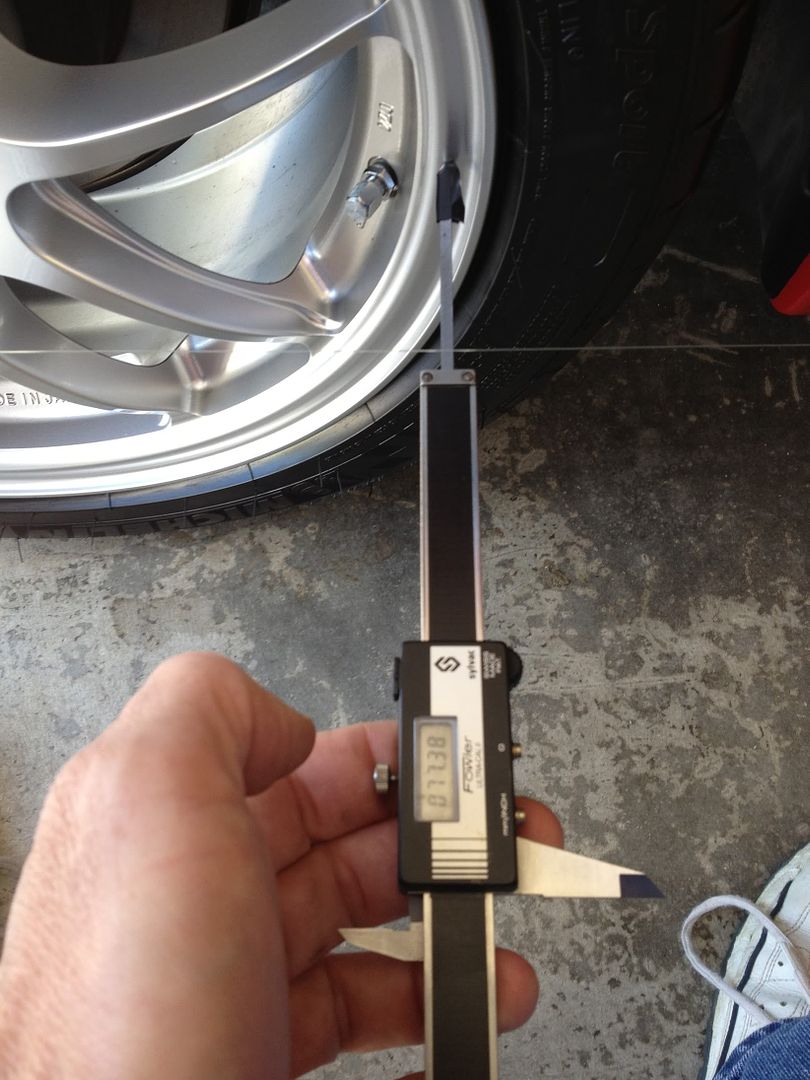 [IMG]http://i260.photobucket.com/albums/ii21/KySilverado/D7AB4C65-3BB4-4357-8***-508E1EC946BA-82607-0000245EAD163954_zps8898bce7.jpg[/IMG] 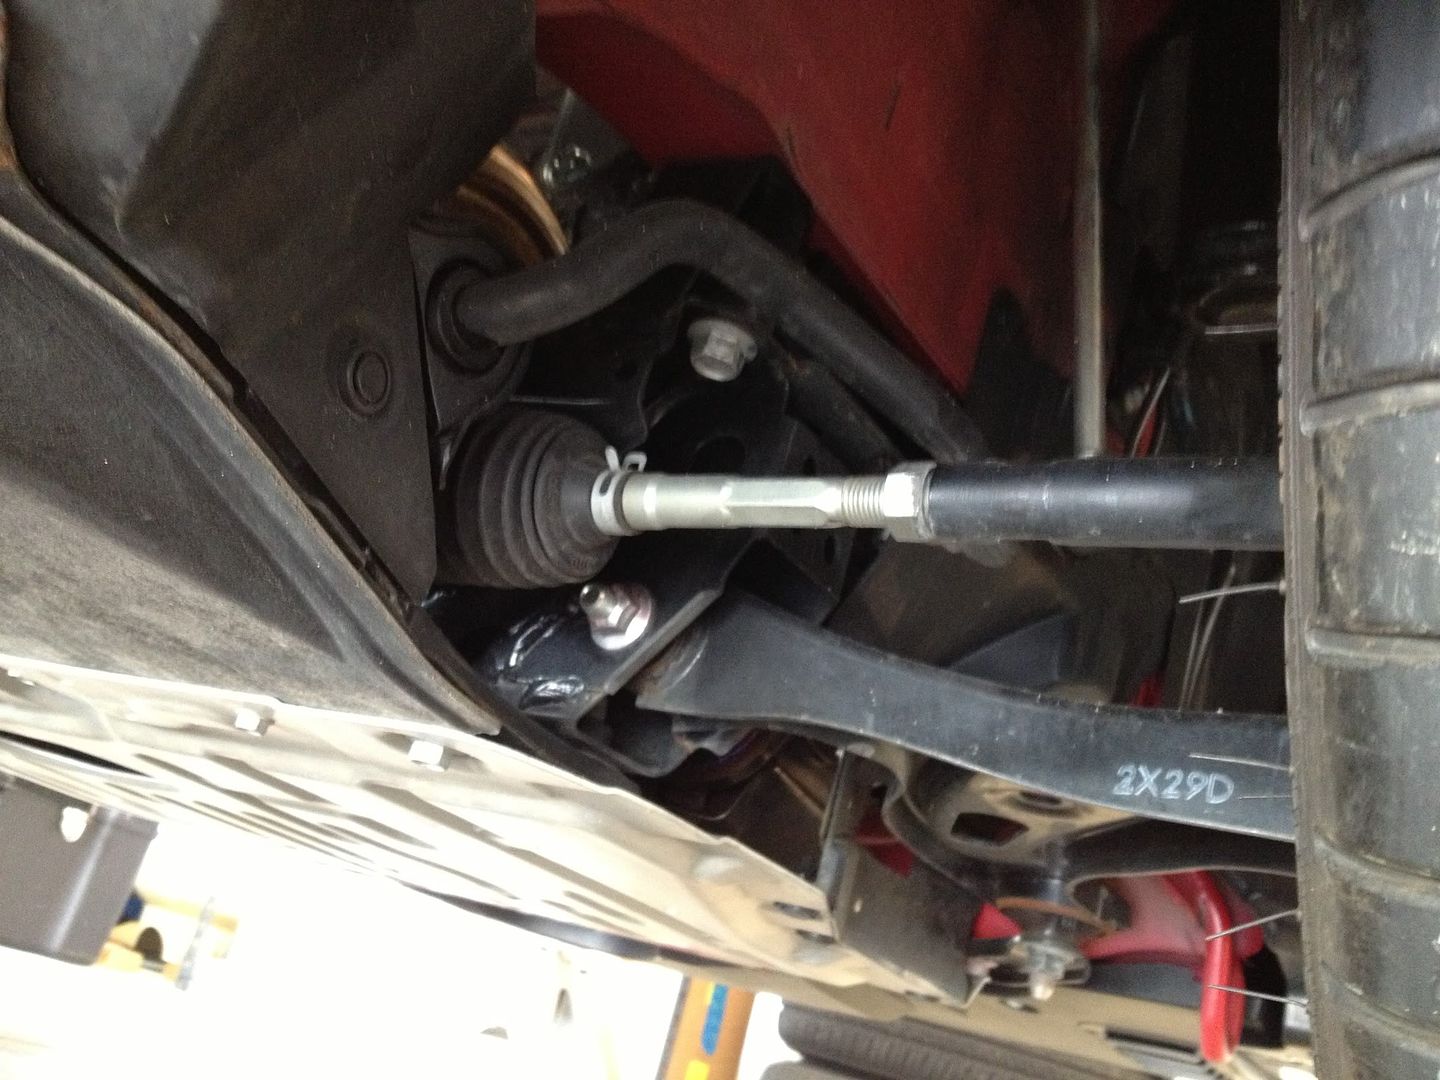 This is the second time I've done this. Measurements from the first time to the second time were very close for the front. Numbers well within spec tolerances so I'm pretty confident in the results. Car drives and handles great. Tracks beautifully and the wheel is dead nuts centered. I put everything close to factory spec that way if anything is out it should fall within tolerance to the specfication nominal. I've made an appointment in a couple weeks to have Koni shocks installed. They will do an alignment afterward. At some point I'll string it up again to see if I get the same numbers they do on a machine. Like I said earlier this is not a novice DIY but it can be done and accurately with some patience and the right setup. Last edited by FRSFirestorm; 06-05-2013 at 08:29 PM. |
|
|
|
| The Following 9 Users Say Thank You to FRSFirestorm For This Useful Post: | Fender0122 (05-20-2015), hamzam (02-19-2016), Hindi (06-05-2013), ML (06-03-2013), RAWR BRZ (06-05-2013), Trap63 (06-06-2013), Tristor (02-22-2018), Ultramaroon (12-29-2015), Wepeel (08-30-2013) |
|
06-05-2013, 12:21 PM
|
#4 |
|
Red is Fastest
Join Date: Dec 2012
Drives: 13 FRS 6MT Firestorm
Location: Central Kentucky
Posts: 439
Thanks: 85
Thanked 242 Times in 120 Posts
Mentioned: 11 Post(s)
Tagged: 0 Thread(s)
|
One more thing I'll add to this thread. I've mentioned it in another.
I would have expected to see a difference in the equdistant with a parallel string. From published data I've found: Front track width 1519mm Rear track width 1539mm I expected to see a 10mm difference in equidistant between the front and rear when I strung it. It was not there and I can't explain it. |
|
|
|
|
06-05-2013, 01:12 PM
|
#5 |
|
Senior Member

Join Date: Jan 2013
Drives: Awesome
Location: Vancouver, BC
Posts: 295
Thanks: 167
Thanked 78 Times in 61 Posts
Mentioned: 0 Post(s)
Tagged: 0 Thread(s)
|
that is the most work ive seen doing the alignment. great work!
__________________
 |
|
|
|
| The Following 3 Users Say Thank You to Retro86 For This Useful Post: |
|
06-05-2013, 08:35 PM
|
#6 |
|
Red is Fastest
Join Date: Dec 2012
Drives: 13 FRS 6MT Firestorm
Location: Central Kentucky
Posts: 439
Thanks: 85
Thanked 242 Times in 120 Posts
Mentioned: 11 Post(s)
Tagged: 0 Thread(s)
|
Here is a great alignment spreadsheet that I've found for jotting down toe and calculating toe in angle degrees.
http://www.cmoullas.net/wp-content/u...et.xlsx?7d02e5 |
|
|
|
|
06-06-2013, 06:17 PM
|
#7 |
|
Red is Fastest
Join Date: Dec 2012
Drives: 13 FRS 6MT Firestorm
Location: Central Kentucky
Posts: 439
Thanks: 85
Thanked 242 Times in 120 Posts
Mentioned: 11 Post(s)
Tagged: 0 Thread(s)
|
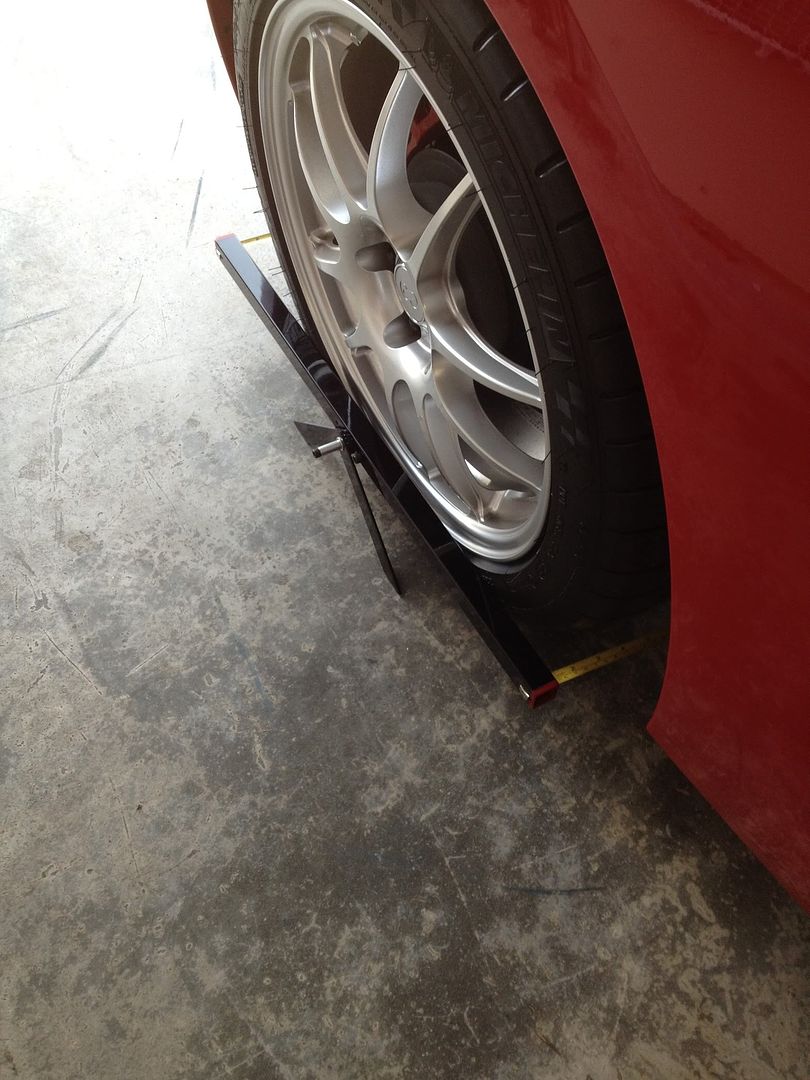
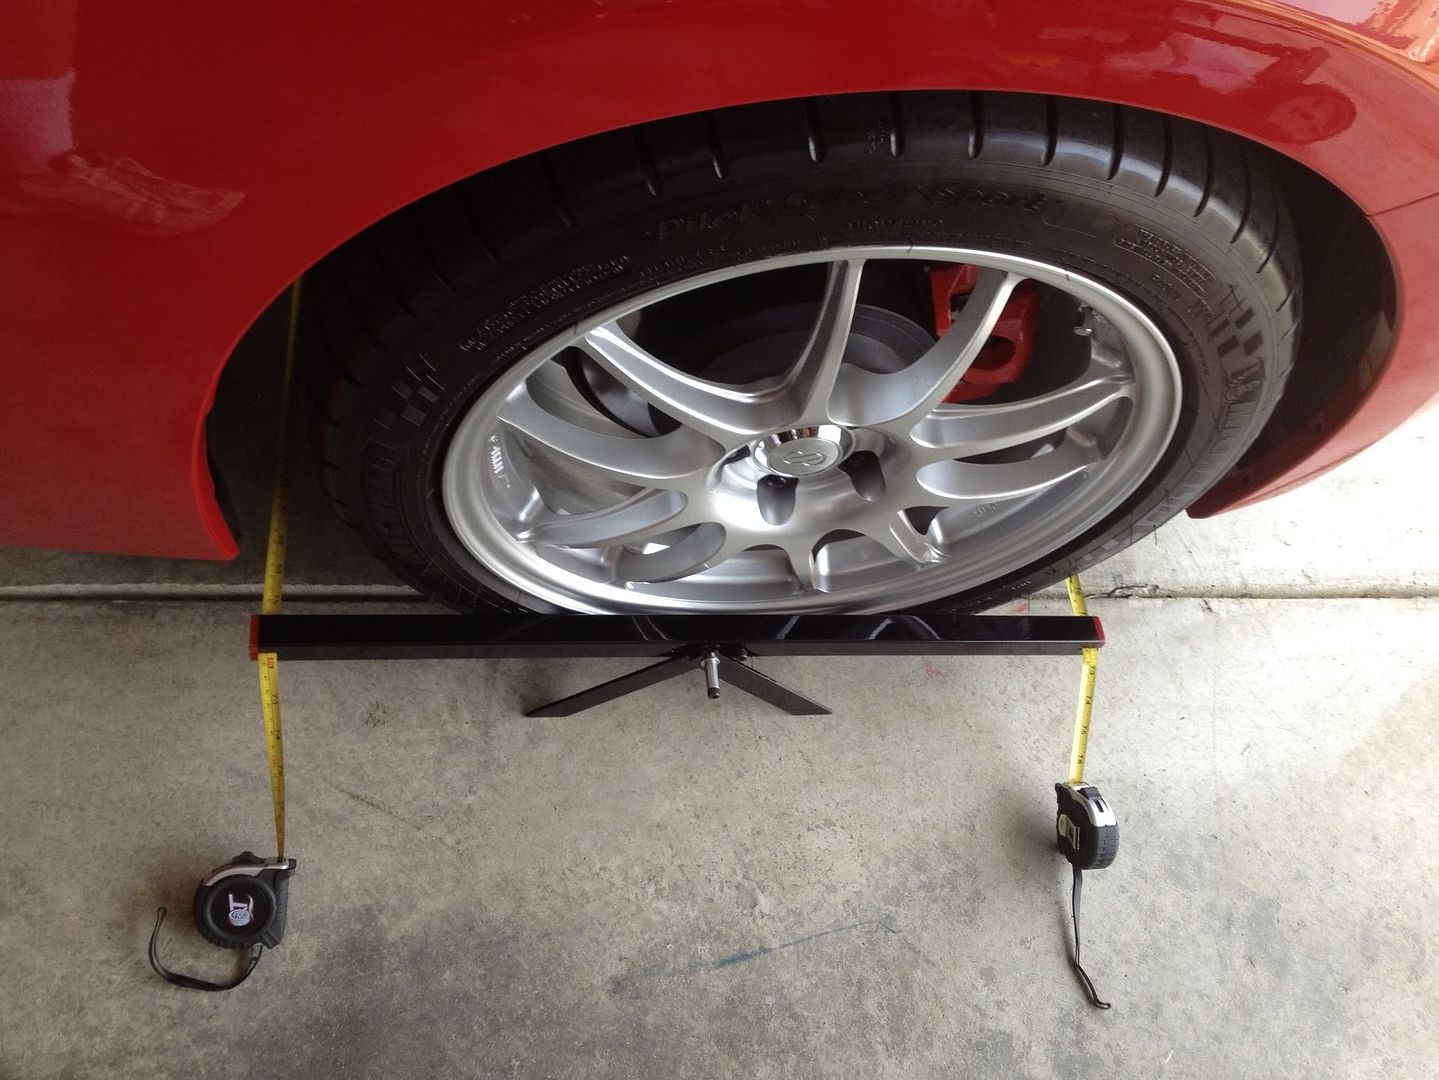
Found these pictures on the phone. Might as well throw them in also. These are toe plates that came with my camber gauge. After I'd done the string alignment I put these on to double check. Two drawbacks with them that I see. 1) I'd say they are only accurate to .5 to 1mm accurate. 2) They can only give you a number for total toe. Whatever toe you read you wouldn't know individual toe for each wheel. One wheel could be toed out 5mm and the other toed in 6mm. You'd think you were great by reading this gauge.
Last edited by FRSFirestorm; 06-06-2013 at 09:56 PM. |
|
|
|
|
06-07-2013, 11:17 AM
|
#8 |
|
Senior Member

Join Date: Apr 2013
Drives: Toyota Skyline Type-R
Location: Screwston
Posts: 205
Thanks: 7
Thanked 93 Times in 51 Posts
Mentioned: 4 Post(s)
Tagged: 1 Thread(s)
|
Serious question, why pay all that money and time when you can just get a lifetime alignment for about half of the cost?
Great writeup though. |
|
|
|
| The Following 2 Users Say Thank You to mackdaddytran For This Useful Post: | 448hpsti (09-29-2013), FRSFirestorm (06-08-2013) |
|
06-08-2013, 10:01 AM
|
#9 | |
|
Red is Fastest
Join Date: Dec 2012
Drives: 13 FRS 6MT Firestorm
Location: Central Kentucky
Posts: 439
Thanks: 85
Thanked 242 Times in 120 Posts
Mentioned: 11 Post(s)
Tagged: 0 Thread(s)
|
Quote:
I'm anal and ummm.. un-trusting of shops working on my vehicles. I recently had my tint installed because I didn't want to tackle that, and it was a disaster. This primarily comes from living in Smallsville USA most of my life and good shops not available. Early on in my hot rodding career I couldn't afford parts and labor to install them so I had to do all the work myself. I like working on my vehicles and expanding my knowledge and skill sets at wrenching. I enjoyed re-searching all the ways to go about this, reading these stories and using some of the simple things that made it work. IE the slip plates and water level. I plan on playing with different settings of camber and toe. Now its just a matter of a couple hours in my own garage to do this. |
|
|
|
|
| The Following 5 Users Say Thank You to FRSFirestorm For This Useful Post: | Cmorris8848 (01-17-2016), gonzo (01-10-2014), hamzam (02-19-2016), j2digit (07-11-2013), Tristor (02-22-2018) |
|
06-09-2013, 07:27 PM
|
#10 | |
|
Senior Member
Join Date: Nov 2011
Drives: 4 wheels
Location: tampa bay
Posts: 108
Thanks: 7
Thanked 25 Times in 21 Posts
Mentioned: 0 Post(s)
Tagged: 0 Thread(s)
|
Quote:
As far as the safety for working under/around a car on those plates you made, if a good shove will knock the car off, then isn't that even worse than working under a car without jack stands? Are there any extra precautions you took because of this? It seems like only using the sliding tiles for 1/2 the car at a time might be a better, although add some extra time. |
|
|
|
|
| The Following User Says Thank You to bucket For This Useful Post: | FRSFirestorm (06-09-2013) |
|
06-09-2013, 07:59 PM
|
#11 | |
|
Red is Fastest
Join Date: Dec 2012
Drives: 13 FRS 6MT Firestorm
Location: Central Kentucky
Posts: 439
Thanks: 85
Thanked 242 Times in 120 Posts
Mentioned: 11 Post(s)
Tagged: 0 Thread(s)
|
Quote:
Last edited by FRSFirestorm; 06-09-2013 at 08:16 PM. |
|
|
|
|
|
07-11-2013, 03:05 PM
|
#12 |
|
Senior Member

Join Date: May 2013
Drives: 2013 BRZ
Location: Iowa
Posts: 928
Thanks: 135
Thanked 298 Times in 202 Posts
Mentioned: 1 Post(s)
Tagged: 0 Thread(s)
|
Has anyone aligned a car after installing factory crash bolts? I'm planning on installing them.... whenever I get around to it and wanted to get an idea of how far off my toe is going to be with camber maxed out.
__________________
|
|
|
|
|
07-11-2013, 09:10 PM
|
#13 | |
|
Senior Member

Join Date: Apr 2013
Drives: 2000 Integra LS, 2013 FRS Firestorm
Location: Bikini Bottom
Posts: 271
Thanks: 108
Thanked 74 Times in 59 Posts
Mentioned: 13 Post(s)
Tagged: 0 Thread(s)
|
Quote:
I wish I had the knowledge to do this stuff- err i think the guts to do it. I'm scared i just might screw it up. Great right up sir. 
__________________
 "Power is nothing without Control" |
|
|
|
|
|
07-21-2013, 08:57 AM
|
#14 |
|
Guy on internet
Join Date: Jun 2013
Drives: Slowly
Location: PA
Posts: 582
Thanks: 1,407
Thanked 492 Times in 233 Posts
Mentioned: 5 Post(s)
Tagged: 0 Thread(s)
|
That's incredible..... I'm glad I'm a mechanic and can use my Hunter rack anytime. If I wasn't I think I'd rather pay the 89.95 that we charge.....
Awesome write up though. |
|
|
|
|
|
|
|
 |
| Thread Tools | Search this Thread |
|
|
 Similar Threads
|
||||
| Thread | Thread Starter | Forum | Replies | Last Post |
| DIY Alignment | FRSFirestorm | Suspension | Chassis | Brakes -- Sponsored by 949 Racing | 39 | 10-03-2013 05:29 PM |
| alignment | dori. | NY / NJ / CT / PA | 10 | 04-02-2013 03:57 PM |
| Big O For Alignment? | djliquidsteele | Suspension | Chassis | Brakes -- Sponsored by 949 Racing | 7 | 02-19-2013 05:21 PM |
| DIY alignment | dsgerbc | Suspension | Chassis | Brakes -- Sponsored by 949 Racing | 0 | 08-17-2012 11:41 AM |
| where to get alignment? | FML | Hawaii | 2 | 08-08-2012 01:36 AM |


