


 01-06-2013, 09:56 AM
|
#1 |
|
Senior Member

Join Date: Aug 2012
Drives: 2013 Scion FR-S
Location: Syracuse
Posts: 719
Thanks: 274
Thanked 277 Times in 161 Posts
Mentioned: 6 Post(s)
Tagged: 0 Thread(s)
|
DIY: LED "Demon Eye"
Ok ft86club members, here is my DIY on "demon eyes" headlights. this DIY will include a how to for "LED" demon eye installation. You can also go the Painted route with this DIY.
However, I prefer to be able to turn them off when you do not want them on at all. Any questions please feel free to ask. start by following the headlight relector blackout DIY here - http://www.ft86club.com/forums/showthread.php?t=8788. Once you have the halves seperated is where this DIY comes in. if possible have a small compressor with blow gun handy, to help clean off all plastic bits and dust. Lets start: Start with a Nice cold one:  Follow DIY for reflector black-out: 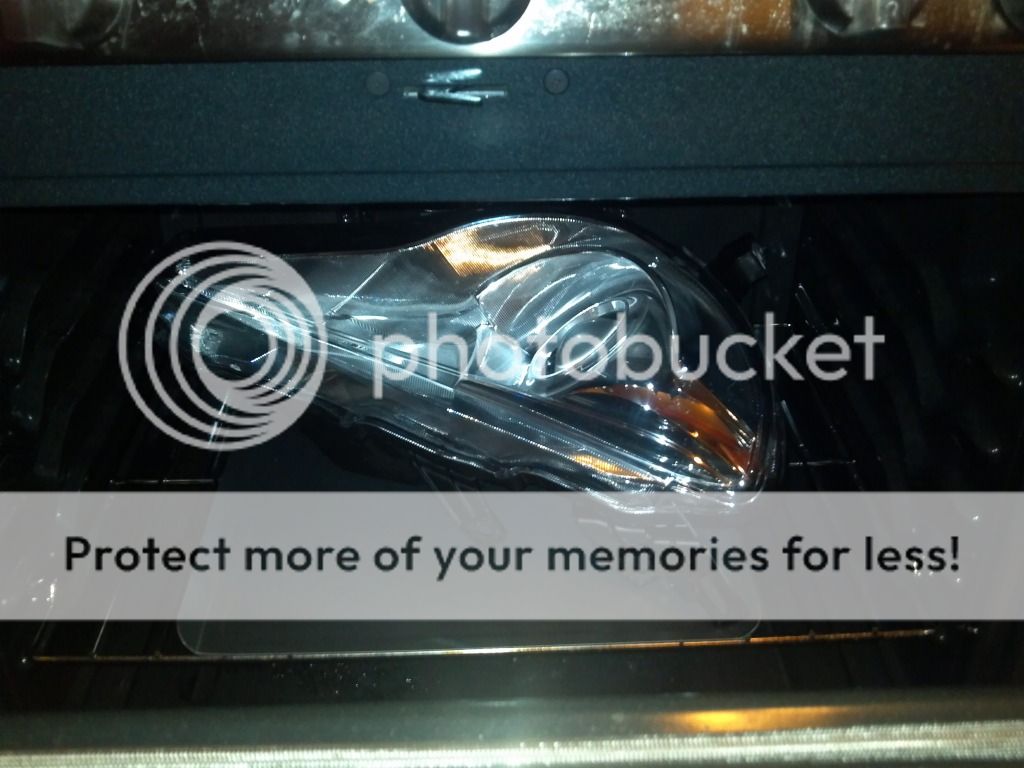 Once housing is "halved"  Remove projector housing 4 phillips screws: 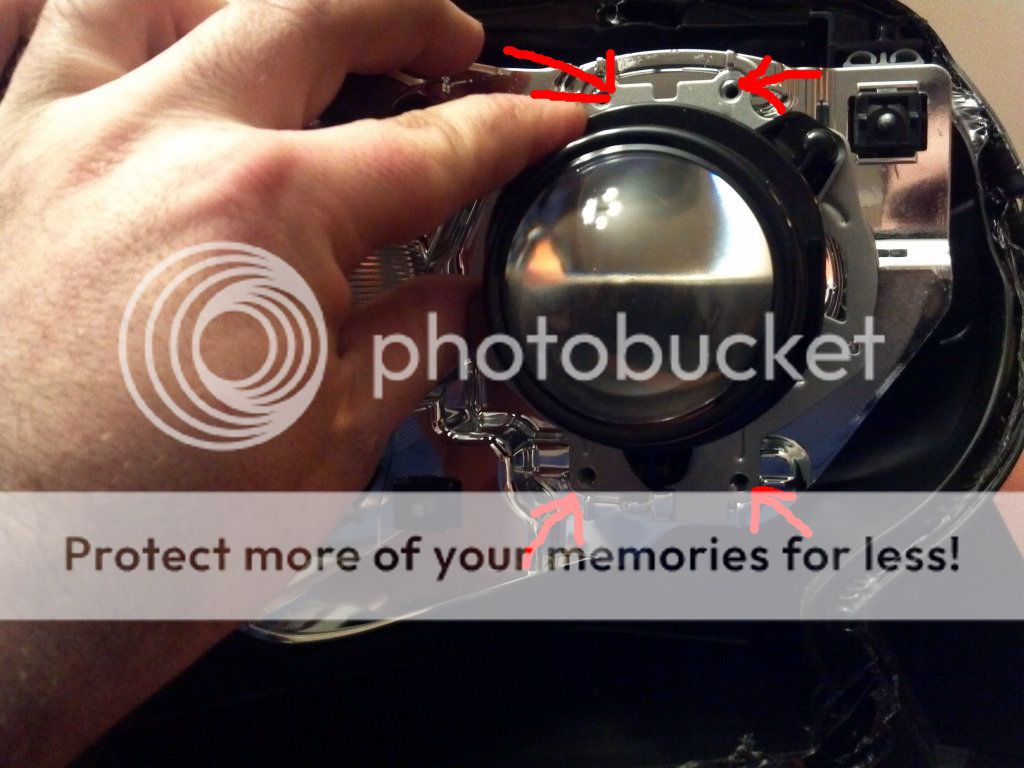 Seperate projector housing 3 phillips screws:  For painted version, paint cutoff shield (middle of picture) desired color and re-assemble from this point. 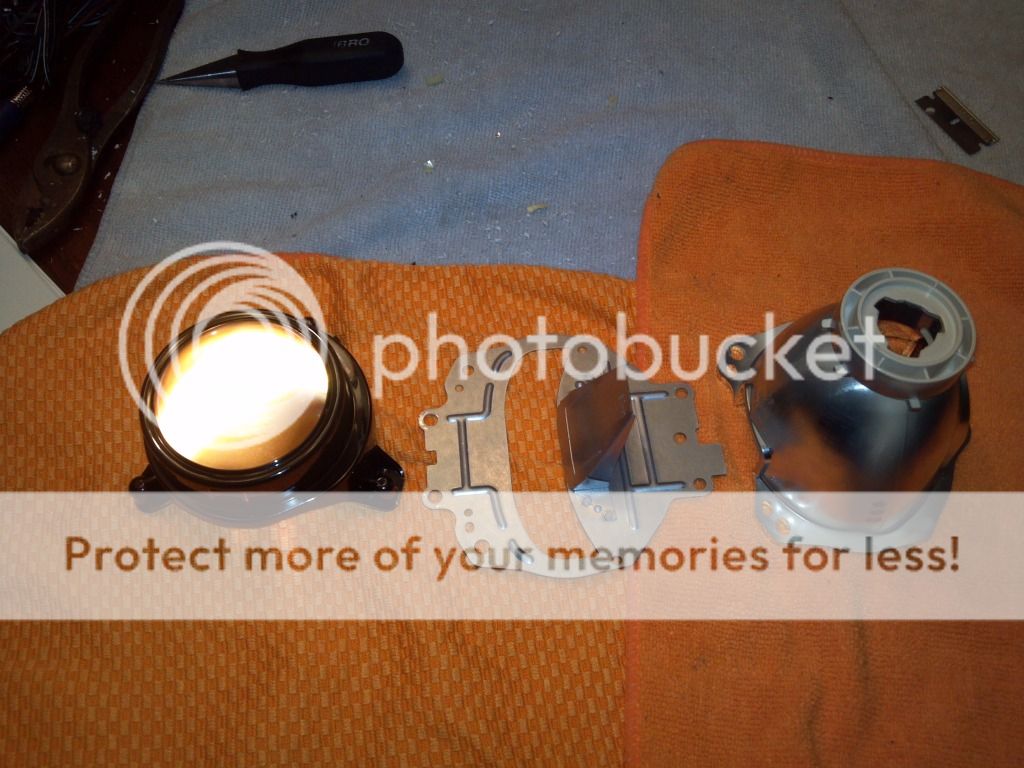 LED will sit under this "Shield" 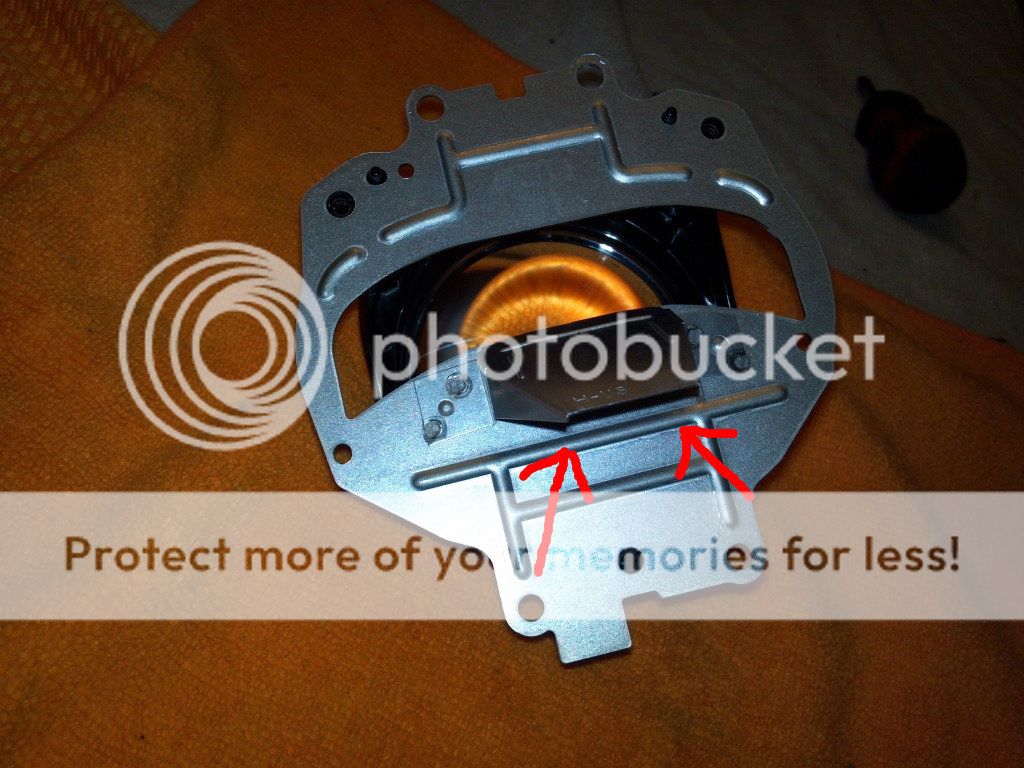 I used a 194 holder and 194 style red LED bulb:  Figure where to drill and get as close to edge of proector as possible:  Mine came out a little off center, drill slowly using good sharp bits, small pilot hole and then whatever size you may need for your perticular lighting socket: 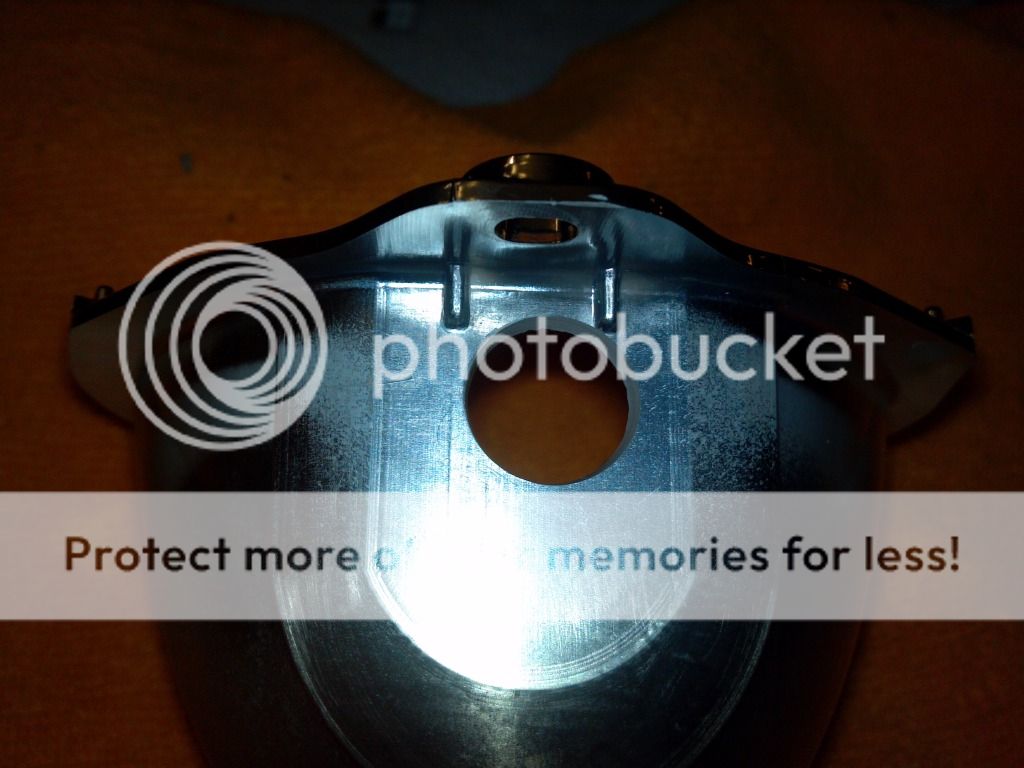 Trim light socket to fit better, I made one edge straight so I can get it as close as possible to the edge of the housing:  Install LED into socket and install socket into housing. re-asseble projector housing (lens, cutoff, reflector, 3 phillips screws) and make sure to test that it works as desired before install into housing and re-baking everything together this 14.4V drill battery is perfect as that is close to full charging voltage with vehicle running:  Now You need to trim some of the main housing to get light socket to fit I used a new pair of side cutters, after doing this I would recommend a dremel here as this material is brittle and cracks easy with the use of cutters. you also have to trim some to the side so you can twist the light in to place use some judgement here and remove what you feel is neccessary for what you need:   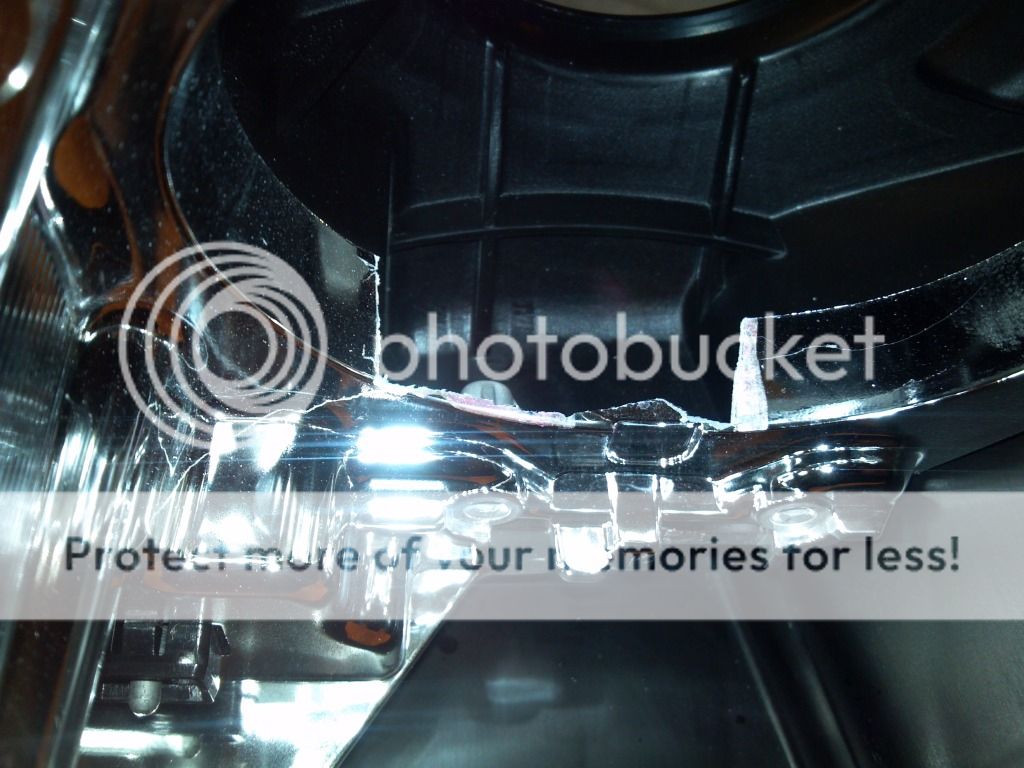 Re-install projector housing with newly installed LED socket into the light half. run wires out through the rear opening. make a small hole in light seal and thread wires though (you can add a dab of sealant here if you so desire). I ran mine in between the headlight wiring to keep everything nice and neat: 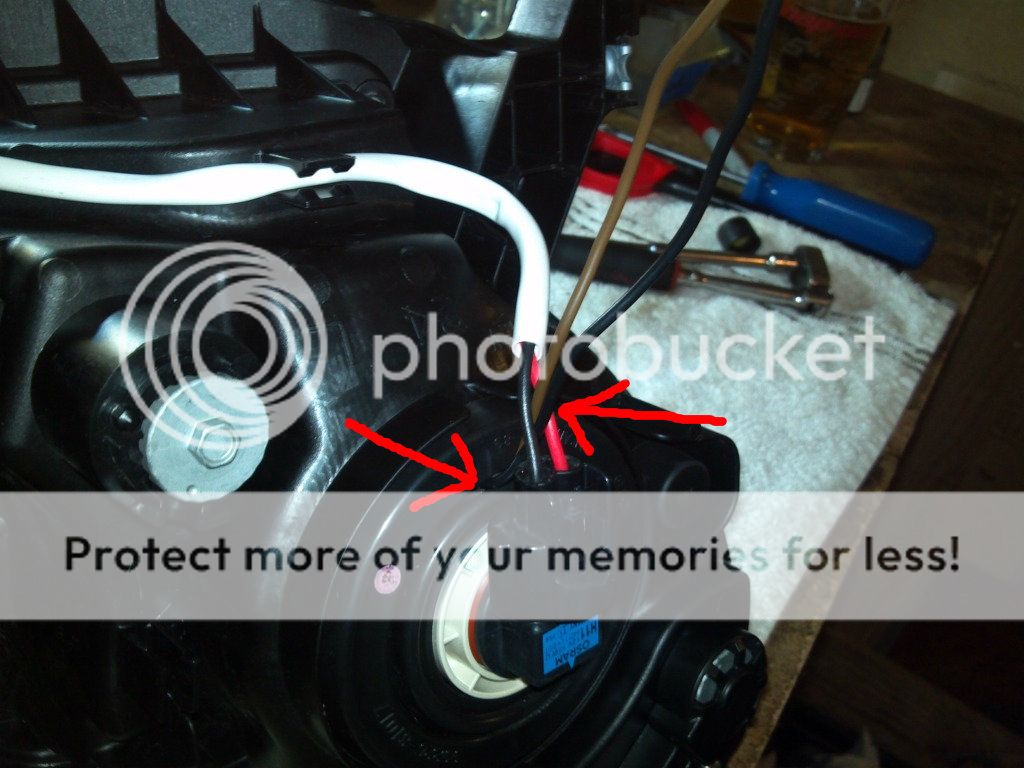 I put the two halves together as far as I could before re-baking. Then once baked I squished them together further and re-assembled, make sure to re-test operation of LED before you re-install into vehicle. better to catch a problem here than to have an issue after re-installing the front clip:  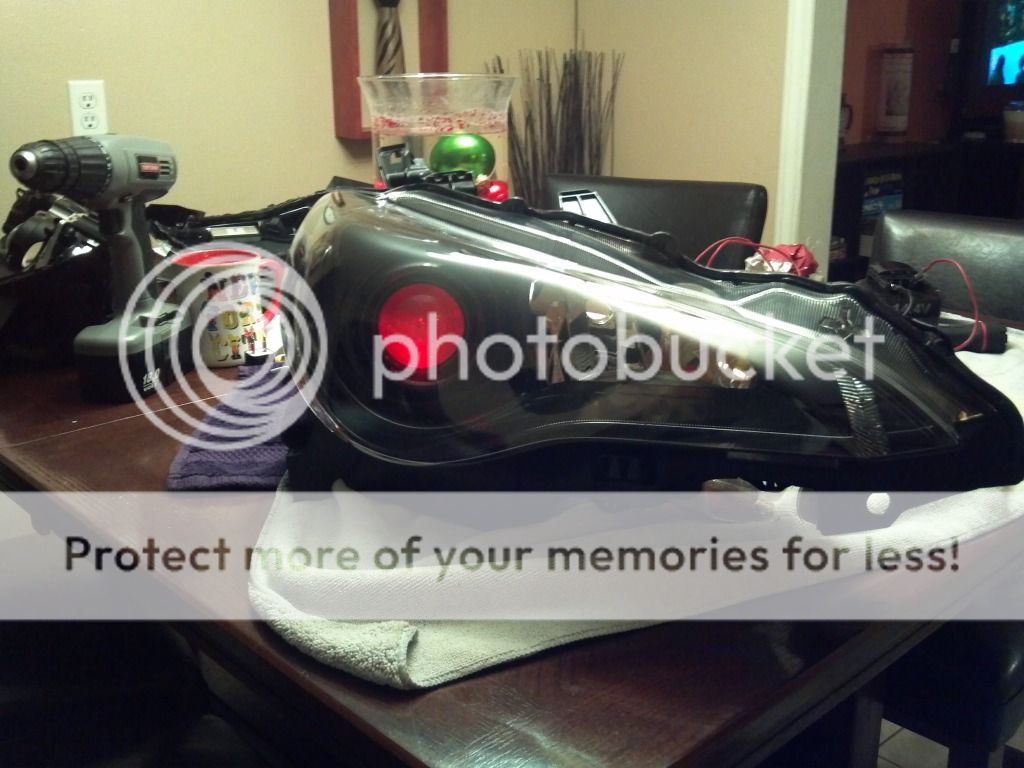 Install headlights into vehicle and wire LED's to Your desire there are many options here. I ran mine to a seperate switch and I can turn them on or off as desired here are some pics, No Daytime pics Yet, will put up soon when we get nice weather, vehicle is in garage for winter. In the last picture I had headlights on and unplugged the Dr. side so you can see the LEDS effect on headlight output. there is a slight hint of red when looking at the light but none from drivers seat looking out:  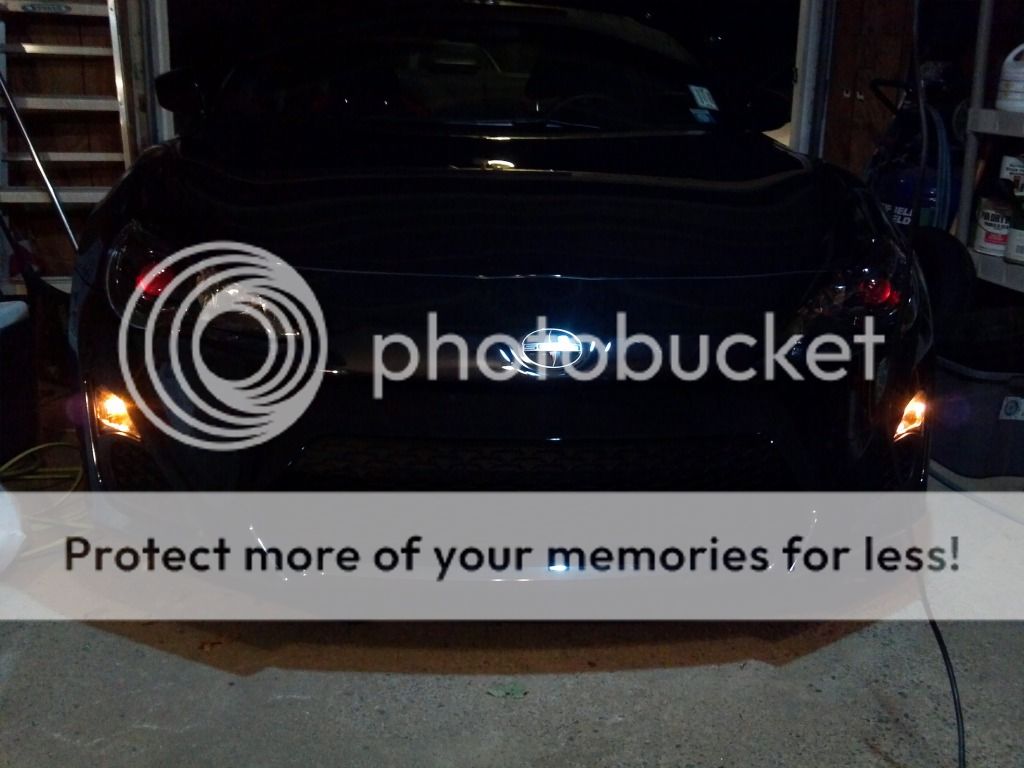 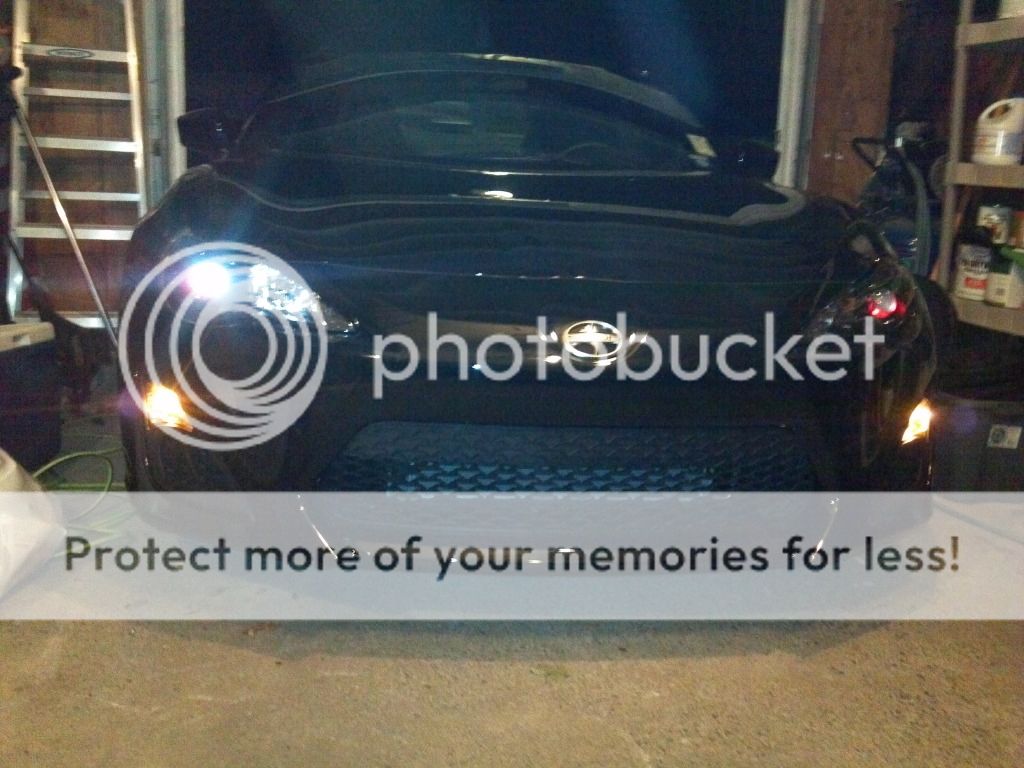 Hope you guys enjoyed this DIY and you can add any Comments, suggestions, pics of your own. I will try and answer any questions I can as they arise. Happy Modding! |

|

|
| The Following 6 Users Say Thank You to Hardrock4445 For This Useful Post: | CamryDS (04-08-2013), F1point4 (01-06-2013), JDMenrique (01-06-2013), Ray Gunnz (04-10-2015), wu_dot_com (02-26-2013), Z3D (02-22-2013) |
|
01-06-2013, 11:18 AM
|
#2 |
|
Senior Member
Join Date: Dec 2012
Drives: 2013 Scion FR-S Argento
Location: Houston, TX
Posts: 190
Thanks: 71
Thanked 29 Times in 23 Posts
Mentioned: 0 Post(s)
Tagged: 0 Thread(s)
|
Thats realy freakin cool. Way to step outside the box and try something new :-)
|
|
|
|
|
01-06-2013, 11:31 AM
|
#3 |
|
Senior Member
Join Date: Jul 2010
Drives: Subaru BRZ Limited
Location: Toronto, Canada
Posts: 2,624
Thanks: 763
Thanked 1,586 Times in 776 Posts
Mentioned: 10 Post(s)
Tagged: 0 Thread(s)
|
Pretty awesome! If your car was silver, it would look like the Terminator's head!
__________________
 |
|
|
|
| The Following User Says Thank You to Burrcold For This Useful Post: | 86design (01-11-2013) |
|
01-06-2013, 11:34 AM
|
#4 |
|
Oppa Gangnam Style!
Join Date: Nov 2012
Drives: Limited BRZ
Location: USofA
Posts: 59
Thanks: 9
Thanked 27 Times in 14 Posts
Mentioned: 0 Post(s)
Tagged: 0 Thread(s)
|
This is pretty bad ass looking, i know if i saw that rolling up behind me i would be like WTF haha. I won't be doing it just because of fear of f-ing something up in the process. Thanks for sharing, it makes me think of the movie Short Circuit when Johnny 5's eyes turn red lol
__________________
Time moves on but memories last forever...
'13 Limited Dark Grey Metallic BRZ, Manual Transmission '07 STi, Cobb AP Stage 1, Invidia Cat back exhaust (Traded for the BRZ) '06 Nissan Sentra SE-R Spec V, Numerous Mods, mostly Nismo My Journal |
|
|
|
| The Following User Says Thank You to Knightmare For This Useful Post: | usptwins (04-11-2013) |
|
01-06-2013, 11:40 AM
|
#5 |
|
Senior Member

Join Date: Jun 2012
Drives: nissan frontier, DGM MT BRZ
Location: North nj
Posts: 1,576
Thanks: 404
Thanked 418 Times in 254 Posts
Mentioned: 7 Post(s)
Tagged: 0 Thread(s)
|
Thanks for the writeup!! Deff going to give it a try!
Sent from my iPhone using Tapatalk |
|
|
|
|
01-06-2013, 11:43 AM
|
#6 |
|
Banned
Join Date: Aug 2012
Drives: VortechSC,BorlaEL,Perrin,GCRace
Location: HighHeatHighAltitudeAZ,USA
Posts: 2,254
Thanks: 458
Thanked 669 Times in 394 Posts
Mentioned: 9 Post(s)
Tagged: 2 Thread(s)
|
looks great
|
|
|
|
|
01-06-2013, 12:05 PM
|
#7 |
|
Senior Member
Join Date: Aug 2012
Drives: 2013 Scion FR-S
Location: Syracuse
Posts: 719
Thanks: 274
Thanked 277 Times in 161 Posts
Mentioned: 6 Post(s)
Tagged: 0 Thread(s)
|
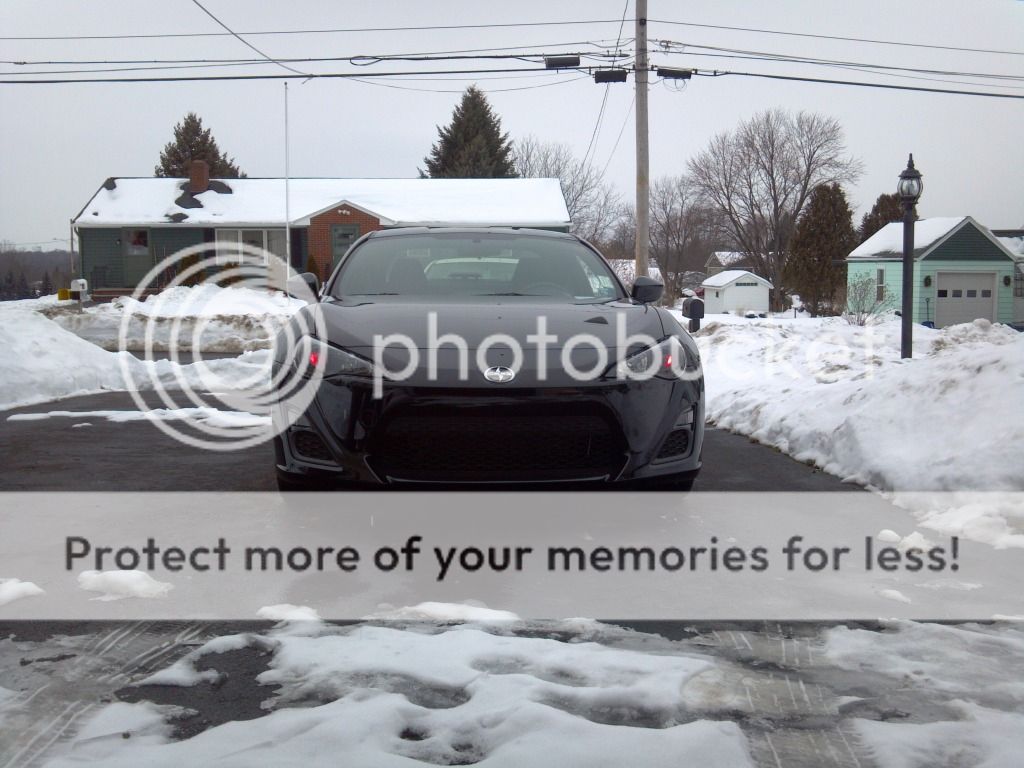
Now I finally got a Day picture. if you are standing above the lights looking down it is hard to see in daylight but looking straight on they are really noticeable. the painted version of this effect will be more noticeable during the daytime and the LED version will be more noticeable during morning/evening/night time lighting. I have this more for show when parked more than anything. But wanted to give the information to people looking for certain effects.
|
|
|
|
| The Following User Says Thank You to Hardrock4445 For This Useful Post: | jimmillion (01-06-2013) |
|
01-06-2013, 12:23 PM
|
#8 | |
|
Senior Member
Join Date: Jul 2010
Drives: Subaru BRZ Limited
Location: Toronto, Canada
Posts: 2,624
Thanks: 763
Thanked 1,586 Times in 776 Posts
Mentioned: 10 Post(s)
Tagged: 0 Thread(s)
|
Quote:

__________________
|
|
|
|
|
| The Following 5 Users Say Thank You to Burrcold For This Useful Post: | Ben Stef (01-24-2013), FriedRicr (04-06-2013), MmmDieselFumes (02-04-2013), rhythmM (06-09-2014), Tujin (01-24-2013) |
|
01-06-2013, 12:26 PM
|
#9 |
|
DADA

Join Date: Jun 2012
Drives: 2013
Location: Kanada
Posts: 1,500
Thanks: 47
Thanked 388 Times in 249 Posts
Mentioned: 10 Post(s)
Tagged: 0 Thread(s)
|
That's mean looking , very nice
|
|
|
|
|
01-06-2013, 01:55 PM
|
#10 |
|
Senior Member

Join Date: May 2012
Drives: JRSC'd Asphalt FR-S
Location: SoCal
Posts: 1,317
Thanks: 868
Thanked 436 Times in 260 Posts
Mentioned: 9 Post(s)
Tagged: 1 Thread(s)
|
That looks very good!! Super aggressive
|
|
|
|
|
01-06-2013, 08:24 PM
|
#11 |
|
Senior Member
Join Date: Oct 2012
Drives: Asphalt Scion Frs 6MT
Location: New York
Posts: 1,044
Thanks: 101
Thanked 564 Times in 286 Posts
Mentioned: 14 Post(s)
Tagged: 0 Thread(s)
|
looks great!
__________________
|
|
|
|
|
01-06-2013, 08:51 PM
|
#12 |
|
Senior Member

Join Date: Jun 2012
Drives: Black
Location: Tally
Posts: 291
Thanks: 27
Thanked 61 Times in 41 Posts
Mentioned: 1 Post(s)
Tagged: 0 Thread(s)
|
I like it
I'm going to give it a try next weekend Sent from my iPad using Tapatalk HD |
|
|
|
|
01-06-2013, 09:09 PM
|
#13 | |
|
Senior Member

Join Date: Aug 2012
Drives: Toyota GT86, 66 beetle, 11 GSXR 750
Location: Las Vegas, NV.
Posts: 1,382
Thanks: 575
Thanked 836 Times in 436 Posts
Mentioned: 32 Post(s)
Tagged: 0 Thread(s)
|
Quote:
|
|
|
|
|
| The Following User Says Thank You to Gixxersixxerman For This Useful Post: | Jesse (01-06-2013) |
|
01-06-2013, 09:21 PM
|
#14 |
|
DEEEERP

Join Date: Sep 2012
Drives: 2013 Whiteout FR-S 6MT
Location: Buzzards Bay, MA
Posts: 1,341
Thanks: 333
Thanked 913 Times in 434 Posts
Mentioned: 26 Post(s)
Tagged: 0 Thread(s)
|
Probably not a good idea for whiteout cuz you'd look albino, but pretty cool nonetheless!
__________________
|
|
|
|
| The Following 4 Users Say Thank You to JDMenrique For This Useful Post: |
|
|
|
|
 |
| Thread Tools | Search this Thread |
|
|
 Similar Threads
|
||||
| Thread | Thread Starter | Forum | Replies | Last Post |
| Odometer Functions - "S" & "G" What are they? | kablammo | BRZ First-Gen (2012+) -- General Topics | 59 | 12-01-2013 12:28 AM |
| Which Markets have "GT86" and "Toyota" badges on trunk? | Tanuki | Scion FR-S / Toyota 86 GT86 General Forum | 20 | 02-10-2013 05:23 PM |
| Anyone else try running "square" tires on "staggered" wheels? | hamlet | Wheels | Tires | Spacers | Hub -- Sponsored by The Tire Rack | 21 | 12-19-2012 12:59 PM |
| Thoughts on a "component" setup with a 3.5" dash and 6.5" door setup? | PatrickSAN | Electronics | Audio | NAV | Infotainment | 22 | 11-14-2012 02:12 PM |


 Serenity


