


|
||||||
| Electronics | Audio | NAV | Infotainment Anything related to in-car electronics, navigation, and infotainment. |
 |
|
|
Thread Tools | Search this Thread |
 04-21-2013, 01:19 AM
|
#1 |
|
Senior Member

Join Date: Aug 2012
Drives: 2013 FR-S, raven
Location: East Bay, California
Posts: 421
Thanks: 261
Thanked 204 Times in 123 Posts
Mentioned: 20 Post(s)
Tagged: 0 Thread(s)
|
brianlo622's SQ build log by Simplicity in Sound |Illusion|Arc|Mosconi|Audiomobile|
Hey guys, as promised here is the complete build log by Bing. But first, my impression. Having read hundreds of Bing's build logs on DIYMA and having Bing personally demoed a few cars he had done to me, I sorta knew the quality I was expecting from SiS. But after I got my car back, it was simply amazing to see the Bing Magic now resides in my personal vehicle
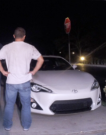
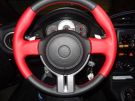
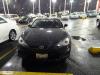
 Design/Fabrication is top notch, and everything is extremely detailed. Sound quality is just amazing. In other words, Bing and Joey over delivered and I am extremely happy Design/Fabrication is top notch, and everything is extremely detailed. Sound quality is just amazing. In other words, Bing and Joey over delivered and I am extremely happy  Highly recommend!! Highly recommend!!Without further delay, here is the complete build log by Bing. http://www.diymobileaudio.com/forum/...diomobile.html To complete the trio of build logs i have for this day, i present last but not least, the most intensive effort of the three. a SQ build on a 2013 Scion FR-S. Having worked on two other FR-S builds before, this one is still unique that it had some different design criteria compared to the other two that allow us...(read JOEY!  ) to flex some of his fabrication skills. ) to flex some of his fabrication skills.ithout further adieu, lets take a quick look the car, nicely furnished with the TRD body kit and exhaust, clean and simple, i like it a lot:  the goals are: 1. to achieve a nice level of SQ throughout 2. maintain a totally stealth appearance in the interior 3. maintain spare tire, take up as little room as possible other wise and try to keep things stealth.but have a lil show factor thrown in. This is the hard one, with such a small trunk to begin with, there was quite a challenge... luckily, Joey was more than up to the challengedivision of labor here is that Joey did the underhood, and the trunk, while i did everything in between and also the trunk wiring...so hes the bread in a Bing sandwich...wait..that sounded totally wrong! So first order of business was the underhood, and once again, Joey fabricated a trick mounting bracket that uses stock bolts to provide a rock solid platform for the stringer circuit breaker: here it is in its various phases of construction and prep, all the way to mounting in the vehicle      The signal starts with a pioneer 5500 headunit, installed to the stock location via the beatsonic tabs:  The BT mic was mounted next to the steering column for a closer, direct path to the driver:  Because the system utilizes a Mosconi DSP, full tuning can be done via a laptop from the front seat wirelessly:  here is the prep of the wiring harness with the antenna adapter and grounding ring attached:  the front stage is a set of illusion audio carbon C6 component, the tweeter went into the stock midrange location and is mounted via the supplied metal bridges:  i gave the tweeter a slight twist to angle them back slightly, which theoritically could help tame the reflections between the windshield and the dash a lil haha     the midbass went into the stock door location, first, a new set of speaker wires were run into the doors:  next, 8 blocks of focal blackhole Tile went onto the outter door skin to help tame resonance:  then the entire door was smothered with focal BAM XXL composite damper, while the section around the speaker mounting got the thinner, easier to work with STP gold damper:  using the stock speaker as a template, we then fabricated these 1/2" mdf spacer rings and coated them with truck bedliner to protect them against the elements:   and then this was bolted to the door:  and the carbon C6 midbass installed:   the same procedure was then repeated on the passenger side:       next comes a series of pics showing the wiring bundle as it travels from the front to the back of the car, and then into the trunk, ziptied and secured every few inches:            to prevent the rear deck from rattling, i applied several piece of STP closed cell foam to the underside of the rear deck to decouple it from the metal panel beneath:  so now, moving to the trunk. as mentioned, the customer waned to RETAIN the spare but also keep as much trunk space as possible, and have just a touch of cool factor built in. so here is the normal view, as you can see, the only thing really visible is a single fiberglass side box on the passenger side. the box is unique in that it features a cool decorative grille, providing just a lil bit of show factor. the grille is actually a two piece design, with a vinyl outter, and a CF vinyl covered center ring with pressed grille. the rest of the box is done in carpet dyed to match the stock color.     this pic is to give you an idea how little room it actually takes up: here are some build pics of the sub enclosure: first the entire area was taped off, sheeting thrown down and the the back mold done up:   this is the front baffle, with the edges rabetted:   then the baffle was attached to the trimmed back section, with metal rods used to give it a more rounded shape at the top:   resin was applied, when that cured, body filler was applied and over several processes, more and more filler was applied to match the edges to the car's carpeting precisely, the grille piece was also test fitted at the same time   joey then made a press and fabricated the grille and test fitted to the wooden portion:   for future FR-S/ BR-Z builds, we decided to make a mold of the back of the enclosure, so after much smoothing, gel coating etc, this is the finish product next to the subbox itself, with an air fitting attached to it to allow us to pop the new pieces easier in the future:    going back to the subbox, the entire enclosure was then carpeted, dyed darker, and then the main baffle was cut out and a piece of red vinly was attached and cut precisely along the edge:   and an Audiomobile elite 2208 8" sub was installed. total sealed volume is somewhere around .6.  the back of the enclosure:  the two piece grille was then wrapped in their respective vinyl, the grille mesh secured and then mated together:    and finally, the grille was press fit onto the box for the completed design:     so thats it for the subbox...moving on to the rest of the trunk. we removed the stock amp and in its place, located the mosconi 6to8 DSP:  once again, joey fabricated a cool bracket to secure the unit with oem mounting holes and bolts:      now, onto the amps...as you can see from previous sub enclosure pics, standing at normal height you cant see the amps at all, you would have go bend down to your knees to see the three Arc audio KS Mini amps bolted to the room of the trunk. we chose the arc minis because of their size, the three amps can actually go into the channel area under the rear deck, saving us quite a few inches of additional room:    here are some fabrication pics of the rack. first, using our stronghand welding table and precision clamps, we made the rack out of metal stock:   when that was painted black, the amps were bolted onto it (except the middle amp which had to go on after the center attachment point is secured to the car:   we installed a total of four big rivet nut sets onto the rear deck to bolt the entire structure securely:    after the amps were secured, i lied in the trunk and wired it all up in about 5 hours, working with the amps upside down and inches from my face was a bit of a challenge lol, but i managed it. but it is almost impossible to take pictures of the amp rack and wiring properly. so here are the best attempts from me. but everything is still neatly bundled, ziptied and secured every few inches...yo would really need to see the car in person by ducking your head into the trunk to see all the wiring. one KS mini 125.4 is bridged powering the midbass with 250 watts each, another is bridged on the tweeter at 250 watts each (headroom ftw, but also gives him the flexibility to expand to a 3 way in the future if he wanted to) while on arc audio's recommendation, a 125.2 power the audiomobile 8" sub with 250 watts RMS. these pictures also show how the entire structure was able to attach to the highest points of the trunk, allowing the amp rack to be tucked up and out of the way:      so thats it...a few quick shots of the audiomobile 2208, if you want to know how its bigger brother preforms, go here: http://www.diymobileaudio.com/forum/...l-mosconi.html but this sub is basically the same thing, moderately priced, nothing too crazy to look at, but boy does it perform...     overall, the car sounds very nice, great detail with a nice center image, good height and width, the mdibass of full of impact and overall just a nice sounding car. the subbass, with the arc mini's BX^2 circuit engaged, sounds nothing like a single 8" in a sealed trunk with 250 watts, it sound much fuller and bigger. and infact, see this picture of the freq response, with the BX circuit off and on...really nice for a single 8. though it looks just like a low shelving filter, it SOUNDS much more than that...really i would have guessed single 10" for sure. once again, bravo to audiomobile on producing a fine 8" sub  so thats it, just spent the last 5 hours posting build logs...time to take a rest. but one last thing, i made this quick video with my phone to perhaps better show the trunk: [ame="http://www.youtube.com/watch?v=_KP67biB4uo"]2013 FRS Custom Trunk Build by Simplicity In Sound - YouTube[/ame] adios b
__________________
悪魔のハチロク
2013 Scion FR-S, Raven Current Mods: TRD Full Body Kit | TRD JDM Exhaust | SQ Audio by Simplicity in Sound Stance Coilovers & LCA | TE37SL18x9.5PressedGraphite |

|

|
| The Following 5 Users Say Thank You to brianlo622 For This Useful Post: | jlu (04-23-2013), mit_peid (04-29-2013), MJones_RB (05-19-2015), serial gixxer (04-28-2013), Skippman (05-01-2013) |
|
04-21-2013, 05:11 AM
|
#2 |
|
Member
Join Date: Jan 2013
Drives: Galaxy Blue BRZ
Location: QLD, Australia
Posts: 36
Thanks: 13
Thanked 7 Times in 5 Posts
Mentioned: 0 Post(s)
Tagged: 0 Thread(s)
|
Magnificent. Love the fabrication work. I'm gobsmacked at someone fitting three nice amps in that location so neatly and discreetly. Even the best installers in my city are an embarrassment compared to Bing.
|
|
|
|
| The Following User Says Thank You to Redmist For This Useful Post: | brianlo622 (04-23-2013) |
|
04-21-2013, 10:14 AM
|
#3 |
|
Senior Member

Join Date: Apr 2013
Drives: 2013 Scion FR-S (Raven)
Location: Woodbridge, Virginia
Posts: 105
Thanks: 9
Thanked 16 Times in 13 Posts
Mentioned: 15 Post(s)
Tagged: 1 Thread(s)
|
Looks great! Did the foam under the rear deck stop the rattle? When I turn the bass up the third brake light rattle is almost louder than the music

|
|
|
|
| The Following User Says Thank You to cmarks20 For This Useful Post: | brianlo622 (04-23-2013) |
|
04-21-2013, 10:47 AM
|
#4 |
|
Member

Join Date: Sep 2012
Drives: 2010 Subaru LGT
Location: San Jose, CA
Posts: 75
Thanks: 2
Thanked 33 Times in 21 Posts
Mentioned: 4 Post(s)
Tagged: 0 Thread(s)
|
thanks guys, i want to point out that Joey is the one that did almost all the fab work on this car
and hes the one that deserves the credit redmist, i know quite a few very cool installers in australia, one may even be in QLD. we talk quite a bit, mostly about V8s and why i love lowndsey and frosty so much
|
|
|
|
|
04-21-2013, 11:12 AM
|
#5 |
|
Senior Member
Join Date: Nov 2012
Drives: Flight 86 is now boarding.
Location: CA
Posts: 1,759
Thanks: 1,842
Thanked 1,502 Times in 700 Posts
Mentioned: 230 Post(s)
Tagged: 1 Thread(s)
|
Looks great! Thanks for posting. Nice pics.
__________________
 |
|
|
|
| The Following User Says Thank You to MyRx For This Useful Post: | brianlo622 (04-23-2013) |
|
04-21-2013, 11:35 AM
|
#6 |
|
Member
Join Date: Aug 2012
Drives: 13 gbs brz
Location: SF
Posts: 98
Thanks: 21
Thanked 24 Times in 17 Posts
Mentioned: 1 Post(s)
Tagged: 0 Thread(s)
|
another excellent build, and they made a mold for future sub box creation. that is a great development for the bay area 86 community.
congrats on the build man!
__________________
> CA crew. gbs brz ltd. 370z (sold). ap2 s2000 (sold). fg2 si (sold).
|
|
|
|
| The Following User Says Thank You to butdamnbrian For This Useful Post: | brianlo622 (04-23-2013) |
|
04-21-2013, 02:07 PM
|
#7 |
|
Senior Member
Join Date: Jan 2013
Drives: 2013 Toyota 86/Scion FRS
Location: Chicago
Posts: 122
Thanks: 23
Thanked 40 Times in 24 Posts
Mentioned: 0 Post(s)
Tagged: 0 Thread(s)
|
Very clean build man!
|
|
|
|
| The Following User Says Thank You to iketiak For This Useful Post: | brianlo622 (04-23-2013) |
|
04-23-2013, 10:21 AM
|
#8 |
|
Member
Join Date: Sep 2012
Drives: 2010 Subaru LGT
Location: San Jose, CA
Posts: 75
Thanks: 2
Thanked 33 Times in 21 Posts
Mentioned: 4 Post(s)
Tagged: 0 Thread(s)
|
thanks guys, Brian, when am i gotta get a peek at the BR-Z in person!?
|
|
|
|
|
04-24-2013, 09:48 AM
|
#9 |
|
Senior Member
Join Date: Jul 2012
Drives: Sonic Blue 86GT Manual
Location: Victoria
Posts: 376
Thanks: 51
Thanked 122 Times in 61 Posts
Mentioned: 1 Post(s)
Tagged: 0 Thread(s)
|
Beautiful work
|
|
|
|
|
04-24-2013, 10:20 AM
|
#10 |
|
Senior Member
Join Date: Apr 2013
Drives: 2001 ZX2, WRBP BRZ (soon hopefully)
Location: Port Arthur Tx
Posts: 182
Thanks: 111
Thanked 23 Times in 23 Posts
Mentioned: 0 Post(s)
Tagged: 0 Thread(s)
|
Bing Is a Beast!!! I follow anything he does on DIYMA!
|
|
|
|
|
04-24-2013, 11:25 AM
|
#11 |
|
Senior Member
Join Date: Aug 2012
Drives: 2013 FR-S, raven
Location: East Bay, California
Posts: 421
Thanks: 261
Thanked 204 Times in 123 Posts
Mentioned: 20 Post(s)
Tagged: 0 Thread(s)
|
Lol you can also follow simplicity in sound's Facebook page since the updates are more frequent. Lol maybe you shouldn't actually that's what I do every hour at work and I'm about to get in trouble!! Lol
__________________
悪魔のハチロク
2013 Scion FR-S, Raven Current Mods: TRD Full Body Kit | TRD JDM Exhaust | SQ Audio by Simplicity in Sound Stance Coilovers & LCA | TE37SL18x9.5PressedGraphite |
|
|
|
|
04-24-2013, 01:12 PM
|
#12 |
|
Senior Member
Join Date: Jan 2013
Drives: 2013 Asphalt FR-S
Location: Orange County
Posts: 1,639
Thanks: 632
Thanked 981 Times in 537 Posts
Mentioned: 100 Post(s)
Tagged: 0 Thread(s)
|
No deadening on the outer door skins?
never mind.. i see it now: "next, 8 blocks of focal blackhole Tile went onto the outter door skin to help tame resonance:"
__________________
~Namaste~ |
|
|
|
|
04-24-2013, 11:19 PM
|
#13 |
|
Member
Join Date: Sep 2012
Drives: 2010 Subaru LGT
Location: San Jose, CA
Posts: 75
Thanks: 2
Thanked 33 Times in 21 Posts
Mentioned: 4 Post(s)
Tagged: 0 Thread(s)
|
no sq install would be complete without some sound proofing on the outter door skins. the blackhole tile is by far my favorite, about 30-40 percent coverage on the outter door skin isignificantly reduces the resonance on it. its pricey, but IMO well worth it compared to try to stick normal CLD damper on it...and IMO more effective.
|
|
|
|
|
04-25-2013, 01:21 AM
|
#14 |
|
Senior Member

Join Date: Jul 2012
Drives: Whiteout FR-S
Location: Arkansas
Posts: 4,154
Thanks: 1,666
Thanked 1,627 Times in 997 Posts
Mentioned: 72 Post(s)
Tagged: 0 Thread(s)
|
How much is that sub and where can you buy them?
|
|
|
|
|
|
|
|
|
|
|
 Similar Threads
|
||||
| Thread | Thread Starter | Forum | Replies | Last Post |
| Equipment finalized with Bing from simplicity in sound.. car going in next week =) | brianlo622 | Electronics | Audio | NAV | Infotainment | 27 | 05-15-2014 01:10 PM |
| FR-S Audio Build - SQ (Illusion Audio/Mosconi) | DekaMori | Electronics | Audio | NAV | Infotainment | 28 | 04-17-2013 04:34 AM |
| Scion FR-S (Ultramarine) upgraded with Illusion Audio and Mosconi parts | SpeedRacer | Electronics | Audio | NAV | Infotainment | 25 | 10-19-2012 08:23 PM |
| Konig Illusion Wheels | mezdup | Wheels | Tires | Spacers | Hub -- Sponsored by The Tire Rack | 17 | 09-30-2012 11:17 AM |
| A Call for Simplicity | Axel | Other Vehicles & General Automotive Discussions | 2 | 01-25-2010 04:43 PM |


 Toyota 86/Scion FR-S