|
||||||
| DIY (Do-It-Yourself) Guides For all DIYs. |
 |
|
|
Thread Tools | Search this Thread |
|
|
#1 |
|
Checking and Changing BRZ/FR-S Engine Coolant
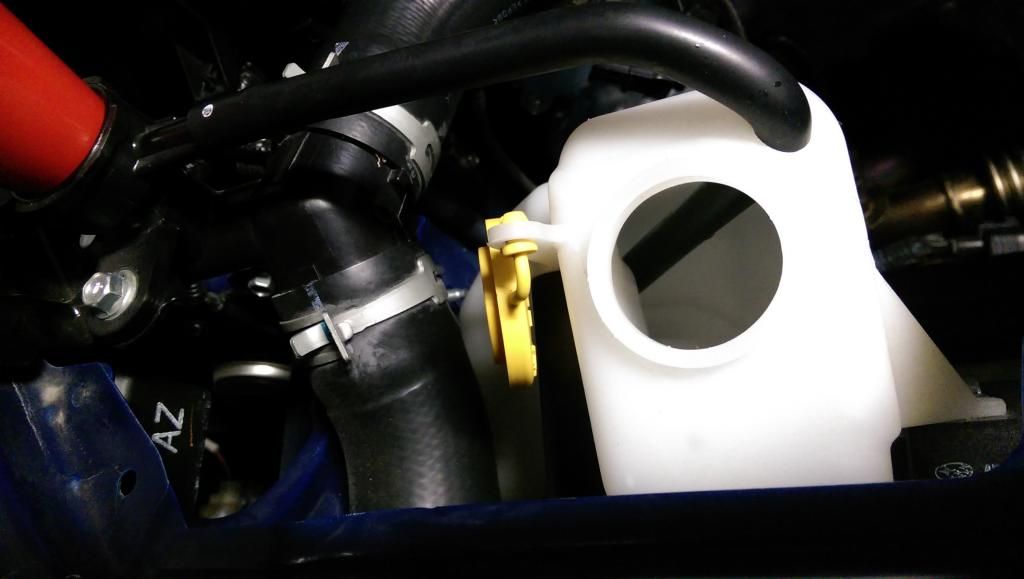
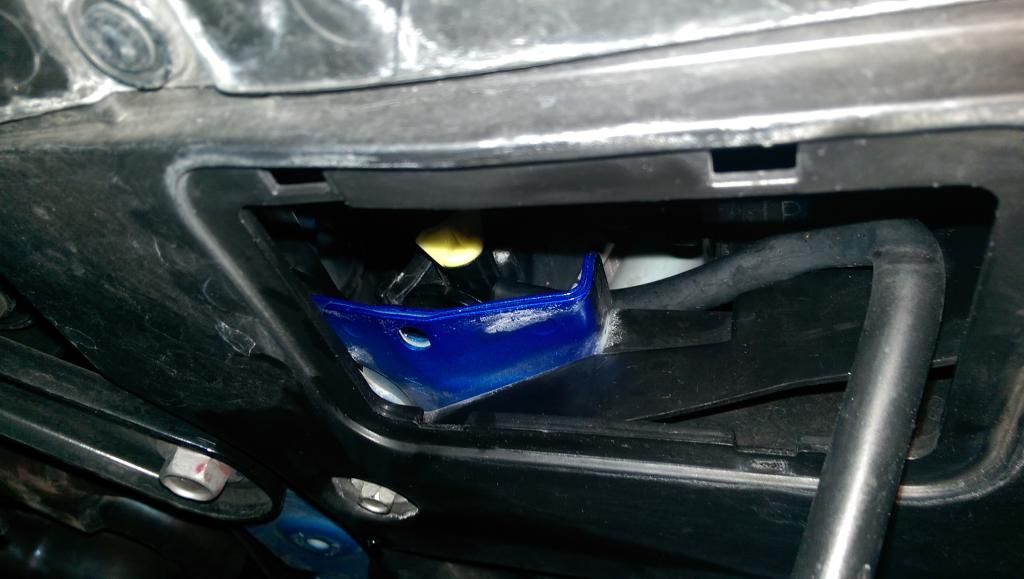
GrimmSpeed DIY Guide Series Checking and Changing BRZ/FR-S Engine Coolant Updated 6/25/12 Introduction: This guide will illustrate how to check and change the coolant in your BRZ/FR-S. Tools: The tools listed below are suggested for this task. Optional tools are noted. - Rubber hose - Drain Pan - Funnel - Flat head screwdriver - Subaru Super Coolant, Item # K0670Y0001 o Manual Transmission 7.6 U.S. qt (7.2 L) o Automatic Transmission 7.9 U.S. qt (7.5 L)  Tips: Procedure: A.) Checking your coolant level 1) Park the vehicle on a level surface. 2) Open the hood and locate the Coolant Overflow Reservoir. It is made of clear plastic and located directly below the Radiator Cap.  3) Check that the fluid level is between the "Full" and "Low" lines on the reservoir when the car is COLD.  4) If the level is low, add coolant to the reservoir until it reaches the "Full" line. 5) If the vehicle is cold, remove the radiator cap and verify that the coolant level is all the way up to the filler neck. If not, top off with coolant. B.) Changing your coolant 1) Safely lift and support the vehicle. Refer to owner’s manual for preferred method. 2) Locate and remove the service hole cover on the underside of the front bumper, on the passenger side.   3) Locate the drain plug on the side of the radiator and connect a hose to the nipple. Use a hose with an internal diameter of 8mm. This allows you to drain the coolant into a container without making a mess.  4) Position your catch container under the hose, and open up the radiator's drain plug. 5) Remove the radiator cap to speed up the draining process. 6) After fully draining the radiator, tighten the drain **** plug, and reinstall the service hole cover. 7) Lower the vehicle onto the ground, and fill the radiator with coolant. Do so slowly to prevent air bubbles, and stop when you get to the filler neck. 8) Locate and open the air bleeder plug. It is towards the rear of the engine, attached to one of the heater core hoses that passes through the firewall. Unscrew the plug using a screwdriver to loosen.  9) Check the coolant level in the radiator. If the level dropped, fill it back up to the filler neck. 10) Close the air bleeder plug once fluid starts to come out of it. Otherwise continue filling the radiator. 11) Fill the coolant overflow reservoir until the level reaches "Full." 12) Replace the radiator cap, and twist to seal it. Start the engine and race the engine 5 times to about 3000rpm. Turn the engine off. Spend no longer than 40 seconds completing this step. 13) Wait for an entire minute and then remove the radiator cap. If the coolant level has dropped, open the air bleeder plug in the heater hose. Add coolant to the radiator until the fluid level reaches the radiator neck. Close the air bleeder plug. 14) Re-do steps 12 and 13 again. 15) Re-attach the radiator and reservoir caps. 16) Start the engine and turn the heater on to the maximum hot position with the blower speed set to "LO." 17) Run the engine at 2000rpm until the radiator fan starts and stops. Be careful with the coolant temperature to avoid overheating the engine. 18) Stop the engine and wait until the engine coolant temperature lowers to at most 86 degrees F. 19) Open the radiator cap. If the coolant level has dropped add coolant until the level reaches the filler neck. Also, add coolant to the overflow reservoir until it reaches the "Full" line. Re-attach the radiator cap and twist to seal it. 20) Set the heater to the maximum hot position and set the blower speed to "LO." Start the engine, and race to 3000rpm several times. If a flowing sound can be heard (from the heater core in the cabin) repeat this process from step 17 on. Last edited by GrimmSpeed; 02-10-2014 at 12:27 PM. |
|
|
|

|
| The Following 48 Users Say Thank You to GrimmSpeed For This Useful Post: | 200hp/tonne (04-21-2016), 2013GTRNate (10-01-2014), Anthony (01-24-2015), Anthonytpt (03-15-2013), autobrz (11-23-2013), AzFranz (07-10-2014), BatStig (07-16-2014), BigFatFlip (03-15-2013), Black Tire (04-30-2013), charged86 (07-27-2013), Chrisgalactic (09-15-2016), cobrabyte (10-11-2012), CockpitCruiser (11-13-2021), driftking96 (05-22-2016), Fly Guy (06-28-2012), frs23 (06-26-2012), FRSBRZGT86FAN (01-04-2016), fstlane (07-08-2014), ft86Fan (06-28-2012), FyeaFRS (07-17-2014), GT86_PRAGUE (06-03-2015), housecat (03-10-2015), illicitstylz (05-19-2015), Jayp (06-26-2012), jcw99 (07-08-2014), JDKane527 (08-06-2017), jliongh (02-13-2019), Keenercarguy (08-28-2017), kthxbai (03-16-2013), Lverasky (04-19-2013), mit_peid (03-07-2015), MJones_RB (10-29-2020), Moshpit37 (07-02-2014), normancw (03-27-2014), Ornelas66 (08-18-2016), Packofcrows (06-12-2015), PerCompLLC (11-22-2017), protpibe (01-21-2014), RallySport Direct (06-27-2012), RehabJeff86 (07-22-2013), RL_BRZ (09-06-2018), SkAsphalt (02-26-2014), sonnydelight (08-06-2013), stevesnj (06-12-2015), stockysnail (03-15-2013), Symbiont (06-27-2012), Tristor (07-22-2018), zoomzoomers (11-18-2013) |
|
|
#2 |
|
NW Region Moderator
Join Date: Mar 2010
Drives: FR-S No More
Location: Portland OR
Posts: 5,156
Thanks: 1,134
Thanked 3,186 Times in 1,091 Posts
Mentioned: 300 Post(s)
Tagged: 4 Thread(s)
|
Added to DIY Directory:
http://www.ft86club.com/forums/showthread.php?t=7365
__________________
|
|
|

|
|
|
#3 |
|
Senior Member
Join Date: Feb 2010
Drives: FR-S, Exige S, Miata
Location: Basking Ridge NJ
Posts: 798
Thanks: 327
Thanked 131 Times in 80 Posts
Mentioned: 2 Post(s)
Tagged: 0 Thread(s)
|
Thanks. This is super helpful.
__________________
'13 Scion FR-S (Whiteout)
'07 Lotus Exige S (Aspen White) Touring, Traction, Starshield '95 Miata (Montego Blue) |
|
|

|
|
|
#4 |
|
Just the tip
Join Date: Jan 2012
Drives: 2013 Lightning Red Subaru BRZ Mt Lt
Location: Beaverton, OR
Posts: 2,716
Thanks: 636
Thanked 1,004 Times in 665 Posts
Mentioned: 176 Post(s)
Tagged: 2 Thread(s)
|
Thank you very much! I'm swapping out my radiator hoses for more engine bling (Perrin red hoses) and I needed this info!

__________________
Current: 2013 Lightning Red Subaru BRZ Limited
Past (sold): Click here to see previous cars and bikes  |
|
|

|
|
|
#5 |
|
In Test:Oil Fed SC
Join Date: May 2013
Drives: Vortech Prototype Test Car
Location: Hotter than where you are
Posts: 355
Thanks: 156
Thanked 142 Times in 89 Posts
Mentioned: 7 Post(s)
Tagged: 0 Thread(s)
|
I'm looking for a factory radiator hose, if anyone doesnt need theirs please let me know. The one from top of motor to back of plastic pc that has the cap.
|
|
|

|
|
|
#6 |
|
Banned
Join Date: Sep 2012
Drives: 2013 Subaru BRZ & 99' Ford Explorer
Location: NYC
Posts: 709
Thanks: 94
Thanked 86 Times in 65 Posts
Mentioned: 4 Post(s)
Tagged: 0 Thread(s)
|
orange or green coolant???????
|
|
|

|
|
|
#7 |
|
Banned
Join Date: Sep 2012
Drives: 2013 Subaru BRZ & 99' Ford Explorer
Location: NYC
Posts: 709
Thanks: 94
Thanked 86 Times in 65 Posts
Mentioned: 4 Post(s)
Tagged: 0 Thread(s)
|
|
|
|

|
|
|
#8 |
|
In Test:Oil Fed SC
Join Date: May 2013
Drives: Vortech Prototype Test Car
Location: Hotter than where you are
Posts: 355
Thanks: 156
Thanked 142 Times in 89 Posts
Mentioned: 7 Post(s)
Tagged: 0 Thread(s)
|
I cut it poorly, ie its about 4mm too short. Jus thought I'd see if someone's upgrade resulted in spare hoses ..
|
|
|

|
|
|
#9 |
|
Banned
Join Date: Sep 2012
Drives: 2013 Subaru BRZ & 99' Ford Explorer
Location: NYC
Posts: 709
Thanks: 94
Thanked 86 Times in 65 Posts
Mentioned: 4 Post(s)
Tagged: 0 Thread(s)
|
|
|
|

|
|
|
#10 |
|
In Test:Oil Fed SC
Join Date: May 2013
Drives: Vortech Prototype Test Car
Location: Hotter than where you are
Posts: 355
Thanks: 156
Thanked 142 Times in 89 Posts
Mentioned: 7 Post(s)
Tagged: 0 Thread(s)
|
|
|
|

|
|
|
#11 |
|
Senior Member
Join Date: Aug 2013
Drives: 2013 BRZ Premium Dark Gray Metallic
Location: McAllen, TX
Posts: 534
Thanks: 306
Thanked 199 Times in 127 Posts
Mentioned: 18 Post(s)
Tagged: 0 Thread(s)
|
Can view the photo's.
|
|
|

|
|
|
#12 |
|
Sorry about that! When we launched our new website, we found a handful of broken image links. We'll have these sorted out mid-week, but feel free to give us a call with specific questions! You can ask for Chase or Matt in engineering.
Matt Beenen Engineering |
|
|
|

|
| The Following User Says Thank You to GrimmSpeed For This Useful Post: | Markiv (10-29-2016) |
|
|
#13 |
|
Senior Member
Join Date: Apr 2013
Drives: BRZ Limited
Location: Las Vegas, NV
Posts: 289
Thanks: 742
Thanked 314 Times in 148 Posts
Mentioned: 4 Post(s)
Tagged: 0 Thread(s)
|
Thanks OP for the very useful DIY guide! On a side note, I realized I didn't have the correct size hose for the radiator drain spout. I found the overflow tank hose works great as it's the correct size and even the bend fits perfectly. Just pull it off the radiator nipple and it slides out of the overflow bottle. Reinstall when done!
 
|
|
|

|
| The Following 10 Users Say Thank You to fstlane For This Useful Post: | AzFranz (07-10-2014), BatStig (07-11-2015), blackfireball5 (07-10-2020), Imrac (08-01-2014), jcw99 (07-08-2014), jliongh (02-13-2019), ShadowReaper (02-27-2021), Tristor (07-22-2018), weederr33 (03-08-2019), YouShallKnow (02-20-2015) |
|
|
#14 |
|
Senior Member
Join Date: Apr 2013
Drives: Toyota GT 86
Location: Perú
Posts: 138
Thanks: 33
Thanked 25 Times in 19 Posts
Mentioned: 2 Post(s)
Tagged: 0 Thread(s)
|
I was following this thread and as I loosened the air bleeder plug, I unscrewed it a bit too much and it fell. I moved my car in the garage and I couldn't find it. Moved items around the area I was parked and I still couldn't find it. Maybe it fell on an underbody panel/tray or it travelled into a parallel dimension.
Does anyone know the dimensions for it (or can measure it for me)? I feel like an idiot. |
|
|

|
|
|
|
|
 |
| Thread Tools | Search this Thread |
|
|
 Similar Threads
|
||||
| Thread | Thread Starter | Forum | Replies | Last Post |
| Blue Coolant | Boosted2.0 | Mechanical Maintenance (Oil, Fluids, Break-In, Servicing) | 108 | 07-12-2016 05:13 PM |
| Changing Premium to Limited? | zygrene | BRZ First-Gen (2012+) -- General Topics | 32 | 10-09-2012 11:58 AM |
| Checking out your own car | Bu-Tang | Scion FR-S / Toyota 86 GT86 General Forum | 18 | 06-11-2012 10:41 PM |
| Mixed day today checking out my DGM | Phaedrus29 | BRZ First-Gen (2012+) -- General Topics | 61 | 06-03-2012 11:30 PM |
| European fuel/coolant gauge face | arbnpx | Cosmetic Modification (Interior/Exterior/Lighting) | 0 | 05-31-2012 12:23 AM |