


|
||||||
| Member's Car Journals Car journals by our members. |
 |
|
|
Thread Tools | Search this Thread |
 09-06-2013, 02:07 PM
|
#1 |
|
Senior Member

Join Date: Jun 2012
Drives: Scion FR-S Subaru BRZ
Location: Fountain Valley, CA 92708
Posts: 502
Thanks: 35
Thanked 82 Times in 37 Posts
Mentioned: 16 Post(s)
Tagged: 0 Thread(s)
 |
The Ongoing FR SPORT BRZ Build Journal
Hello everyone!
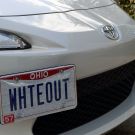
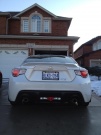
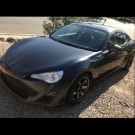
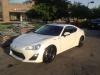
It is with the greatest pleasure to announce that we, FRSport.com, will be posting all of our build and updates related to our very own Subaru BRZ here in the FT86CLUB forums  ! !FRSport.com has been in the sport compact industry for a long time now and after watching beautiful build after beautiful build we have decided to join all of you in the fun and picked up our very own Subaru BRZ to mess around with (we know its not an FR-S but will distinguish differences appropriately). As we progress with the build keep in mind that there is no end goal in mind. If manufacturers keep innovating and we like what they innovate or produce we will update our car and share all the findings out with you! We want this thread to be mainly a learning and discussion thread so any info or FAQ related to what we post (parts, installs, track settings) are welcomed. Any concerns or questions having to do with items you have purchased, orders you have made, or issues concerning a transaction through FRSport.com should ALWAYS be made towards FR SPORT Sales team members directly, as this thread and others will be led by the marketing team and may not exactly be familiar with your issues. Also the strict rules of this forum prevent us from selling anything to you guys so lets keep it on topic and learn from one another. For weekly sales we will posting our ads and other specials in the Commercial Classified Sections. But enough chatting. Here are some base images of what we are starting with...     Stay Tuned because we have some great updates coming up! - The FR SPORT Team |

|

|
|
09-06-2013, 02:11 PM
|
#2 |
|
Senior Member
Join Date: May 2013
Drives: Scion FR-S
Location: Dayton, OH
Posts: 258
Thanks: 22
Thanked 71 Times in 60 Posts
Mentioned: 5 Post(s)
Tagged: 0 Thread(s)
|
Sub'd for this! Can't wait to see what you guys have in store.
__________________
|
|
|
|
|
09-06-2013, 02:15 PM
|
#3 |
|
Senior Member
Join Date: Jun 2012
Drives: Scion FR-S Subaru BRZ
Location: Fountain Valley, CA 92708
Posts: 502
Thanks: 35
Thanked 82 Times in 37 Posts
Mentioned: 16 Post(s)
Tagged: 0 Thread(s)
|
Thanks
We are actually super excited to join this community!
This car has already proven itself to be a champ and we can't wait to share our findings on here. |
|
|
|
|
09-06-2013, 05:22 PM
|
#4 |
|
Senior Member
Join Date: Jun 2012
Drives: Scion FR-S Subaru BRZ
Location: Fountain Valley, CA 92708
Posts: 502
Thanks: 35
Thanked 82 Times in 37 Posts
Mentioned: 16 Post(s)
Tagged: 0 Thread(s)
|
We are starting the modding process with small items anybody can change until we get our huge gallery of images sorted from our Stance Coilover install and Blitz Nur Spec Ti-C Exhaust swap. Here we changed the shift knob with DIF's Pawn Shift Knob.
 The stock shift knob on the BRZ is actually very nice already. It is leather wrapped, feels sturdy, and has some metal construction to it. Because we want the stock shift knob to remain in tip top shape we are swapping it on and off as we see fit or as we participate in track events; the DIF shift knob is capable of being held better at the end of the day actually. We do a lot of driving with this car, both touring and tracking, and there are three main benefits for sporting this unit that we have discovered. One, it stays cooler than the stock leather and metal unit. Two, it is way more ergonomical than the one that came with the BRZ and three, it will help us retain the mint look in our BRZ leather shift knob.  The installation of the shift knob is very straight forward. All one has to do is spin the factory knob counter clockwise and remove it from the shifter lever. Installation of the new shift knob is the opposite. Simply place the unit above the shifter lever and screw it on in a clockwise manner. Turn it until you feel it has gone on there tightly because if you race out in the track you will need to make sure it doesn't start coming undone at 100+ miles per hour.  Above is an image of it installed just to give you an idea of how it sits in the cabin.  The DIF Shift Knob is also available in white so we picked up both just for the heck of it. Game of chess anyone? Ultimately the inclusion of this shift knob is a welcomed mod considering we (the FR SPORT Team) live in Southern California. Lets hope it keeps our palms  in this scorching heat. Can it be winter already?! haha. in this scorching heat. Can it be winter already?! haha.
|
|
|
|
|
09-16-2013, 08:02 PM
|
#5 |
|
Senior Member
Join Date: Jun 2012
Drives: Scion FR-S Subaru BRZ
Location: Fountain Valley, CA 92708
Posts: 502
Thanks: 35
Thanked 82 Times in 37 Posts
Mentioned: 16 Post(s)
Tagged: 0 Thread(s)
|
Suspension Update!
And so the FR SPORT BRZ build continues.This is probably going to be the biggest post in our journal and loaded with pictures too. Because it is sort of like a tech install moderators should feel free to let us know if we should also post it in the tech section. In this segment of our Subaru BRZ Build, we installed a set of Stance ST-ZN6-XS Coilovers on our BRZ. This post may also apply to other coilovers installed on the BRZ and the Scion FR-S with the understanding that some differences may exist. While we were installing the Stance Suspension we also decided to upgrade the springs to some Swift units while we were at it. we apologize for the hiatus but we have been super busy as of lately. If you follow us on FB you would know why haha
  Prepping the Coilovers for Installation: The first thing we did before installing anything was to get our tools, coils, and vehicle ready. We started by removing the trunk interior before anything. This way, we were clean of interior panels just in case we got dirty when working on the suspension  . .  As far as interior panels go, we removed the trunk liner first. It's interesting to note that on the Subaru BRZ this super heavy duty liner is included. Well at least on the limited version we found this to be true.  We used a pick or flat-head screwdriver to pry up the retaining clips on 3 seperate interior panels in the trunk. We removed the center rear panel first to make taking the side panels out easier; there were a total of 4 clips on the rear there. We were very careful not to break any clips because the moment you pull the wrong way these clips can break off.  On the BRZ, there were also 6 retaining clips per side panel, so a total of 12. On an FR-S we have read that there are only 4 clips so its an interesting difference we discovered. After each clip is pried up, the clips should be removable by hand.  The BRZ also has a Remote Trunk Release Cancel Button plug to disconnect on the driver side interior panel. After we had pulled the driver side interior cabin panel off we noticed we couldn't completely remove it out of the way because we had to disconnect this small gadget. A very useful button indeed in case someone hijacks you and throws you into the trunk haha.  The next thing we did was replace the springs. If you are following this as a guide but you are not replacing the springs, you simply have to check the torque/tightness of any nuts/bolts used on the coilovers and move to the "REAR SUSPENSION REMOVAL & INSTALL" below. We know that Stance is an amazing company and that their products are equally amazing, but its ALWAYS a good idea to check the tightness of your suspension pieces before it goes in.  We lowered the collars so there was no tension on the springs and prevent the spring from flying toward our mugs. At this point its also a good idea to select your preferred initial height.   Because we were replacing the springs, we then moved on to loosen the 17 mm nuts retaining the top hats to the coilovers. Be sure to use a plier or wrench to keep the shaft from rotating when loosening the top nut. In the images, we show us just using on our hands but then realized that it would be better for the benefit of the coilover to be held with a wrench rather than just our hands.  Included with the coilovers are these metal and plastic washers to help the springs seat better and reduce binding. Make sure you leave the metal wahser closest to the spring followed by the plastic one. The combination of these two washers allow for the proper movement of the spring.    Upon reassembly, we tightened the collars back on until there was no play in the springs, then we tightened it one more turn. There are different preferences in setting preload so feel free to set it to your preferred setting.  We chose to use 6 kg/mm Swift springs in front & 7 kg/mm Swift springs in the rear, which are the standard spring rates that come with most coilovers. You can go stiffer or softer depending on your personal preference and the guys over at Swift Springs will move heaven and earth to get you the preferred settings you require.  Finally, once our coilovers have been assembled, we picked an initial ride height by loosening the lowest collar & spinning the housing as necessary. Make sure that the same is done for all sides in order to reduce changes once the coilvers are on the car.   For our initial ride height, we are using whatever came from Stance. Our front coilovers are set at 16.25" to 16.5", measured from the top of the top plate (ignoring the studs) to the center of the bottom strut mounting bolt. The rear coilovers are set between 14.75" to 15", measured from the top of the top plate to the middle of the bottom eyelet. Some coilovers can go super low but we decided to keep the stock height and then adjust as needed once the coils were on the car.   An essential thing to note as well is that Stance provides replacement sway bar end links with their coilover kits - sweet! You will find out that because of the new geometry introduced by these coilovers, you will end up needing them. Its also a perfect time to make these replacement sway bar end links face the same way. Out of the box they come facing the opposite way but will not go on like that.  After all this prep we were now ready to begin the install (finally haha). We got the vehicle up in the air with our car lift, then loosened the lug nuts on our BRZ. We mainly used an impact gun for most of the loosening of bolts/nuts, however you can use ratchets and/or wrenches if you don't have an impact gun.  Removal/Installation of the Rear Suspension: We started first with the rear section of the car. We removed the 17 mm nut holding the strut to the lower control arm.    Then we disconnected the rear sway bar end link from the sway bar with a 14mm wrench and 6mm allen wrench to keep the end link from spinning. Next, we removed the end link from the control arm itself with a 14 mm socket and wrench. We did this on both sides so that one side would not have more tension than the other. We found out that doing this reduced the amount of effort needed to remove the lower portion of the stock strut & spring from the lower control arm. If you are doing this by your self than the removal of the link is a must, as you can see in the first image above we were trying to force it out and succeeded, but it was way more easier when we took off the sway bar link on the other side.  Because the interior panels should already be removed, you can now remove the 14mm top hat nuts located in the trunk.  At this point one can remove the oem suspension from the car. You will have to put some force on the rear suspension/rear control arm to have enough clearance to remove the OEM strut assembly from the rear. This especially true if one has not removed the sway bar link. We decided to use a pry bar and pried from the front of the lower control arm through to the sway bar.  While one person pried the suspension control arm down (Or in our case our guy literally pushed down and that seemed to work too), another person removed the strut assembly. Again you may have to remove the rear sway bar if you aren't able to safely remove the stock strut.  Install of the new Stance coilover is the opposite of removal. We used the included diagrams that came with the coilovers for torque specs.  Removal/Installation of the Front Suspension: Once we had the front wheels removed, there were a few things that needed to be moved out of the way before removing the entire front shock/strut assembly.   First we had to remove the brake line brackets with a 12mm socket or combination wrench.   Next, we removed the ABS sensor clips located on the oem strut. There are actually 2 clips to the ABS sensor line: one can use a pick, a screwdriver, or even one's fingers (if possible) to remove the 2 clips holding the ABS line to the strut housing. After you manage to take the strut off, remember to also remove these clips with pliers from the strut housing in order to reuse them on your coilovers. We almost tossed them before we realized we needed them. They are quite small and easily forgettable.   To remove the entire clip from the stock strut in order to reuse on the Stance coilovers, we have to loosen a 4-way clip that is a completely tricky bastard, you have to pinch the larger two prongs, then the smaller two prongs at the same time to remove it. We would recommend dealing with this clip outside of the car since inside it would be a total pain on the vehicle.  The last small component we removed on the front oem suspension was the sway bar end links. We used a 14mm socket on the nut side and an Allen wrench on the bolt when we removed the end links. If you don't have replacement sway bar end links, then leave the end links on. Stance supplies the extra end links which are a little bit longer to adjust for the small changes in geometry. Since we had new end links in our kit, we removed the oem end links entirely and swapped in the new ones. We then proceeded to repeat this process for both sides.    At this point you should find a box, crate, or use the jack (or if you have a friend helping like us, he or she will do) to support the front lower control arm as the whole front oem suspension will soon be disconnected from the stock suspension and fall. We used a 19 mm ratchet on the nut side of the strut housing to spindle bolts and a 19 mm combination wrench to secure the bolt on the opposite side. There are two of these bolts per side.  We then proceeded to remove the two upper, shock tower bolts, they ended up being 14mm nuts. While holding the strut against the car we removed both of them gently. Here a helper was really useful in order for us to maintain the strut in place while we removed it and prevent it from crashing to the ground.  Once we were completely finished removing the front suspension we then essentially worked backwards in order to install the Stance alternative. It took us a long time to install these as we were mindful of every little challenge we encountered and wanted to share it with the community. Ultimately we hope this helps other BRZ owners with the installation of their own suspension no matter what brand they go with. Cheers! Words adapted from our esteemed colleague Quoc Viet (or QV for short). - JM Last edited by FRSport.com; 10-21-2013 at 07:46 PM. |
|
|
|
|
09-17-2013, 01:41 PM
|
#6 |
|
Senior Member
Join Date: Jun 2012
Drives: Scion FR-S Subaru BRZ
Location: Fountain Valley, CA 92708
Posts: 502
Thanks: 35
Thanked 82 Times in 37 Posts
Mentioned: 16 Post(s)
Tagged: 0 Thread(s)
|
Our Subaru BRZ Wins at Subiefest 2013
We want to happily share with everyone that the FR SPORT BRZ officially won its first podium at Subiefest 2013. Our Subaru, Driven by one of our staff members Catherine Tran, managed to beat out all other BRZ competitors in the "Race BRZ" category at the event. With a time of 32.306, it posted the fastest time out of all the BRZ's there. As a side note the vehicle also performed at Redline Time Attack where it helped our sponsored driver/co-worker, Adam Knapik, stay close to the top in the points race leading to the overall championship. We can't wait to test this beast further in coming events.
   The suspension stayed strong as well during the beating it took at the Auto X event and the Time Attacke session! And while speaking of upgraded mods we actually managed to install the Blitz Nur Spec C-Ti exhaust before the race as well. Pics and post are soon to follow on that as well. 
|
|
|
|
|
10-22-2013, 01:01 PM
|
#7 |
|
Senior Member
Join Date: Jun 2012
Drives: Scion FR-S Subaru BRZ
Location: Fountain Valley, CA 92708
Posts: 502
Thanks: 35
Thanked 82 Times in 37 Posts
Mentioned: 16 Post(s)
Tagged: 0 Thread(s)
|
Our FR SPORT BRZ Gets an Exhaust Upgrade
The FR SPORT team had installed this amazing Blitz Nur Spec C-Ti exhaust a few weeks ago but hadn't had the opportunity until recently to publish or share all the details of the install until now. Below is a step by step guide on how we installed this ultra, JDM Blitz exhaust if you care to read.
 The evening after work essentially began with us planning the whole ordeal. We knew this install was traditionally fast but took our time writing little details about the process because we wanted to make sure people who read this post or how to, know how to do it correctly. We first began by raising the car. If you don' t happen to conveniently have a lift you simply have to raise it on a couple of jack stands and use extreme caution.  We then began by removing the original factory exhaust parts.   Using 14mm and a 12mm wrenches begin by removing the center section of the exhaust or what is the longest portion of the system. Make sure to use the 14mm wrench toward the rear on the spring side of the nut while the 12mm wrench is placed more towards the front of the car. Go on to turn the 12mm wrench until the nut is off while the 14mm stays in place.   Once both of those nuts are loose move on to the rear of the car. Behind the rear wheel you will find the bolts connecting the longer segment of the exhaust to the muffler. Here we used one 14mm wrench and one 14mm ratchet in order to remove the final bolts from the center section and dislodge it from beneath the car.   Because Blitz provides new hardware for the exhaust we ended up not having to use the older hardware for the new install. If you do not happen to get new hardware with any other exhaust system, it's always a good idea just to swap it out and prevent future headaches.   While supporting the front of the longer exhaust segment remove the exhaust component from the factory bushings. The bushings should let go of the hinges very quickly, however if you need a little assistance some WD-40 can help you dislodge the exhaust hangers. Having an extra hand here can be a lot more helpful.  Next, we began to remove the rear section of the factory BRZ exhaust which surprisingly is only hung up by exhaust hangers. By removing the bolts from the front and rear of the center exhaust section we essentially unbolted all the bolts in contention.   We removed the two exhaust bushing closest to the rear of the car first so the exhaust tips wouldn't swing up and hit our bumper. Also, if you are working on jack stands be sure to put some cardboard on the ground below your exhaust so you don't scratch the exhaust when it swings down, one never knows when they will need the oe exhaust again. Again lubricant spray will assist in separating the bushing from the support.  Make sure to have a another person support the exhaust and proceed to remove the other 2 exhaust bushings on the back of the muffler or towards the front of the car . Once this muffler section was removed we succeeded in taking off the stock exhaust system.   Before we began installing our new exhaust, we checked the front exhaust pipe sealant bushing for damage; reason being that we had to reuse it. They felt extremely fragile so when you are removing these or working around them be very careful.   Upon installation and while supporting the front of the longer exhaust pipe, insert the front hangers (closest to the front of the car) onto their respective bushings first. Re-use the hardware (bolts with springs) that came with the factory exhaust and install these bolts. Only install or thread all hardware halfway, the reasoning behind this is to promote proper fitment and tightening has been put together.   Next we moved on to install the Blitz muffler portion of the cat-back system. While supporting the rear most section of the exhaust (or the part closest to the back of the car) insert the front exhaust hangers onto the bushings. Next, install the rear hangers onto the rear bushings. If you used some sort of lubricant in the removal process there should be some residue left and install of these should be a breeze.  Using the Blitz provided hardware (2 bolts, 2 nuts and 1 gasket), bolt up the two exhaust sections together; the longer exhaust pipe and the muffler section. Install the bolt with its head toward the rear of the car. The reason we did this was because in the future it would be easier to take out . We also used Red Loctite to secure the nuts and bolts, this is a step we strongly recommend in order to prolong the connections in our exhaust. http://blog.frsport.com/wp-content/u...nstall-022.jpg  Once we had everything bolted halfway we checked clearances and had everything bolted all the way. Whether you are installing this exhaust or a different one we strongly recommend to check torque specs to prevent from threading portions of your exhausts or breaking bolts.  And that is it. Our install of the Blitz Nur Spec C-Ti was complete. Now we drive the car a little more spiritedly and it's nice to hear it growl a little bit more wholesomely. Feedback: After driving the BRZ for a while we noticed that this is a very sensible exhaust with a lot of flair. It gets noticed quite a bit. The Ti finish on the exhaust get that extra attention because of its high contrast blue, but here is the best part (or worst part depending on what you think an exhaust should be); it is extremely quiet. Driving spiritedly on the street will most likely not get you any attention from the popos' or Five "O". If you are looking into a throaty meaty exhaust perhaps this version might not be your cup of tea (we've heard the Berk units are a little louder), but this was perfect for us, specially in our tuner-unfriendly neighborhoods haha. |
|
|
|
|
01-20-2014, 08:20 PM
|
#8 |
|
Senior Member
Join Date: Jun 2012
Drives: Scion FR-S Subaru BRZ
Location: Fountain Valley, CA 92708
Posts: 502
Thanks: 35
Thanked 82 Times in 37 Posts
Mentioned: 16 Post(s)
Tagged: 0 Thread(s)
|
After driving the BRZ for a few thousand miles The FR Sport Team decided it was time to change the engine oil and document it. Because this was going to be the first time we did it, we wanted to share the process just so that other ZN6 owners have a solid idea on how to perform the oil change properly (or to help question the heck out of your Walmart oil change haha).
  The very first thing we did was raise the car. Yes we have a lift so it made it even easier, but most of you will use a jack and some stands. It is important to keep the car level as the drain hole is not fitted more or less to any side.   Next gather all the supplies one would need for the oil change. We used (5) Torco SR1 0W-20 Synthetic Oil as is recommended in the Subaru Owners manual, an OEM Subaru Oil Filter (P/N 15208AA130), an OEM Subaru Crush washer (P/N 803916010), and a small funnel Koyo Radiators let us borrow hehe. We also took out a 14mm ratchet which was the only tool we would end up using. Also we recommend you have a rag nearby in case you spill any oil as well. We have yet to meet a person that does a super clean, no mess oil swap.  Before we started raising the car we opened up the oil cap in order to expedite the process of leaking the oil out.  Once the car was raised we positioned the oil capturing bucket right below where the oil escapes.  This outlet is extremely easy to find. One has to simply locate the front, under-engine cover and a hole where the access point is will be clearly visible.   We started unscrewing the bolt and began the process of leaking out the oil. Oddly we discovered that there was no washer visible upon the removal of the nut.   The Factory Service Manual clearly suggests using one so we were a bit dumbfounded for a second but ended up using the crush washer in the end. "BE CAREFUL" and observe that you really do remove a crush washer from the drain plug, reports from fellow enthusiast have come up noting that the washer and plug sometimes come painted together. This could lead you into believing that there is no crush washer in the first place. We, however, we're pretty confident that there was not one there.   After all the oil was completely out we started putting the drain bolt back on. When replacing the nut you will find that there is quite a bit less thread before you continue to turn the nut into place. This is because we added the crush washer and simply needed to turn harder; it is called a crush washer for a reason.  The recommended tightening torque according to the Subaru Owners manual is 28.9 ft-lb. Keeping to this torque ensures easy removal next time you need to swap the oil again.   After our drain bolt was securely tightened we lowered the car and began the oil filter removal. Most of the time one can simply remove it by hand. If you happen to have an oil filter removal tool the better. The filter takes an 80mm tool in case you wanted to get one for yourself. We moved on to remove the filter by hand after breaking it loose and sat it down next to our new one.   We then began to prep the new filter. We got some of the used oil (or you can use the new oil) to lubricate the new one and ensure a secure seal. Next we simply hand tightened the new filter as only 10.3 ft-lb of torques is needed to secure it on. DO NOT over tighten the filter however as it may become deformed and ultimately leak out all over the place.  Once the this was done we proceeded to adding the oil. The exact amount used for the oil change was 5.4L or 5.7 U.S. Quarts. Make sure you use a funnel as it clearly helps in keeping things clean.  Finally we checked our oil dip-stick and verified that the oil was at the correct level. Nailed it!   We then secured the oil cap and ran the car for a bit. Running it helps to determine if there are any leaks. If nothing drips in 5 to 10 minutes we'd say that you are in the clear. We noted how many miles were in the BRZ, created a reminder on our cellphones for the next oil change, and were finished. This definitely had to be one of the easiest oil changes we have done in a while and are positive you could do it as well! |
|
|
|
|
01-24-2014, 08:07 PM
|
#9 |
|
Senior Member
Join Date: Jun 2012
Drives: Scion FR-S Subaru BRZ
Location: Fountain Valley, CA 92708
Posts: 502
Thanks: 35
Thanked 82 Times in 37 Posts
Mentioned: 16 Post(s)
Tagged: 0 Thread(s)
|
Our First Auto X Event of 2014
We finally got the chance to put the BRZ through its paces once again in the first
SCCA Auto X event of 2014 at Fontana Speedway! Check out some of the action below.  Still a very stock body, but we are getting used to the stock suspension so as to grow with the mods which will be later introduced to the car. We like to write down stuff a lot so this helps us compare any thing we add to the car.  The Konig SSM Wheels currently on the car are great for drifting or daily driving (or stuntin' haha) but they seem a bit heavy for Auto-X. In a future post you will see our newer Enkei wheels specifically for Auto-X. We also have a set of Gramlights 57Xtreme that we will mostly be using for any Time Attack Sessions as slicks are currently fitted to those.  The car performed great and our Sales Manager/Auto X Driver Catherine Tran scored a first place podium. Later we'll post that up too (apparently there is a trophy wait in SCCA haha). Before we headed out, one of our shocks was acting funky so we had Stance send us out a new one. During the whole event the Stance coilovers worked great after replacing the ubber bouncy shock. Ultimately it was a great experience to bring out the car and start getting ready for more mods. Next up we are fitting the new (TBA) Enkei wheels and Cusco Rear Lower Control Arms (which we severely need for neg camber). Stick around as we'll be sharing all the installs in detail. - JM 
|
|
|
|
|
01-24-2014, 08:59 PM
|
#10 |
|
Senior Member

Join Date: Dec 2011
Drives: Moped
Location: CA
Posts: 4,298
Thanks: 4,897
Thanked 2,128 Times in 1,193 Posts
Mentioned: 21 Post(s)
Tagged: 0 Thread(s)
|
This is a nice-looking ride...bump for excellence
|
|
|
|
| The Following User Says Thank You to Lonewolf For This Useful Post: | FRSport.com (01-27-2014) |
|
01-25-2014, 11:33 AM
|
#11 |
|
Senior Member
Join Date: Feb 2013
Drives: 2013 Scion FRS
Location: Windsor Ontario Canada
Posts: 149
Thanks: 9
Thanked 49 Times in 47 Posts
Mentioned: 0 Post(s)
Tagged: 0 Thread(s)
|
Nice, keep us posted!
__________________
|
|
|
|
| The Following User Says Thank You to Fresh86 For This Useful Post: | FRSport.com (01-27-2014) |
|
01-25-2014, 11:49 AM
|
#12 |
|
Senior Member
Join Date: Dec 2011
Drives: Widebody '94 Miata R-Package
Location: St. Petersburg, Florida
Posts: 653
Thanks: 48
Thanked 161 Times in 83 Posts
Mentioned: 1 Post(s)
Tagged: 0 Thread(s)
|
I really like the graphics on it. The dot design looks really good.
__________________
 I <3 my Miata. But I <3 my new BRZ even more! |
|
|
|
| The Following User Says Thank You to merlin2111 For This Useful Post: | FRSport.com (01-27-2014) |
|
01-25-2014, 12:38 PM
|
#13 |
|
Man-ape
Join Date: Oct 2013
Drives: 2013 Buddy Club Scion FR-S
Location: Coachella valley
Posts: 378
Thanks: 385
Thanked 113 Times in 96 Posts
Mentioned: 10 Post(s)
Tagged: 0 Thread(s)
|
I am really enjoying the write ups! Great help when doing my own work on the car!
|
|
|
|
| The Following User Says Thank You to Kakawate For This Useful Post: | FRSport.com (01-27-2014) |
|
01-27-2014, 07:32 PM
|
#14 | |
|
Senior Member
Join Date: Jun 2012
Drives: Scion FR-S Subaru BRZ
Location: Fountain Valley, CA 92708
Posts: 502
Thanks: 35
Thanked 82 Times in 37 Posts
Mentioned: 16 Post(s)
Tagged: 0 Thread(s)
|
Quote:
That is what we are going for. We are ridiculously good when it comes to various JDM vehicles and are already pretty knowledgeable on the ZN6 platform as well. But there are a lot of similarities to the S13 and S14 so it comes easy to us. We can't wait to post more stuff. We hope the big pictures aren't bogging anyone's computers down. Might have to post smaller images if that's the case  - JM - JM
|
|
|
|
|
| The Following User Says Thank You to FRSport.com For This Useful Post: | Kakawate (01-27-2014) |
|
|
|
|
|
| Tags |
| brz, frsport, subaru |
|
|
 Similar Threads
|
||||
| Thread | Thread Starter | Forum | Replies | Last Post |
| Hyper-BRZ Build Journal | hypermax | Member's Car Journals | 62 | 06-10-2016 11:39 PM |
| Gopherboy's WRB BRZ Limited - Build Journal | Gopherboy6956 | Member's Car Journals | 41 | 03-22-2015 01:28 AM |
| 1 SIK FRS Raven FRS Build Journal | 1SIKFRS | Member's Car Journals | 20 | 01-19-2014 02:58 AM |
| Build Journal for Koigataki (6MT Argento FR-S) | Koigataki | Member's Car Journals | 25 | 10-10-2013 02:09 AM |


 GT 86
GT 86

