


|
||||||
| Suspension | Chassis | Brakes -- Sponsored by 949 Racing Relating to suspension, chassis, and brakes. Sponsored by 949 Racing. |
 |
|
|
Thread Tools | Search this Thread |
 06-23-2013, 11:55 PM
|
#1 |
|
Photo Specialist

Join Date: Feb 2012
Drives: 2013 Toyota 86 DGM 6MT
Location: Texas
Posts: 1,152
Thanks: 587
Thanked 1,802 Times in 420 Posts
Mentioned: 94 Post(s)
Tagged: 0 Thread(s)
|
Password JDM Ultimate Strut Tower Brace Package Review and Photoexplosion
Password JDM Ultimate Strut Tower Brace Package Review!
Hello all, in this episode we will take a look at the @password:jdm Ultimate Strut Tower Brace Package. It has a very long name, but the word Ultimate is in it, so it has to be good right? Let's see... Earlier in my series I presented @FT-86 SpeedFactory's strut tower brace. http://www.ft86club.com/forums/showthread.php?t=20863 It was a quality piece and I'd recommend it to anyone, but I was unsure of my plans for forced induction at the time, so I parted ways. I could have gone back to them now that I did not get the sprintex supercharger but I opted to explore and give another vendor a shot. Overall I chose this kit because 1) It meets my desire to mount to the actual strut top instead of those flimsy tack welded studs for the diagonal brace. My mate had a few of his break on him. (sorry Grimmspeed) 2) It is a (Semi) solid lateral brace. No flex points for me (sorry cusco) 3) The piece is a round tubes/pipe. Meets my needs to mount my catch can and vacuum manifold (sorry hotchkis) I don't mean to say other vendor's products are rubbish. I haven't even tried them! They simply do not meet my requirements. Like the @FT-86 SpeedFactory brace , I instantly noticed the difference in chassis response. I just installed this today so I don't have more feedback but I do plan to take Lola out to the track next weekend so I'll be sure to have tons of feedback soon! Shall we get on with it? Product shots Danbo is presenting the Password JDM Ultimate Strut Tower Brace Package (mouthful) 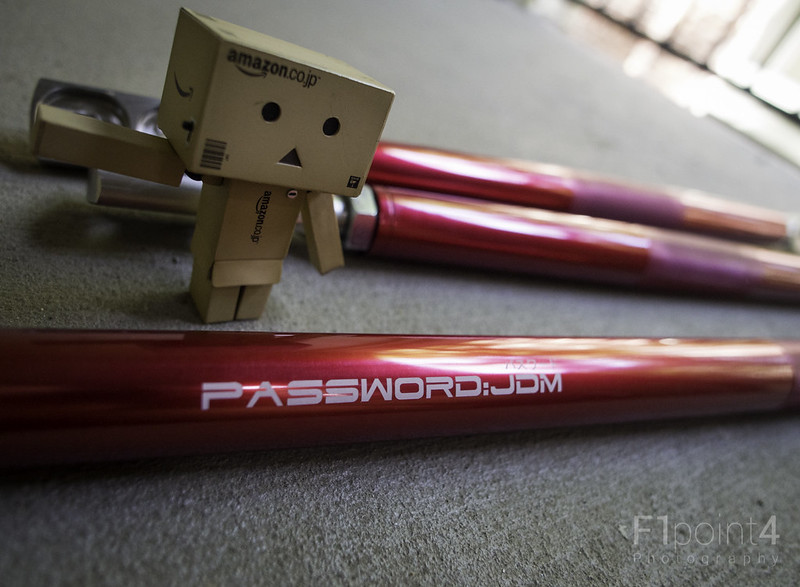 20130621-PasswordJDMUltimateStrutTowerBracePackage-001 by VictorN07, on Flickr The braces. As far as I know they are made from aluminium. They do adjust in length as the ends are threaded into the red tube itself. There are lockout nuts on each end to keep the bar from winding longer/shorter during operation. If you completely screw the ends in, it is definitely too short to install. 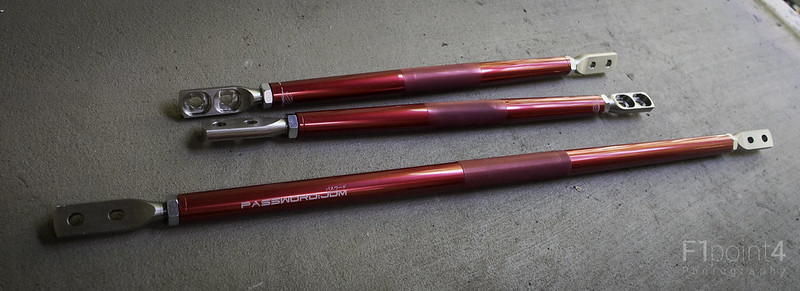 20130621-PasswordJDMUltimateStrutTowerBracePackage-002 by VictorN07, on Flickr The diagonal brace for lack of a better word 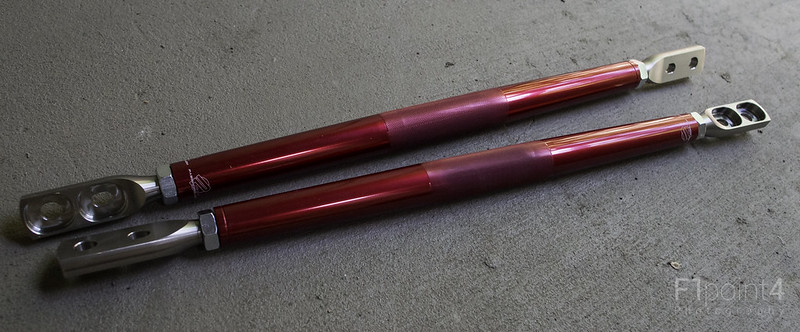 20130621-PasswordJDMUltimateStrutTowerBracePackage-003 by VictorN07, on Flickr Danbo is fascinated. The ends are machined beautifully and have indentation for the huts. The holes are elongated to give some room to install. 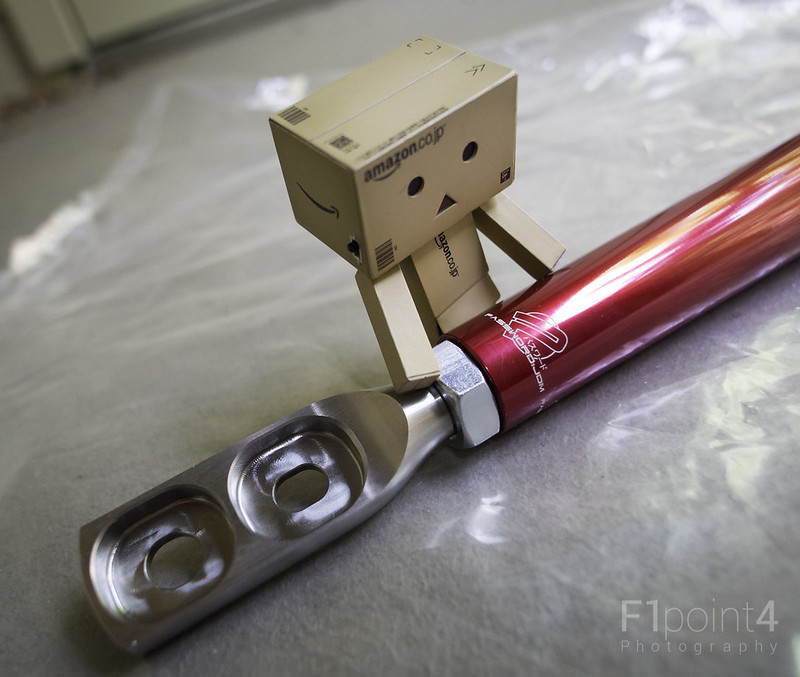 20130621-PasswordJDMUltimateStrutTowerBracePackage-004 by VictorN07, on Flickr Ends of the diagonal brace. The backside is flat. The lateral brace is flat on both sides 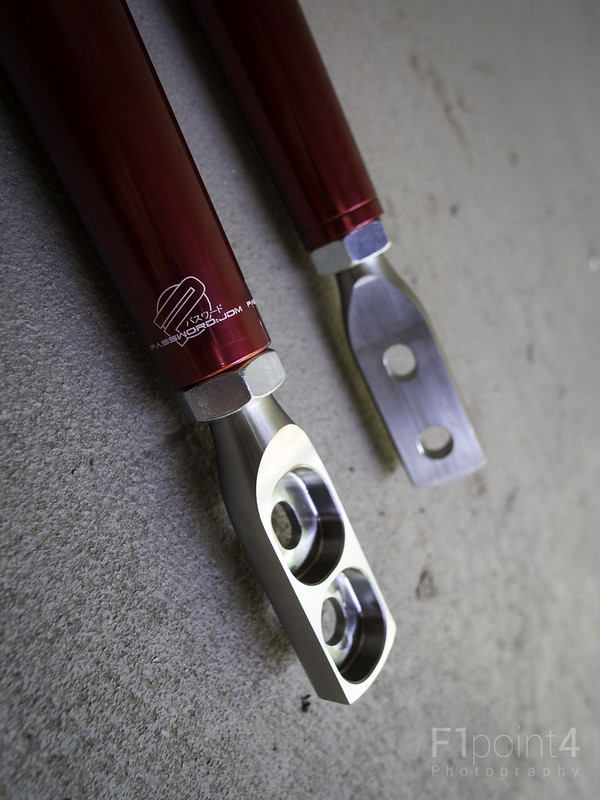 20130621-PasswordJDMUltimateStrutTowerBracePackage-005 by VictorN07, on Flickr Mounting blocks. The diagonal braces don't install to these but to the stock studs instead. I'll show how they fit together soon. These are also machined out of aluminium. Says made in the USA on one of them. I like this because it actually uses two of the three studs on the strut tower itself. Should be able to transfer the energy laterally better since you don't have to go through the chassis to the tack welded studs for the diagonal brace for some strut tower braces out there. 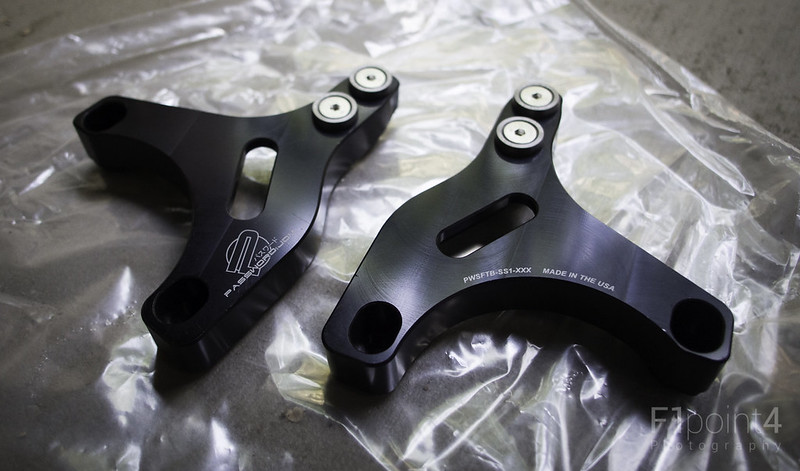 20130621-PasswordJDMUltimateStrutTowerBracePackage-006 by VictorN07, on Flickr Danbo goes ooooh 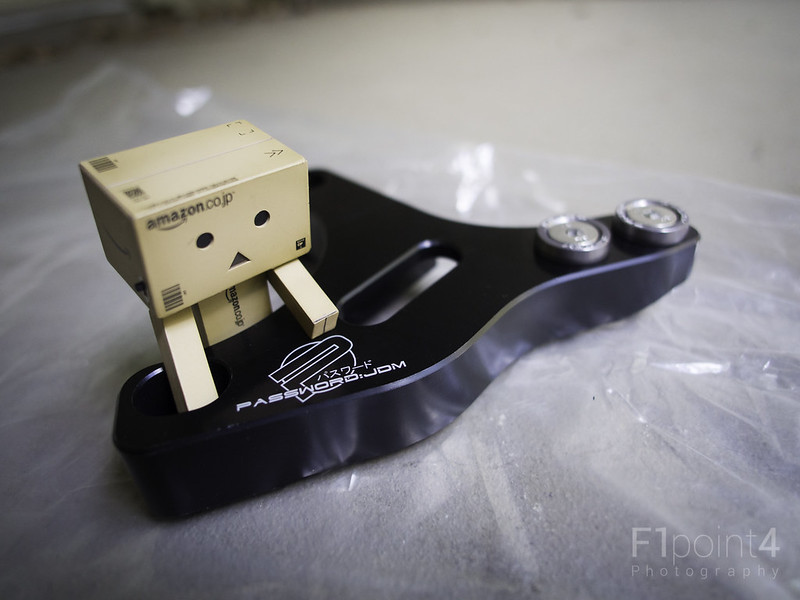 20130621-PasswordJDMUltimateStrutTowerBracePackage-007 by VictorN07, on Flickr These hex screws are taken off so you can mount the lateral brace. There are the Password JDM accents as well. Nice touch. 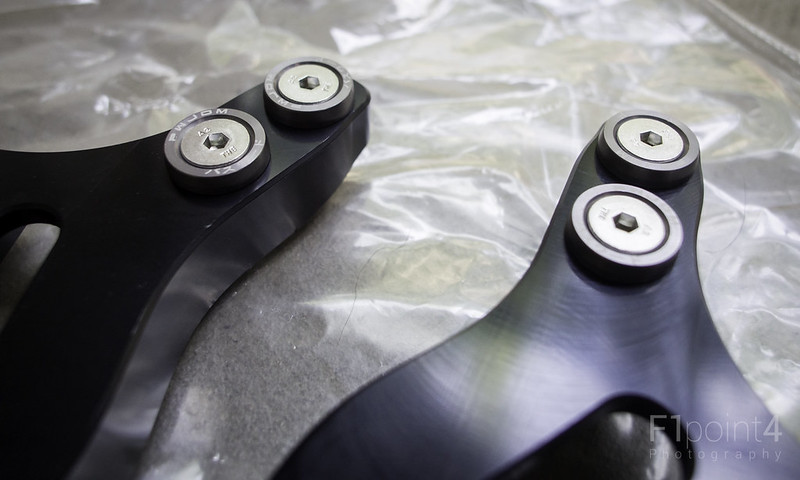 20130621-PasswordJDMUltimateStrutTowerBracePackage-008 by VictorN07, on Flickr Various angles of the Mounting blocks 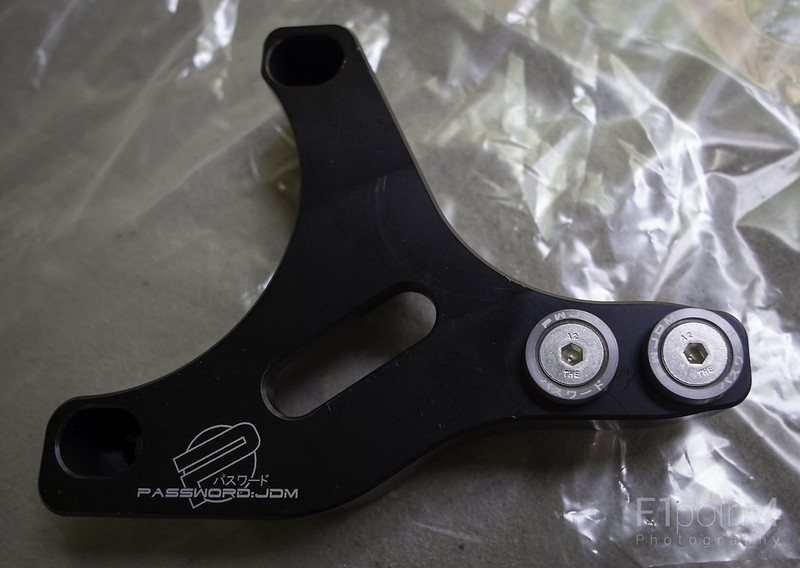 20130621-PasswordJDMUltimateStrutTowerBracePackage-009 by VictorN07, on Flickr Speed holes. 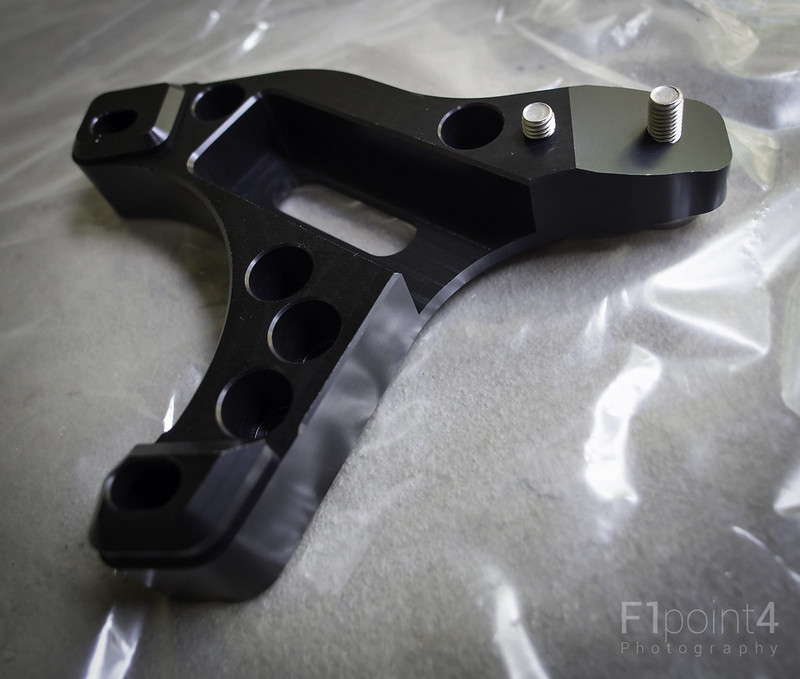 20130621-PasswordJDMUltimateStrutTowerBracePackage-010 by VictorN07, on Flickr 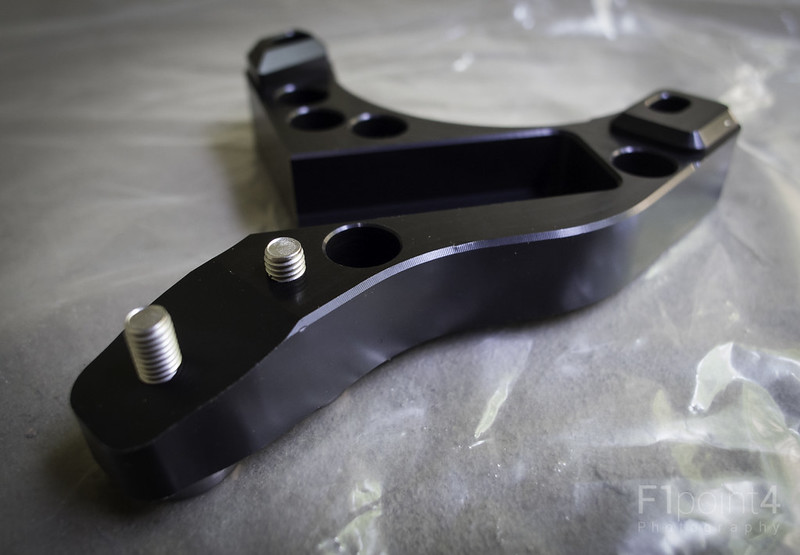 20130621-PasswordJDMUltimateStrutTowerBracePackage-011 by VictorN07, on Flickr The long angled rectangular bore section is for the diagonal brace 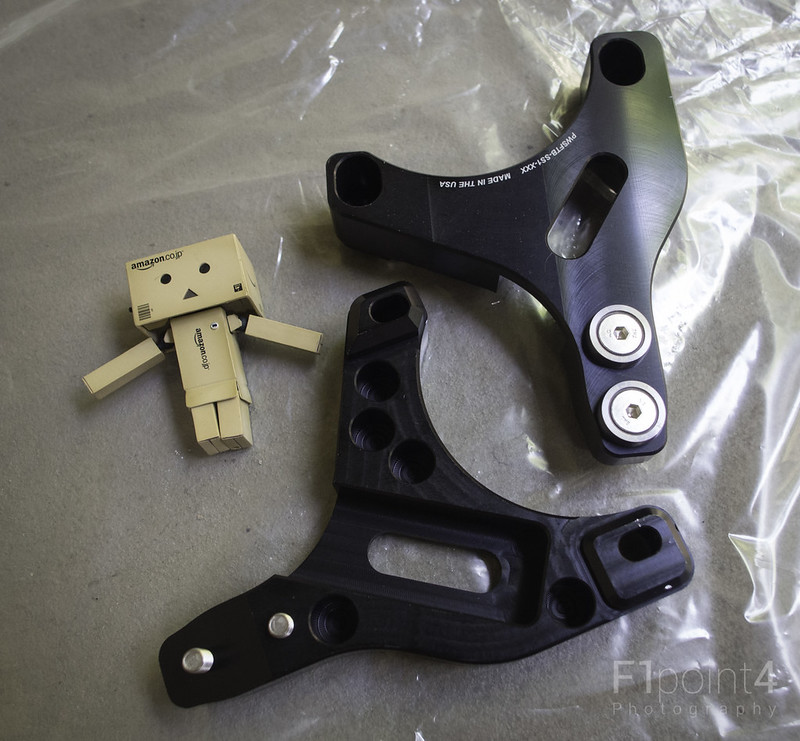 20130621-PasswordJDMUltimateStrutTowerBracePackage-012 by VictorN07, on Flickr Here is how everything fits together. Danbo says hi 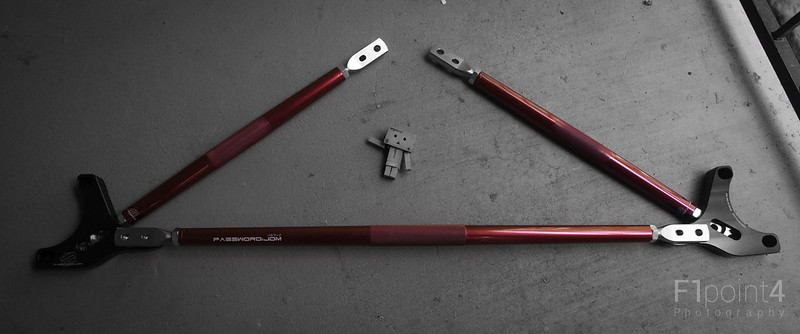 20130621-PasswordJDMUltimateStrutTowerBracePackage-013 by VictorN07, on Flickr 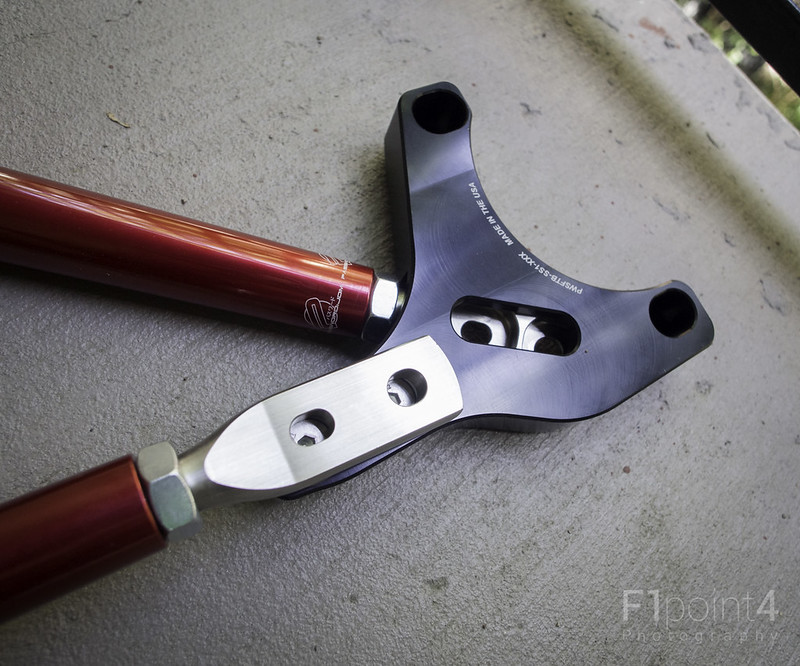 20130621-PasswordJDMUltimateStrutTowerBracePackage-014 by VictorN07, on Flickr
__________________
Last edited by F1point4; 06-24-2013 at 12:22 AM. |

|

|
| The Following User Says Thank You to F1point4 For This Useful Post: | SuperTom (04-02-2022) |
|
06-23-2013, 11:55 PM
|
#2 |
|
Photo Specialist
Join Date: Feb 2012
Drives: 2013 Toyota 86 DGM 6MT
Location: Texas
Posts: 1,152
Thanks: 587
Thanked 1,802 Times in 420 Posts
Mentioned: 94 Post(s)
Tagged: 0 Thread(s)
|
Installation
I did not get any instructions in the box. I will admit I didn't look at all at their website for instructions. Gotta "Man" up and figure it out myself Here is the DIY for the @FT-86 SpeedFactory brace. Good starting point for me http://www.ft86club.com/forums/showthread.php?t=20862 Logically I started by screwing in all the ends all the way, but leave it loose. Here is the a pic of the lateral brace 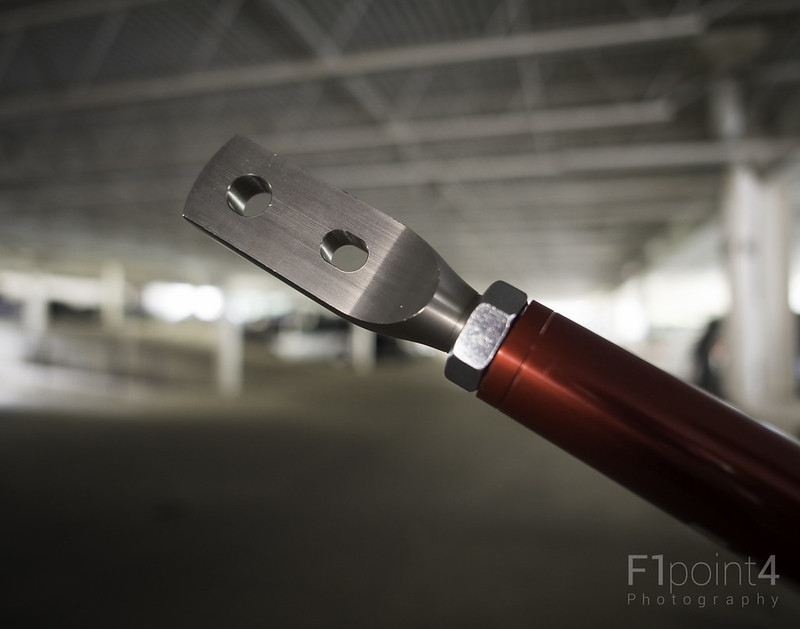 20130623-PasswordJDMUltimateStrutTowerBracePackage-015 by VictorN07, on Flickr I placed the diagonal brace on the firewall side. Now if you turn the red brace, both ends will start to unwind. This is important so both ends are screwed the same amount and will balance load. I unwinded it just enough to place the strut tower side on. Repeat for the other side. Now I Unwinded both bars equally so that the studs sit in the middle of all the elongated holes on each end. Again, this is important to balance the load from the driver side and passenger side. Then I started to add the nuts and bolts back in. You only need to torque it down pretty much two finger tight since the torque needed is so low. And the fact the studs are tack welded on and can break easily if you over do it. Make sure to jump around like the DIY says when tightening things. 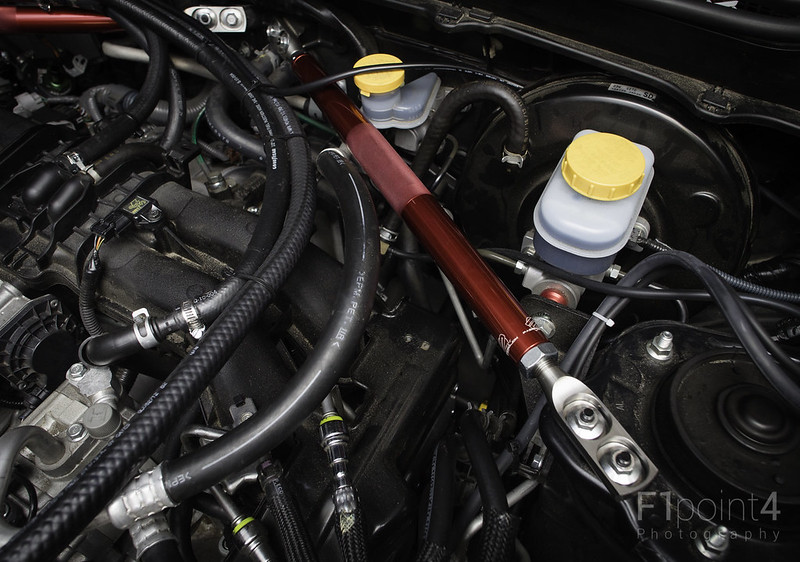 20130623-PasswordJDMUltimateStrutTowerBracePackage-016 by VictorN07, on Flickr Here is a closeup of the installed brace. Next I take an adjustable wrench, grab on tight to the red bar to keep it from spinning, and tighten the lock nut down. These will keep the bar from expanding and contracting over time. You can see how much exposed thread there is. 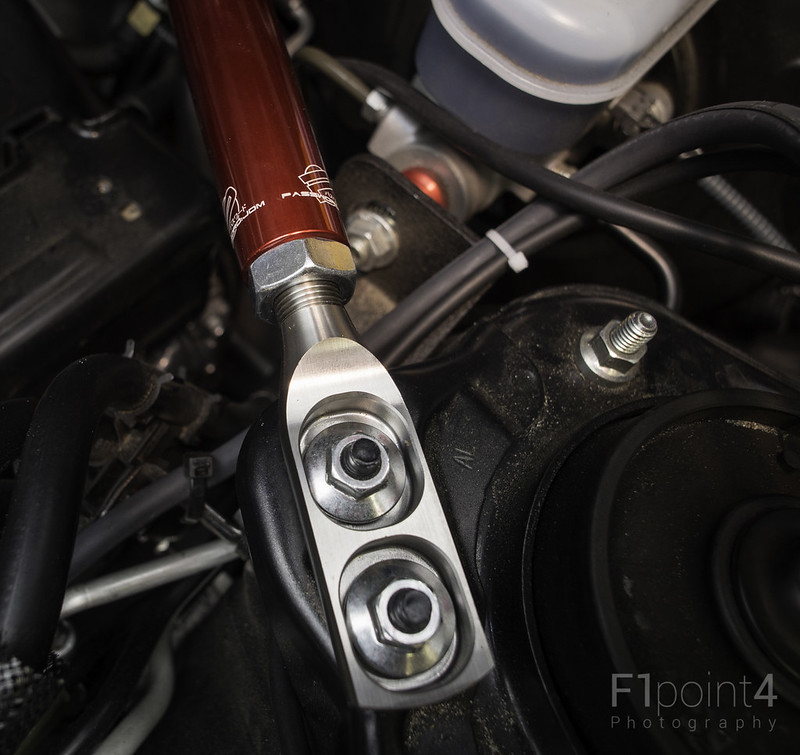 20130623-PasswordJDMUltimateStrutTowerBracePackage-017 by VictorN07, on Flickr Firewall side 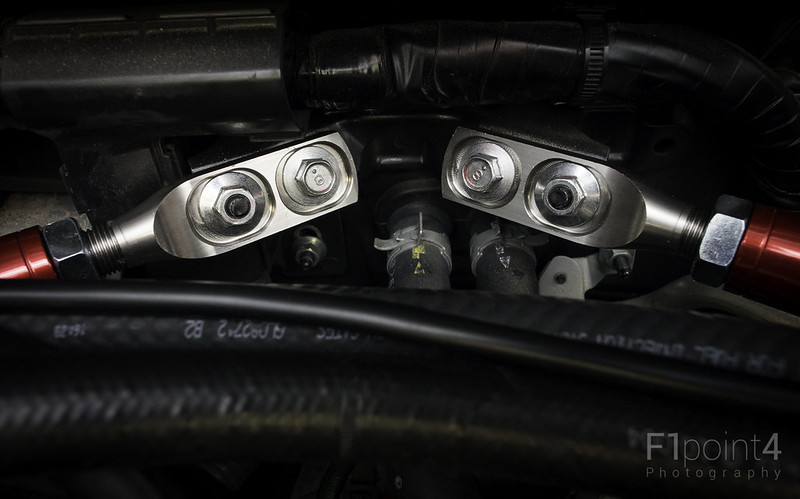 20130623-PasswordJDMUltimateStrutTowerBracePackage-019 by VictorN07, on Flickr Diagonal Brace Finished! I had to take off my vacuum manifold and oil catch cans to install them. I'll put them back on later. 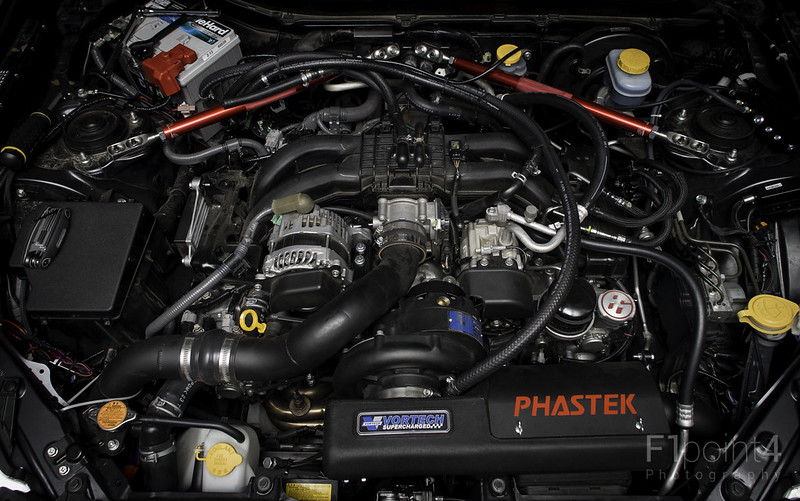 20130623-PasswordJDMUltimateStrutTowerBracePackage-018 by VictorN07, on Flickr Here is the lateral brace sitting next to where it goes. You can see it uses two of the actual strut studs. I placed these on both sides and loosely tighten the nut back on. 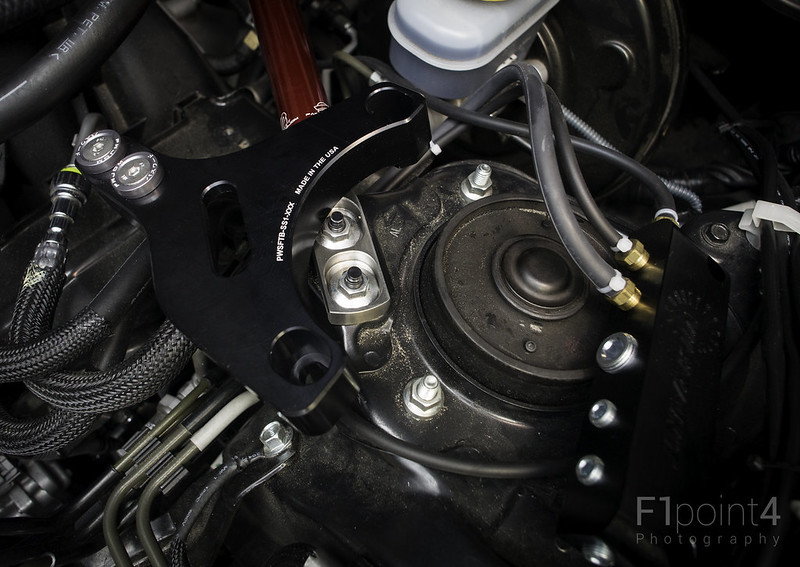 20130623-PasswordJDMUltimateStrutTowerBracePackage-020 by VictorN07, on Flickr Again I repeat the expansion procedure and just place one hex bolt on each side. Make sure you install the bar so Password JDM reads the right way. At this point i situate the mounting blocks and tighten down. Now I expand the bar so I can install the hex bolts in the middle of the holes. 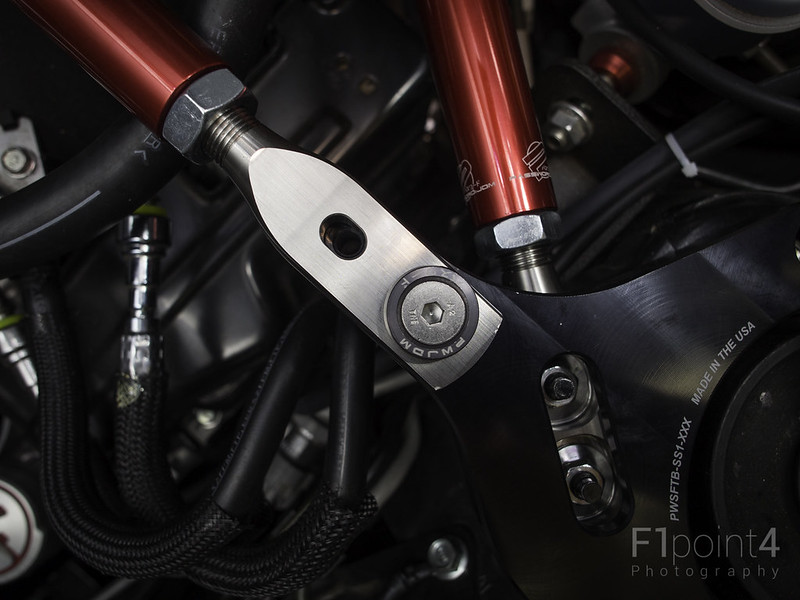 20130623-PasswordJDMUltimateStrutTowerBracePackage-021 by VictorN07, on Flickr Again lock down the lockout nut on each side. 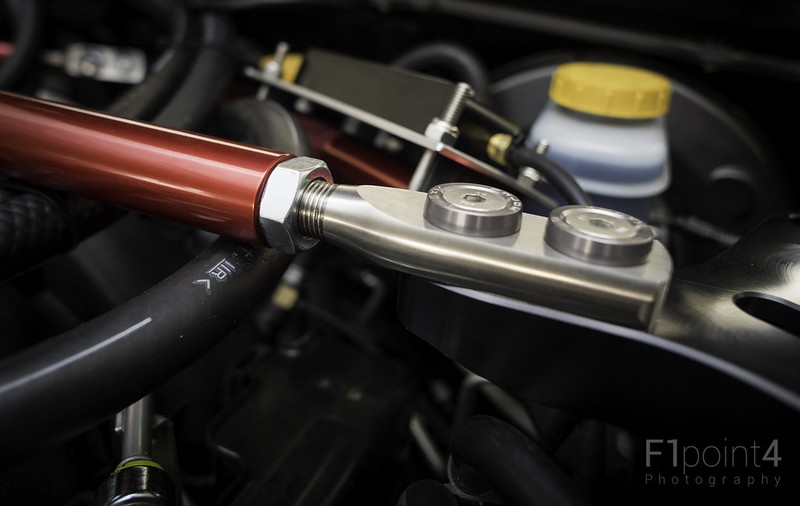 20130623-PasswordJDMUltimateStrutTowerBracePackage-022 by VictorN07, on Flickr
__________________
Last edited by F1point4; 06-24-2013 at 12:20 AM. |
|
|
|
|
06-23-2013, 11:56 PM
|
#3 |
|
Photo Specialist
Join Date: Feb 2012
Drives: 2013 Toyota 86 DGM 6MT
Location: Texas
Posts: 1,152
Thanks: 587
Thanked 1,802 Times in 420 Posts
Mentioned: 94 Post(s)
Tagged: 0 Thread(s)
|
Finished!
Here is a picture of my engine before I started 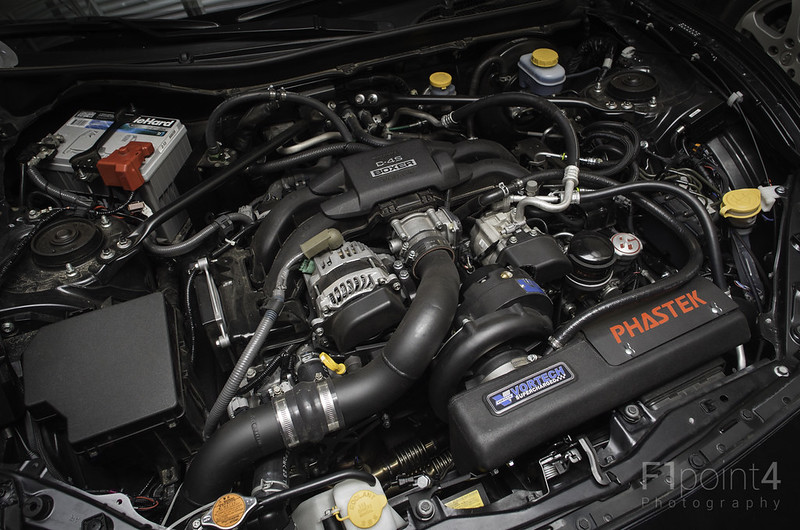 20130607-RadiumCatchCanNumber2-004 by VictorN07, on Flickr Here is the completed install with remounted oil catch can and vacuum manifold 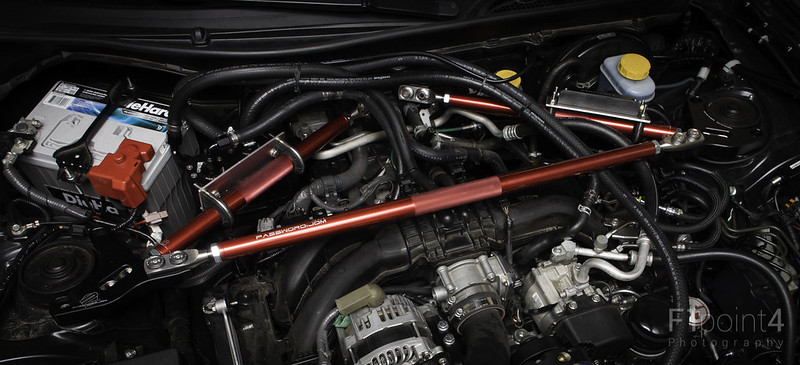 20130623-PasswordJDMUltimateStrutTowerBracePackage-023 by VictorN07, on Flickr The rest are various shots of the finished install. 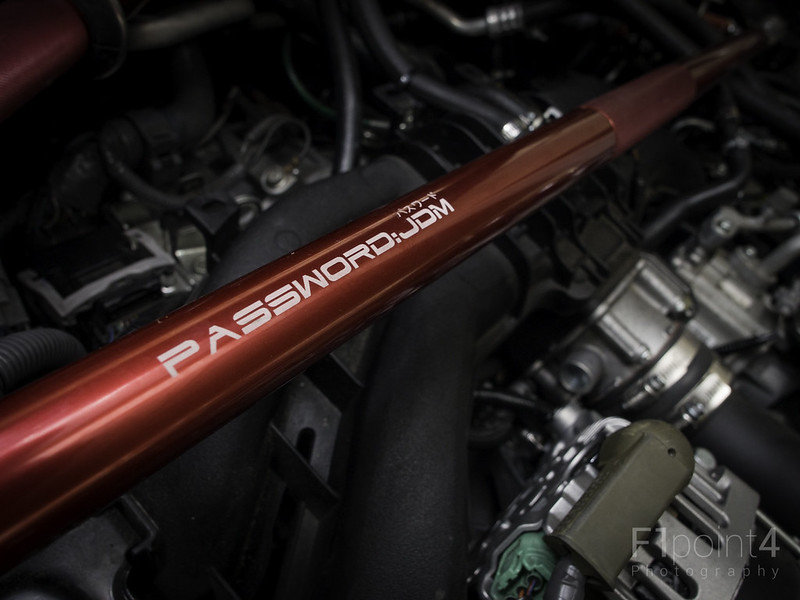 20130623-PasswordJDMUltimateStrutTowerBracePackage-024 by VictorN07, on Flickr 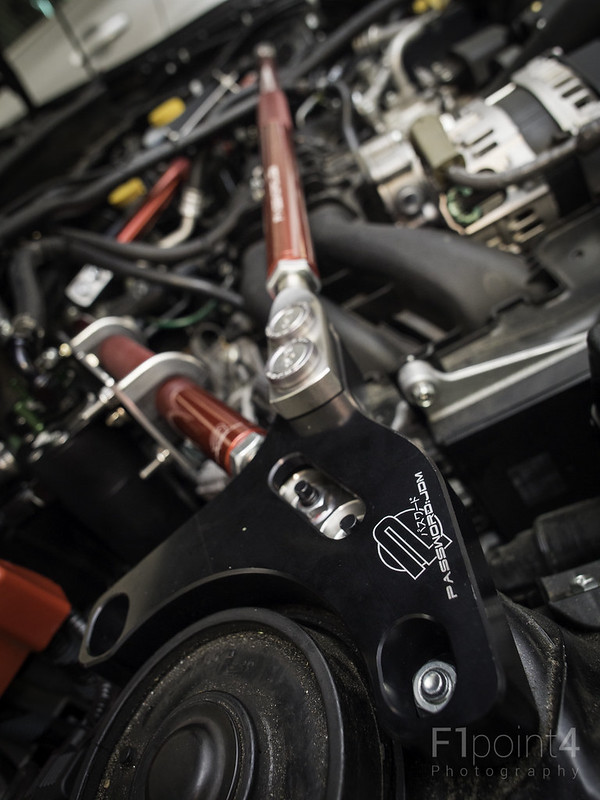 20130623-PasswordJDMUltimateStrutTowerBracePackage-025 by VictorN07, on Flickr  20130623-PasswordJDMUltimateStrutTowerBracePackage-026 by VictorN07, on Flickr Had to step up to 1.25 OD Vibration Dampened U-bolts. This meant I had to make new brackets for the catch can and vacuum manifold. 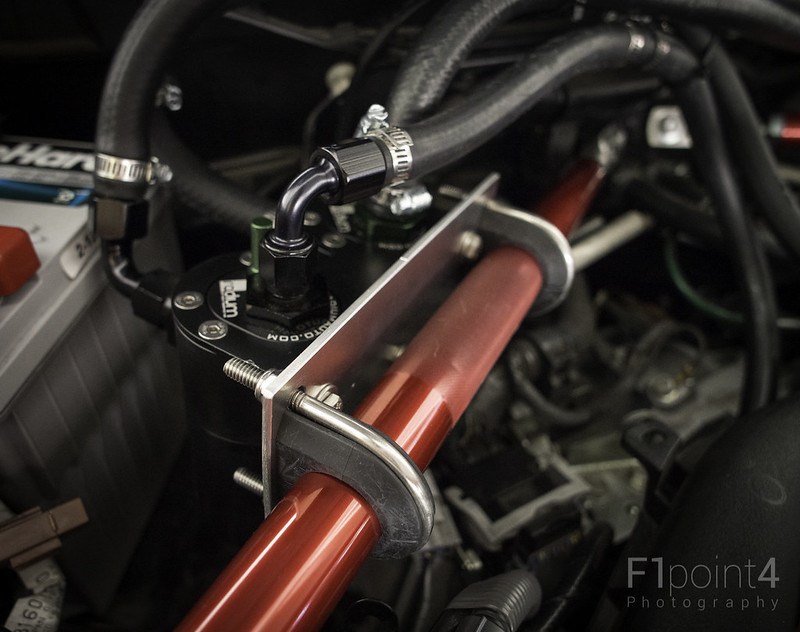 20130623-PasswordJDMUltimateStrutTowerBracePackage-027 by VictorN07, on Flickr 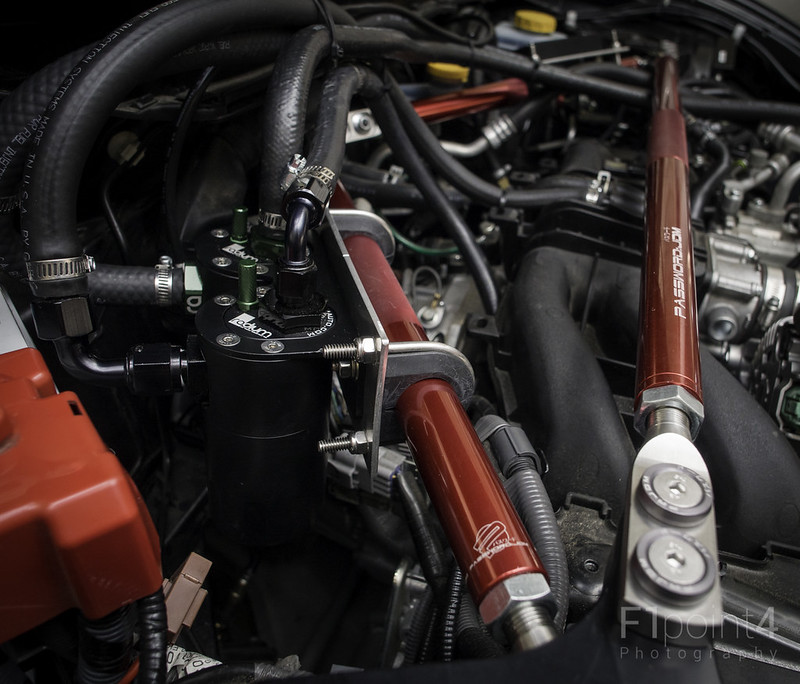 20130623-PasswordJDMUltimateStrutTowerBracePackage-028 by VictorN07, on Flickr Here is the vacuum manifold. It tilted it up due to lack of room in that area. I also Like the look here as well 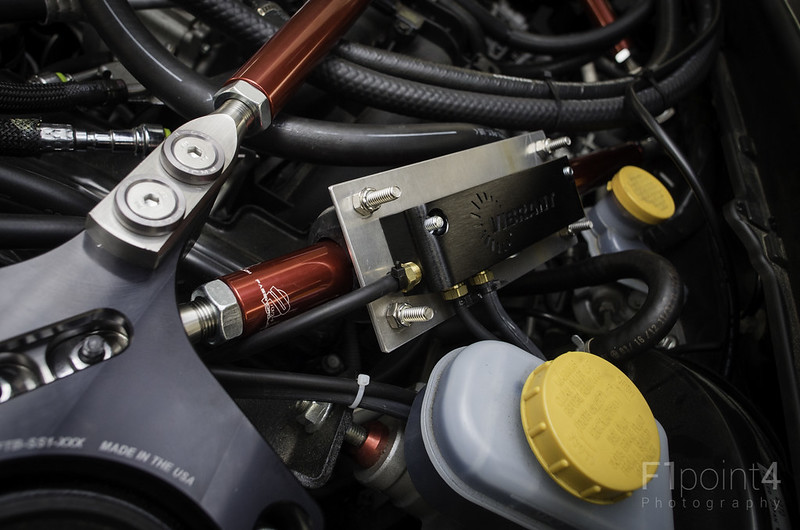 20130623-PasswordJDMUltimateStrutTowerBracePackage-029 by VictorN07, on Flickr 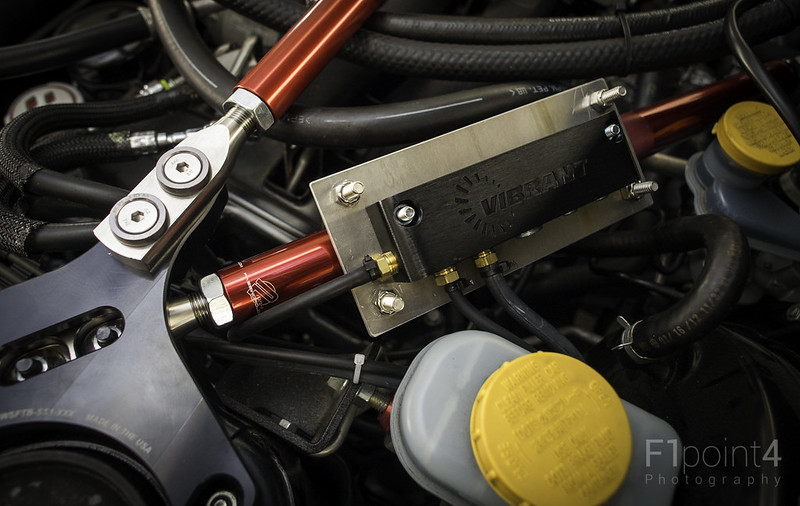 20130623-PasswordJDMUltimateStrutTowerBracePackage-030 by VictorN07, on Flickr 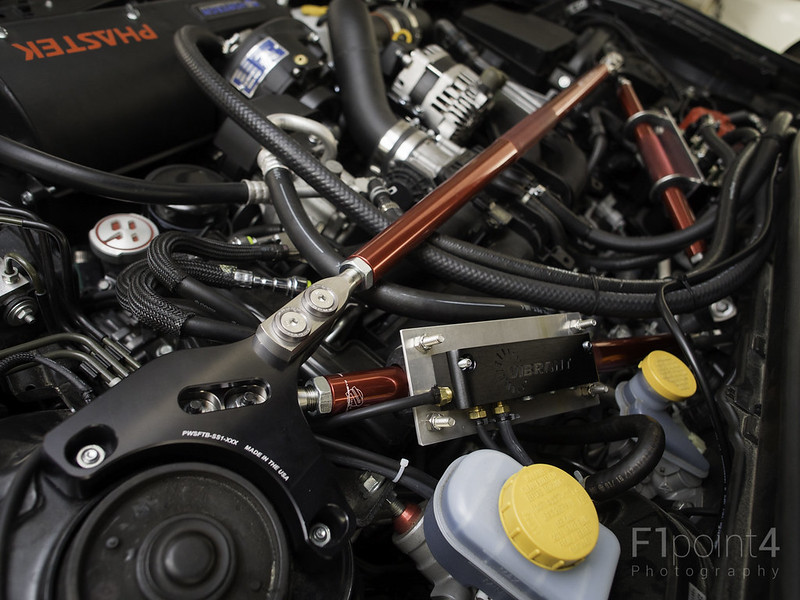 20130623-PasswordJDMUltimateStrutTowerBracePackage-031 by VictorN07, on Flickr 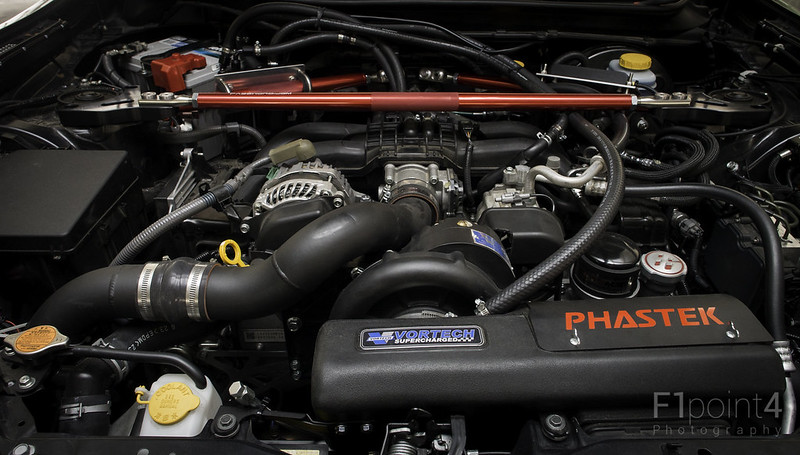 20130623-PasswordJDMUltimateStrutTowerBracePackage-032 by VictorN07, on Flickr 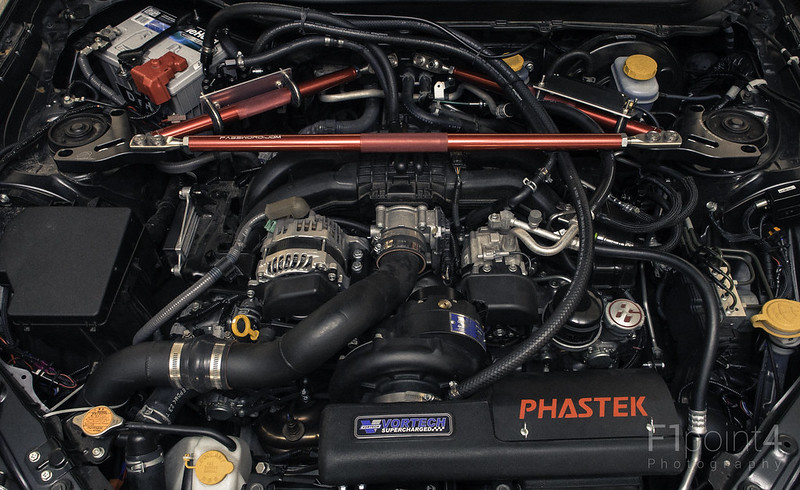 20130623-PasswordJDMUltimateStrutTowerBracePackage-033 by VictorN07, on Flickr I hope you all enjoy these photos as much as I like making them. Until next time. Thanks!
__________________
Last edited by F1point4; 06-24-2013 at 12:11 AM. |
|
|
|
| The Following 9 Users Say Thank You to F1point4 For This Useful Post: | Asphalt~86 (06-24-2013), Aztec (01-17-2016), continuecrushing (06-24-2013), Enraged21 (06-24-2013), JEFFSTYLE (01-02-2014), Mr. (06-24-2013), SkAsphalt (06-24-2013), SuperTom (01-19-2020), YURparts (12-19-2013) |
|
06-24-2013, 12:16 AM
|
#4 |
|
Banned
Join Date: Oct 2012
Drives: Asphalt AT
Location: Midwest
Posts: 813
Thanks: 324
Thanked 608 Times in 262 Posts
Mentioned: 10 Post(s)
Tagged: 0 Thread(s)
|
completely amazing as always. I needed this right before bed.
|
|
|
|
| The Following User Says Thank You to Asphalt~86 For This Useful Post: | F1point4 (06-24-2013) |
|
06-24-2013, 12:41 AM
|
#5 | |
|
DADA

Join Date: Jun 2012
Drives: 2013
Location: Kanada
Posts: 1,500
Thanks: 47
Thanked 388 Times in 249 Posts
Mentioned: 10 Post(s)
Tagged: 0 Thread(s)
|
Quote:
|
|
|
|
|
| The Following User Says Thank You to mashal For This Useful Post: | F1point4 (06-24-2013) |
|
06-24-2013, 07:26 AM
|
#6 |
|
Senior Member
Join Date: Mar 2013
Drives: 2013 Raven FRS 2JZ-GTE/V160 swapped
Location: Hampton, VA
Posts: 960
Thanks: 376
Thanked 623 Times in 315 Posts
Mentioned: 18 Post(s)
Tagged: 0 Thread(s)
|
Bashing other vendors in a review for products you've never had. Got it.
|
|
|
|
|
06-24-2013, 07:49 AM
|
#7 | |
|
Photo Specialist
Join Date: Feb 2012
Drives: 2013 Toyota 86 DGM 6MT
Location: Texas
Posts: 1,152
Thanks: 587
Thanked 1,802 Times in 420 Posts
Mentioned: 94 Post(s)
Tagged: 0 Thread(s)
|
Quote:
Frankly, I had the hotchkis on order but backed out because I couldn't mount my catch can to it using the U bolts.
__________________
Last edited by F1point4; 06-24-2013 at 08:13 AM. |
|
|
|
|
|
06-24-2013, 08:21 AM
|
#8 |
|
Member
Join Date: Oct 2011
Drives: 86 & Picanto
Location: soul city
Posts: 87
Thanks: 2
Thanked 5 Times in 4 Posts
Mentioned: 2 Post(s)
Tagged: 0 Thread(s)
|
Looks nice, but all those flex joints used in that strut bar makes it a downgrade from the stock bar. In terms of structural rigidity (i.e., the very purpose of installing a 'strut bar', solid one-piece bar like the OEM ones beats pretty looking aftermarket ones with multi-flex joints every time.
|
|
|
|
| The Following User Says Thank You to balance For This Useful Post: | Captain Snooze (06-24-2013) |
|
06-24-2013, 01:10 PM
|
#9 |
|
Gundam Meister

Join Date: Oct 2011
Drives: A Gundam
Location: Westchester County, NY
Posts: 2,685
Thanks: 320
Thanked 1,010 Times in 510 Posts
Mentioned: 9 Post(s)
Tagged: 0 Thread(s)
|
Strut bar looks really looks good in red.
|
|
|
|
|
06-24-2013, 08:57 PM
|
#10 |
|
Supra Senior Member

Join Date: Oct 2012
Drives: AE86 & BRZ
Location: Merica maryland
Posts: 877
Thanks: 717
Thanked 491 Times in 288 Posts
Mentioned: 38 Post(s)
Tagged: 2 Thread(s)
|
looks great!
|
|
|
|
|
06-24-2013, 09:50 PM
|
#11 |
|
Senior Member
Join Date: Dec 2012
Drives: 2013 subaru limited wrb brz
Location: troutdale oregon
Posts: 725
Thanks: 191
Thanked 259 Times in 170 Posts
Mentioned: 24 Post(s)
Tagged: 0 Thread(s)
|
While i don't have the Supercharger yet. Here is my engine bay with my PasswordJDM stuff in it.

|
|
|
|
| The Following User Says Thank You to wrohdejr For This Useful Post: | F1point4 (06-24-2013) |
|
06-24-2013, 10:48 PM
|
#12 | |
|
#RememberTheBuster

Join Date: Aug 2012
Drives: Firestorm FRS MT
Location: Orlando, FL
Posts: 597
Thanks: 637
Thanked 154 Times in 102 Posts
Mentioned: 6 Post(s)
Tagged: 0 Thread(s)
|
Quote:
|
|
|
|
|
|
06-24-2013, 10:50 PM
|
#13 | |
|
Photo Specialist
Join Date: Feb 2012
Drives: 2013 Toyota 86 DGM 6MT
Location: Texas
Posts: 1,152
Thanks: 587
Thanked 1,802 Times in 420 Posts
Mentioned: 94 Post(s)
Tagged: 0 Thread(s)
|
Quote:
__________________
|
|
|
|
|
|
06-24-2013, 10:51 PM
|
#14 |
|
Senior Member
Join Date: Nov 2011
Drives: Subaru BRZ Limited 6MT
Location: Winston-Salem, NC
Posts: 2,432
Thanks: 712
Thanked 954 Times in 545 Posts
Mentioned: 47 Post(s)
Tagged: 0 Thread(s)
|
I love my PasswordJDM set (in black) but I'll likely have to remove the front bar as I just ordered the Innovate supercharger kit. It's honestly the best looking strut tower and nice thick design.
__________________
Innovate Supercharged Black Limited BRZ 6-Speed MT(Build Thread)
2010 Cadillac CTS-V Sedan M6 w/550whp (Build Thread)  |
|
|
|
|
|
|
|
|
| Tags |
| password jdm, strut tower brace |
|
|
 Similar Threads
|
||||
| Thread | Thread Starter | Forum | Replies | Last Post |
| Password:JDM Ultimate Strut Tower Brace Subaru BRZ / Scion FR-S *Group Buy* | password:jdm | Groupbuys | 265 | 01-28-2015 03:15 PM |
| DIY - Password:JDM Strut Tower Brace & Lower Tie Bar Install | xxscaxx | DIY (Do-It-Yourself) Guides | 15 | 05-14-2013 09:52 PM |
| FT-86 SpeedFactory Strut Tower Brace Review | F1point4 | Suspension | Chassis | Brakes -- Sponsored by 949 Racing | 35 | 01-07-2013 04:31 AM |
| DIY - Strut Tower Brace - FT-86 SpeedFactory | F1point4 | DIY (Do-It-Yourself) Guides | 4 | 10-28-2012 04:30 PM |


