


 09-15-2018, 01:38 PM
|
#127 |
|
Senior Member

Join Date: Mar 2017
Drives: Q5 + BRZ + M796
Location: Santa Rosa, CA
Posts: 7,884
Thanks: 5,668
Thanked 5,805 Times in 3,299 Posts
Mentioned: 70 Post(s)
Tagged: 0 Thread(s)
|
Sweet build man. Love seeing fab work.
__________________
My Build | K24 Turbo Swap | *K24T BRZ SOLD*
|

|

|
| The Following User Says Thank You to Irace86.2.0 For This Useful Post: | DIY (10-07-2018) |
|
09-30-2018, 04:42 AM
|
#128 |
|
Senior Member

Join Date: Jul 2016
Drives: BRZ, WRX
Location: Sydney, Australia
Posts: 291
Thanks: 105
Thanked 962 Times in 233 Posts
Mentioned: 2 Post(s)
Tagged: 0 Thread(s)
|
Update.
Snow season is over now so more time for working on this project.
Today I finished all those welds I could not reach with the factory chassis rails and wheel tubs in the way. Gave all the welds the wire brush treatment and then the whole lot got a good clean and a couple of coats of cold gal to stop any surface rust appearing. I'll be working on boxing the chassis rails next, cutting the metal back to where I want them boxed will be the hard part. Here are some of the unfinished welds 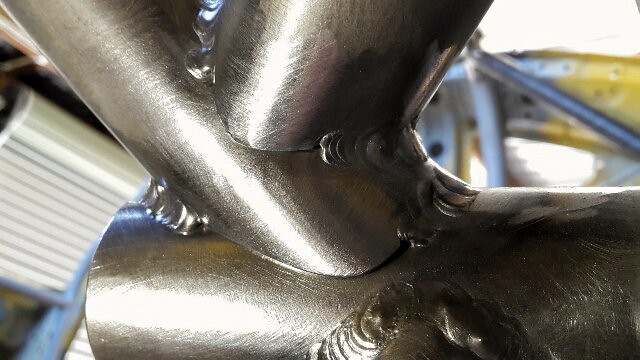 Some photos after paint. 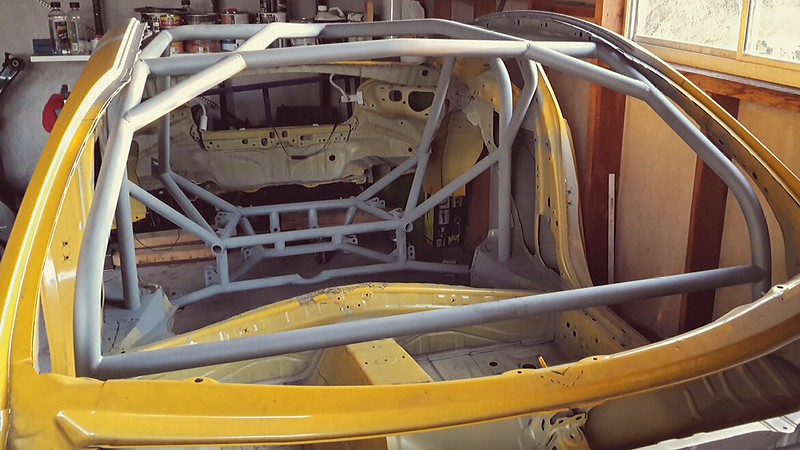 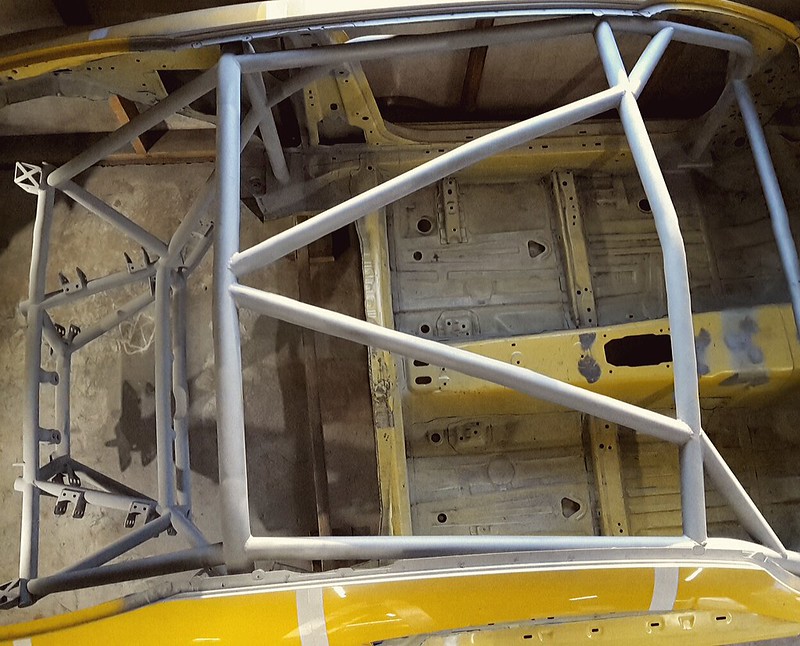 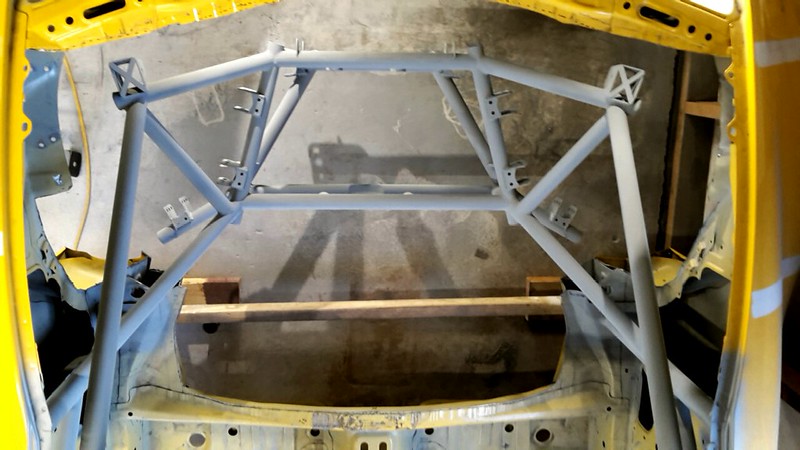 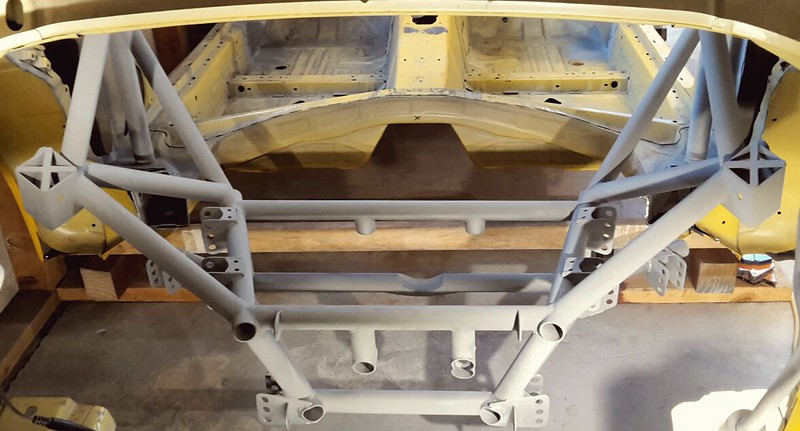
__________________
|
|
|
|
| The Following 4 Users Say Thank You to DIY For This Useful Post: |
|
10-07-2018, 05:37 AM
|
#129 |
|
Senior Member
Join Date: Jul 2016
Drives: BRZ, WRX
Location: Sydney, Australia
Posts: 291
Thanks: 105
Thanked 962 Times in 233 Posts
Mentioned: 2 Post(s)
Tagged: 0 Thread(s)
|
I got started one the chassis rails today, just one side as I will probably need to move the car away from the wall to get proper access to the other side.
I put a fair bit of thought into how I was going to cut them, I wanted to keep it reasonably neat but still remove as much sheet metal as possible under the WTAC rules. So this is what they looked like before I started. 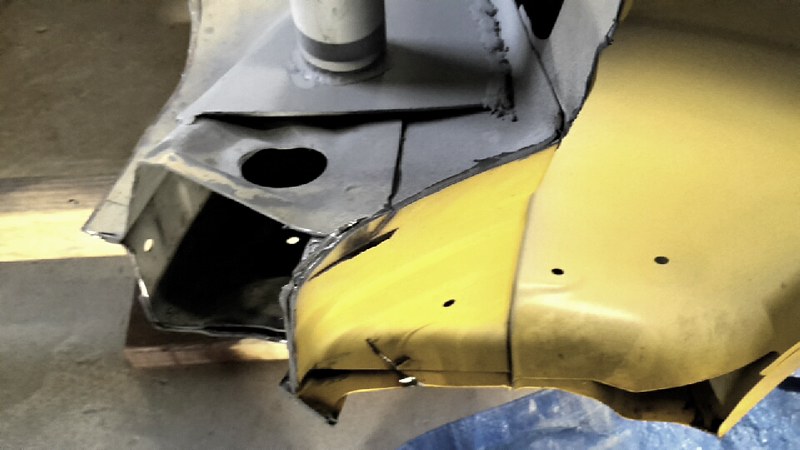 I only had a couple of angle grinders and a reciprocating saw to work with. I guess a plasma cutter would be handy but I don't know as I've never used one. So I cut a straight line behind the base plate of the main roll cage hoop being careful not to cut into the outer wheel arch. It came out pretty good after I used a flap disc to even out some of the cuts. 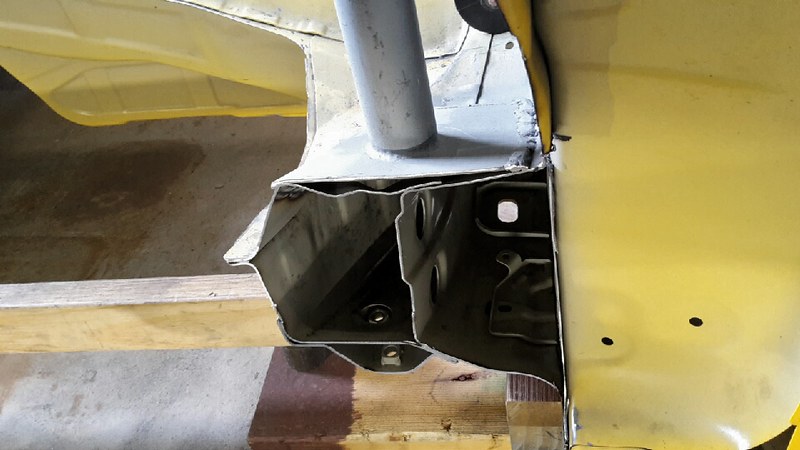 I then decided to remove that lower pair of captive nuts and extra bracing on the bottom edge to shave a little extra weight. There was about 6 spot welds to drill out. 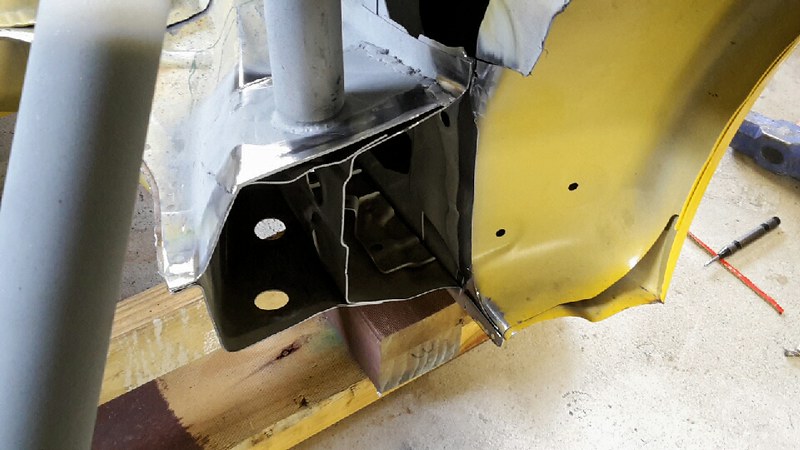 After some cardboard aided design (CAD) I had a plate cut out ready to box off the rail. 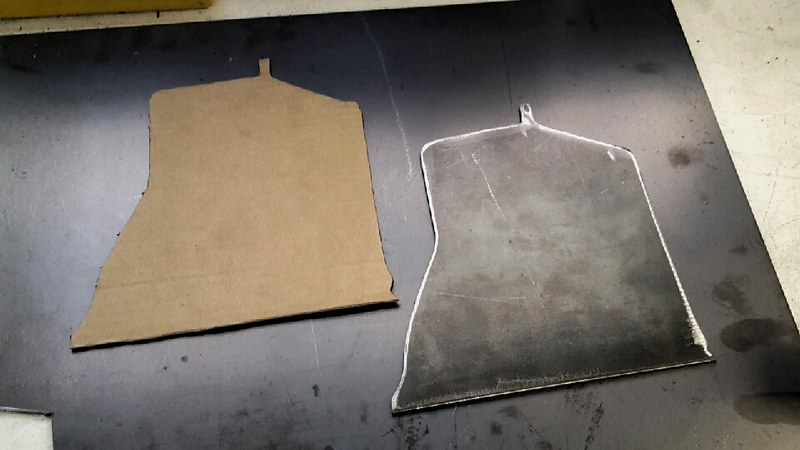 I TIG welded the top edge where it buts up to the base plate of the roll cage and then converted my multi-process welder over to MIG to do the rest. My MIG skills are still pretty average but welding to the chassis with TIG is almost impossible because you can't get it clean enough.  This is the job finished, I'm very happy with how neat it turned out. 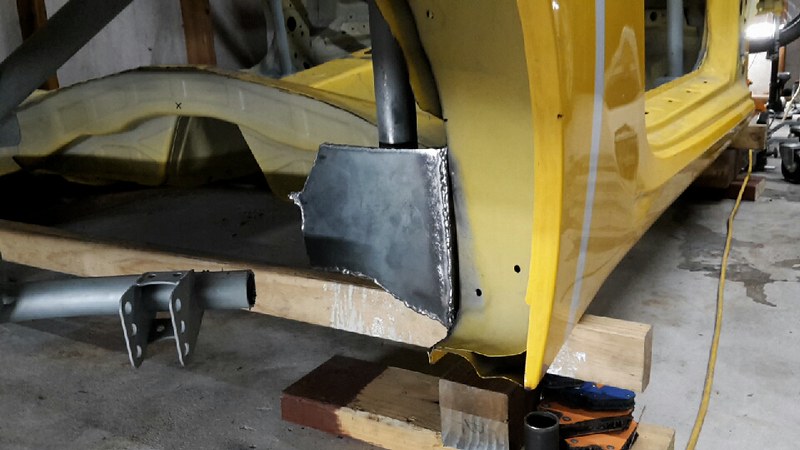 Next job I'll cut and notch some tube to join the suspension cradle to the chassis rail and then repeat it all on the other side. Next weekend I'm going to WTAC so probably won't be able to work on the car. Looking forward to checking out some time attack machines though, especially the HKS TRB-03.
__________________
|
|
|
|
|
10-13-2018, 05:37 AM
|
#130 |
|
Senior Member
Join Date: Jul 2016
Drives: BRZ, WRX
Location: Sydney, Australia
Posts: 291
Thanks: 105
Thanked 962 Times in 233 Posts
Mentioned: 2 Post(s)
Tagged: 0 Thread(s)
|
I sacrificed my day to work on the car this weekend and attended World Time Attack Challenge instead.
Had a great day and got to check out some of my favorite cars up close. Here are just a few of the photos I took. 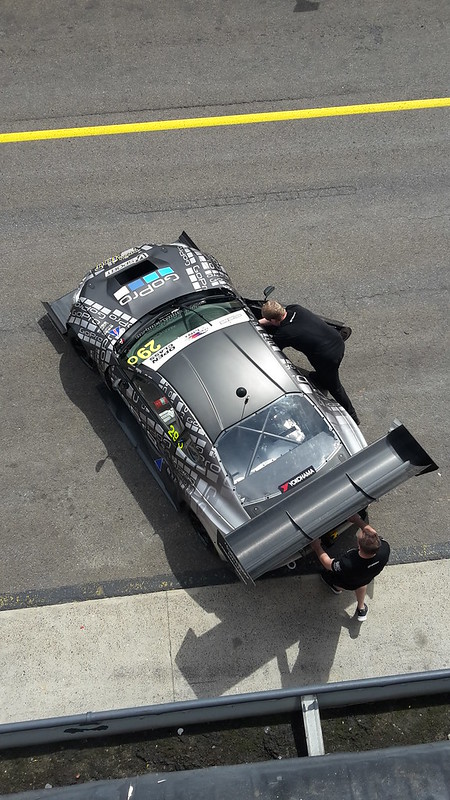 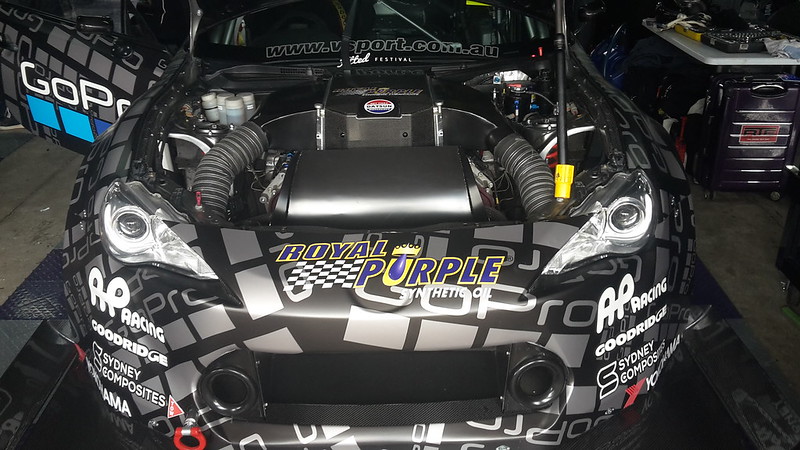 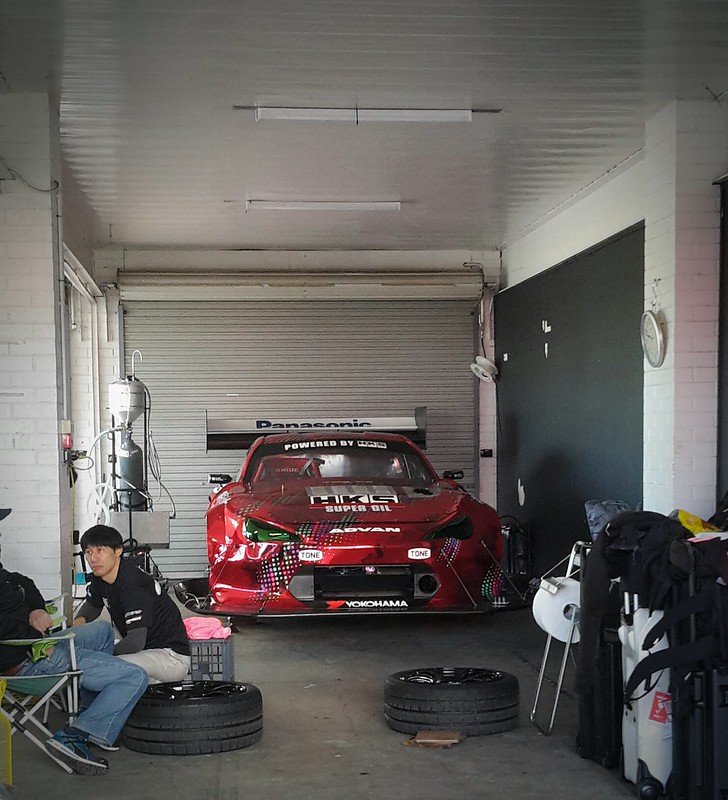  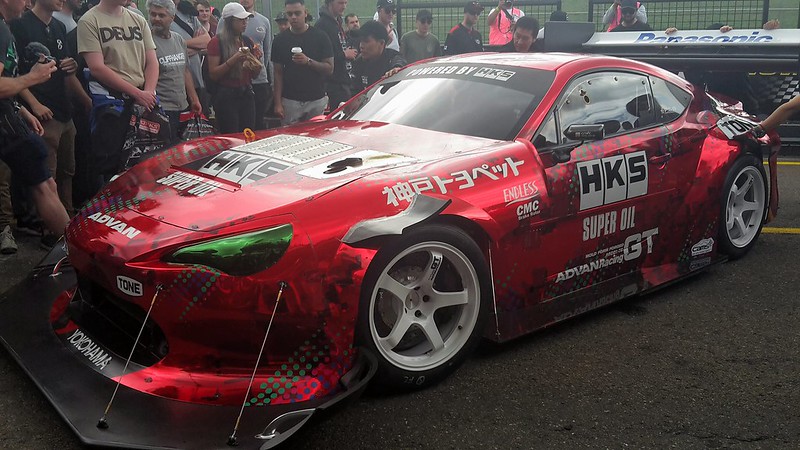 The winning car! 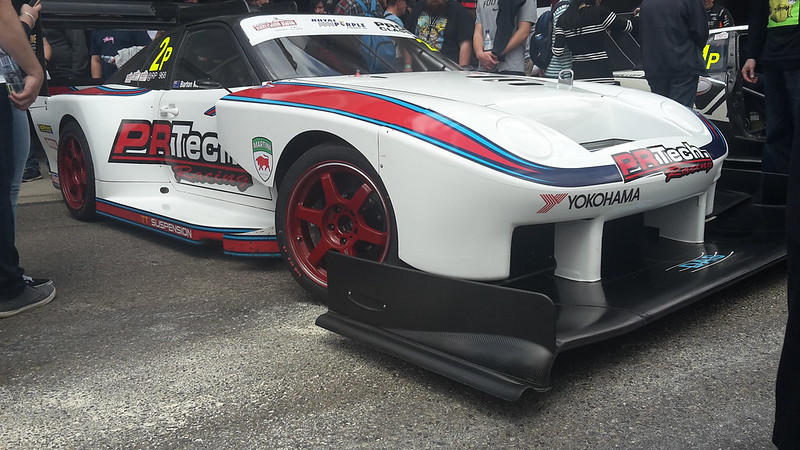
__________________
|
|
|
|
|
10-13-2018, 06:42 AM
|
#131 |
|
Senior Member

Join Date: May 2016
Drives: toyota 86
Location: Brisbane Australia
Posts: 165
Thanks: 56
Thanked 128 Times in 72 Posts
Mentioned: 2 Post(s)
Tagged: 0 Thread(s)
|
great build mate. some great cars out there at wtac as usual
__________________
 |
|
|
|
| The Following User Says Thank You to johl For This Useful Post: | DIY (10-13-2018) |
|
10-15-2018, 07:29 AM
|
#133 | |
|
Senior Member
Join Date: Jul 2016
Drives: BRZ, WRX
Location: Sydney, Australia
Posts: 291
Thanks: 105
Thanked 962 Times in 233 Posts
Mentioned: 2 Post(s)
Tagged: 0 Thread(s)
|
Quote:
You can watch the whole thing on youtube if you like Day 1. Day 2.
__________________
|
|
|
|
|
|
10-16-2018, 04:46 AM
|
#134 |
|
Senior Member
Join Date: Jul 2016
Drives: BRZ, WRX
Location: Sydney, Australia
Posts: 291
Thanks: 105
Thanked 962 Times in 233 Posts
Mentioned: 2 Post(s)
Tagged: 0 Thread(s)
|
Got a little done on the car today, I took some leave from work to do some painting on the exterior of our house but it won't stop raining so I'm working on the car instead
 Today's job was to box the other chassis rail. I got it done reasonably quick since I had already done the other side and knew how to do it. Here is how it looked before I started. 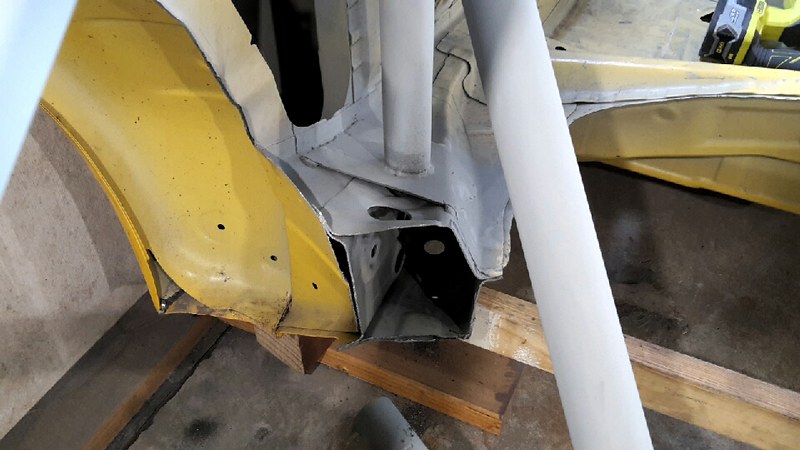 Here it is after I cut it back and made the patch panel. It was not as easy as the other side to cut because I had to hold my grinder upside-down so the flat edge was against the base plate. This meant it wanted to grab and was shooting sparks towards my face. 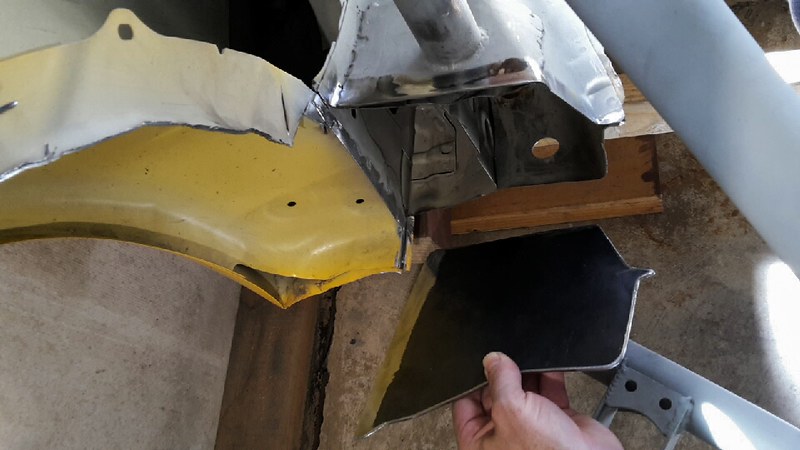 This photo shows how I got the inner edge so neat. Basically just left a small flap of metal that I could tap with a hammer to fold over the patch panel. 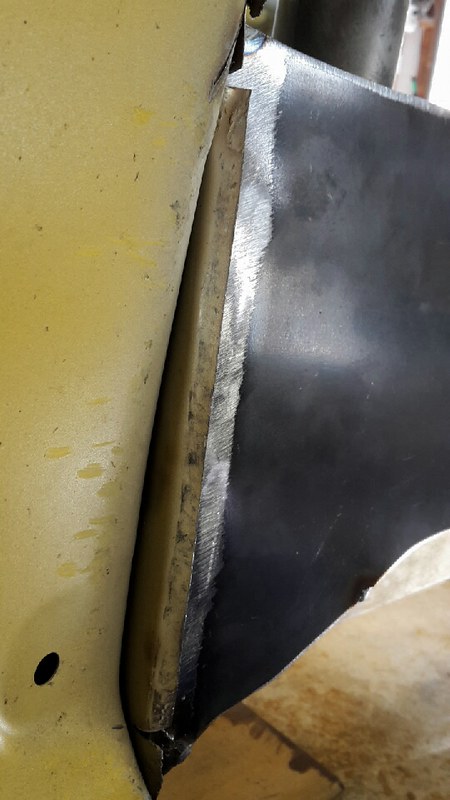 Here it is all done with a bit of a clean up and some weld through primer. 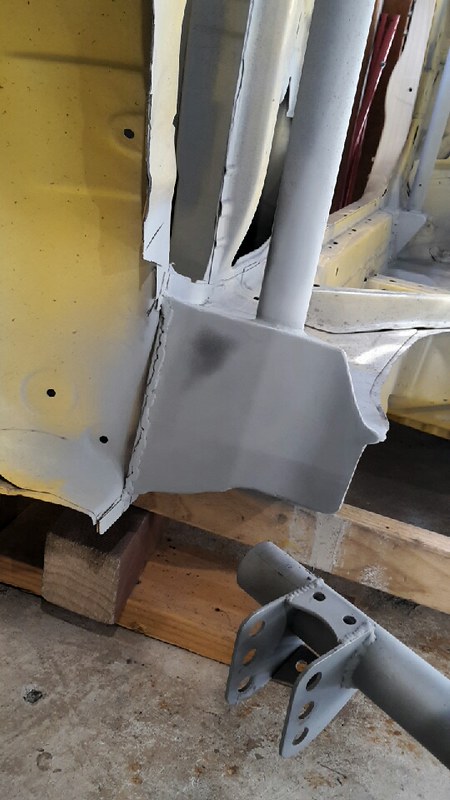 Final photo showing both main chassis rails completely boxed and ready to be joined to the rear suspension cradle.  If it rains again tomorrow I might get some more done on it 
__________________
|
|
|
|
|
10-18-2018, 05:37 AM
|
#135 |
|
Senior Member
Join Date: Jul 2016
Drives: BRZ, WRX
Location: Sydney, Australia
Posts: 291
Thanks: 105
Thanked 962 Times in 233 Posts
Mentioned: 2 Post(s)
Tagged: 0 Thread(s)
|
Completed rear end
So I have hit a bit of a milestone today and completed the majority of the fabrication on the rear end.
I started off by cutting and notching some tube to join the lower part to the boxed off chassis rails. 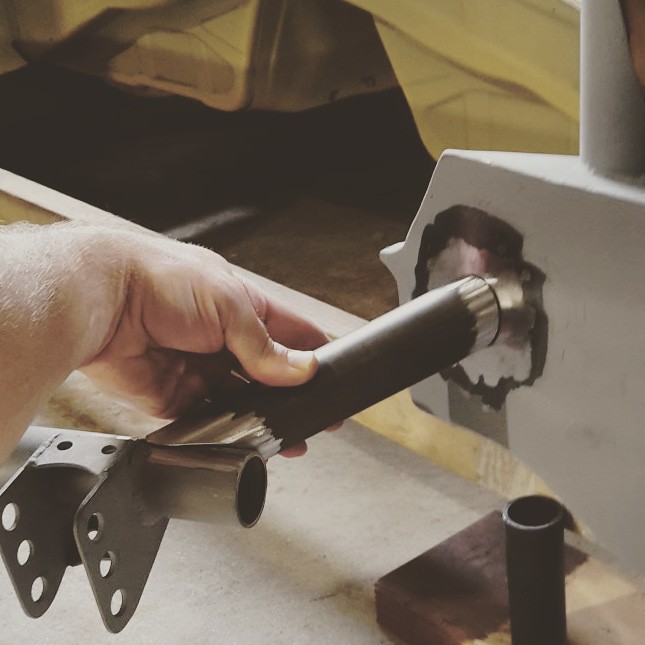 I love the way it looks from the wheel arch 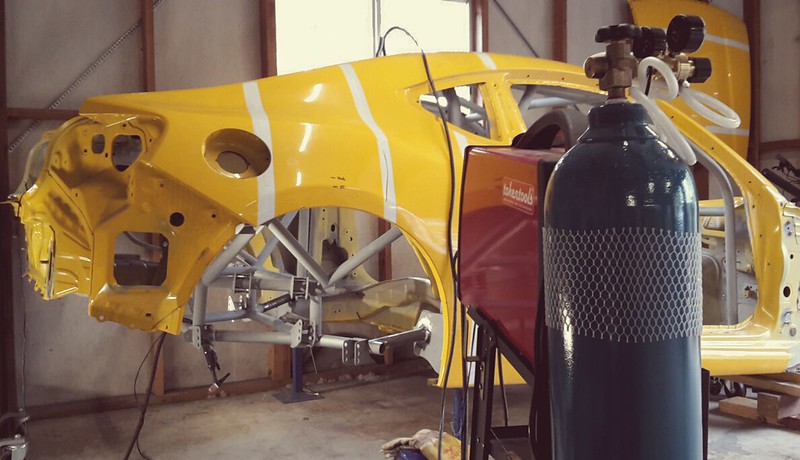 With both sides done it was time to get started on the final two rear stays. 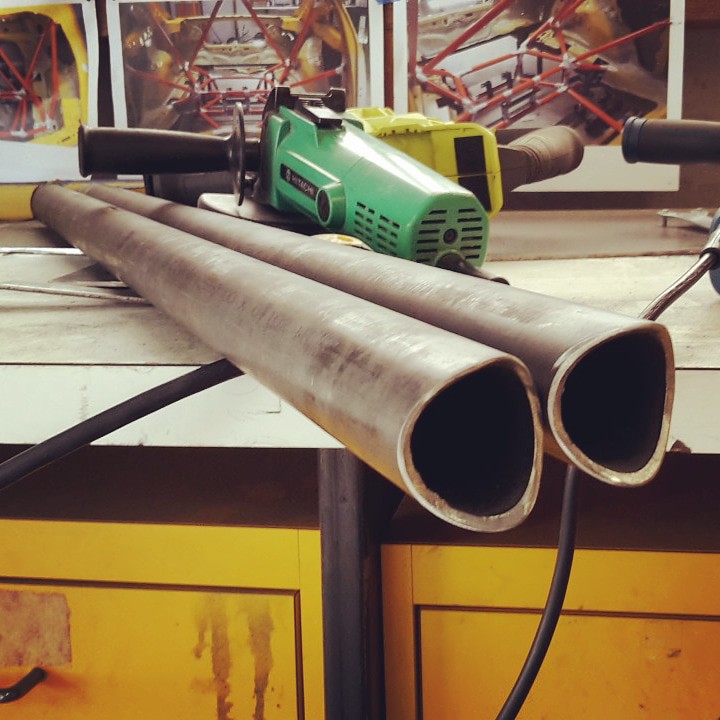 I didn't really take any more progress photos after that as I wanted to get all the welding done, clean it all up and give it a coat of cold gal. So here are some photos of the finished product. 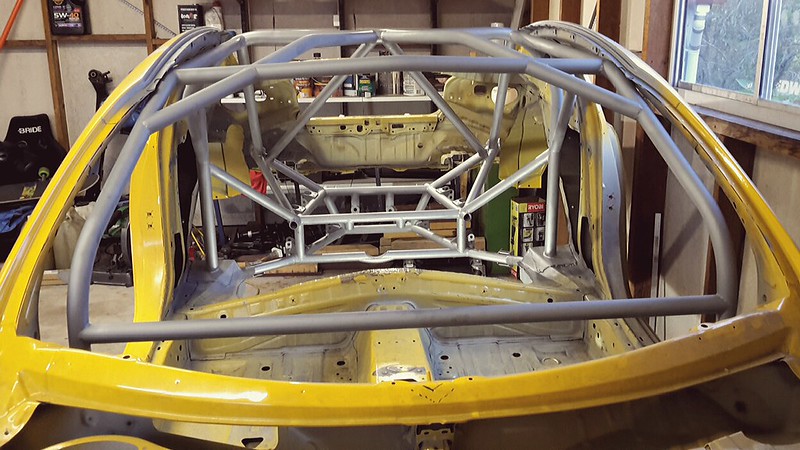 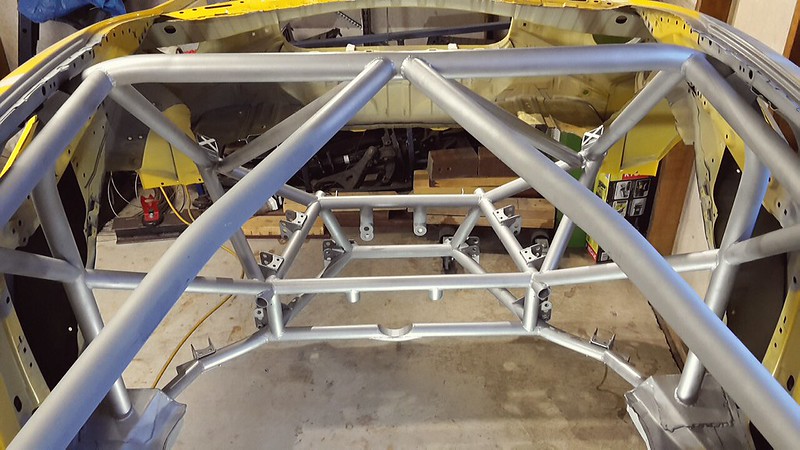 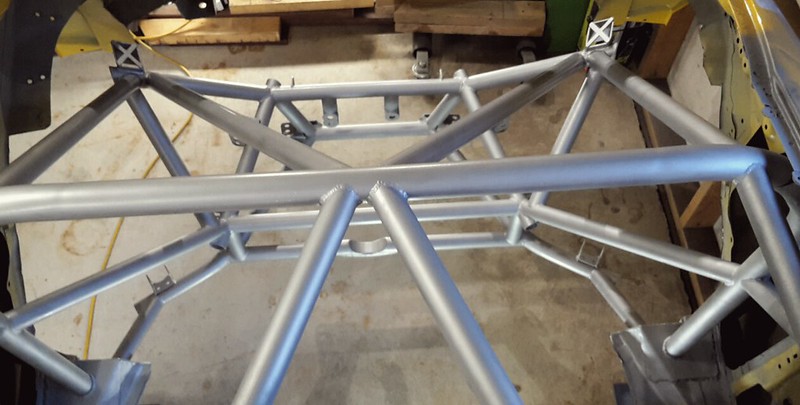 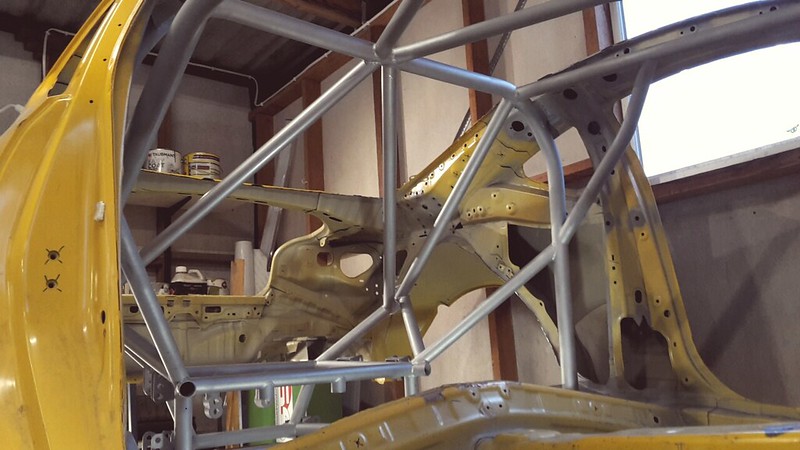 I'm not sure what to work on next, if I make a start on the front end I really need to buy a motor and trans first and I don't really have the funds for that right now. What I might do is start working on the rear control arms so I can get the rear on sitting on some wheels. I have some thinking to do.....
__________________
|
|
|
|
|
10-27-2018, 08:03 AM
|
#136 |
|
Senior Member
Join Date: Jul 2016
Drives: BRZ, WRX
Location: Sydney, Australia
Posts: 291
Thanks: 105
Thanked 962 Times in 233 Posts
Mentioned: 2 Post(s)
Tagged: 0 Thread(s)
|
I have started on the control arms, just measured everything and thinking about what I need. Basically I want each arm to be adjustable and I want to remove all rubber bushings so all the joints are either rod ends or spherical bearings. I will modify some of the factory arms and possibly build some from scratch. I may buy some toe arms straight off the shelf.
 In other news I was doing a bit of work on my WRX this weekend as I want to resume racing it next year after taking this year off. After my last race I took all the brake system apart, deleted the booster and ABS. Installed a dual master cylinder and balance bar with hydraulic handbrake. I also removed the airbags and air conditioning which left a big mess of wires where my center console used to be, the car now weighs around 1210kg (2660 lbs). So today I made a small panel to house my engine oil temp gauge, water temp gauge, intercooler waterspray switch and adjustment dial for the balance bar which changes the brake bias. I also added a phone mount. 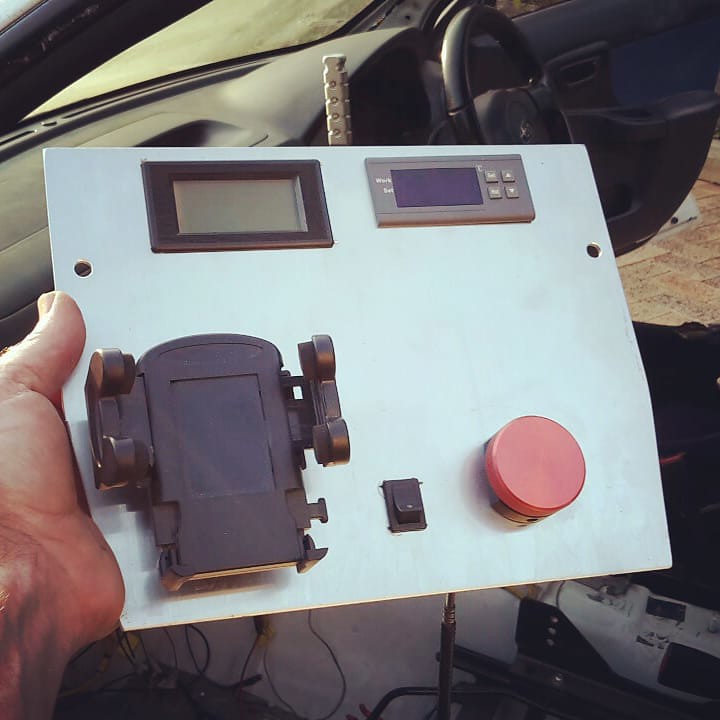 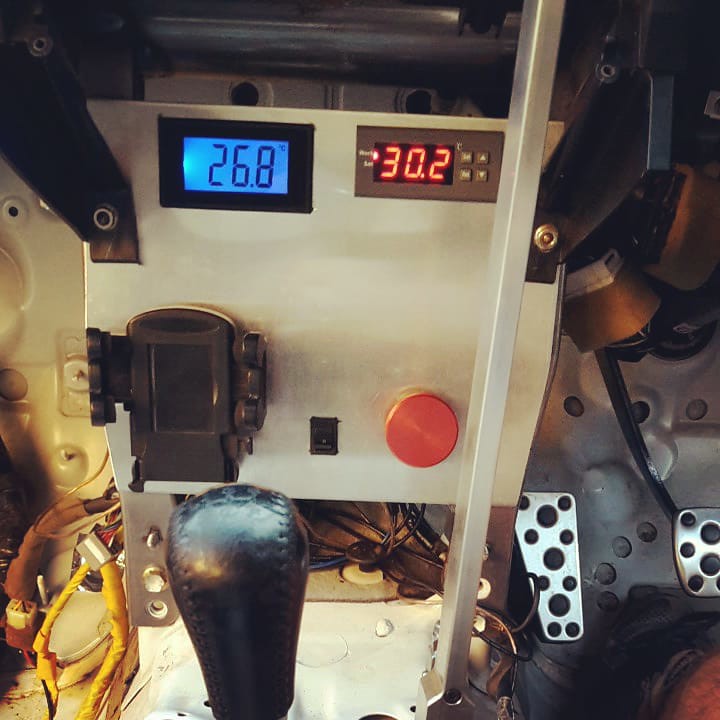 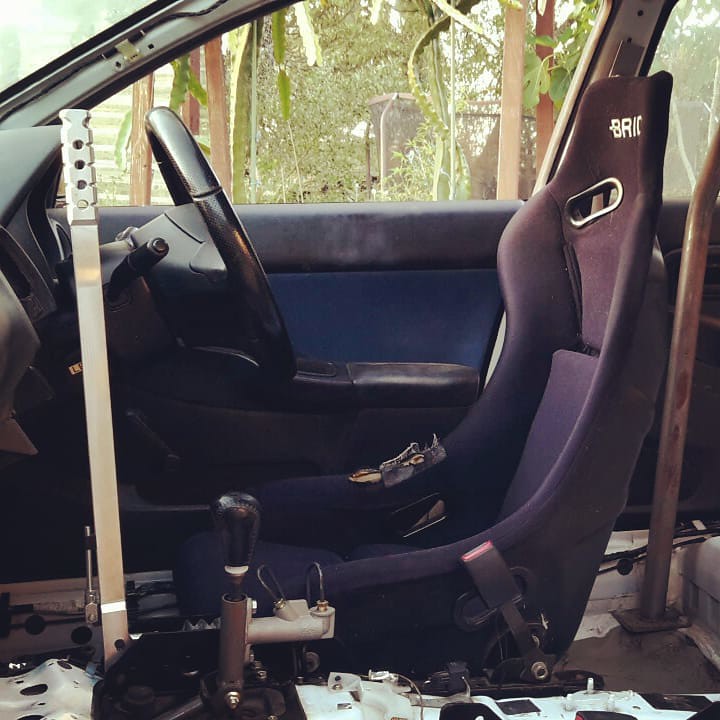 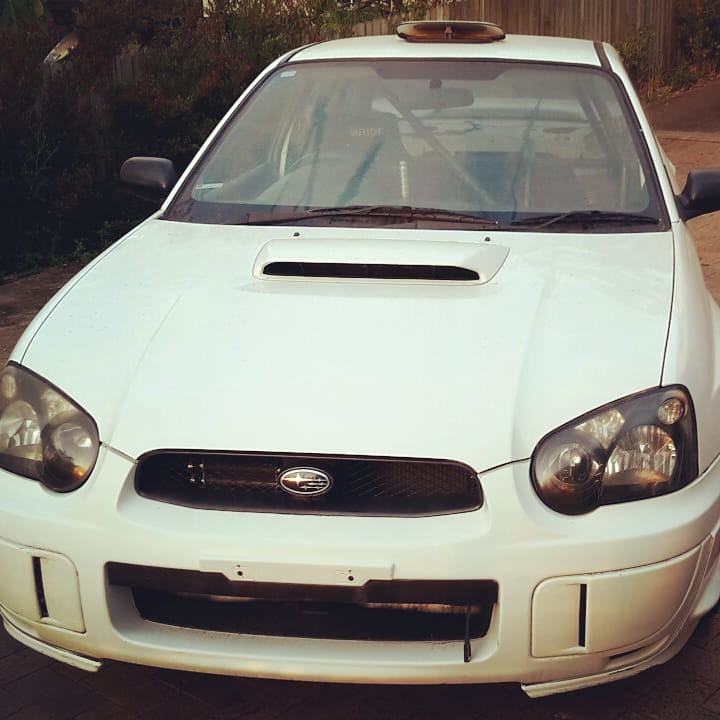
__________________
|
|
|
|
| The Following 3 Users Say Thank You to DIY For This Useful Post: |
|
10-27-2018, 08:17 PM
|
#137 | |
|
Member
Join Date: May 2015
Drives: BRZ
Location: Vancouver, BC
Posts: 33
Thanks: 5
Thanked 13 Times in 10 Posts
Mentioned: 1 Post(s)
Tagged: 0 Thread(s)
|
Quote:
|
|
|
|
|
|
10-27-2018, 10:36 PM
|
#138 | |
|
Senior Member
Join Date: Jul 2016
Drives: BRZ, WRX
Location: Sydney, Australia
Posts: 291
Thanks: 105
Thanked 962 Times in 233 Posts
Mentioned: 2 Post(s)
Tagged: 0 Thread(s)
|
Quote:
__________________
|
|
|
|
|
|
11-11-2018, 04:58 AM
|
#139 |
|
Senior Member
Join Date: Jul 2016
Drives: BRZ, WRX
Location: Sydney, Australia
Posts: 291
Thanks: 105
Thanked 962 Times in 233 Posts
Mentioned: 2 Post(s)
Tagged: 0 Thread(s)
|
I took my WRX out today for a little skidpan racing. The new hydraulic handbrake is simply awesome!
[ame="http://www.youtube.com/watch?v=GfrWyJkUABw"]YouTube[/ame] Not much happening with the BRZ right now, I'm ready to order everything I need to build the rear control arms but I want to order the parts for the front as well to save on shipping. The problem is I am undecided on how I want to do the front, part of me wants to convert it to double wishbone so I'm looking into that and doing some reading.
__________________
|
|
|
|
| The Following User Says Thank You to DIY For This Useful Post: | Zer0 (11-11-2018) |
|
12-02-2018, 05:54 AM
|
#140 |
|
Senior Member
Join Date: Jul 2016
Drives: BRZ, WRX
Location: Sydney, Australia
Posts: 291
Thanks: 105
Thanked 962 Times in 233 Posts
Mentioned: 2 Post(s)
Tagged: 0 Thread(s)
|
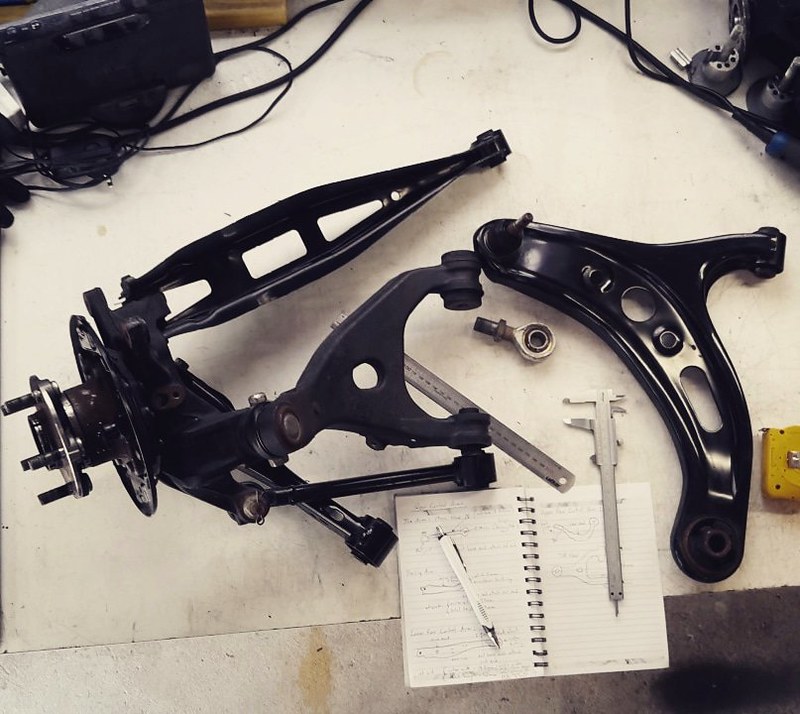
Double wishbone conversion
Decided to jump in the deep end and convert the McPherson strut front suspension to a double wishbone. It's something I have been thinking about since I bought the shell but the whole idea seemed very daunting and information specific to a conversion was not really available. The only way was to focus my research on designing a double wishbone suspension from scratch and then adapt it to my car.
First step was finding some suitable uprights from a car with double wishbone as standard. I also wanted a car that uses the 5x114.3 pcd so that narrowed the choices down a fair bit. Obvious candidates are Honda S2k, Mazda MX5 and RX8. The RX8 is very similar in dimension to the BRZ and the parts are easily available since their motors keep failing. So I picked up a pair of RX8 uprights for $200 complete with wheel bearings and tie rods. 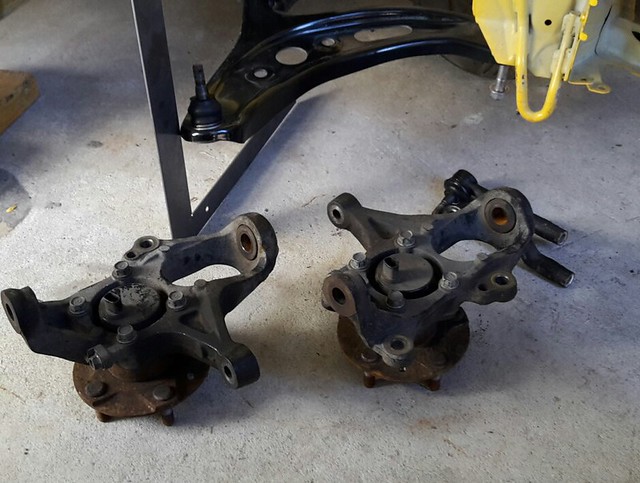 It would have been nice to buy the entire RX8 front suspension including the subframe as it all comes as one piece and I could have potentially just made a jig of it and grafted it to the front of my car. Unfortunately I could not find one for a reasonable price but the guy I bought the uprights off was kind enough to let me measure all the factory control arms. Next step was to make a jig to position an upright in the correct position in space that it would sit if it were mounted to a 18x11" wheel with a 295/35/18 tyre on it. 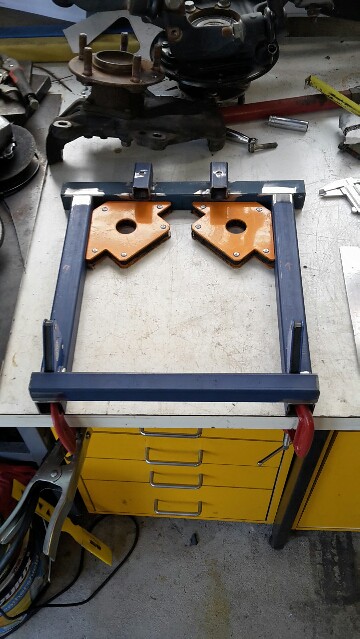 With the upright in the jig I was then able to accurately measure the ball joint and steering arm locations, these are your "fixed" points that you can not alter. The arm lengths, angles and points at which they attach to the chassis are all the points you have freedom the play with. 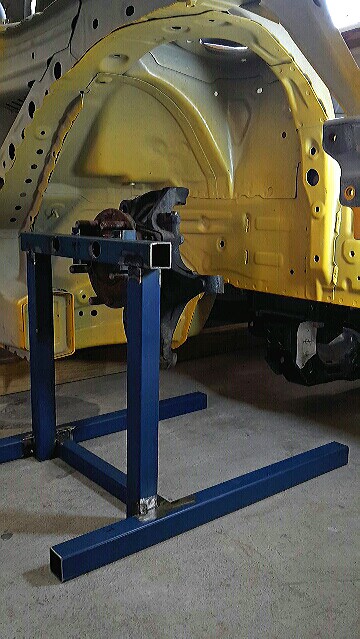 I spent the majority of Saturday night and most of today measuring everything and plugging the numbers into some software I got off the Locost forums. I have tried to stay as close to as possible the Mazda RX8 geometry as it is considered to be very good. The software takes a bit to get used to but basically it just plots everything in X,Y,Z coordinates and allows you to see what the camber and roll center is doing in bump and roll or both. I then lowered the shell back to its planned "lowest" ride height and positioned the jig inside the front wheel well such that the face of the wheel bearing is in the same position as it would be on a stock BRZ. 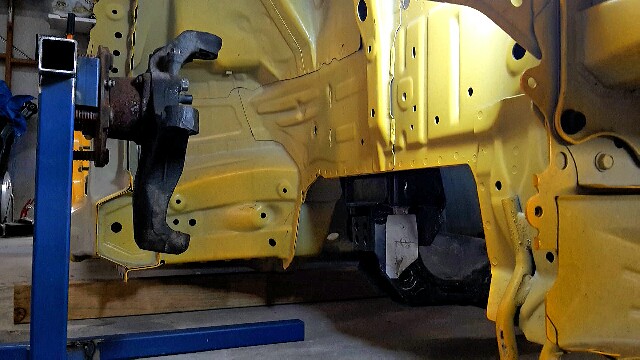 Now I was able to take my arm lengths and angles and see where the inner pivot points would land on the chassis. The RX8 has longer arms than the BRZ since the engine bay is not as wide so the stock RX8 arm lengths would require major surgery to fit to the BRZ. I then went back to the computer with my shorter or more appropriate arm lengths as measured to see what effect shorter arms would have on the geometry. The results were good, I am seeing a 1.4 degree gain in camber with 2 degrees of roll. With 1" of bump I am gaining 0.5 degree of neg camber and combing both I am seeing 1 degree positive camber. Roll center migration is very minimal at less than 1 degree under 2 degrees of roll. The results are actually very similar to the stock RX8 arm lengths once to change the angles around to suit the shorter arms. I have not yet factored in the steering other than doing my "fixed point" measurements with 7 degrees of positive caster in the upright. Ideal positioning the steering rack is not too difficult to work out however there is the chance of something being in the way of the ideal position and then I have to get creative.
__________________
|
|
|
|
| The Following 6 Users Say Thank You to DIY For This Useful Post: | Ash_89 (03-02-2021), BigFatFlip (04-25-2019), DustinS (12-03-2018), JeremyR (12-06-2018), RedReplicant (09-17-2022), Zer0 (12-02-2018) |
|
|
|
|
 |
|
|


