


|
||||||
| Forced Induction Turbo, Supercharger, Methanol, Nitrous |
 |
|
|
Thread Tools | Search this Thread |
 02-08-2014, 09:21 PM
|
#1 |
|
King of Kiwi Palace

Join Date: Aug 2012
Drives: Faster than you
Location: Everywhere
Posts: 585
Thanks: 184
Thanked 578 Times in 264 Posts
Mentioned: 33 Post(s)
Tagged: 0 Thread(s)
|
Full Blown Stage 2, Rad + Shroud + SPAL install
So there I was, talking to LJ about my heating issues and he suggested their radiator, shroud and SPAL fans. But he warned me I'd be the first one to attempt it.
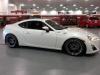
Here's my attempt, with pics and description of modifications. There are some eyebrow raising points, not for the faint of heart. You've been warned. ----- First thing we noticed was that the FBM radiator+shroud+fan piece would not even fit the bottom holes of the radiator support without directly hitting the downpipe. We knew this ahead of time but wanted to see for ourselves. @Mikethesnake had suggested to reem the support holes out and moving the rubber grommet forward. We decided to leave the hole intact and re-drill the grommet.  This gave us enough clearance on the bottom without issue, support holds nicely also. Next thing to tackle was affixing the a/c condenser to the radiator, keeping in mind that the IC/Crash bar needed room too. We clipped the fan support ties off the FBM unit and re-tied it "through" the a/c condenser so that it's all one big piece. We took off the black brackets that secure it to the stock rad because we no longer are in the same spot.  Next up was tackling the top mount support. The Stage 2 kit came with new brackets so we started there. Immediately saw that stock positioning wasn't going to work. We moved the support bracket forward and skipped a hole.  Here's a passenger side view of the new bottom position  Here's our new clearance, about 1/2 inch.  With that said here's a few notes and modifications outside the radiator support. 1. You will need to modify the extra plastic tabs (cut out) on the back side of the headlights.. I mean who puts that much extra plastic back there anyway  2. You will need to either buy a tubular crash beam, run without one (can't recommend), or space out your stock crash beam by 1/2 inch. We opted to space it out with 1/2 inch grade 8 oversized nuts. Would be nice to just have some company make a bracket/spacer. This actually solved some bumper fitment issues for us also, so bonus!  Optional note: Fullblown could revise their downpipe a bit to avoid some of the fitment issues here. Not a big deal for me but I know how some people are with fitment. ------ Post-run  Fans work nicely, when they go into high mode it's very loud, lol. It's actually cooler hovering around 195 degree at idle, and on the road boosting around town below 45mph it goes up to like 205. I assume this is because I have the condenser sammiched with the radiator. Necessary to fit the IC/Crash beam though. All in all, I think this solution works for us southern guys in the high heat.
__________________
 |

|

|
| The Following 8 Users Say Thank You to Ironsquid For This Useful Post: | 1stGenBRZ86 (02-09-2014), Boba_kz (06-10-2014), carlitosway6891 (02-11-2014), FullBlown (02-11-2014), jamesm (02-08-2014), Nomed Alucard (02-08-2014), OjiGeorge (02-18-2014), Sportsguy83 (02-08-2014) |
|
02-11-2014, 10:10 PM
|
#3 |
|
Senior Member

Join Date: Sep 2012
Drives: Scion FRS
Location: MN
Posts: 1,171
Thanks: 242
Thanked 2,026 Times in 548 Posts
Mentioned: 298 Post(s)
Tagged: 4 Thread(s)
|
Thanks Jay, our stage 2 uses a 750hp core and it moves everything towards the motor slightly. We expected that it would be tight with the radiator and shroud.
I have a set of brackets on my desk that will allow you to use both holes. I need to get you and Mike a set still. |
|
|
|
| The Following 2 Users Say Thank You to FullBlown For This Useful Post: | Ironsquid (02-11-2014), Nomed Alucard (02-13-2014) |
|
02-11-2014, 10:47 PM
|
#4 |
|
King of Kiwi Palace
Join Date: Aug 2012
Drives: Faster than you
Location: Everywhere
Posts: 585
Thanks: 184
Thanked 578 Times in 264 Posts
Mentioned: 33 Post(s)
Tagged: 0 Thread(s)
|
goodguy LJ
__________________
|
|
|
|
|
|
|
|
|
| Tags |
| fullblown, radiator, shroud, stage2, turbo |
|
|
 Similar Threads
|
||||
| Thread | Thread Starter | Forum | Replies | Last Post |
| Full Blown FRS/BRZ Stage 1 Turbo Kit | FullBlown | Forced Induction | 456 | 09-27-2021 03:10 AM |
| Full Blown Stage 1 Short Block | FullBlown | Forced Induction | 116 | 03-22-2019 07:29 PM |
| Spal Fan Shroud & Koyo Radiator | Carolina Dyno | Forced Induction | 64 | 12-14-2016 08:38 PM |
| Pure Automotive Performance's Full Blown Stage 1+ Install Is In Progress! | Pure Automotive | Forced Induction | 37 | 07-25-2013 11:09 AM |
| Whitefrs's Full Blown Stage 1 base kit build | whitefrs | Member's Car Journals | 9 | 03-28-2013 03:22 PM |


 Project Fr-s