 10-30-2012, 09:28 PM
|
#2
|
|
Senior Member
Join Date: Aug 2012
Drives: FR-S
Location: IL
Posts: 2,857
Thanks: 519
Thanked 2,997 Times in 1,095 Posts
Mentioned: 159 Post(s)
Tagged: 1 Thread(s)
|
Preface:
FULL TECHNICAL DETAILS: http://www.ft86club.com/forums/showp...3&postcount=75
SAE ARTICLE ON HOW PCV SYSTEMS WORK BY TOYOTA: http://www.ft86club.com/forums/attac...3&d=1355781670
I chose the Radium can for a few reasons.
- I used to own a Lotus and Radium was one of those companies who put quality over quantity.
- I already had the can from my previous car and knew it worked.
- I want an OEM looking piece that will last the life of the vehicle.
- Most importantly, there was engineering behind it, design, flow testing race testing and more. It's not a generic product.


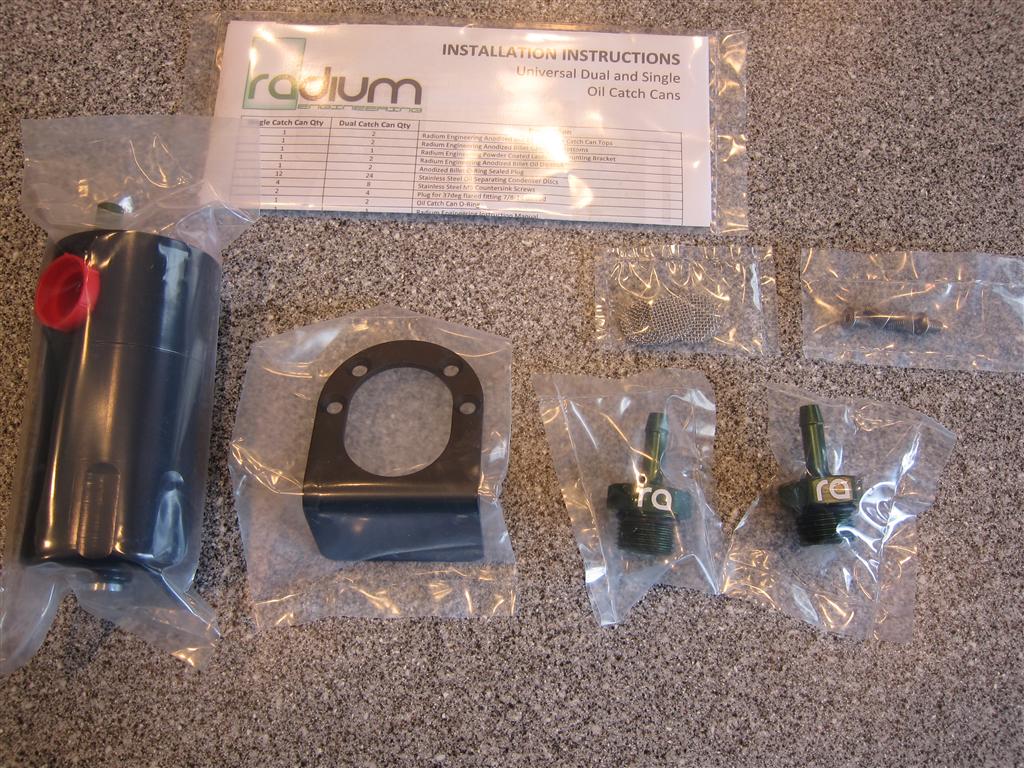
Installation:
- layout contents of can.
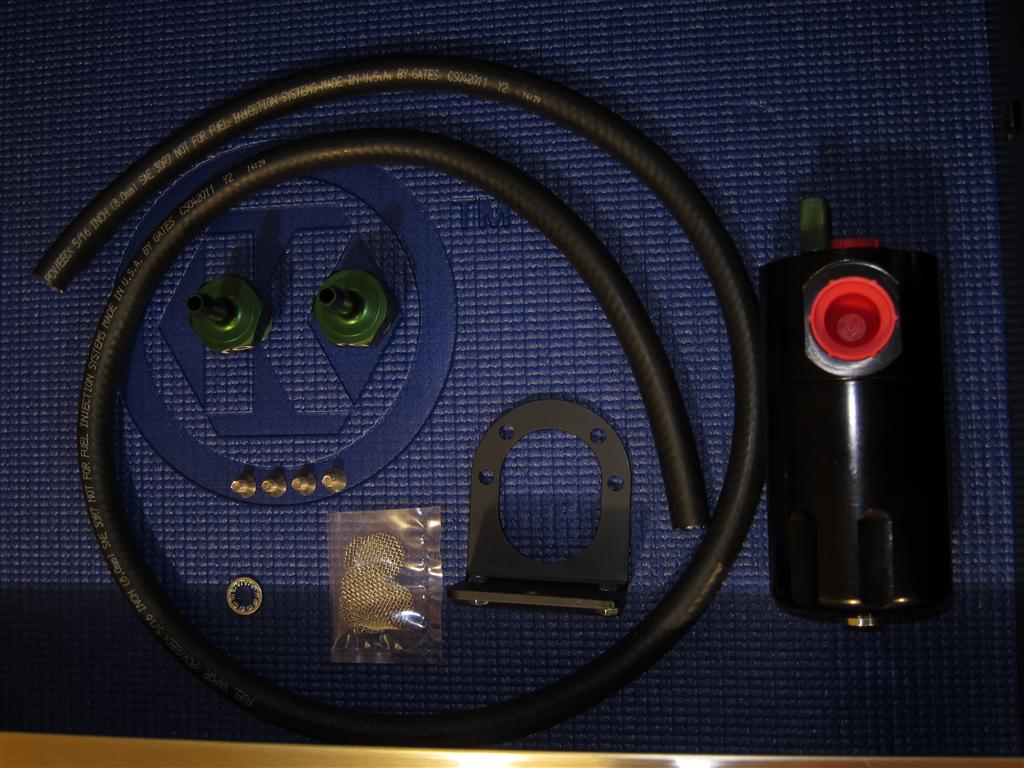
2. Attach the .5" Barb to the outlet port (Middle of Can)
3. Insert 3 stainless steel filters in top port of can.


4. Attach the .4" Barb to the inlet port (Top of Can)
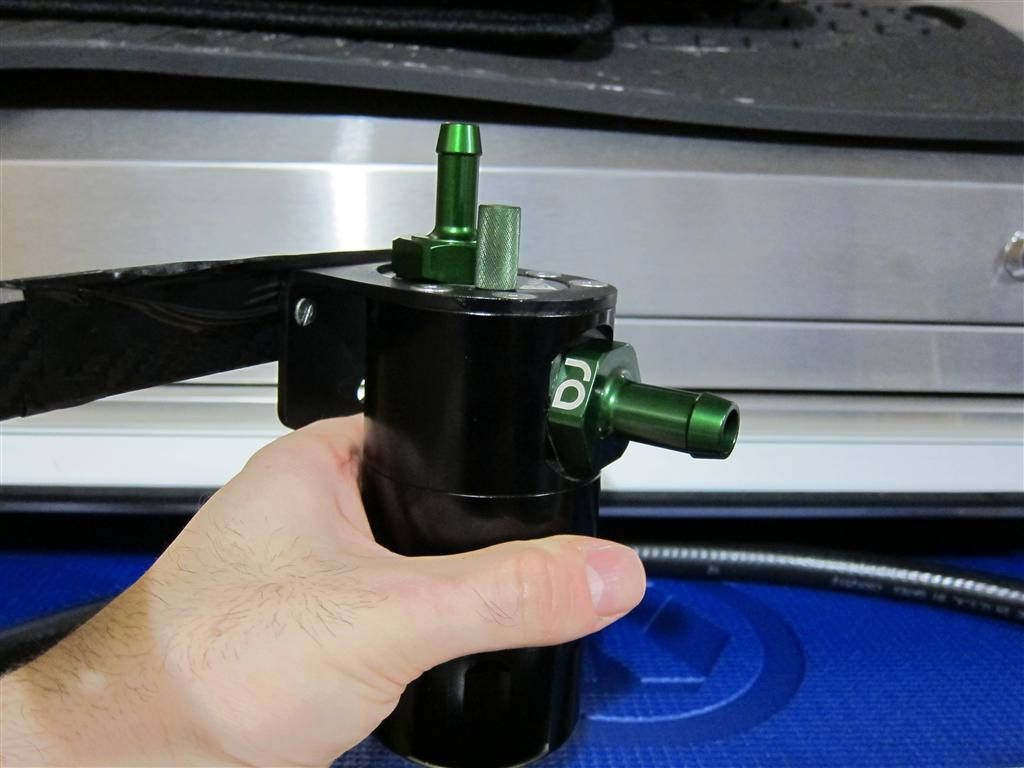
5. Attach can to supplied Radium bracket to assure it fits and then remove it from the bracket.
6. Cut your aluminum strip down to roughly 16"
7. Scribe the marks on the aluminum piece.
 8. Drill holes into bracket using the correct drill bit for the screws you purchased.
10. Spray your bracket black or cover with vinyl. (OPTIONAL)
11. Secure your bracket the the Radium can bracket. (Ignore bracket length in picture)
 12. Remove the two 10mm screws on the air pump/noise generator bracket.
 13. Test fit the length of the aluminum so you can bend the metal to shape to fit.
14. Remove the aluminum from the Radium bracket and bend to shape, using small vise and vise grips.
15. Drill hole at end of aluminum to fit the 10mm mounting screw from air tube.
16. Test fit your custom bracket make sure you have enough clearance and the can sits level.
17. Secure the Radium Can to the bracket with supplied Allen Screws using blue thread lock on the screws.
 18. Finish final assembly making sure you use thread lock on all your bolts. (NOT THE BARBS)
 19. Snaggle the bracket into place and re-tighten the two 10mm bolts back into the air hose/noise generator bracket. Bend your aluminum as needed.
20. Remove the top plastic cover from the engine that says Toyota, Subaru.
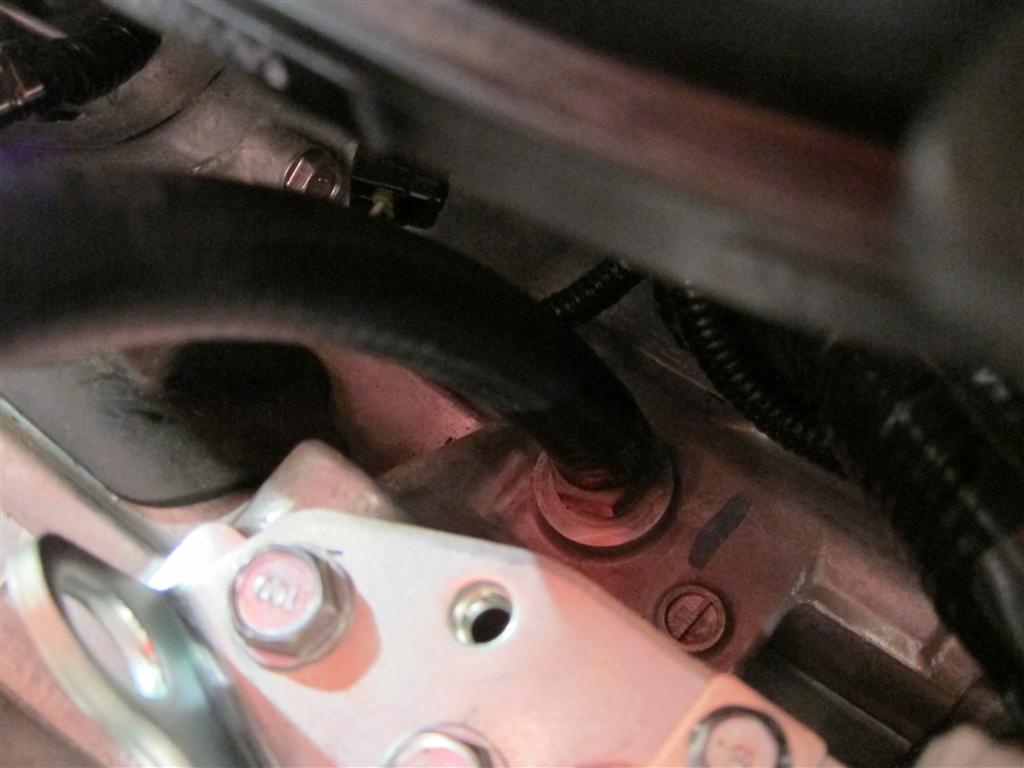
21. Underneath remove the PCV hose. (The one on the left with no hose clamp)
22. Follow the PCV hose down and remove it from the PCV valve. (Just pulls off, don't complain)
 PCV VALVE AND HOSE
 23. Grab 18" of 1/2" PCV hose and connect it from the intake manifold and then to the outlet of the catch can push it on there, use hose clamps if you want to.
24. Grab 18" of 11/32" PCV hose and connect it from the PCV valve to the catch can inlet. Don't be a chud, if it feels loose use hose clamps.
 25. Check tightness and all hoses.
26. Re-install plastic cover.
27. Look at that you installed it!!!!
 FINAL NOTES SHUT UP AND LISTEN!!!
- If you drive for economy drain the can every oil change 3000-5000 miles
- If you drive agressive street only, check the can level every 2000 miles.
- If you do auto and aggressive street driving check every 1000 miles.
- If you track the car, check after each session.
Q&A
Q. What no breather tube can?
A. You don't need a can for the breather tube unless you are on the track all day every day or you use I forced induction. The PCV system is where 95% blow by goes. Still concerned? Check the intake tube at thethrottle body. If there is oil there, well you need to get a can for the breather tube.
Read the PCV info first post for more details.
Change in Barbs FYI - Choose the standard or 90 Degree Two Piece Barb.
Last edited by Dezoris; 12-17-2012 at 05:18 PM.
|

|

|